Do you need to increase photo quality for printing or client work? At dfphoto.net, we provide a quick fix using the Enhance feature in Photoshop, Lightroom, and Adobe Camera RAW to turn a tiny file into a large, printable poster with enhanced image clarity and detail enhancement. Explore dfphoto.net for more on image upscaling, photo enhancement techniques, and high-resolution photography.
1. What Is Photo Resolution And Why Does It Matter For Printing?
Photo resolution refers to the number of pixels in an image, determining its detail and clarity. It’s crucial for printing because a higher resolution ensures a sharper, more detailed print, especially for larger formats. According to the Santa Fe University of Art and Design’s Photography Department, a higher resolution image contains more data, allowing for better reproduction of fine details and textures when printed.
- Pixel Count: The more pixels, the better the resolution.
- Print Size: Larger prints require higher resolutions to maintain quality.
- Image Clarity: High resolution prevents pixelation and blurring.
2. What Are Megapixels, And How Do They Relate To Print Quality?
Megapixels (MP) refer to the number of million pixels in a digital image and directly impact print quality; more megapixels allow for larger, more detailed prints. A photo with more megapixels contains more information, which translates to better clarity and detail when printed at larger sizes.
- Definition: One megapixel equals one million pixels.
- Impact on Print Size: Higher megapixel counts support larger prints without significant loss of quality.
- Image Detail: More megapixels mean finer details are captured and retained in the print.
3. What Happens If My Photo Doesn’t Have High Enough Resolution To Print?
If your photo doesn’t have a high enough resolution to print, the resulting image may appear blurry, pixelated, or lack detail, especially when printed at larger sizes. Lower resolution images lack the necessary pixel density to maintain sharpness when enlarged.
- Pixelation: Visible squares or pixels become apparent in the print.
- Blurriness: Fine details are lost, making the image look soft.
- Limited Print Size: You’ll be restricted to smaller print sizes to avoid significant quality degradation.
4. How Can I Check The Resolution Of My Photo?
You can check the resolution of your photo by viewing its properties on your computer or within photo editing software. In Windows, right-click the file, select “Properties,” and go to the “Details” tab. On macOS, right-click the file, select “Get Info,” and look under the “More Info” section.
- Windows: Right-click > Properties > Details.
- macOS: Right-click > Get Info > More Info.
- Photo Editing Software: Open the image and check the “Image Size” or “Properties” panel.
5. What Is The “Enhance” Feature In Adobe Lightroom, Photoshop, And Adobe Camera Raw?
The “Enhance” feature in Adobe Lightroom, Photoshop, and Adobe Camera Raw uses AI to increase the resolution of an image while attempting to maintain or improve its quality. This feature is beneficial for upscaling images for printing or other high-resolution applications.
- AI-Powered Upscaling: Uses artificial intelligence to intelligently add pixels.
- Detail Preservation: Aims to retain and enhance fine details during the upscaling process.
- Accessibility: Available within popular Adobe photo editing software.
6. How Do I Use The Enhance Feature In Lightroom To Increase Photo Resolution?
To use the Enhance feature in Lightroom to increase photo resolution:
- Open the image in Lightroom.
- Go to the “Photo” menu.
- Select “Enhance.”
- Allow Lightroom to process the image. A new, higher-resolution version will be created.
- Step 1: Open Image: Import and select the image in Lightroom.
- Step 2: Access Enhance: Navigate to the Photo menu and choose Enhance.
- Step 3: Process Image: Lightroom will create an enhanced version automatically.
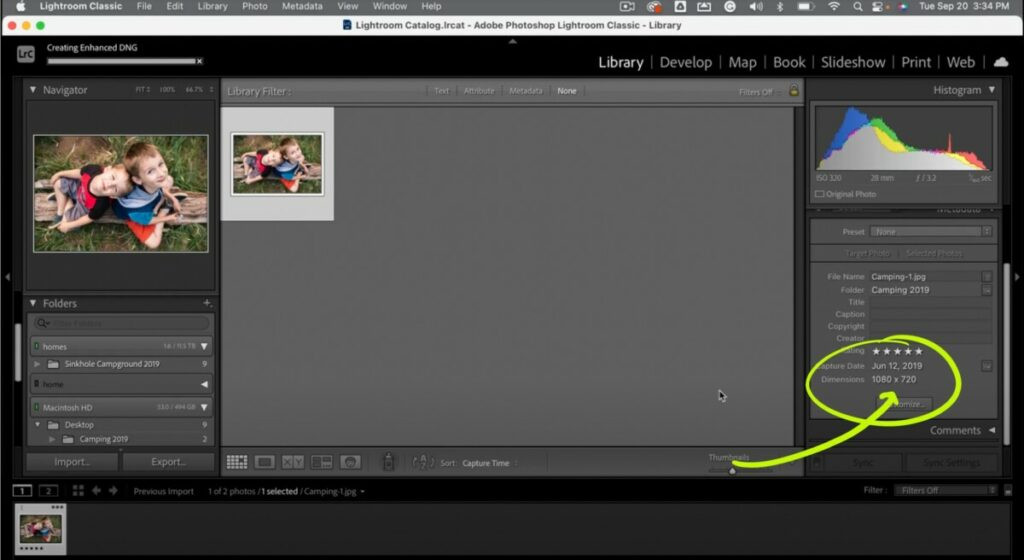 Lightroom Interface with Photo Menu and Enhance Option Selected
7. What Are The Steps To Enhance An Image In Adobe Camera Raw?
To enhance an image in Adobe Camera Raw:
- Open the image in Photoshop, which will automatically open it in Adobe Camera Raw.
- Click on the three dots icon on the right-hand side of the panel.
- Select “Enhance.”
- Adjust the settings as needed (e.g., “Super Resolution”).
- Let Adobe Camera Raw process the image to create a higher-resolution version.
- Step 1: Open in Photoshop: Open the image via Photoshop to launch Adobe Camera Raw.
- Step 2: Access Enhance: Click the three dots icon to find the Enhance option.
- Step 3: Adjust Settings: Choose appropriate settings, such as Super Resolution.
8. What Is “Super Resolution” In Adobe Camera Raw’s Enhance Feature?
“Super Resolution” in Adobe Camera Raw’s Enhance feature is an AI-powered option that quadruples the resolution of an image, providing significant upscaling while preserving details and reducing artifacts. According to Adobe, this feature uses advanced machine learning models to intelligently add pixels, resulting in a higher-quality, larger image.
- Resolution Increase: Quadruples the pixel count of the original image.
- AI-Powered: Utilizes advanced algorithms to fill in missing details.
- Quality Preservation: Aims to minimize artifacts and maintain image clarity.
9. Can I Enhance An Image Multiple Times To Further Increase Its Resolution?
While you can enhance an image multiple times, doing so within the same software (like Lightroom) may be limited. However, you can enhance an image once in Lightroom, then open the enhanced version in Adobe Camera Raw to enhance it again, further increasing the resolution.
- Lightroom Limitation: Lightroom typically allows only one pass of the Enhance feature.
- Camera Raw Option: You can enhance the Lightroom-enhanced image again in Adobe Camera Raw.
- Iterative Upscaling: Multiple passes can significantly increase resolution but monitor for quality degradation.
10. What Is The Best Way To Avoid Loss Of Quality When Upscaling A Photo?
The best way to avoid loss of quality when upscaling a photo is to use AI-powered enhancement tools like those in Adobe Lightroom and Camera Raw, which are designed to intelligently add pixels and preserve details. Starting with the highest quality original image possible also helps.
- AI Enhancement Tools: Use features like Super Resolution in Adobe Camera Raw.
- High-Quality Original: Begin with the best possible source image.
- Careful Monitoring: Regularly check the upscaled image for artifacts or excessive blurring.
11. How Much Can I Enlarge A Photo Using The Enhance Feature While Maintaining Acceptable Quality?
The amount you can enlarge a photo using the Enhance feature while maintaining acceptable quality depends on the original image resolution and the specific tool used. Generally, you can expect to double or quadruple the resolution with good results, but it’s essential to critically evaluate the upscaled image for any loss of detail or artifacts.
- Original Resolution: Higher starting resolutions allow for greater enlargement.
- Tool Capabilities: AI-powered tools like Super Resolution offer better results.
- Critical Evaluation: Always inspect the final image for quality issues.
12. Are There Any Drawbacks To Using The Enhance Feature?
Yes, there are potential drawbacks to using the Enhance feature, including increased file size, longer processing times, and the possibility of introducing artifacts or unnatural-looking details, especially if the original image is of very low quality.
- Increased File Size: Upscaled images can be significantly larger.
- Processing Time: AI-powered enhancement can take considerable time.
- Potential Artifacts: Low-quality originals may result in noticeable artifacts.
13. What Are Some Alternative Software Options For Upscaling Photos Besides Adobe Products?
Besides Adobe products, several alternative software options for upscaling photos include:
- Topaz Photo AI: Known for its advanced AI upscaling capabilities.
- Gigapixel AI: Specialized software focused on increasing image resolution.
- Let’s Enhance: An online tool that uses AI to upscale images.
These tools leverage advanced algorithms to increase image resolution while attempting to preserve or enhance details.
14. How Does Upscaling Affect The File Size Of My Photo?
Upscaling significantly increases the file size of your photo because you are adding more pixels to the image. Doubling the resolution, for example, quadruples the number of pixels, leading to a much larger file size.
- More Pixels: Upscaling adds a substantial number of new pixels.
- Larger File: Increased pixel count results in a larger file size.
- Storage Considerations: Be mindful of storage space when working with upscaled images.
15. What DPI (Dots Per Inch) Should I Aim For When Printing Photos?
When printing photos, aim for a DPI (dots per inch) of 300 for the best quality. This ensures that the print has sufficient detail and sharpness. For large format prints viewed from a distance, a lower DPI such as 150 or 200 may be acceptable.
- 300 DPI: Ideal for high-quality prints with fine details.
- 150-200 DPI: Suitable for large format prints viewed from a distance.
- Lower DPI: May result in pixelation and loss of detail.
16. What Is The Relationship Between DPI And Print Size?
The relationship between DPI (dots per inch) and print size is that as you increase the print size, the DPI decreases if the number of pixels remains constant. To maintain a high-quality print at a larger size, you need more pixels (higher resolution) to maintain the desired DPI.
- Constant Pixels: Increasing print size lowers DPI.
- Maintaining Quality: Larger prints require higher resolution to keep DPI high.
- Pixel Density: DPI reflects the density of pixels in a printed inch.
17. How Do I Convert Pixels To Inches For Printing?
To convert pixels to inches for printing, divide the number of pixels by the desired DPI (dots per inch). For example, if you have an image that is 3000 pixels wide and you want to print it at 300 DPI, the width of the print would be 3000 pixels / 300 DPI = 10 inches.
- Formula: Inches = Pixels / DPI
- Example: 3000 pixels / 300 DPI = 10 inches
- DPI Choice: Select the appropriate DPI for your desired print quality.
18. Can I Use Online Tools To Increase Photo Resolution?
Yes, several online tools can increase photo resolution, often using AI-powered algorithms. Some popular options include Let’s Enhance, Icons8 Upscaler, and VanceAI. These tools can be convenient for quick upscaling tasks.
- Convenience: Easy to use without installing software.
- AI-Powered: Many use advanced algorithms to enhance details.
- Variable Quality: Results can vary depending on the tool and original image quality.
19. What Are The Best File Formats For Saving High-Resolution Photos For Printing?
The best file formats for saving high-resolution photos for printing are:
- TIFF (Tagged Image File Format): Ideal for professional printing due to its lossless compression, which preserves all image data.
- JPEG (Joint Photographic Experts Group): Commonly used due to its good balance between file size and image quality. Use the highest quality setting to minimize compression artifacts.
- PNG (Portable Network Graphics): Suitable for images with text or graphics, as it offers lossless compression.
Choose TIFF for critical prints where quality is paramount, and JPEG for general use when file size is a concern.
- TIFF: Lossless, best for professional printing.
- JPEG: Lossy, good balance of size and quality.
- PNG: Lossless, suitable for images with text or graphics.
20. How Do I Ensure My Colors Are Accurate When Printing Photos?
To ensure your colors are accurate when printing photos:
- Calibrate Your Monitor: Use a monitor calibration tool to ensure accurate color display.
- Use Color Profiles: Embed the appropriate color profile (e.g., sRGB, Adobe RGB) in your image file.
- Soft Proofing: Use soft proofing in Photoshop to simulate how the colors will look when printed.
- Printer Settings: Configure your printer settings to match the paper type and desired color profile.
Consistent color management practices are essential for achieving accurate prints.
- Monitor Calibration: Essential for accurate color representation.
- Color Profiles: Embed profiles like sRGB or Adobe RGB.
- Soft Proofing: Preview how colors will print in Photoshop.
21. What Role Does Lighting Play In The Perceived Resolution Of A Photo?
Lighting plays a crucial role in the perceived resolution of a photo. Good lighting can enhance details and sharpness, making the image appear higher resolution, while poor lighting can obscure details and make the image look soft or blurry. According to Popular Photography magazine, optimal lighting conditions can significantly improve the perceived sharpness and detail in a photograph.
- Enhancing Details: Good lighting brings out fine details.
- Avoiding Blur: Proper lighting reduces the need for extreme ISO settings, which can introduce noise.
- Shadows and Highlights: Balanced lighting creates depth and dimension, enhancing perceived resolution.
22. How Can I Improve The Sharpness Of My Photos Before Upscaling Them?
Before upscaling photos, you can improve their sharpness using sharpening tools in photo editing software. Apply a moderate amount of sharpening to enhance details without introducing excessive artifacts.
- Unsharp Mask: A common sharpening filter in Photoshop.
- Smart Sharpen: An advanced sharpening filter that reduces noise.
- Clarity Adjustment: Increasing clarity can enhance mid-tone details.
23. What Are Common Mistakes To Avoid When Increasing Photo Resolution?
Common mistakes to avoid when increasing photo resolution include:
- Over-Upscaling: Enlarging an image too much, leading to significant loss of quality.
- Ignoring Artifacts: Failing to address artifacts or noise introduced during upscaling.
- Using Inadequate Tools: Relying on low-quality upscaling methods that don’t preserve details.
- Skipping Sharpening: Not sharpening the image after upscaling to restore fine details.
Avoiding these mistakes will help you achieve better results when increasing photo resolution.
24. How Do Different Types Of Images (E.G., Portraits, Landscapes) Respond To Upscaling?
Different types of images respond differently to upscaling. Portraits may require careful attention to skin texture and facial details, while landscapes may benefit from enhanced sharpness in natural elements like trees and mountains. Graphics and text-heavy images need clean lines and sharp edges to remain legible.
- Portraits: Focus on preserving skin texture and facial features.
- Landscapes: Enhance sharpness in natural elements.
- Graphics/Text: Maintain clean lines and sharp edges.
25. What Are The Ethical Considerations When Upscaling Photos, Especially In Professional Contexts?
Ethical considerations when upscaling photos, especially in professional contexts, include:
- Authenticity: Transparency about the extent of modifications made to the image.
- Misrepresentation: Avoiding misleading representations of the original scene or subject.
- Client Expectations: Ensuring clients are aware of the limitations of upscaling and the potential impact on image quality.
Maintaining transparency and honesty is crucial when working with upscaled images in professional settings.
26. How Can I Restore Old Or Damaged Photos Using Upscaling Techniques?
You can restore old or damaged photos using upscaling techniques combined with retouching and restoration tools. Start by scanning the photo at a high resolution, then use software like Photoshop or specialized restoration software to remove blemishes, repair tears, and enhance details. Upscaling can then help to increase the overall resolution and clarity of the image.
- High-Resolution Scan: Begin with a detailed scan of the original photo.
- Retouching: Remove blemishes, scratches, and tears using retouching tools.
- Upscaling: Increase the resolution to enhance overall clarity.
27. What Are The Hardware Requirements For Efficiently Upscaling Photos?
Efficiently upscaling photos requires a computer with:
- Powerful Processor: A multi-core CPU for faster processing.
- Sufficient RAM: At least 16 GB of RAM to handle large image files.
- Dedicated GPU: A dedicated graphics card (GPU) to accelerate AI-powered upscaling tasks.
- Fast Storage: An SSD (solid-state drive) for quick loading and saving of files.
These hardware components will help ensure smooth and efficient upscaling.
28. How Do I Batch Upscale Multiple Photos At Once?
To batch upscale multiple photos at once, use the batch processing features in software like Adobe Photoshop or specialized batch upscaling tools. This allows you to apply the same upscaling settings to a large number of images, saving time and effort.
- Photoshop Actions: Create an action in Photoshop and apply it to a batch of files.
- Batch Upscaling Tools: Use dedicated software designed for batch processing.
- Consistent Settings: Ensure consistent settings for uniform results across all images.
29. Can I Use Upscaled Photos For Commercial Purposes?
Yes, you can use upscaled photos for commercial purposes, but it’s essential to ensure that the upscaling process has not introduced any artifacts or distortions that could misrepresent the original image. Additionally, be mindful of any copyright restrictions on the original images.
- Quality Check: Ensure the upscaled image meets quality standards.
- Copyright: Respect copyright restrictions on original images.
- Transparency: Be transparent about the upscaling process if necessary.
30. What Future Trends Can We Expect In Photo Upscaling Technology?
Future trends in photo upscaling technology are likely to include:
- More Advanced AI: Even more sophisticated AI algorithms that can better preserve and enhance details.
- Real-Time Upscaling: Real-time upscaling capabilities for video and live streaming.
- Integration With Mobile Devices: Improved upscaling tools on mobile devices for on-the-go enhancement.
These advancements will make upscaling more accessible, efficient, and effective.
31. What Is The Impact Of Noise On The Upscaling Process?
Noise in an image can significantly impact the upscaling process, often resulting in amplified artifacts and a loss of detail. When upscaling a noisy image, the algorithms may interpret the noise as genuine detail, leading to an unnatural or undesirable outcome.
- Amplified Artifacts: Noise can be exaggerated during upscaling, creating visible artifacts.
- Loss of Detail: Noise can obscure fine details, making them harder to recover during upscaling.
- Unnatural Results: Upscaling algorithms may produce an unnatural or artificial-looking image if noise is not properly managed.
32. How Can I Remove Noise From My Photos Before Upscaling?
Before upscaling your photos, removing noise can significantly improve the final result. Here are some effective methods to reduce noise:
- Use Noise Reduction Software: Software like Adobe Photoshop, Lightroom, or Topaz Denoise AI can effectively reduce noise while preserving image details.
- Adjust ISO Settings: When shooting, use the lowest possible ISO setting to minimize noise.
- Shoot in RAW Format: RAW format captures more information than JPEG, allowing for better noise reduction during post-processing.
- Apply Noise Reduction Filters: Use noise reduction filters in your photo editing software to smooth out noise without sacrificing too much detail.
33. How Can I Preserve Fine Details During Upscaling?
Preserving fine details during upscaling is crucial for maintaining image quality. Here are some tips to help you retain those important details:
- Use AI-Powered Upscaling Tools: AI-based upscaling algorithms are designed to intelligently add pixels while preserving details.
- Sharpen the Image: After upscaling, apply a moderate amount of sharpening to enhance fine details.
- Adjust Texture and Clarity: Use texture and clarity adjustments to bring out subtle details in the image.
- Avoid Over-Upscaling: Upscaling too much can lead to a loss of detail. Stick to a reasonable enlargement factor.
34. What Are The Best Settings For Upscaling Different Types Of Images?
The best settings for upscaling different types of images can vary depending on the subject matter and desired outcome. Here are some general guidelines:
- Portraits: Focus on preserving skin texture and facial details. Use AI-based upscaling tools with face enhancement features.
- Landscapes: Enhance sharpness and clarity in natural elements like trees, mountains, and water.
- Architecture: Maintain clean lines and sharp edges in buildings and structures.
- Text and Graphics: Ensure text remains legible and graphics retain their sharpness.
35. How Can I Use Color Grading To Enhance Upscaled Photos?
Color grading can be a powerful tool for enhancing upscaled photos and giving them a unique look and feel. Here are some ways to use color grading effectively:
- Adjust White Balance: Correct any color casts and set the overall tone of the image.
- Adjust Hue, Saturation, and Luminance: Fine-tune colors to create a cohesive and visually appealing color palette.
- Use Color Grading Tools: Software like Adobe Photoshop and Lightroom offer advanced color grading tools that allow you to target specific colors and tones.
- Create a Mood: Use color grading to create a specific mood or atmosphere in your photos.
36. What Are Some Creative Ways To Use Upscaled Photos?
Upscaled photos can be used in a variety of creative ways, including:
- Large Format Printing: Create stunning large format prints for display in homes, offices, or galleries.
- Social Media: Enhance the quality of your social media posts with high-resolution images.
- Website Graphics: Use upscaled photos as website graphics, banners, or backgrounds.
- Digital Art: Incorporate upscaled photos into digital art projects or designs.
37. How Can I Upscale Photos On A Mobile Device?
Upscaling photos on a mobile device is becoming increasingly popular due to the advancements in mobile technology. Here are some options:
- Mobile Apps: Several mobile apps, such as Remini and PhotoDirector, offer AI-powered upscaling features.
- Online Tools: Use online upscaling tools that are accessible through your mobile browser.
- Cloud-Based Services: Upload your photos to cloud-based services that offer upscaling capabilities.
38. What Is The Future Of Photo Upscaling Technology?
The future of photo upscaling technology looks promising, with several exciting developments on the horizon:
- More Advanced AI Algorithms: Expect AI algorithms to become even more sophisticated, capable of preserving and enhancing details with greater accuracy.
- Real-Time Upscaling: Real-time upscaling for video and live streaming will become more common.
- Integration With Other Technologies: Upscaling technology will likely be integrated with other technologies like virtual reality and augmented reality.
- Accessibility: Upscaling tools will become more accessible to users of all skill levels.
39. How To Upscale Photos For Different Social Media Platforms?
Different social media platforms have different image size and resolution requirements. Here are some guidelines for upscaling photos for various platforms:
- Instagram: Upscale photos to a resolution of at least 1080 pixels wide.
- Facebook: Upscale photos to a resolution of at least 2048 pixels wide.
- Twitter: Upscale photos to a resolution of at least 1200 pixels wide.
- LinkedIn: Upscale photos to a resolution of at least 1584 x 396 pixels.
40. How To Ensure Authenticity When Upscaling Photos For News Or Journalism?
When upscaling photos for news or journalism, it’s crucial to ensure authenticity and avoid misrepresentation. Here are some guidelines:
- Transparency: Be transparent about the fact that the photo has been upscaled.
- Avoid Misleading Alterations: Do not make any alterations that could change the meaning or context of the photo.
- Verify Information: Verify all information related to the photo, including its source and date.
- Follow Ethical Guidelines: Adhere to the ethical guidelines of your news organization or publication.
Exploring dfphoto.net will provide you with detailed tutorials, software recommendations, and tips to master the art of upscaling while upholding journalistic integrity.
In conclusion, mastering the art of upscaling photos involves understanding resolution, utilizing AI-powered tools, and maintaining ethical considerations. Whether you’re printing large format prints, enhancing social media posts, or restoring old photos, the techniques and tools discussed in this article will help you achieve outstanding results. Remember to visit dfphoto.net for more in-depth guides, software reviews, and creative inspiration to elevate your photography skills. Check out our detailed guides, view stunning photo collections, and join our vibrant community of photography enthusiasts today! For professional assistance, you can reach us at 1600 St Michael’s Dr, Santa Fe, NM 87505, United States, or call +1 (505) 471-6001. Also, visit our website dfphoto.net for more information.