Want to recover accidentally deleted photos from your iPad? This dfphoto.net guide offers simple and effective methods to restore your precious memories, ensuring you never lose those irreplaceable moments. We provide step-by-step instructions, expert tips, and insights into photo recovery techniques, including utilizing iCloud and third-party software.
1. Understanding Photo Deletion on iPad
What happens when you delete a photo from your iPad? Understanding the deletion process is crucial for successful recovery.
1.1. The “Recently Deleted” Album: Your First Line of Defense
When you delete a photo or video on your iPad, it doesn’t immediately vanish into thin air. Instead, it’s moved to the “Recently Deleted” album within the Photos app. This album acts as a temporary holding pen for your deleted media, giving you a 30-day grace period to recover them.
1.2. How the Recently Deleted Album Works
The “Recently Deleted” album is a smart feature designed to prevent accidental data loss. Here’s what you need to know:
- 30-Day Limit: Photos and videos stay in this album for 30 days. After this period, they are permanently deleted.
- iCloud Sync: If you use iCloud Photos, deleting a photo on one device (like your iPad) will also remove it from other devices connected to the same iCloud account. The deleted photo will then appear in the “Recently Deleted” album on all those devices.
- Security: In iOS 16, iPadOS 16.1, and later, the “Recently Deleted” album is locked by default and requires Face ID or Touch ID to access it. This adds an extra layer of security, preventing unauthorized access to your recently deleted photos.
1.3. Permanent Deletion: When Photos Are Gone for Good
After the 30-day period, photos and videos are automatically and permanently deleted from the “Recently Deleted” album. Once this happens, recovering them directly from your iPad becomes impossible without backups or specialized recovery tools.
2. Recovering Photos from the “Recently Deleted” Album
How can you retrieve photos from the “Recently Deleted” album on your iPad? The process is straightforward and can save you from potential heartbreak.
2.1. Step-by-Step Guide to Photo Recovery
Follow these steps to recover your deleted photos:
- Open the Photos App: Launch the Photos app on your iPad.
- Navigate to Albums: Scroll down to the “Utilities” section and tap on “Recently Deleted”.
- Authenticate: If prompted, use Face ID, Touch ID, or your passcode to unlock the album.
- Select Photos: Tap “Select” in the upper-right corner. Then, tap on the photos or videos you want to recover.
- Recover: Tap “Recover” at the bottom of the screen, then tap “Recover Photo” to confirm. To recover all items, tap “Recover All” and confirm.
2.2. Important Considerations
- Time Sensitivity: Remember that you only have 30 days to recover photos from this album. Regularly check the “Recently Deleted” album to ensure no accidentally deleted photos are lost forever.
- iCloud Impact: If you’re using iCloud Photos, any recovery action will sync across all your devices.
- Shared Photo Library: In iOS 16.1 and later, with iCloud Shared Photo Library, only the person who added the photo can permanently delete or recover from “Recently Deleted.”
2.3. Troubleshooting: What if the Photos Are Not There?
If you can’t find your deleted photos in the “Recently Deleted” album, it could mean:
- The 30-day period has expired: Once the 30 days are up, the photos are permanently deleted.
- Photos were permanently deleted: Someone manually deleted them from the “Recently Deleted” album.
- iCloud Photos is disabled: Without iCloud Photos enabled, deletions might not sync correctly across devices.
In these cases, you’ll need to explore other recovery options like checking your backups or using data recovery software, which we’ll discuss in the following sections.
3. Restoring Photos from iCloud Backup
How can you use iCloud backups to recover deleted photos? iCloud backups can be a lifesaver when the “Recently Deleted” album fails you.
3.1. Understanding iCloud Backup
iCloud Backup automatically saves your iPad’s data, including photos, videos, device settings, app data, and more, to Apple’s cloud servers. To use iCloud Backup effectively, you need:
- iCloud Photos Enabled: Ensure iCloud Photos is turned on in Settings > [Your Name] > iCloud > Photos.
- Sufficient iCloud Storage: You need enough free space in your iCloud account to store your photos and backups. Apple provides 5GB of free storage, but you may need to purchase more.
- Backup Frequency: iCloud Backup occurs automatically when your device is locked, connected to Wi-Fi, and has power. You can also manually initiate a backup in Settings > [Your Name] > iCloud > iCloud Backup > Back Up Now.
3.2. Steps to Restore from iCloud Backup
Restoring your iPad from an iCloud backup will revert your device to a previous state, potentially recovering your deleted photos. Here’s how:
- Erase Your iPad: Go to Settings > General > Transfer or Reset iPad > Erase All Content and Settings. This will completely wipe your iPad.
- Set Up Your iPad: Follow the on-screen instructions until you reach the “Apps & Data” screen.
- Restore from iCloud Backup: Select “Restore from iCloud Backup”.
- Sign In: Sign in to your iCloud account using your Apple ID and password.
- Choose a Backup: Select the most recent backup that predates the photo deletion.
- Wait for Restoration: Your iPad will begin restoring from the selected backup. This process can take some time, depending on the size of the backup and your internet speed.
3.3. Important Considerations and Potential Drawbacks
- Data Loss: Restoring from an iCloud backup will overwrite all current data on your iPad with the data from the backup. Any data created after the backup date will be lost.
- Backup Date: Make sure the backup you choose was created before you deleted the photos. If the backup was made after the deletion, it won’t contain the photos you want to recover.
- Time Commitment: The restoration process can take a significant amount of time, so ensure you have a stable Wi-Fi connection and enough battery life.
3.4. Verifying Photo Recovery
After the restoration is complete, check your Photos app to see if the deleted photos have been recovered. If the backup was recent enough, you should find your photos back in their original albums.
If you’re considering professional photography services, you can reach out to us at: Address: 1600 St Michael’s Dr, Santa Fe, NM 87505, United States. Phone: +1 (505) 471-6001. Website: dfphoto.net.
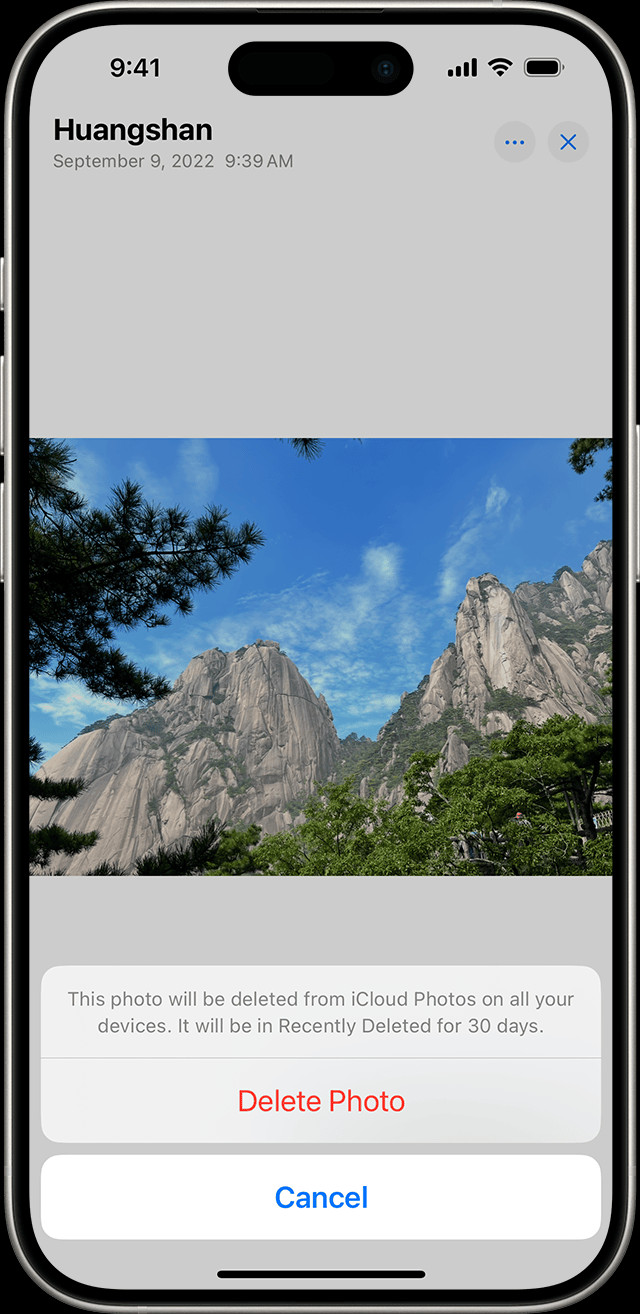 iPhone showing Delete Photo option
Photo Recovery Option Displayed on iPhone
4. Using iTunes/Finder Backup to Recover Photos
How can you use iTunes or Finder to recover photos from a backup? iTunes (on older macOS versions) and Finder (on newer macOS versions) offer another way to back up and restore your iPad.
4.1. Understanding iTunes/Finder Backup
iTunes and Finder backups create a local copy of your iPad’s data on your computer. This method is useful if you prefer not to rely on cloud storage or if you have limited iCloud storage. Key aspects include:
- Full Device Backup: iTunes/Finder backs up almost all of your iPad’s data, including photos, videos, apps, settings, messages, and more.
- Local Storage: The backup is stored on your computer’s hard drive, providing quick access for restoration.
- Backup Frequency: Backups are not automatic like iCloud. You need to manually initiate a backup by connecting your iPad to your computer and using iTunes or Finder.
4.2. Steps to Restore from iTunes/Finder Backup
Here’s how to restore your iPad from an iTunes or Finder backup:
- Connect Your iPad: Connect your iPad to the computer you used to create the backup.
- Open iTunes/Finder: Open iTunes (if you’re using macOS Mojave or earlier) or Finder (if you’re using macOS Catalina or later).
- Select Your Device: In iTunes, click on the device icon. In Finder, find your device in the sidebar under “Locations”.
- Restore Backup: In iTunes, click “Restore Backup”. In Finder, click “Manage Backups” and then select “Restore”.
- Choose a Backup: Select the backup you want to restore from the list. Make sure to choose a backup created before you deleted the photos.
- Enter Password (if encrypted): If your backup is encrypted, you’ll need to enter the password to proceed.
- Wait for Restoration: The restoration process will begin. Keep your iPad connected to your computer until the process is complete.
4.3. Important Considerations and Potential Drawbacks
- Data Overwrite: Restoring from an iTunes/Finder backup will overwrite all current data on your iPad with the data from the backup. Any data created after the backup date will be lost.
- Backup Date: Ensure the backup you choose was created before you deleted the photos.
- Time Commitment: The restoration process can take a significant amount of time, so be patient and ensure your iPad remains connected throughout.
4.4. Verifying Photo Recovery
After the restoration is complete, check your Photos app to see if the deleted photos have been recovered. If the backup was recent enough, you should find your photos back in their original albums.
4.5. Alternative: Extracting Photos Directly from the Backup
If you don’t want to restore your entire iPad, you can use third-party software to extract photos directly from the iTunes/Finder backup. This method allows you to recover only the photos you need without overwriting your current data. Several software options are available, such as iMyFone D-Back, Dr.Fone, and AnyTrans.
5. Using Third-Party Data Recovery Software
How can you utilize third-party software to recover deleted photos? When all else fails, third-party data recovery software can be your last resort for retrieving permanently deleted photos from your iPad.
5.1. Understanding Data Recovery Software
Data recovery software works by scanning your iPad’s internal storage for traces of deleted files. Even after a file is permanently deleted, fragments of the data may still be present until they are overwritten by new data. Key aspects include:
- Deep Scan: Data recovery software performs a deep scan of your device’s storage to identify recoverable files.
- File Preview: Most software allows you to preview recoverable photos before restoring them, ensuring you’re recovering the right files.
- Recovery Success: The success of data recovery depends on several factors, including how long ago the photos were deleted and how much new data has been written to the device since then.
5.2. Popular Data Recovery Software Options
Several reputable data recovery software options are available for iOS devices. Some popular choices include:
- iMyFone D-Back: Known for its high recovery rate and user-friendly interface.
- Dr.Fone – Data Recovery (iOS): Offers a comprehensive suite of tools for data recovery, including options for recovering from iCloud and iTunes backups.
- Tenorshare UltData: Provides efficient data recovery with a focus on simplicity and ease of use.
5.3. Steps to Use Data Recovery Software
Here’s a general guide on how to use data recovery software to recover deleted photos from your iPad:
- Download and Install: Download and install the data recovery software on your computer.
- Connect Your iPad: Connect your iPad to your computer using a USB cable.
- Launch the Software: Launch the data recovery software and select the “Recover from iOS Device” mode.
- Start Scanning: Click “Start” to begin scanning your iPad for deleted files.
- Preview Recoverable Photos: Once the scan is complete, preview the recoverable photos and select the ones you want to restore.
- Recover Photos: Click “Recover” and choose a location on your computer to save the recovered photos.
5.4. Important Considerations and Limitations
- Success Rate: The success rate of data recovery is not guaranteed and depends on various factors.
- Cost: Most data recovery software requires a paid license to unlock the full recovery features.
- Security: Ensure you download the software from a reputable source to avoid malware or security risks.
- Overwriting Data: The more you use your iPad after deleting the photos, the lower the chances of successful recovery. It’s best to stop using your device immediately after realizing the photos are missing.
5.5. Tips for Improving Recovery Chances
- Act Quickly: The sooner you start the recovery process, the better your chances of success.
- Minimize Device Usage: Avoid using your iPad after deleting the photos to prevent overwriting the data.
- Use a Reliable Software: Choose a reputable data recovery software with positive reviews and a proven track record.
Remember that professional photographers at dfphoto.net, located at 1600 St Michael’s Dr, Santa Fe, NM 87505, United States, can offer advice and services. You can reach us at +1 (505) 471-6001 or visit our website at dfphoto.net.
 iPhone showing multiple photos selected in the Photos app
Multiple photos in the Photos app selected on an iPhone
6. Preventing Future Photo Loss
How can you prevent future photo loss on your iPad? Prevention is always better than cure. Here are some proactive measures to safeguard your precious memories and prevent future photo loss on your iPad.
6.1. Enable iCloud Photos
iCloud Photos automatically uploads and syncs your photos and videos across all your Apple devices. This ensures that your photos are safely stored in the cloud and accessible from anywhere.
- How to Enable: Go to Settings > [Your Name] > iCloud > Photos and turn on “iCloud Photos”.
- Benefits: Automatic backup, access from any device, and easy sharing options.
6.2. Regular Backups
Regularly backing up your iPad to iCloud or your computer is crucial. Backups create a snapshot of your device’s data, allowing you to restore it in case of data loss.
- iCloud Backup: Enable automatic iCloud Backup in Settings > [Your Name] > iCloud > iCloud Backup.
- iTunes/Finder Backup: Connect your iPad to your computer and create a backup using iTunes or Finder.
6.3. Use Multiple Storage Solutions
Don’t rely on a single storage solution. Use a combination of iCloud, local backups, and external storage devices to create multiple layers of protection.
- External Hard Drives: Transfer photos and videos to an external hard drive for long-term storage.
- Cloud Storage Services: Consider using other cloud storage services like Google Photos, Dropbox, or OneDrive as additional backup options.
6.4. Be Careful When Deleting Photos
Take extra care when deleting photos and videos. Double-check before tapping the delete button, and be mindful of which photos you’re selecting.
- Review Before Deleting: Always review photos before deleting them to avoid accidental deletions.
- Use the “Favorite” Feature: Mark your favorite photos as favorites to easily identify and protect them from accidental deletion.
6.5. Educate Shared Library Users
If you use iCloud Shared Photo Library, educate all users about the importance of careful deletion and the impact of deleting photos on everyone’s devices.
- Communication: Establish clear guidelines for adding, editing, and deleting photos in the Shared Library.
- Recovery Responsibility: Remind users that only the person who added a photo can permanently delete or recover it from the “Recently Deleted” album.
6.6. Regularly Check the “Recently Deleted” Album
Make it a habit to regularly check the “Recently Deleted” album to ensure no accidentally deleted photos are lost forever.
- Routine Check: Set a reminder to check the “Recently Deleted” album at least once a week.
- Prompt Recovery: If you find any accidentally deleted photos, recover them immediately.
7. Advanced Tips and Tricks
What advanced tips and tricks can help with photo recovery and management on your iPad? For those who want to go the extra mile in managing and protecting their photos, here are some advanced tips and tricks.
7.1. Using iCloud Shared Photo Library Effectively
iCloud Shared Photo Library, introduced in iOS 16.1 and iPadOS 16.1, allows you to share photos and videos with up to five other people. Here’s how to use it effectively:
- Setup: Go to Settings > Photos > Shared Library and follow the instructions to set up or join a Shared Library.
- Smart Suggestions: Use the smart suggestions feature to automatically add photos based on date, location, or people.
- Collaboration: Encourage all members to actively contribute and manage the library, but emphasize the importance of careful deletion.
7.2. Archiving Photos
Archiving photos involves moving them from your main photo library to a separate storage location. This helps declutter your library and free up storage space on your iPad.
- Manual Archiving: Manually transfer photos to an external hard drive or cloud storage service.
- Software Solutions: Use photo management software like Adobe Lightroom or Capture One to archive and organize your photos.
7.3. Managing Storage Space
Efficiently managing storage space on your iPad can prevent performance issues and ensure you have enough room for new photos and videos.
- Optimize Storage: Enable “Optimize iPad Storage” in Settings > [Your Name] > iCloud > Photos. This stores full-resolution photos in iCloud and keeps smaller, device-optimized versions on your iPad.
- Delete Unnecessary Files: Regularly delete old photos, videos, and apps that you no longer need.
- Use Storage Analysis Tools: Use built-in or third-party storage analysis tools to identify large files and apps that are taking up the most space.
7.4. Using RAW Format
If you’re serious about photography, consider shooting in RAW format. RAW files contain more data than JPEG files, allowing for greater flexibility in post-processing and editing.
- Enable RAW Capture: Go to Settings > Camera > Formats and enable “ProRes” or “RAW”.
- Post-Processing: Use photo editing software like Adobe Lightroom or Capture One to process and edit your RAW files.
7.5. Protecting Privacy
Protecting your privacy is essential, especially when sharing photos online or with others.
- Remove Location Data: Disable location services for the Camera app in Settings > Privacy > Location Services > Camera.
- Use Private Albums: Create private albums in the Photos app to hide sensitive photos from prying eyes.
- Watermark Your Photos: Add a watermark to your photos to protect them from unauthorized use or copyright infringement.
7.6. Automating Photo Management
Automating photo management tasks can save you time and effort.
- IFTTT and Zapier: Use automation platforms like IFTTT and Zapier to create custom workflows for backing up, organizing, and sharing your photos.
- Photo Management Apps: Explore photo management apps that offer features like automatic tagging, facial recognition, and duplicate detection.
Remember to visit dfphoto.net for more photography tips, tutorials, and inspiration. Our team of experienced photographers in Santa Fe, NM, is dedicated to helping you capture and preserve your precious memories. Contact us at +1 (505) 471-6001 for any inquiries or assistance.
8. Common Mistakes to Avoid
What common mistakes should you avoid when dealing with deleted photos on your iPad? To ensure successful photo recovery and prevent future data loss, avoid these common mistakes.
8.1. Delaying Recovery Efforts
Delaying recovery efforts is one of the biggest mistakes you can make. The longer you wait, the lower the chances of successful recovery.
- Why It Matters: The more you use your iPad after deleting the photos, the more likely the data will be overwritten.
- Best Practice: Act immediately after realizing the photos are missing.
8.2. Overwriting Data
Using your iPad excessively after deleting photos can overwrite the data, making it unrecoverable.
- Why It Matters: New data can replace the fragments of deleted files, rendering them unrecoverable.
- Best Practice: Minimize device usage and avoid installing new apps or saving new files.
8.3. Disabling iCloud Photos
Disabling iCloud Photos can lead to data loss and make it harder to recover deleted photos.
- Why It Matters: Without iCloud Photos, your photos are not automatically backed up to the cloud, increasing the risk of permanent loss.
- Best Practice: Keep iCloud Photos enabled to ensure automatic backup and syncing.
8.4. Neglecting Backups
Failing to create regular backups is a significant mistake. Backups are your safety net in case of data loss.
- Why It Matters: Without backups, you have no way to restore your photos if they are permanently deleted from your iPad.
- Best Practice: Create regular backups to iCloud or your computer.
8.5. Using Unreliable Recovery Software
Using unreliable or untrusted data recovery software can put your data and device at risk.
- Why It Matters: Some software may contain malware or fail to recover your photos effectively.
- Best Practice: Choose reputable data recovery software with positive reviews and a proven track record.
8.6. Ignoring Storage Management
Ignoring storage management can lead to performance issues and data loss.
- Why It Matters: When your iPad is full, it can slow down and may not save new photos or videos.
- Best Practice: Regularly manage your storage space by deleting unnecessary files and optimizing storage settings.
8.7. Not Securing the “Recently Deleted” Album
Not securing the “Recently Deleted” album can allow unauthorized access to your deleted photos.
- Why It Matters: Anyone with access to your iPad can view and potentially recover or permanently delete your deleted photos.
- Best Practice: Enable Face ID or Touch ID for the “Recently Deleted” album in Settings > Photos.
9. Conclusion: Regaining Control of Your Photos
How can you regain control of your photos after accidental deletion on your iPad? Recovering deleted photos on your iPad can be a stressful experience, but with the right knowledge and tools, you can regain control of your precious memories. By understanding the deletion process, utilizing recovery methods like the “Recently Deleted” album, iCloud backups, iTunes/Finder backups, and third-party software, you can significantly increase your chances of successful photo recovery.
9.1. Recap of Key Steps
- Check the “Recently Deleted” Album: Your first step should always be to check the “Recently Deleted” album in the Photos app.
- Restore from iCloud Backup: If the photos are not in the “Recently Deleted” album, restore your iPad from an iCloud backup.
- Use iTunes/Finder Backup: Alternatively, restore from an iTunes or Finder backup if you have one available.
- Try Data Recovery Software: If all else fails, use reputable data recovery software to scan your iPad for deleted photos.
- Prevent Future Loss: Enable iCloud Photos, create regular backups, and be careful when deleting photos.
9.2. Final Thoughts
Accidental photo deletion is a common issue, but it doesn’t have to be a permanent loss. By following the steps outlined in this comprehensive guide and taking proactive measures to protect your photos, you can ensure that your memories are safe and secure.
9.3. Call to Action
Ready to take control of your photo management? Visit dfphoto.net today for more photography tips, tutorials, and inspiration. Explore our rich collection of articles, connect with our vibrant community, and discover how to capture and preserve your precious moments.
For professional photography services or personalized assistance, contact us at:
- Address: 1600 St Michael’s Dr, Santa Fe, NM 87505, United States
- Phone: +1 (505) 471-6001
- Website: dfphoto.net
Let dfphoto.net be your trusted resource for all things photography. Start your journey to better photo management and preservation today!
10. Frequently Asked Questions (FAQ)
10.1. Can I recover permanently deleted photos from my iPad without a backup?
Yes, you might be able to recover permanently deleted photos using third-party data recovery software. This software scans your iPad’s storage for traces of deleted files, but the success rate depends on how long ago the photos were deleted and how much new data has been written to the device since then.
10.2. How long do photos stay in the “Recently Deleted” album on my iPad?
Photos and videos stay in the “Recently Deleted” album for 30 days. After this period, they are automatically and permanently deleted.
10.3. Does deleting a photo from my iPad also delete it from iCloud?
Yes, if you use iCloud Photos, deleting a photo on one device (like your iPad) will also remove it from other devices connected to the same iCloud account. The deleted photo will then appear in the “Recently Deleted” album on all those devices.
10.4. How do I enable iCloud Photos on my iPad?
To enable iCloud Photos, go to Settings > [Your Name] > iCloud > Photos and turn on “iCloud Photos”.
10.5. Can I recover photos from an encrypted iTunes/Finder backup?
Yes, you can recover photos from an encrypted iTunes/Finder backup, but you’ll need to enter the password you used to encrypt the backup.
10.6. What is the best data recovery software for iPads?
Some popular data recovery software options for iOS devices include iMyFone D-Back, Dr.Fone – Data Recovery (iOS), and Tenorshare UltData. Choose reputable software with positive reviews and a proven track record.
10.7. How can I prevent accidental photo deletion on my iPad?
To prevent accidental photo deletion, enable iCloud Photos, create regular backups, be careful when deleting photos, and regularly check the “Recently Deleted” album.
10.8. Does restoring from a backup erase all the current data on my iPad?
Yes, restoring from an iCloud or iTunes/Finder backup will overwrite all current data on your iPad with the data from the backup. Any data created after the backup date will be lost.
10.9. How do I access the “Recently Deleted” album on my iPad?
To access the “Recently Deleted” album, open the Photos app, scroll down to the “Utilities” section, and tap on “Recently Deleted”. You may need to use Face ID, Touch ID, or your passcode to unlock the album.
10.10. What should I do immediately after realizing I’ve accidentally deleted photos on my iPad?
Immediately after realizing you’ve accidentally deleted photos, stop using your iPad to prevent overwriting the data, check the “Recently Deleted” album, and consider using data recovery software if needed.