Live Photos on iPhone bring your still images to life by capturing a few seconds of motion and sound before and after you snap a picture. This feature allows you to record moments in a more immersive way, going beyond traditional static photos. Understanding how to activate and utilize Live Photos can significantly enhance your iPhone photography experience. This guide will walk you through the simple steps to turn on Live Photos and explore its functionalities.
To start using this dynamic feature, first, you need to ensure it’s enabled on your iPhone. Here’s how you can do it:
Step-by-Step Guide to Turn on Live Photo on iPhone
Turning on Live Photo is straightforward and can be done directly from your Camera app. Follow these simple steps to activate it:
-
Open the Camera App: Locate the Camera app icon on your iPhone Home Screen and tap to open it.
-
Verify Photo Mode: Make sure your camera is set to Photo mode. Swipe left or right on the screen or tap on the options above the shutter button to select ‘Photo’.
-
Locate the Live Photos Button: Look at the top right corner of your screen in portrait orientation, or top center in landscape, within the Camera app interface. You will see a circular icon that resembles rings or a target. This is the Live Photos button.
-
Turn On Live Photos: If the Live Photos button is not highlighted in yellow (or another prominent color depending on your iOS version) or doesn’t have the word “LIVE” displayed, it means Live Photos is currently off. Tap this button once to turn Live Photos on. When activated, the icon will typically change color, and ‘LIVE’ may appear to indicate it is active.
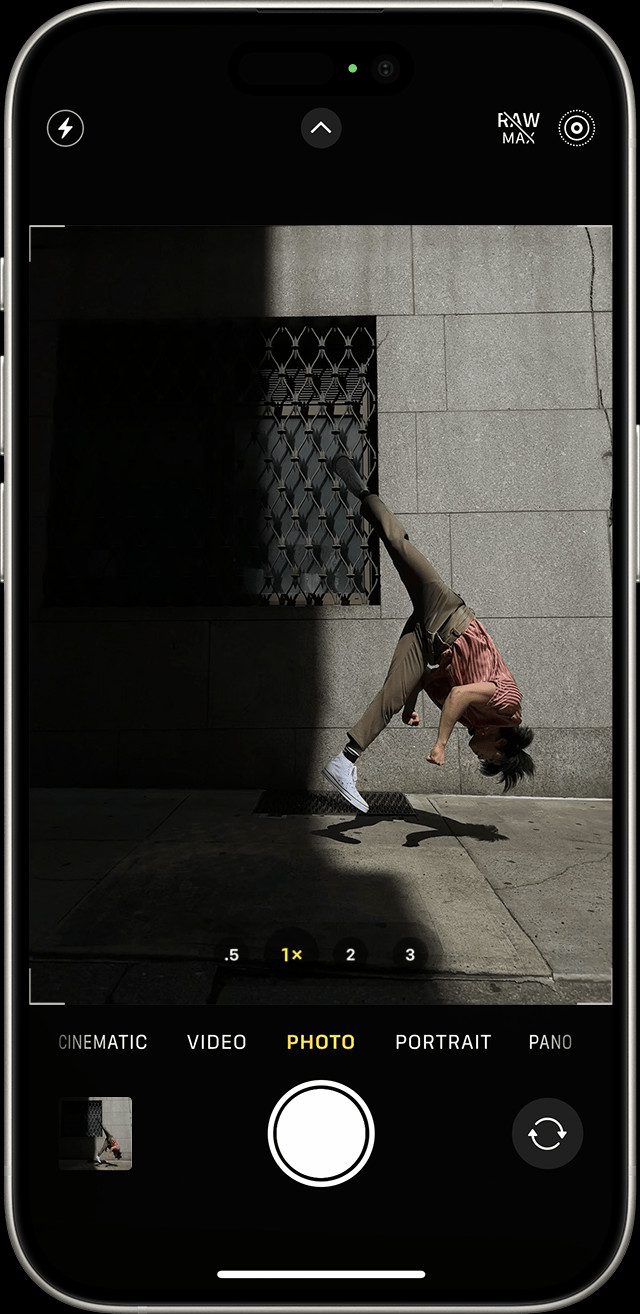 iPhone Camera app interface with the Live Photos button highlighted as ON.
This image demonstrates how the Live Photos button looks when it is turned on within the iPhone Camera app, ready to capture moving photos.
-
Start Capturing Live Photos: Once the Live Photos button is active, your iPhone camera is set to capture Live Photos. Simply frame your shot and press the shutter button to take a photo as you normally would. Your iPhone will now record a short video clip along with the still image.
Ensuring Live Photos is Always Ready
By default, Live Photos is usually turned on automatically. However, if you find yourself frequently wanting to use Live Photos and want to make sure it remains active each time you open the Camera app, you can adjust your settings to preserve the Live Photo setting. Here’s how:
- Open Settings App: Go to the Settings app on your iPhone Home Screen.
- Scroll to Camera: Scroll down and find ‘Camera’ in the list of settings and tap on it.
- Tap on Preserve Settings: Within the Camera settings, find and tap on ‘Preserve Settings’.
- Enable Live Photo Preservation: On the ‘Preserve Settings’ screen, you will see a toggle switch next to ‘Live Photo’. Ensure this switch is turned on (green or highlighted).
By enabling this setting, your iPhone will remember whether you had Live Photos turned on or off the last time you used the Camera app. This means if you turn Live Photos off, it will stay off until you manually turn it back on, and vice versa.
Exploring the Features of Live Photos
Once you know how to turn on Live Photos, you can start exploring what makes them special. Here’s a quick look at what you can do with Live Photos:
Viewing and Playing Live Photos
To enjoy the motion and sound captured in your Live Photos, you can easily play them back in the Photos app:
-
Open Photos App: Launch the Photos app on your iPhone.
-
Navigate to Live Photos Album: Scroll down to the ‘Media Types’ section under the ‘Albums’ tab. Tap on ‘Live Photos’. This album automatically collects all the Live Photos you’ve taken.
 Navigating to the Live Photos album in the Photos app on iPhone.
This image shows the path to find the Live Photos album within the Photos app, under Media Types.
-
Play a Live Photo: Tap on any photo in the Live Photos album to open it.
-
Press and Hold to Play: To bring the Live Photo to life, simply press and hold anywhere on the photo. You’ll see the photo animate and hear any captured sound.
Editing Your Live Photos
Live Photos are not just about capturing motion; they also offer creative editing options:
- Change the Key Photo: You can choose a different frame to be the still image thumbnail of your Live Photo. In the Photos app, tap ‘Edit’, then tap the Live Photos icon, use the slider to select a new frame, and tap ‘Make Key Photo’.
- Add Fun Effects: Swipe up on a Live Photo to reveal effects like ‘Loop’, ‘Bounce’, and ‘Long Exposure’ to transform your Live Photos into interesting animations or simulate long exposure photography.
Sharing Live Photos
Sharing Live Photos allows you to send these dynamic images to friends and family. When sharing, remember that:
- Sharing as Still Image: You can choose to share just the still image part of a Live Photo if needed. Before sharing, tap ‘Live’ in the upper-left corner of the photo to convert it to a still photo for sharing.
- Compatibility: Recipients need to have devices and platforms that support Live Photos to view them in motion (like iPhones, iPads, and Macs via Messages). When shared via email, they are typically sent as still images.
Conclusion
Turning on Live Photo on your iPhone is a simple yet powerful way to capture more than just a static image. By following these steps, you can easily activate this feature and start recording your memories with motion and sound. Experiment with different settings and editing options to fully utilize the creative potential of Live Photos and bring your iPhone photography to the next level.