When you connect your iPhone, iPad, or iPod touch to a computer or other accessory for the first time, you might encounter a prompt asking if you trust the connected device. This alert is crucial for safeguarding your personal information, especially your photos and videos, by controlling which devices can access them. Understanding how to manage this “Trust This Computer” notification is essential for your device’s security and your data privacy.
This article will guide you through understanding the “Trust This Computer” alert, how it relates to allowing access to your photos, videos, and other content, and most importantly, how to turn off or reset these settings to manage device access permissions effectively.
Understanding the “Trust This Computer” Alert and Access to Your Data
The “Trust This Computer” alert is a security feature designed to protect your iPhone, iPad, or iPod touch when connecting to computers or other devices. When you see this notification, it’s essentially asking you to decide whether to grant the connected device access to your data.
- Trusting a computer means you are allowing it to sync with your device and access your personal content, including photos, videos, contacts, and more. This trusted status is saved, so you won’t be prompted again for the same computer unless you change your trust settings or erase your device.
- Not trusting a computer blocks its access to your device’s content. You will see the “Trust This Computer” alert every time you connect your device to an untrusted computer.
In iOS 16 and later versions, this alert also appears when you back up your device. If automatic backups are enabled, the notification will appear every time your device connects to the computer designated for backups. This highlights the importance of understanding and managing these trust settings to control access to your photos and videos and prevent unauthorized access.
Steps to Choose Whether to Allow Access (Trust)
When you connect your iPhone, iPad, or iPod touch to a computer, follow these steps to choose whether to allow access:
- Connect your device: Use a USB cable to connect your iPhone, iPad, or iPod touch to your computer or another device.
- Unlock your device: If you have set up a passcode, enter it to unlock your iPhone, iPad, or iPod touch.
- Access device in Finder, Apple Devices app, or iTunes:
- For macOS Catalina or later: Open Finder, and select your device from the Locations in the sidebar.
- For Windows: Use the Apple Devices app or iTunes.
- Click “Trust” or “Continue”: In Finder or Apple Devices app, click “Trust”. In iTunes, click “Continue”. If a dialog box appears asking to trust the device, select “Trust This [device]” to allow it to appear in the sidebar.
- Respond to the “Trust This Computer” alert on your device:
- Tap “Trust”: If you want to grant the computer access to your data.
- Tap “Don’t Trust”: If you want to block the computer from accessing your data. This will prevent the computer from accessing your photos, videos, and other content.
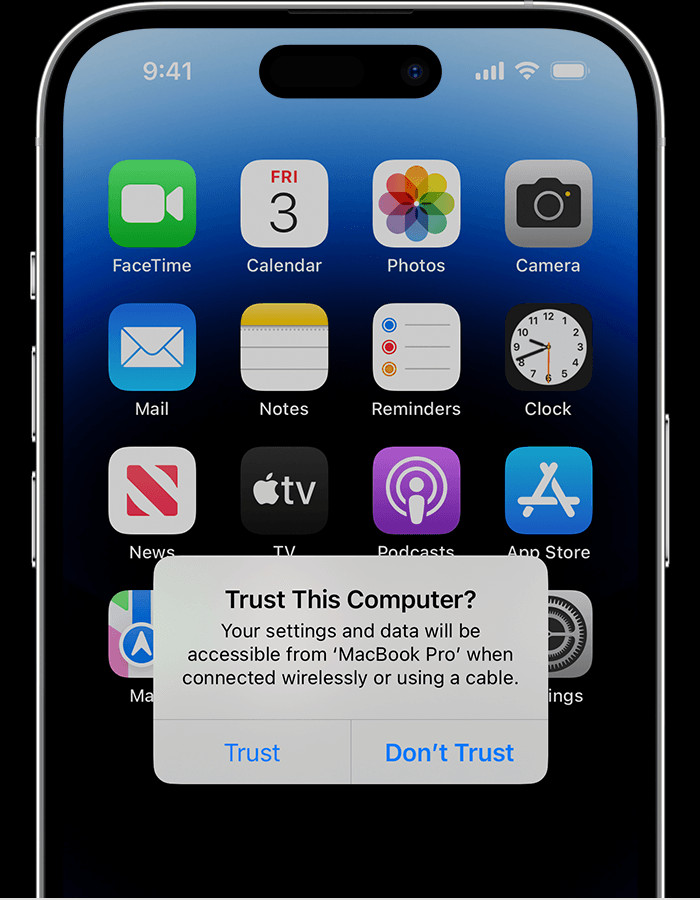 The Trust This Computer alert appears on an iPhone Home screen asking for permission to allow device access to photos and videos.
Choose carefully whether to “Trust” or “Don’t Trust” based on whether you recognize the computer and intend to allow it access to your device’s information.
How to Turn Off or Reset Trusted Computer Settings (Revoking Access)
If you previously trusted a computer but no longer want to allow it access to your photos, videos, and other data, you can reset your trusted computers settings. This effectively turns off the “allow device access” permission for all previously trusted computers. Here’s how to do it:
- Open Settings: On your iPhone, iPad, or iPod touch, go to the “Settings” app.
- Navigate to General: Tap on “General”.
- Transfer or Reset [Device]: Scroll down and tap “Transfer or Reset iPhone” (or iPad/iPod touch, depending on your device).
- Reset Location & Privacy: Tap “Reset”, and then select “Reset Location & Privacy”.
- Confirm Reset: You may need to enter your passcode to confirm this action.
After resetting your Location & Privacy settings, the next time you connect your device to any computer, including those previously trusted, the “Trust This Computer” alert will reappear. You will then have the option to “Trust” or “Don’t Trust” the computer again. This is how you effectively turn off the automatic “allow device access photos videos notification” for previously trusted devices.
Troubleshooting: When the Alert Doesn’t Appear or Respond
In some cases, you might encounter issues with the “Trust This Computer” alert. If you tap “Trust” or “Don’t Trust,” but your computer doesn’t recognize your response, or if the alert message doesn’t appear at all, try these troubleshooting steps:
- Update your computer’s software:
- For macOS: Ensure your computer is running the latest version of macOS.
- For Windows: Make sure you have the latest version of iTunes or the Apple Devices app installed. If you installed iTunes from the Microsoft Store, verify that “iTunes Mobile Device Helper” is enabled as a startup item in your Windows settings.
- Disconnect and reconnect: Disconnect your iPhone, iPad, or iPod touch from your computer and then reconnect it.
- Restart your computer: Restart your computer to refresh its system processes.
- Restart your Apple device: Restart your iPhone, iPad, or iPod touch.
- Reset Location & Privacy settings again: Repeat the steps to reset your Location & Privacy settings as outlined earlier.
- Reset Network Settings: If the issue persists, you can try resetting your network settings. Go to “Settings” > “General” > “Transfer or Reset [Device]” > “Reset” and tap “Reset Network Settings”. Be aware that this will also reset Wi-Fi networks, passwords, cellular settings, and VPN & APN settings.
By following these troubleshooting steps, you should be able to resolve most issues related to the “Trust This Computer” alert and regain control over device access permissions.
Conclusion
Managing the “Trust This Computer” alert is a vital aspect of keeping your iPhone, iPad, or iPod touch secure, especially regarding access to your personal photos and videos. By understanding how to respond to the alert and how to reset trusted computer settings, you can effectively control which devices are allowed to access your valuable data. Regularly reviewing and resetting your Location & Privacy settings ensures that you maintain optimal security and prevent unauthorized access to your device’s content.