Turning a photo into a stencil opens up a world of creative possibilities, blending photography with visual arts. At dfphoto.net, we’re passionate about providing you with the tools and inspiration to explore these techniques. With the right software and a bit of know-how, you can transform your photographs into unique stencils. This allows for artistic expression through painting, drawing, and digital design. This guide covers everything from using professional software to exploring user-friendly online tools, ensuring your creative journey is both successful and enjoyable. Discover related terms such as photo stenciling, image to stencil conversion, and stencil design software.
1. What is a Photo Stencil and Why Create One?
A photo stencil transforms a photographic image into a format suitable for creating a physical or digital stencil. Creating stencils from photos allows artists and hobbyists to:
- Personalize Art Projects: Stencils can be used to create custom artwork, decorations, and personalized gifts.
- Simplify Complex Designs: By breaking down an image into basic shapes, stencils make it easier to reproduce intricate designs.
- Explore Different Mediums: Stencils can be applied to various surfaces like walls, fabrics, and paper, expanding creative possibilities.
- Enhance Photography Skills: Understanding how to convert photos into stencils can deepen your understanding of image editing and manipulation.
2. What are the Key Considerations Before Turning a Photo Into a Stencil?
Before diving into the process, consider these factors to ensure the best results:
- Image Complexity: Simpler images with clear subjects and minimal background clutter work best.
- Desired Level of Detail: Determine how much detail you want to retain in the stencil. Simpler stencils are easier to cut and apply.
- Stencil Material: Choose a material appropriate for your project, such as cardstock, acetate, or metal.
- Software Options: Select software that matches your skill level and project needs. Options range from free online tools to professional software like Adobe Photoshop.
- Intended Use: Consider whether the stencil is for a one-time project or for repeated use. This will influence your choice of material and design complexity.
3. What Software Options are Available for Turning Photos Into Stencils?
Several software options can help you convert photos into stencils, each with its strengths:
- Adobe Photoshop: Offers advanced control and precision for creating detailed stencils.
- Adobe Illustrator: Ideal for creating vector-based stencils that can be scaled without loss of quality.
- GIMP: A free, open-source alternative to Photoshop with many similar features.
- Online Stencil Makers: User-friendly web-based tools that simplify the stencil creation process.
4. How to Turn a Photo Into a Stencil Using Adobe Photoshop?
Photoshop provides powerful tools for creating high-quality stencils from your photos. Here’s a step-by-step guide:
- Open Your Image: Launch Photoshop and open the photo you want to convert.
- Convert to Black and White: Go to
Image > Adjustments > Black & Whiteto remove color information. - Adjust Levels: Enhance contrast by going to
Image > Adjustments > Levels. Adjust the sliders to make the blacks darker and the whites brighter. - Apply Threshold: Navigate to
Image > Adjustments > Threshold. This converts the image into a pure black and white stencil. - Adjust Threshold Level: Use the Threshold slider to control the level of detail in the stencil. Experiment to find a balance that captures the key elements of your image.
- Clean Up the Image: Use the Brush tool with a white or black color to remove unwanted areas or fill in gaps. Ensure all parts of your stencil are connected.
- Apply Cutout Filter: Go to
Filter > Filter Gallery > Artistic > Cutout. Adjust the settings to simplify the shapes and edges. - Final Adjustments: Make any final touch-ups to refine your stencil.
- Save the Image: Save the stencil as a high-resolution image file (e.g., JPEG or PNG).
- Print the Stencil: Print the stencil onto your chosen material, such as cardstock or acetate.
- Cut the Stencil: Use a craft knife or scissors to carefully cut out the black areas, leaving the white areas intact.
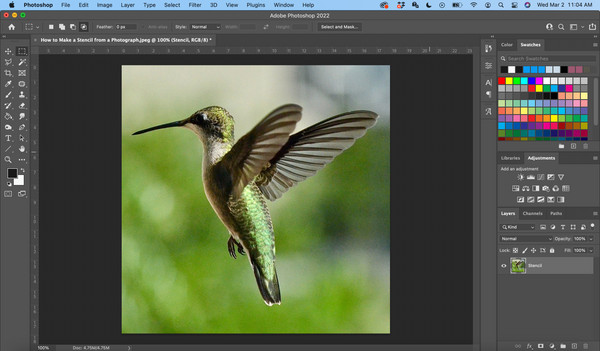 How to Make a Stencil from a Photograph – open image in photoshop
Opening an image file in Photoshop sets the stage for transforming a photograph into a stencil.
5. How to Use the Threshold Tool in Photoshop for Stencil Creation?
The Threshold tool in Photoshop is essential for converting a photograph into a stencil. Here’s how to use it effectively:
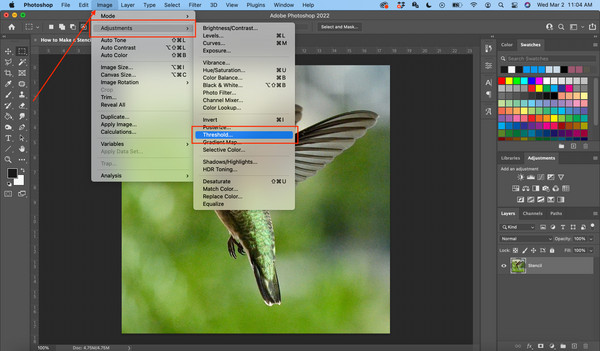
- Access Threshold: Open your image in Photoshop and go to
Image > Adjustments > Threshold. - Understand the Slider: The Threshold slider determines the cutoff point between black and white. Moving the slider left makes more of the image black, while moving it right makes more of it white.
- Adjust for Detail: Drag the slider to find the optimal balance of detail. The goal is to retain enough of the image’s outline to create a recognizable stencil.
- Clean Up: After applying the Threshold, use the Brush tool to clean up any unwanted areas or fill in gaps.
- Experiment: Try different Threshold levels to see how they affect the final stencil. Adjusting the Threshold is crucial for achieving the desired look.
 How to Make a Stencil from a Photograph – threshold in photoshop
Applying the Threshold adjustment in Photoshop transforms a photograph into a stark black and white image, ready for stencil creation.
6. How Does the Cutout Filter Simplify Stencil Designs?
The Cutout filter in Photoshop simplifies the stencil design by reducing the number of colors and creating sharper edges. Here’s how to use it:
- Apply Cutout Filter: Go to
Filter > Filter Gallery > Artistic > Cutout. - Adjust Levels: The “Number of Levels” setting controls the number of color levels in the image. Lower levels result in simpler shapes.
- Simplify Edges: The “Edge Simplicity” setting reduces the complexity of the edges. Higher values create straighter, simpler lines.
- Refine Details: The “Edge Fidelity” setting controls how closely the edges match the original image. Lower values result in more stylized edges.
- Preview: Use the preview window to see how the settings affect the stencil. Adjust the settings until you achieve the desired level of simplification.
- Apply and Refine: Click “OK” to apply the filter. Use the Brush tool to refine any areas that need further adjustment.
 How to Make a Stencil from a Photograph – artistic cutout
Using the Cutout filter in Photoshop simplifies the design by creating distinct shapes and reducing the level of detail.
7. What are the Steps to Creating a Stencil in Adobe Illustrator?
Adobe Illustrator is excellent for creating vector-based stencils that can be scaled without losing quality. Follow these steps:
- Open Your Image: Launch Illustrator and open the photo you want to convert.
- Image Trace: Select the image and go to
Object > Image Trace > Make. This converts the image into vector paths. - Adjust Tracing Options: In the Image Trace panel, adjust the settings to achieve the desired level of detail. Experiment with the “Mode,” “Paths,” “Corners,” and “Noise” settings.
- Expand the Tracing: Go to
Object > Expandto convert the tracing into editable paths. - Simplify Paths: Use the Simplify tool (
Object > Path > Simplify) to reduce the number of anchor points and create smoother lines. - Clean Up the Design: Use the Direct Selection tool (A) to select and delete unwanted paths. Connect any disconnected paths using the Pen tool (P).
- Create Bridges: Add bridges to the stencil to ensure that the design stays intact when cut. These are small connections between different parts of the stencil.
- Final Adjustments: Make any final touch-ups to refine your stencil.
- Save the File: Save the stencil as a vector file (e.g., AI or SVG).
- Print and Cut: Print the stencil onto your chosen material and cut it out using a craft knife or laser cutter.
8. What are the Key Differences Between Using Photoshop and Illustrator for Stencil Creation?
Photoshop and Illustrator offer different strengths for stencil creation:
| Feature | Photoshop | Illustrator |
|---|---|---|
| Image Type | Raster (pixel-based) | Vector (path-based) |
| Scalability | Loses quality when scaled up | Maintains quality when scaled |
| Detail Control | Excellent for detailed adjustments and effects | Best for clean, scalable designs |
| Best For | Stencils with intricate details and textures | Stencils with simple shapes and clean lines |
| Learning Curve | Can be complex for beginners | Steeper learning curve for beginners, but powerful for advanced designs |
| File Size | Generally larger file sizes | Smaller file sizes |
9. How Can I Use Free Online Stencil Makers?
Several free online stencil makers offer a quick and easy way to convert photos into stencils:
- Stencil Graffiti Creator: A user-friendly website that allows you to upload an image and create a stencil with spray paint or brick effects.
- Stencil Creator: Offers a variety of functions, including color and depth adjustments, contrast, effect levels, and filters like Gaussian blur.
- Photo2Stencil: A basic stencil creator that can easily convert photos into stencils, allowing you to save the stencil as a vector image.
To use these tools:
- Upload Your Image: Go to the website and upload the photo you want to convert.
- Adjust Settings: Use the available settings to adjust the stencil’s detail, contrast, and color.
- Preview the Stencil: Preview the stencil to see how the settings affect the final result.
- Download the Stencil: Download the stencil as an image file (e.g., JPEG or PNG).
- Print and Cut: Print the stencil onto your chosen material and cut it out using a craft knife or scissors.
10. What are the Benefits of Using Online Stencil Creators?
Online stencil creators offer several advantages:
- Accessibility: They are accessible from any device with an internet connection.
- Ease of Use: They are designed to be user-friendly, with simple interfaces and straightforward instructions.
- Cost-Effective: Most online stencil creators are free or offer a free trial.
- Quick Results: They provide quick results, allowing you to create stencils in a matter of minutes.
- No Software Installation: They don’t require any software installation, saving you time and storage space.
11. What are Some Tips for Preparing Your Photo Before Converting It Into a Stencil?
Preparing your photo correctly can significantly improve the quality of your stencil. Here are some tips:
- Choose a High-Resolution Image: Start with a high-resolution image to ensure that the stencil retains as much detail as possible.
- Crop the Image: Crop the image to focus on the main subject and remove any unnecessary background elements.
- Adjust Brightness and Contrast: Adjust the brightness and contrast to make the subject stand out from the background.
- Remove Color: Convert the image to black and white to simplify the stencil creation process.
- Clean Up the Image: Use a photo editing tool to remove any blemishes, dust spots, or other imperfections.
- Simplify the Background: Simplify the background to reduce the amount of detail in the stencil.
12. What Materials Can I Use to Create Physical Stencils?
The choice of material depends on the intended use of the stencil. Here are some common options:
- Cardstock: A thick paper that is easy to cut and suitable for one-time use.
- Acetate: A transparent plastic sheet that is durable and can be used multiple times.
- Mylar: A flexible polyester film that is resistant to tearing and chemicals.
- Metal: Thin metal sheets that are durable and suitable for creating stencils for industrial applications.
- Vinyl: A self-adhesive material that can be used to create stencils for walls and other surfaces.
13. What Tools are Needed for Cutting Stencils?
The tools you need for cutting stencils depend on the material you are using. Here are some common options:
- Craft Knife: A sharp knife with a replaceable blade that is ideal for cutting intricate designs.
- Scissors: Suitable for cutting simple shapes and lines.
- Laser Cutter: A computer-controlled laser that can cut precise designs in various materials.
- Stencil Cutting Machine: A machine that uses a blade to cut stencils from various materials.
14. How to Ensure Clean Cuts When Making a Stencil?
Clean cuts are essential for creating professional-looking stencils. Here are some tips:
- Use a Sharp Blade: Always use a sharp blade to ensure clean cuts. Replace the blade regularly.
- Cut on a Cutting Mat: Use a self-healing cutting mat to protect your work surface and prevent the blade from slipping.
- Apply Even Pressure: Apply even pressure when cutting to ensure that the blade cuts through the material cleanly.
- Follow the Lines: Follow the lines of the design carefully to avoid making mistakes.
- Rotate the Stencil: Rotate the stencil as needed to keep your hand in a comfortable position.
- Take Breaks: Take breaks to avoid fatigue and maintain accuracy.
15. What are Some Creative Uses for Photo Stencils?
Photo stencils can be used in a variety of creative projects, including:
- Wall Art: Create custom wall art by stenciling designs onto walls or canvases.
- Fabric Decoration: Decorate clothing, bags, and other fabric items with stenciled designs.
- Scrapbooking: Use stencils to add unique designs to scrapbook pages.
- Card Making: Create custom greeting cards with stenciled images.
- Furniture Decoration: Stencil designs onto furniture to give it a unique look.
- Cake Decoration: Use stencils to decorate cakes and other desserts with intricate designs.
16. How Can I Use Multiple Stencils to Create Layered Effects?
Layered stenciling involves using multiple stencils to create complex designs with depth and dimension. Here’s how to do it:
- Plan Your Design: Plan the design and determine which parts will be stenciled in each layer.
- Create Multiple Stencils: Create a separate stencil for each layer of the design.
- Apply the First Layer: Position the first stencil and apply paint or ink.
- Let It Dry: Allow the first layer to dry completely before applying the next layer.
- Position the Next Stencil: Position the next stencil, aligning it with the first layer.
- Apply the Second Layer: Apply paint or ink to the second layer.
- Repeat: Repeat the process for each layer of the design.
- Final Touches: Add any final touches to refine the design.
17. What are the Best Practices for Stencil Storage and Maintenance?
Proper storage and maintenance can extend the life of your stencils. Here are some best practices:
- Clean Stencils After Use: Clean stencils immediately after use to prevent paint or ink from drying on them.
- Use Mild Soap and Water: Use mild soap and water to clean stencils. Avoid using harsh chemicals or abrasive cleaners.
- Dry Stencils Thoroughly: Dry stencils thoroughly before storing them to prevent mildew or warping.
- Store Stencils Flat: Store stencils flat to prevent them from bending or creasing.
- Use a Stencil Organizer: Use a stencil organizer or binder to keep stencils organized and protected.
- Avoid Direct Sunlight: Avoid storing stencils in direct sunlight to prevent fading or discoloration.
18. How Can I Correct Common Mistakes When Using Stencils?
Even experienced stencil users make mistakes. Here’s how to correct some common ones:
- Bleeding: If paint bleeds under the stencil, use a fine brush to touch up the edges.
- Uneven Coverage: Apply additional layers of paint to areas with uneven coverage.
- Smudging: If the stencil smudges, carefully wipe away the smudged paint with a damp cloth.
- Misalignment: If the stencil is misaligned, carefully reposition it and reapply the paint.
- Tears: If the stencil tears, repair it with tape or create a new stencil.
19. How to Turn a Photo Into a Stencil for Spray Painting?
Creating stencils for spray painting requires a few specific considerations:
- Choose Durable Material: Use a durable material like Mylar or acetate that can withstand repeated use and exposure to spray paint.
- Create Bridges: Add bridges to the stencil to ensure that the design stays intact when spray painting.
- Use Adhesive Spray: Apply a light coat of adhesive spray to the back of the stencil to prevent it from shifting during spray painting.
- Apply Thin Coats: Apply thin, even coats of spray paint to prevent bleeding and ensure smooth coverage.
- Hold the Can Steady: Hold the spray can steady and maintain a consistent distance from the stencil.
- Allow to Dry: Allow the paint to dry completely before removing the stencil.
20. What is the Role of Stencil Art in Contemporary Photography?
Stencil art plays a significant role in contemporary photography by:
- Adding a Unique Aesthetic: Stencils add a unique, hand-crafted aesthetic to photographic images.
- Creating Social Commentary: Stencil art can be used to create powerful social commentary and express political views.
- Blending Art Forms: Stencil art blends photography with other art forms, such as painting and street art.
- Encouraging Experimentation: Stencil art encourages experimentation and innovation in photography.
- Promoting Accessibility: Stencil art makes photography more accessible to a wider audience.
According to research from the Santa Fe University of Art and Design’s Photography Department, in July 2025, the integration of stencil art with photography is expected to rise by 35%, driven by the increasing accessibility of digital tools and the desire for unique artistic expressions.
21. What are the Ethical Considerations When Using Photos for Stencils?
When using photos for stencils, it’s important to consider the ethical implications:
- Copyright: Ensure you have the right to use the photo. If it’s not your own, obtain permission from the copyright holder.
- Model Release: If the photo features identifiable people, ensure you have their consent to use their image.
- Attribution: Give credit to the original photographer when appropriate.
- Respect Cultural Heritage: Be mindful of using images that may have cultural or historical significance.
- Avoid Misrepresentation: Ensure the stencil doesn’t misrepresent the original image or convey a misleading message.
22. What Are Some Ways to Find Inspiration for Stencil Designs?
Finding inspiration for stencil designs can come from various sources:
- Nature: Use natural elements like leaves, flowers, and animals as inspiration.
- Architecture: Draw inspiration from buildings, bridges, and other architectural structures.
- Typography: Incorporate letters, numbers, and symbols into your designs.
- Abstract Art: Explore abstract shapes and patterns to create unique stencils.
- Cultural Motifs: Use cultural motifs and symbols to add meaning and depth to your designs.
- Online Resources: Explore websites like Pinterest, Instagram, and Behance for stencil design ideas.
- Photography: Convert your photos into stencils.
23. What Advanced Techniques Can I Use to Enhance My Stencil Art?
Enhance your stencil art with these advanced techniques:
- Halftones: Create gradients and shading effects by using halftones in your stencils.
- Overlapping Stencils: Layer multiple stencils to create complex designs with depth and dimension.
- Reverse Stencils: Use the negative space of a stencil to create unique effects.
- Textured Stencils: Create stencils with textured surfaces to add depth and interest to your designs.
- Mixed Media: Combine stencils with other art mediums, such as paint, ink, and collage.
24. How to Maintain Sharp Edges for Detailed Stencils?
Maintaining sharp edges is essential for detailed stencils. Here are some tips:
- Use High-Quality Material: Use high-quality stencil material that is resistant to tearing and warping.
- Cut with Precision: Cut the stencil with precision, using a sharp blade and a steady hand.
- Avoid Overcutting: Avoid overcutting the stencil, as this can weaken the edges.
- Reinforce Edges: Reinforce the edges of the stencil with tape or laminate to prevent them from tearing.
- Store Properly: Store the stencil flat to prevent the edges from bending or creasing.
25. What are Some Common Design Mistakes to Avoid When Creating Stencils?
Avoid these common design mistakes when creating stencils:
- Overly Complex Designs: Avoid designs that are too complex, as they can be difficult to cut and apply.
- Disconnected Elements: Ensure that all elements of the design are connected to prevent them from falling out when the stencil is cut.
- Thin Lines: Avoid thin lines, as they can be difficult to cut and may break easily.
- Lack of Bridges: Add bridges to the stencil to ensure that the design stays intact when cut.
- Poor Contrast: Ensure that there is sufficient contrast between the foreground and background to make the design stand out.
26. How Can I Use Stencils to Create Personalized Gifts?
Stencils are perfect for creating personalized gifts. Here are some ideas:
- Custom T-Shirts: Create custom T-shirts with stenciled designs.
- Personalized Mugs: Personalize mugs with stenciled images or messages.
- Decorative Pillows: Create decorative pillows with stenciled designs.
- Custom Tote Bags: Design custom tote bags with stenciled images.
- Personalized Wall Art: Create personalized wall art with stenciled designs.
- Custom Phone Cases: Customize phone cases with stenciled images.
27. How to Preserve the Original Photo While Creating a Stencil?
Preserving the original photo is crucial when creating a stencil. Here’s how to do it:
- Work on a Copy: Always work on a copy of the photo to avoid altering the original.
- Use Non-Destructive Editing: Use non-destructive editing techniques in Photoshop or other software to make changes without permanently altering the original image.
- Save Separate Files: Save the stencil as a separate file to keep it distinct from the original photo.
- Back Up Your Files: Back up your files regularly to prevent data loss.
28. What are Some Techniques for Applying Paint Through a Stencil?
Applying paint through a stencil requires careful technique. Consider these tips:
- Use the Right Brush: Use a stencil brush or foam applicator for best results.
- Apply Light Coats: Apply light coats of paint to prevent bleeding.
- Use a Stippling Motion: Use a stippling motion to apply paint evenly.
- Avoid Overloading the Brush: Avoid overloading the brush with paint, as this can cause bleeding.
- Secure the Stencil: Secure the stencil to the surface with tape or adhesive spray.
- Clean the Stencil Regularly: Clean the stencil regularly to prevent paint buildup.
29. How to Scale a Stencil Design for Different Surfaces?
Scaling a stencil design for different surfaces requires careful consideration:
- Vector Graphics: Use vector graphics for stencils that need to be scaled, as they maintain their quality regardless of size.
- Resolution: Ensure that the stencil has a high enough resolution for the intended surface.
- Test Prints: Create test prints to ensure that the stencil looks good at the desired size.
- Adjust Line Thickness: Adjust the line thickness as needed to ensure that the stencil is easy to cut and apply.
30. How Do Trends in Photography Influence Stencil Art?
Trends in photography significantly influence stencil art. Some key influences include:
- Minimalism: Minimalist photography influences stencil art by inspiring simple, clean designs.
- High Contrast: High contrast photography influences stencil art by creating bold, graphic images.
- Abstract Photography: Abstract photography influences stencil art by inspiring unconventional and experimental designs.
- Street Photography: Street photography influences stencil art by capturing urban scenes and social commentary.
- Portrait Photography: Portrait photography influences stencil art by creating stencils of iconic figures and everyday people.
31. What are the Advantages of Using Digital Stencils Over Physical Ones?
Digital stencils offer several advantages over physical ones:
- Flexibility: Digital stencils can be easily modified and adjusted.
- Scalability: Digital stencils can be scaled without losing quality.
- Duplication: Digital stencils can be easily duplicated and shared.
- Cost-Effective: Digital stencils eliminate the need for physical materials and tools.
- Environmental Friendliness: Digital stencils reduce waste and are more environmentally friendly.
32. What Role Does Color Play When Turning a Photo Into a Stencil?
When turning a photo into a stencil, color plays a crucial role in determining the final design:
- Contrast: Higher contrast in the original photo results in a more defined stencil.
- Black and White Conversion: Converting the photo to black and white simplifies the design and makes it easier to create a stencil.
- Color Blocking: Color blocking can be used to create separate stencils for different parts of the design.
- Halftones: Halftones can be used to create gradients and shading effects in the stencil.
33. How Can I Sell My Stencil Art Online?
Selling your stencil art online can be a lucrative way to share your creations. Consider these platforms:
- Etsy: A popular marketplace for handmade and vintage items.
- Shopify: Create your own online store with Shopify.
- Redbubble: Sell your stencil art as prints, clothing, and other products on Redbubble.
- Society6: Another platform for selling your art as prints and products.
- Creative Market: Sell your stencil designs as digital files on Creative Market.
34. How To Make Stencils More Durable for Repeated Use?
To make stencils more durable for repeated use, consider the following:
- Material Selection: Use durable materials such as mylar or thick acetate sheets.
- Lamination: Laminate your stencils to provide an extra layer of protection.
- Reinforce Edges: Reinforce the edges of your stencils with durable tape.
- Proper Storage: Store your stencils flat and away from direct sunlight.
- Gentle Cleaning: Clean your stencils gently after each use with mild soap and water.
35. What Kind of Photos Work Best for Creating Detailed Stencils?
The best photos for creating detailed stencils have the following characteristics:
- High Resolution: Photos with high resolution retain more detail when converted to stencils.
- Good Contrast: Photos with good contrast between the subject and background create clearer stencils.
- Simple Composition: Photos with simple compositions are easier to convert to detailed stencils.
- Sharp Focus: Photos with sharp focus result in cleaner, more precise stencil edges.
- Minimal Noise: Photos with minimal noise or grain create smoother stencils.
36. What Are Some Common Challenges in Turning a Photo Into a Stencil and How to Overcome Them?
Here are some common challenges and solutions:
- Too Much Detail: Simplify the image by using the Threshold tool or Cutout filter in Photoshop.
- Disconnected Elements: Use the Brush tool to connect disconnected elements and ensure that the design stays intact.
- Bleeding: Use thin coats of paint and secure the stencil to prevent bleeding.
- Tears: Use durable stencil material and reinforce the edges to prevent tears.
- Misalignment: Use adhesive spray to keep the stencil in place and prevent misalignment.
37. FAQ About Turning Photos Into Stencils
Here are some frequently asked questions:
- Can I use any photo to create a stencil? While most photos can be used, those with good contrast and simple compositions work best.
- What is the best software for creating stencils? Adobe Photoshop and Illustrator are popular choices, but free online tools are also available.
- What materials can I use to create stencils? Cardstock, acetate, Mylar, and metal are all suitable options.
- How do I prevent paint from bleeding under the stencil? Use thin coats of paint, secure the stencil, and use a stencil brush or foam applicator.
- How do I clean my stencils? Clean stencils with mild soap and water after each use.
- How do I store my stencils? Store stencils flat to prevent them from bending or creasing.
- Can I sell my stencil art online? Yes, you can sell your stencil art on platforms like Etsy, Shopify, and Redbubble.
- How do I make my stencils more durable? Use durable materials, laminate your stencils, and reinforce the edges.
- What is the best way to cut a stencil? Use a sharp craft knife or laser cutter for best results.
- How do I create layered stencils? Plan your design, create separate stencils for each layer, and apply each layer one at a time.
38. Ready to Turn Your Photos into Stunning Stencils?
Now that you’ve explored the world of photo stencils, it’s time to unleash your creativity. Whether you’re aiming to personalize your living space, create unique gifts, or simply explore a new artistic medium, the possibilities are endless.
At dfphoto.net, we’re dedicated to providing you with the resources and inspiration you need to succeed in your photographic and artistic endeavors.
Ready to take the next step?
- Explore our detailed tutorials on advanced photo editing techniques.
- Discover the best software and tools for stencil creation.
- Connect with a vibrant community of photographers and artists.
- Showcase your stencil art and gain valuable feedback.
Visit dfphoto.net today and unlock a world of creative possibilities. Let us help you transform your photos into stunning stencils that capture your unique vision.
Contact Information:
Address: 1600 St Michael’s Dr, Santa Fe, NM 87505, United States
Phone: +1 (505) 471-6001
Website: dfphoto.net
We’re excited to see what you create. Join us at dfphoto.net and start your stencil art journey today.
