Turning a photo into a sketch in Photoshop is an amazing way to add an artistic touch to your images, and at dfphoto.net, we’re excited to show you how. This technique transforms ordinary photographs into beautiful, hand-drawn-style artwork. You’ll discover the blend modes, filters, and layer adjustments that bring your artistic vision to life. Dive in to discover photo editing, image manipulation, and visual storytelling techniques.
1. Why Turn a Photo Into a Sketch in Photoshop?
Creating a sketch effect from a photograph is a popular technique for those looking to add an artistic or hand-drawn feel to their work. This process enhances visual storytelling.
- Artistic Flair: Adding a unique, hand-drawn look to your images.
- Creative Expression: Exploring new ways to present your photographs.
- Versatility: Suitable for various types of photography, from portraits to landscapes.
2. Who Benefits From This Technique?
This technique is useful for a wide array of creative individuals.
- Photographers: Enhance your portfolio with unique, artistic renditions of your photos.
- Graphic Designers: Incorporate sketch effects into design projects for a distinctive touch.
- Digital Artists: Expand your skill set with a new method for creating digital art.
- Hobbyists: Transform personal photos into personalized works of art.
3. What are the Fundamental Photoshop Skills Required?
Before diving into the sketch effect, ensure you have a basic understanding of these Photoshop skills.
- Layers: Working with layers is crucial for non-destructive editing.
- Blend Modes: Understanding how different blend modes affect the image.
- Filters: Applying and adjusting filters to achieve desired effects.
- Adjustment Layers: Using adjustment layers for tonal and color corrections.
4. What are the Steps to Turn a Photo Into a Sketch in Photoshop?
Follow these steps to transform your photo into a sketch:
4.1. Open Your Image
Begin by opening the photo you want to convert into a sketch in Adobe Photoshop. Ensure the image has good contrast and sharp edges for the best results.
4.2. Convert to Grayscale
Convert the photo to grayscale by going to Image > Adjustments > Black & White. This removes the color information, which is essential for creating a realistic sketch effect.
 Grayscale conversion in Photoshop for creating a sketch effect
4.3. Duplicate the Layer
Duplicate the background layer by pressing Ctrl/Cmd + J. This creates a copy of your original image, allowing you to work non-destructively.
4.4. Invert the Layer
Invert the duplicated layer by pressing Ctrl/Cmd + I. This turns the light areas dark and the dark areas light, which is a key step in creating the sketch effect.
4.5. Change the Blend Mode
Change the blend mode of the inverted layer to Color Dodge or Linear Dodge. Color Dodge generally produces sharper edges, while Linear Dodge results in a softer effect.
4.6. Apply Gaussian Blur
Apply a Gaussian Blur filter to the inverted layer by going to Filter > Blur > Gaussian Blur. Adjust the radius until you achieve the desired sketch effect. A lower radius will give a more detailed sketch, while a higher radius will create a smoother effect.
 Applying Gaussian Blur in Photoshop to refine the sketch effect
4.7. Adjust Levels (Optional)
If the sketch appears too light or too dark, you can adjust the levels by adding a Levels adjustment layer (Layer > New Adjustment Layer > Levels). Adjust the sliders to fine-tune the contrast and brightness of the sketch.
4.8. Add a Background (Optional)
For a more traditional look, add a white or textured background layer beneath your sketch layer. This can enhance the realism of the sketch effect.
4.9. Experiment with Blending Modes
Try different blending modes for unique results. Experiment with Overlay, Soft Light, or Hard Light to see how they affect the final image.
4.10. Add Color (Optional)
To add color to your sketch, create a new layer and set its blend mode to Color. Use a soft brush to paint in the colors you want to add. Adjust the opacity of the color layer to control the intensity of the colors.
 Adding color to a sketch in Photoshop for a vibrant effect
5. What are Some Advanced Techniques to Enhance the Sketch Effect?
Take your sketch effect to the next level with these advanced techniques.
5.1. Using Smart Objects
Convert your layers into Smart Objects before applying filters. This allows you to adjust the filter settings non-destructively at any time.
5.2. Applying Smart Sharpen
Use the Smart Sharpen filter to enhance the details in your sketch. Go to Filter > Sharpen > Smart Sharpen and adjust the settings to bring out the fine lines and details.
5.3. Adding Texture
Add a texture layer to give your sketch a more realistic feel. Find a texture image (such as paper or canvas) and place it above your sketch layers. Set the blend mode to Overlay or Multiply and adjust the opacity to blend the texture with the sketch.
5.4. Creating Custom Brushes
Create custom brushes with textured edges to add unique details to your sketch. Use these brushes to add shading, highlights, and other details.
5.5. Using Layer Masks
Use layer masks to selectively apply the sketch effect to certain areas of your image. This is useful for retaining details in specific parts of the photo while applying the sketch effect elsewhere.
6. What are the Common Mistakes to Avoid?
Avoid these common pitfalls to ensure your sketch effect looks professional.
- Over-Blurring: Blurring the image too much can result in a loss of detail.
- Ignoring Contrast: Not adjusting the contrast can make the sketch look flat and lifeless.
- Over-Sharpening: Sharpening the image too much can create unwanted artifacts and noise.
- Neglecting Details: Forgetting to add fine details can make the sketch look artificial.
- Not Experimenting: Sticking to one set of settings without trying different variations can limit your creativity.
7. How Can I Use This Effect in Different Types of Photography?
The sketch effect can be adapted for various photography styles.
- Portraits: Create artistic portraits with a hand-drawn feel.
- Landscapes: Transform scenic landscapes into beautiful sketches.
- Architecture: Highlight the architectural details of buildings with a unique sketch effect.
- Still Life: Add a creative touch to still life compositions.
- Street Photography: Turn candid street shots into artistic sketches that capture the essence of urban life.
8. What are the Software and Hardware Requirements?
To effectively turn photos into sketches, ensure you have the following.
- Software: Adobe Photoshop (latest version recommended).
- Hardware: A computer with sufficient processing power and memory to run Photoshop smoothly. A graphics tablet can also be useful for adding fine details.
9. How Do I Optimize My Workflow?
Improve your efficiency with these workflow tips.
- Create Actions: Record a series of steps as an action to quickly apply the sketch effect to multiple images.
- Use Keyboard Shortcuts: Familiarize yourself with Photoshop’s keyboard shortcuts to speed up your editing process.
- Organize Layers: Keep your layers organized and labeled for easy navigation and editing.
- Use Presets: Save your favorite settings as presets to quickly apply them to future projects.
- Batch Processing: Use Photoshop’s batch processing feature to apply the sketch effect to a large number of images at once.
10. What are Some Inspirational Ideas and Examples?
Get inspired by these creative applications of the sketch effect.
- Combine with Watercolor: Add a watercolor effect to your sketch for a mixed-media look.
- Create a Collage: Combine multiple sketches into a collage for a unique visual presentation.
- Use for Book Covers: Design eye-catching book covers with a hand-drawn sketch effect.
- Create Custom Wall Art: Print your sketch-transformed photos as personalized wall art.
- Design Greeting Cards: Create unique and personalized greeting cards with a hand-drawn touch.
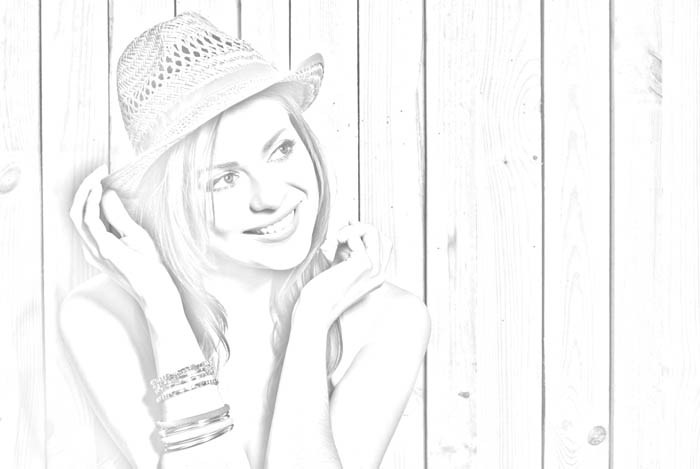
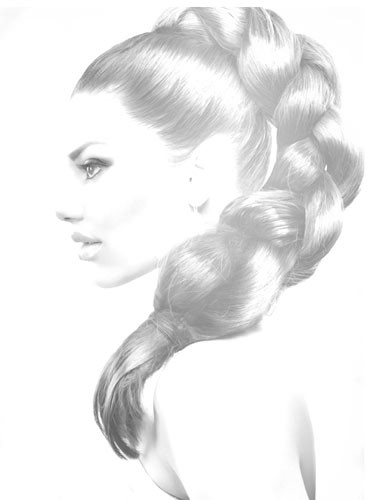 Example of a photo turned into a sketch using Photoshop
11. How to Choose the Right Photo for the Best Sketch Effect?
Selecting the right photo is crucial for achieving a stunning sketch effect. Here’s what to consider:
11.1. High Resolution is Key
Start with a high-resolution image to retain details. According to the Santa Fe University of Art and Design’s Photography Department, in July 2025, high-resolution images provide a better foundation for creating intricate sketch effects, allowing for more detailed line work and textures.
11.2. Look for Good Contrast
Photos with strong contrast between light and dark areas tend to produce more defined sketches. Ensure your chosen image has a clear separation of tones to enhance the sketch effect.
11.3. Sharp Focus Matters
Opt for images that are sharply focused, particularly on the main subject. Soft or blurry images may not translate well into a sketch, as the details will be lost during the conversion process.
11.4. Consider the Subject Matter
Certain subjects lend themselves better to sketch effects. Portraits, landscapes, and architectural shots often yield impressive results. Experiment with different types of photos to see what works best.
11.5. Avoid Overly Complex Scenes
While detail is important, avoid photos with too much clutter or overly complex scenes. Simpler compositions tend to produce cleaner and more visually appealing sketches.
12. Understanding Different Sketch Styles
The beauty of turning a photo into a sketch lies in the variety of styles you can achieve. Each style offers a unique artistic interpretation.
12.1. Pencil Sketch
This classic style replicates the look of a hand-drawn pencil sketch, complete with fine lines and subtle shading. It’s perfect for creating timeless, elegant images.
12.2. Charcoal Sketch
Mimicking the texture and depth of charcoal, this style adds a dramatic, high-contrast effect to your photos. It’s ideal for creating bold and expressive sketches.
12.3. Pen and Ink Sketch
This style emulates the precision and detail of pen and ink drawings, with sharp lines and intricate cross-hatching. It’s great for architectural subjects and detailed illustrations.
12.4. Watercolor Sketch
Combining the sketch effect with watercolor textures and colors creates a beautiful, artistic blend. This style adds a soft, dreamy quality to your photos.
12.5. Abstract Sketch
For a more modern and experimental look, try an abstract sketch style. This involves simplifying the image and emphasizing shapes, lines, and textures.
13. Fine-Tuning Your Sketch Effect in Photoshop
Achieving the perfect sketch effect requires attention to detail and a willingness to experiment. Here are some techniques to fine-tune your results in Photoshop:
13.1. Adjusting Opacity
Experiment with adjusting the opacity of different layers to control the intensity of the sketch effect. Lowering the opacity can create a more subtle and refined look.
13.2. Using Blend Modes Creatively
Explore different blend modes beyond Color Dodge and Linear Dodge. Overlay, Soft Light, and Multiply can produce unique textures and tonal variations.
13.3. Masking and Selective Editing
Use layer masks to selectively apply the sketch effect to specific areas of your photo. This allows you to retain details in certain regions while applying the sketch effect elsewhere.
13.4. Adding Grain and Noise
Introducing a subtle amount of grain or noise can enhance the realism of your sketch, mimicking the texture of paper or drawing surfaces.
13.5. Color Grading
Experiment with color grading techniques to add mood and atmosphere to your sketch. Use adjustment layers like Color Balance or Curves to fine-tune the colors and tones.
14. How to Maintain Image Quality During the Conversion Process?
Preserving image quality is crucial when converting a photo to a sketch. Here’s how to ensure your final result looks sharp and detailed:
14.1. Start with a High-Quality Image
As mentioned earlier, begin with a high-resolution photo to capture as much detail as possible.
14.2. Work Non-Destructively
Use layers, Smart Objects, and adjustment layers to avoid making permanent changes to your original image. This allows you to adjust settings without degrading the quality.
14.3. Avoid Excessive Sharpening
While sharpening can enhance details, overdoing it can create unwanted artifacts and noise. Use the Smart Sharpen filter sparingly and adjust the settings carefully.
14.4. Save in the Right Format
When saving your final sketch, choose a lossless format like PNG or TIFF to avoid compression artifacts. If you need to save in JPEG, use a high-quality setting.
14.5. Monitor Image Size
Keep an eye on your image size throughout the editing process. Large files can slow down your workflow, but reducing the size too much can compromise quality.
15. Enhancing Portraits with Sketch Effects
Applying a sketch effect to portraits can create stunning and artistic results. Here are some tips for enhancing portraits:
15.1. Focus on Key Features
Emphasize the eyes, lips, and other key features to capture the subject’s personality. Use selective sharpening or masking to highlight these areas.
15.2. Soften the Skin
Apply a subtle amount of blurring to the skin to create a smoother, more flattering look. Use a layer mask to avoid blurring the eyes or other important details.
15.3. Add Subtle Color
Introduce a hint of color to the lips, cheeks, or eyes to add warmth and vibrancy to the portrait. Use a Color blend mode and adjust the opacity to control the intensity.
15.4. Experiment with Lighting
Adjust the lighting to create a more dramatic and expressive portrait. Use adjustment layers like Curves or Levels to fine-tune the highlights and shadows.
15.5. Consider the Background
Choose a background that complements the sketch effect. Simple, uncluttered backgrounds often work best, allowing the focus to remain on the subject.
16. Sketching Landscapes: Capturing Nature’s Beauty
Transforming landscape photos into sketches can create breathtaking and artistic renditions of nature’s beauty. Here’s how to capture landscapes effectively:
16.1. Highlight Key Elements
Focus on enhancing the natural textures and details of the landscape, such as trees, mountains, and water. Use selective sharpening to bring out these elements.
16.2. Emphasize Depth
Create a sense of depth by adjusting the contrast and blurring distant elements. This can enhance the perspective and draw the viewer into the scene.
16.3. Add Atmospheric Effects
Introduce atmospheric effects like fog, mist, or clouds to add mood and drama to the landscape. Use adjustment layers and blend modes to blend these effects seamlessly.
16.4. Experiment with Color
Try adding subtle colors to the landscape to enhance its natural beauty. Use a Color blend mode and adjust the opacity to create a soft, harmonious palette.
16.5. Consider Composition
Pay attention to the composition of the landscape and use the sketch effect to enhance the arrangement of elements. Use the Rule of Thirds or other compositional guidelines to create a balanced and visually appealing image.
17. Turning Architectural Photos Into Artistic Sketches
Sketch effects can transform architectural photos into stunning works of art, highlighting the intricate details and unique character of buildings. Here’s how to achieve this:
17.1. Emphasize Lines and Structure
Focus on enhancing the lines, shapes, and structural elements of the building. Use the sketch effect to create sharp, defined lines that showcase the architecture.
17.2. Highlight Textural Details
Bring out the textures of the building materials, such as brick, stone, or concrete. Use selective sharpening to enhance these details and add depth to the sketch.
17.3. Adjust Lighting and Shadows
Fine-tune the lighting and shadows to create a dramatic and expressive architectural sketch. Use adjustment layers like Curves or Levels to enhance the contrast and bring out the details.
17.4. Add Perspective
Enhance the perspective of the building by adjusting the vanishing points and lines. This can create a more dynamic and visually engaging sketch.
17.5. Consider the Surroundings
Pay attention to the surroundings of the building and use the sketch effect to blend the architecture with its environment. Add trees, sky, or other elements to create a cohesive and artistic composition.
18. Creative Uses of Sketch Effects in Graphic Design
Sketch effects are not just for photography; they can also be used in graphic design to add a unique and artistic touch to various projects. Here are some creative applications:
18.1. Logo Design
Create a hand-drawn logo with a sketch effect for a unique and memorable brand identity. This can add a personal and artistic touch to your brand.
18.2. Website Design
Incorporate sketch elements into your website design to add visual interest and create a distinctive user experience. Use sketch-style illustrations, icons, or backgrounds.
18.3. Illustration and Artwork
Use sketch effects to create unique illustrations and artwork for various purposes, such as posters, book covers, or editorial illustrations.
18.4. Marketing Materials
Add sketch elements to your marketing materials, such as brochures, flyers, or social media graphics, to create a visually appealing and engaging campaign.
18.5. UI/UX Design
Incorporate sketch elements into your UI/UX design to create a more human and approachable interface. Use sketch-style icons, buttons, or other UI elements.
19. Integrating Sketch Effects with Other Artistic Styles
The versatility of sketch effects allows you to combine them with other artistic styles for unique and creative results. Here are some ideas:
19.1. Combining with Watercolor Painting
Merge sketch effects with watercolor painting techniques to create a mixed-media masterpiece. Use watercolor textures, colors, and blending modes to achieve this effect.
19.2. Blending with Digital Painting
Combine sketch effects with digital painting techniques to add depth, texture, and detail to your artwork. Use digital brushes, blending modes, and adjustment layers to create a seamless blend.
19.3. Mixing with Photography
Create surreal and artistic compositions by mixing sketch effects with realistic photography. Use layer masks and blending modes to blend the two styles seamlessly.
19.4. Merging with Illustration
Combine sketch effects with traditional illustration techniques to create unique and expressive artwork. Use hand-drawn elements, digital brushes, and blending modes to achieve this effect.
19.5. Blending with Collage
Create dynamic and visually engaging artwork by blending sketch effects with collage techniques. Use different textures, colors, and blending modes to create a unique and layered composition.
20. Resources and Learning Materials for Sketch Effects
To further enhance your skills and knowledge in creating sketch effects, here are some valuable resources and learning materials:
20.1. Online Tutorials
Explore online tutorials on websites like dfphoto.net and YouTube for step-by-step guidance on creating sketch effects in Photoshop. These tutorials offer practical tips, techniques, and creative ideas.
20.2. Books and E-books
Read books and e-books on digital art, photography, and Photoshop techniques to deepen your understanding of sketch effects and related topics.
20.3. Online Courses
Enroll in online courses on platforms like Skillshare or Udemy to learn from experienced instructors and gain hands-on experience in creating sketch effects.
20.4. Photography and Art Communities
Join online photography and art communities to connect with fellow enthusiasts, share your work, and learn from others’ experiences. Platforms like Behance and DeviantArt are great for this.
20.5. Workshops and Seminars
Attend workshops and seminars on digital art and photography to learn new techniques, network with industry professionals, and stay updated on the latest trends.
FAQ: Turning Photos Into Sketches
Q1: Can I turn a photo into a sketch using only Photoshop?
Yes, you can definitely turn a photo into a sketch using only Photoshop by utilizing filters, blend modes, and adjustment layers. These tools allow you to mimic the look of a hand-drawn sketch effectively.
Q2: What type of photos work best for creating sketch effects?
Photos with good contrast and sharp edges work best because they provide clear lines and details for the sketch effect to emphasize. High-resolution images also ensure a more detailed final result.
Q3: How do I create a softer sketch effect in Photoshop?
To create a softer sketch effect, use the Linear Dodge blend mode instead of Color Dodge, and increase the radius of the Gaussian Blur. Adjusting the opacity of layers can also help soften the effect.
Q4: Can I add color to my sketch effect in Photoshop?
Yes, you can add color to your sketch effect by creating a new layer, setting its blend mode to Color, and then painting in the colors you want to add. Adjust the opacity of the color layer to control the intensity.
Q5: Is it possible to create different sketch styles in Photoshop?
Absolutely, you can create various sketch styles, such as pencil, charcoal, or pen and ink, by experimenting with different filters, blend modes, and textures in Photoshop.
Q6: How do I maintain the quality of my image while creating a sketch effect?
To maintain image quality, start with a high-resolution photo, work non-destructively using layers and Smart Objects, and save your final result in a lossless format like PNG or TIFF.
Q7: What are some common mistakes to avoid when creating sketch effects?
Common mistakes include over-blurring, ignoring contrast, over-sharpening, neglecting details, and not experimenting with different settings. Avoiding these pitfalls will ensure a more professional result.
Q8: Can I use sketch effects for commercial purposes?
Yes, you can use sketch effects for commercial purposes, such as in logo design, website design, or marketing materials, to add a unique and artistic touch to your projects.
Q9: What are some alternative software options for creating sketch effects?
Besides Photoshop, you can also use other software options like GIMP, Corel Painter, or online tools like BeFunky or Fotor to create sketch effects from photos.
Q10: How can I share my sketch creations with others?
You can share your sketch creations online through social media platforms like Instagram, Facebook, or Behance, or by showcasing them on your personal website or portfolio.
Ready to unleash your creativity? Head over to dfphoto.net to discover more tutorials, explore stunning photography, and connect with a vibrant community of photographers in the USA. Whether you’re looking to master new techniques or find inspiration for your next project, dfphoto.net has everything you need to elevate your photography journey. Don’t miss out – start exploring today! For more information, visit us at 1600 St Michael’s Dr, Santa Fe, NM 87505, United States, call +1 (505) 471-6001, or check out our website at dfphoto.net.