Turning a photo into a link is a great way to enhance user engagement and navigation on your website, and dfphoto.net is here to guide you through the process. This guide offers simple methods and valuable insights for embedding hyperlinks into your images, creating seamless transitions for your audience interested in photography and visual arts. Let’s explore the techniques of making images interactive, boost your website’s SEO, and discover link building strategies.
1. Why Should I Learn How to Get a URL for an Image?
Learning how to get a URL for an image is essential because it simplifies image sharing and provides a direct pathway to visual content. By obtaining a specific URL, you ensure images are easily accessible to everyone and you direct viewers straight to the image, not just a webpage.
1.1. Easy Image Sharing
Want to share an image with ease? Upload it to your CMS and grab its URL. This guarantees everyone can see it, no matter where they are, as long as they’re online.
1.2. Direct Access
Getting a URL for an image gives direct access. Clicking the link opens just the image, nothing else. It’s efficient and user-friendly.
 A playful Cavalier King Charles Spaniel gazes directly at the camera, showcasing its soft, flowing coat and expressive eyes.
2. How to Get a URL of an Image?
Getting a URL for an image involves a few simple steps that you can quickly master. It’s a practical skill for anyone managing online content.
2.1. Find Your Image
First, pull up the image you’re working with. For example, let’s say we’re using a photo of a Cavalier King Charles Spaniel from the AKC website.
2.2. Right-Click for Options
Next, right-click on the image. A menu should pop up with several options.
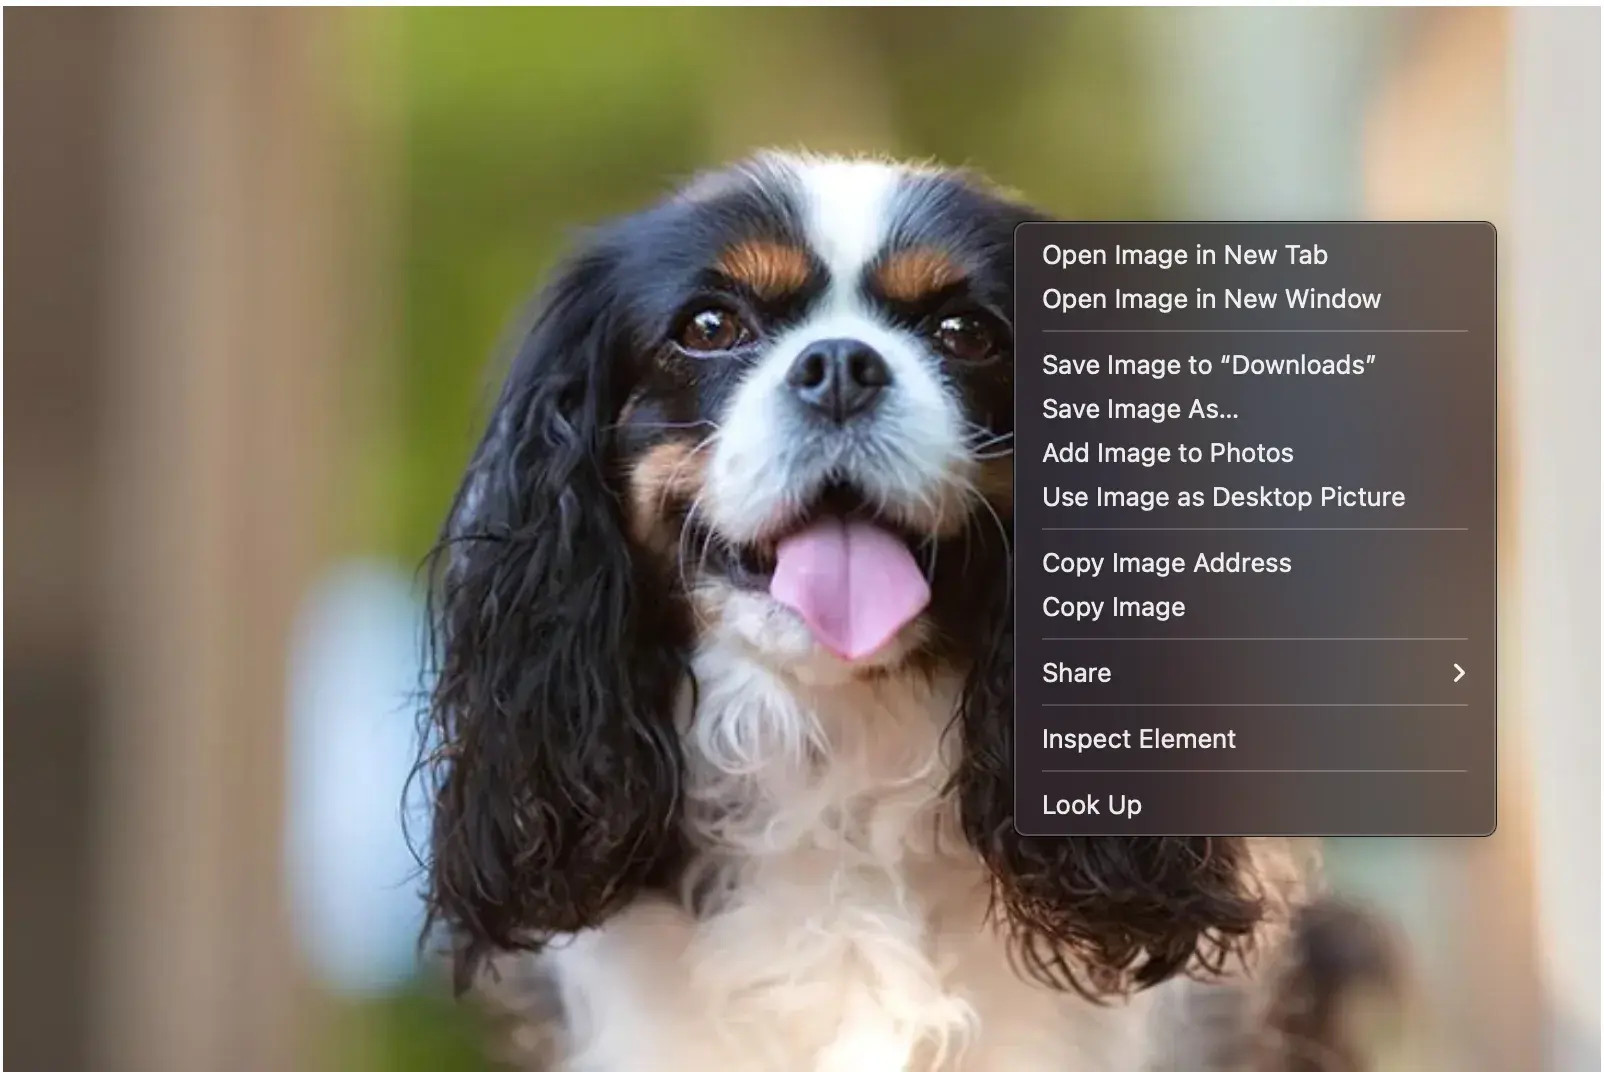 A close-up of a computer screen displaying the options available when right-clicking on an image, including 'Copy Image Address'.
2.3. Copy Image Address
From the menu, find and select “Copy Image Address”. This puts the image’s unique URL on your clipboard.
 The 'Copy Image Address' option highlighted in a drop-down menu, ready to be selected to copy the image's URL.
2.4. Paste and Go
Paste the copied address into your browser’s search bar and hit Enter.
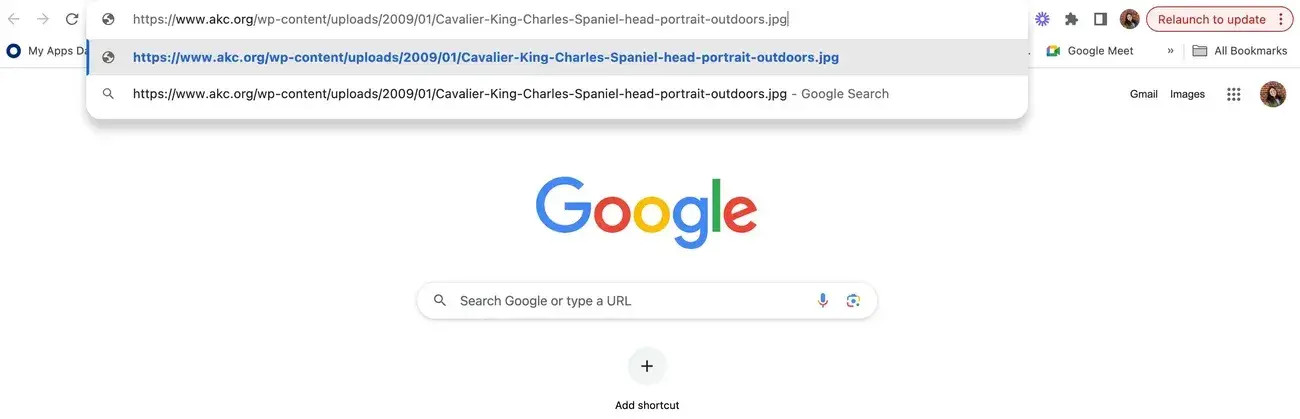 The copied image address, a long URL, is pasted into a browser's search bar, ready to be accessed.
2.5. Verify the Image
Your browser will now display the image directly. This is the URL you can share with anyone to view the image.
 The standalone image of a Cavalier King Charles Spaniel displayed in a web browser, confirming the direct image link.
3. Why Should You Learn How to Add a URL to an Image?
Adding a URL to an image is valuable because it grabs attention and broadens the clickable area on your site. This makes your site more engaging and user-friendly.
3.1. Capture More Attention
Images grab attention more effectively than text. According to BRG Communications, humans process visuals 60,000 times faster than text.
Furthermore, 65% of people are visual learners. A news story or product listing needs a compelling image to draw people in. My journalism professor always said, “No image, no readers.”
3.2. Larger Clickable Areas
Image links streamline customer interaction. Clean makeup brand Tower 28 lets you click either the product’s name or the image to reach its page. This reduces friction and enhances the user experience.
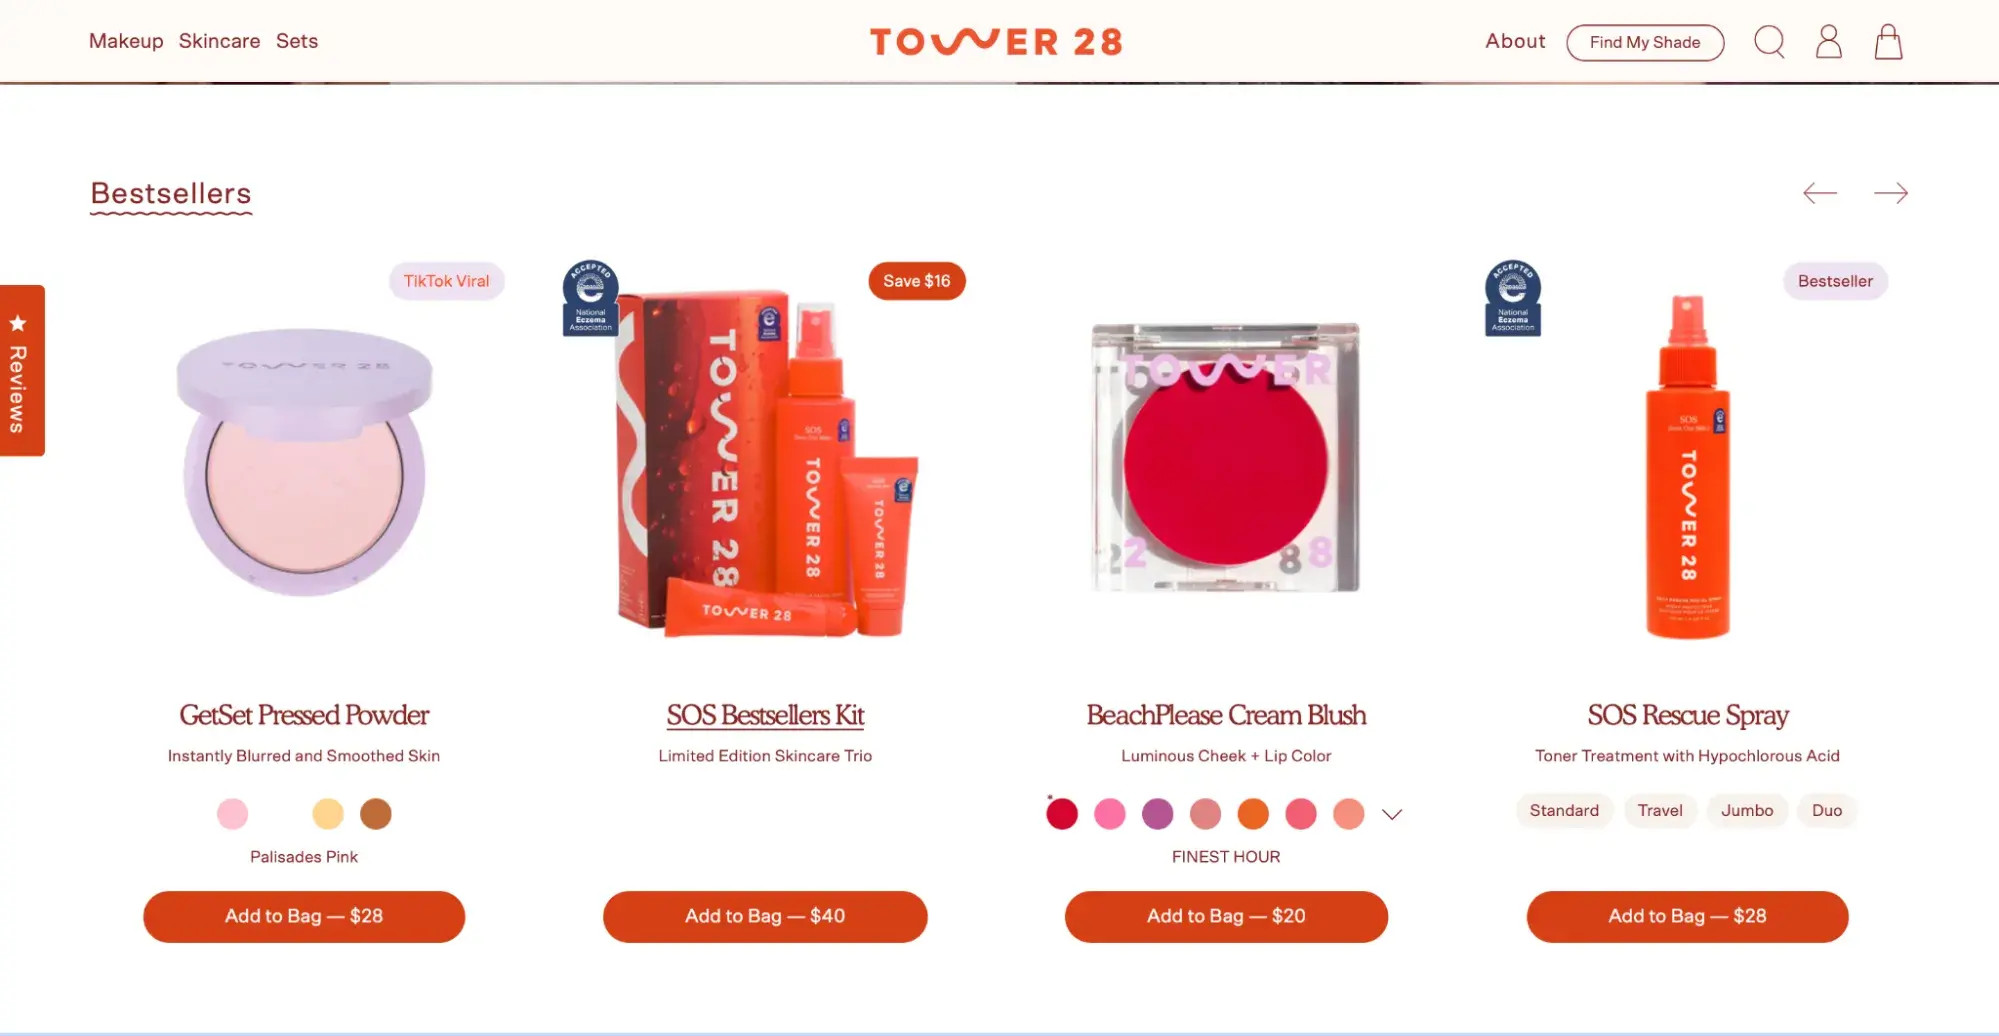 A selection of Tower 28 makeup products displayed on a website, highlighting the ability to click on either the product image or name to access the product page.
4. How to Add a Link to an Image?
The process of adding a link to an image can vary slightly depending on your content management system (CMS). I’ll guide you through how to do this using HubSpot’s Content Hub, which simplifies the process.
4.1. Using HubSpot’s Content Hub
HubSpot’s Content Hub makes it easy to add links to images. Here’s how I do it.
4.1.1. Navigate to Website Pages
In Content Hub, go to the Content icon and click on Website Pages. This takes you to your website’s pages.
4.1.2. Add an Image Module
Click the “+” sign to add a new module. Search for “Image” and choose the type of image module you want to add.
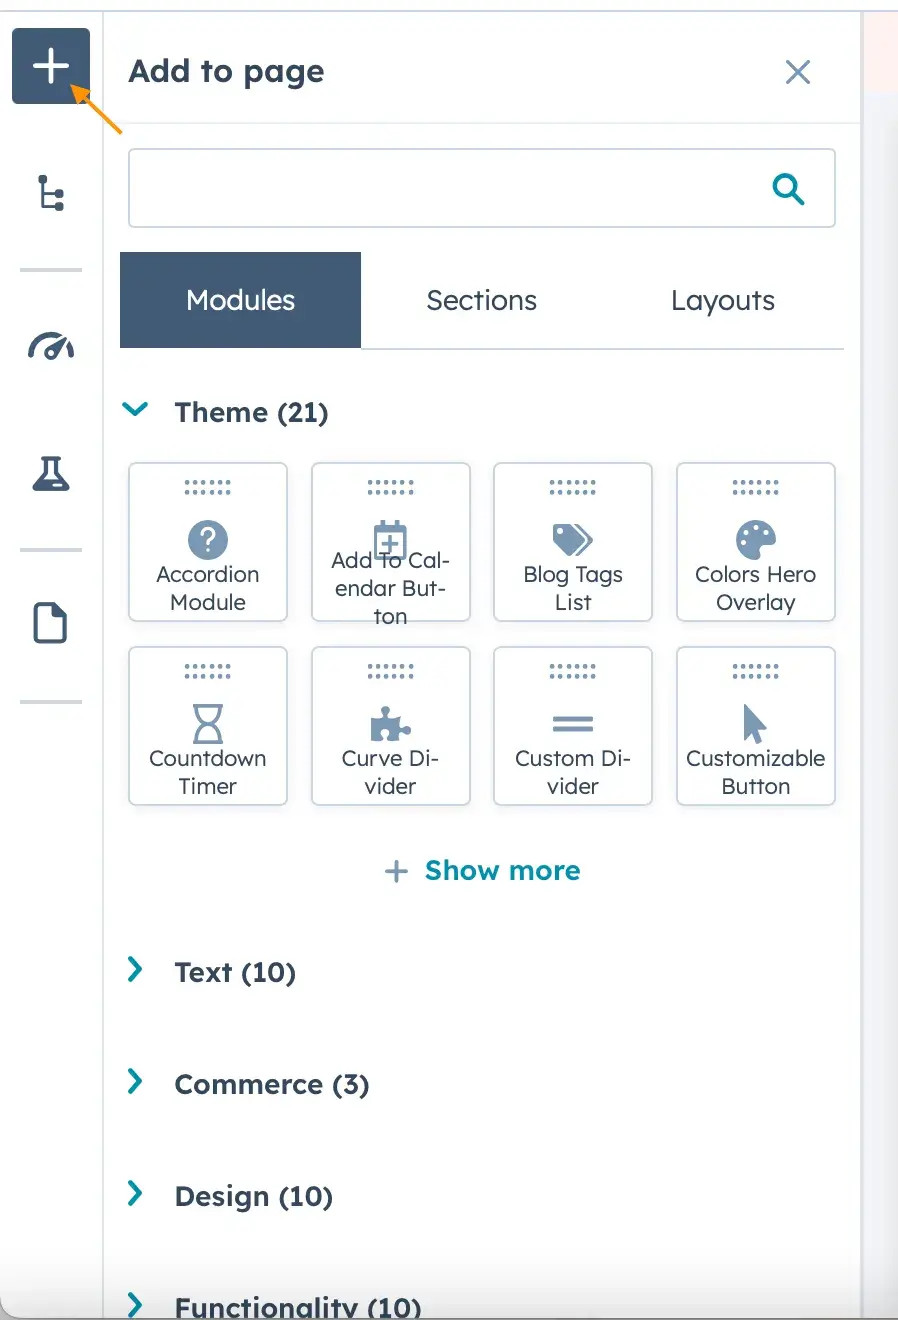 The Content Hub menu, showing the 'Add' tab and the search bar with 'Image' typed in, revealing various image module options.
4.1.3. Place the Image Module
Drag the image module to where you want it on your webpage.
 The process of dragging an image module onto a website builder interface in HubSpot, showing the ease of placement.
4.1.4. Customize Image Details
Replace the placeholder image, add alt text, and adjust appearance settings in the same tab.
 The image details menu in HubSpot, where you can replace the placeholder image, add alt text, and adjust appearance settings.
4.1.5. Add the URL
Scroll to the bottom to add the URL. You can also choose to open the image in a new tab. Save your page manually as a precaution.
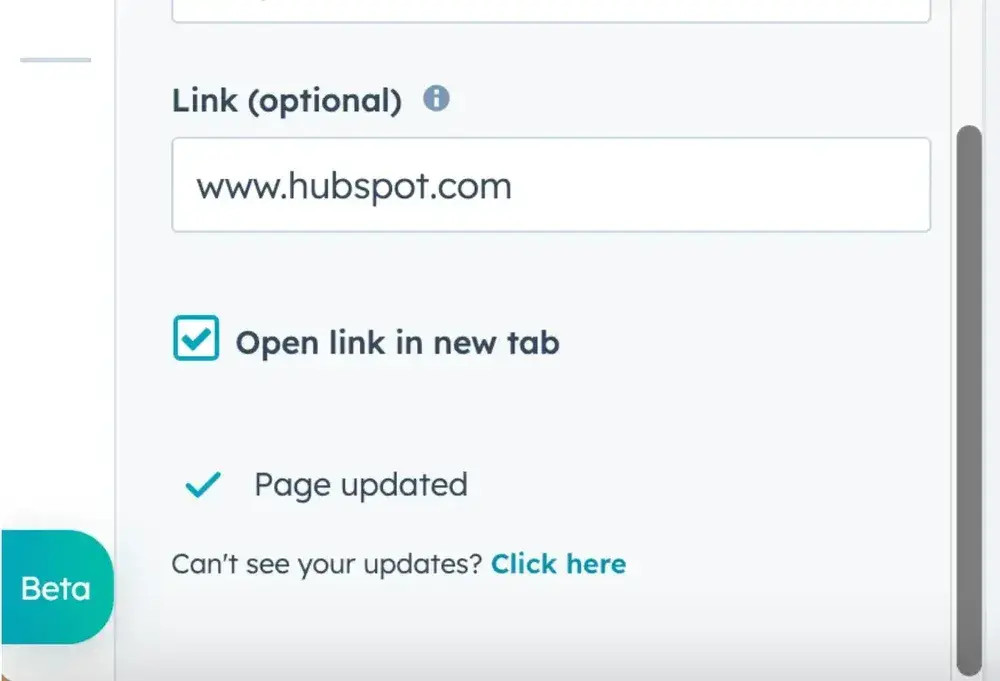 The menu option to add an HTML image link to an image in HubSpot, with the option to open the link in a new tab highlighted.
4.2. Adding a Link to an Image in a Blog Post
You can also add a link to an image within a blog post using Content Hub.
4.2.1. Navigate to Blog Posts
Open Content Hub, click the Content icon, and select Blog. This will take you to your blog posts.
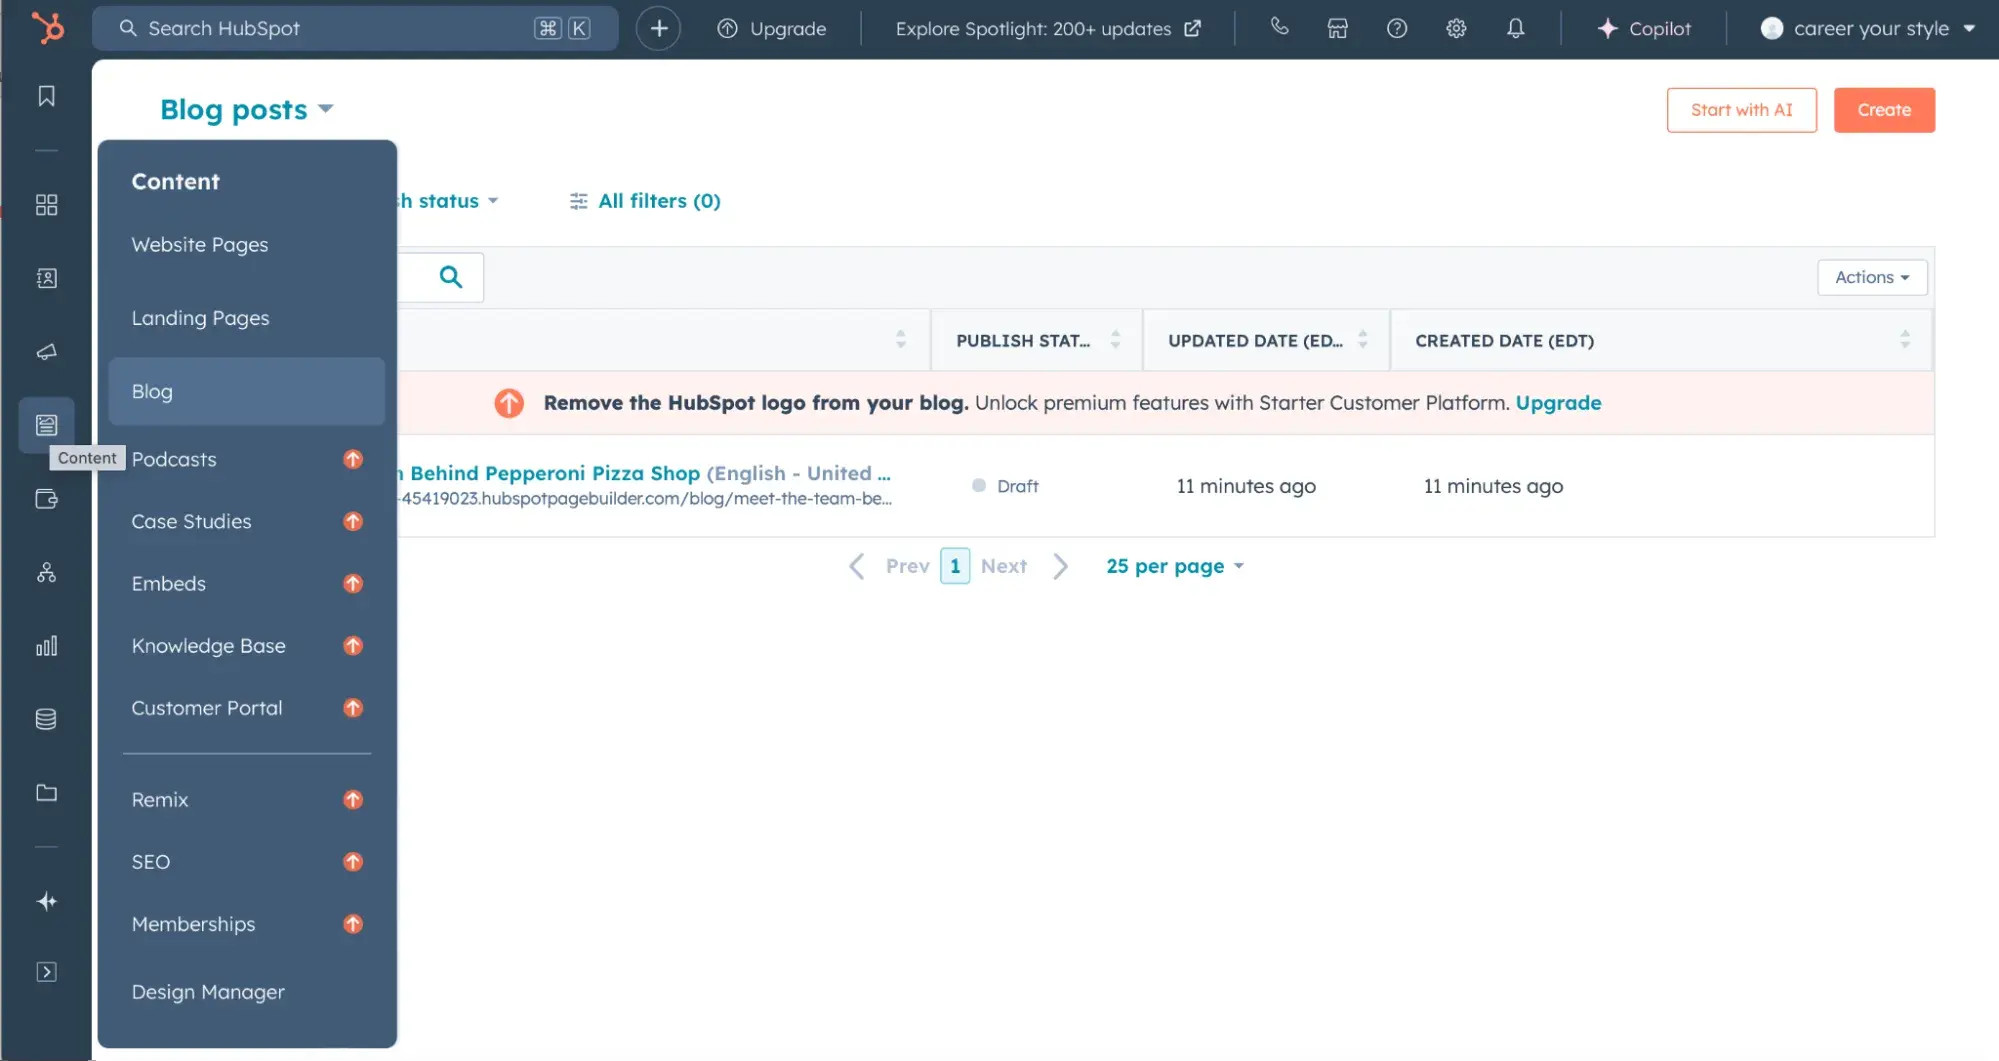 The HubSpot blog interface, showing the layout and options for managing blog content.
4.2.2. Select or Create a Post
Choose an existing post or create a new one.
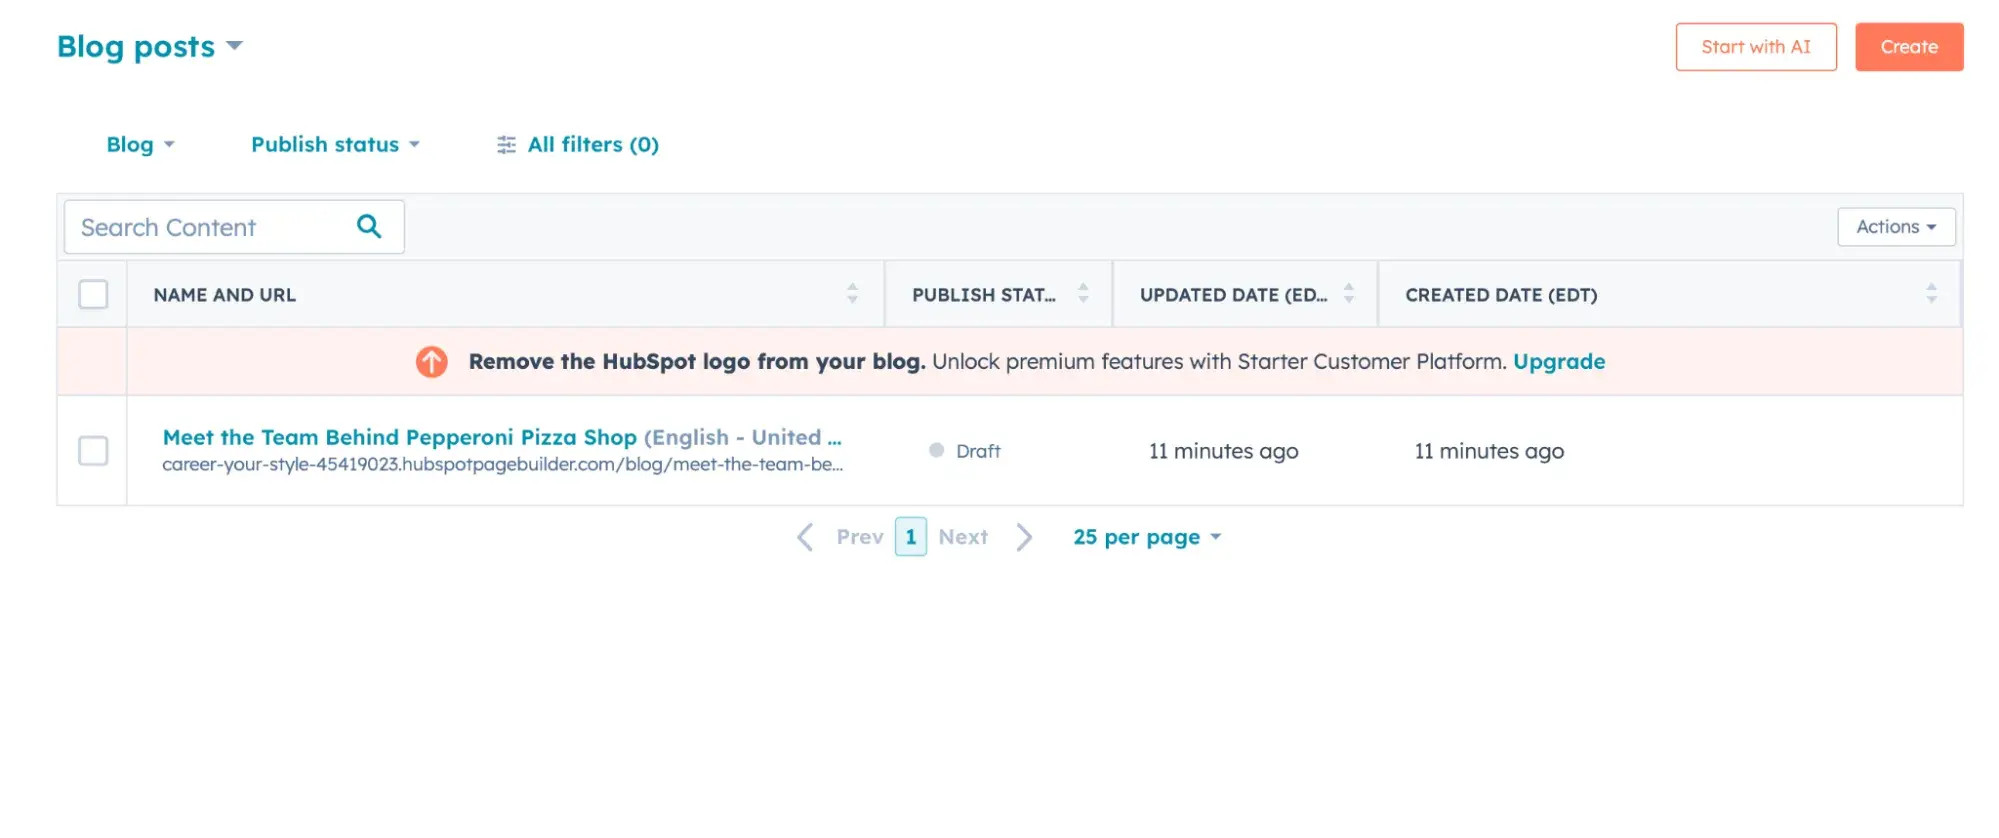 The blog post feed in HubSpot CMS, with options to create a new post or select an existing one to edit.
4.2.3. Insert Image
Click inside the blog post where you want to add the image to access the toolbar. Click the insert image icon.
 Opening a blog post in HubSpot to add an HTML image link, highlighting the toolbar and the insert image icon.
4.2.4. Upload and Edit
Upload or select a recent photo. Once it’s in your post, click “Edit image”.
 The 'Edit image' option highlighted after inserting an image into a blog post, allowing for further customization.
4.2.5. Choose Link Option
Choose where you want the image to link. For this example, we’ll use a URL.
 The image option menu for adding an HTML image link, with options to link to a URL or other destinations.
4.2.6. Insert URL and Apply
Insert your URL into the bar. Decide whether to open the link in a new window, preview the link, and click “Apply” to save.
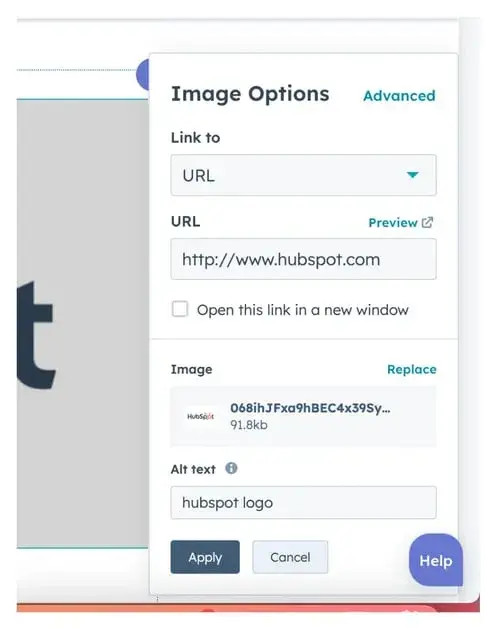 Adding an HTML image link to an image in a blog post, showing the URL insertion bar and the option to open the link in a new window.
4.3. Using Image Hosting Site Imgur
An image hosting site like Imgur helps you manage and share images with links from one place. You can also embed these images across multiple social sites.
4.3.1. Sign In and New Post
Sign in to Imgur and click the “+” button to navigate to the image upload page.
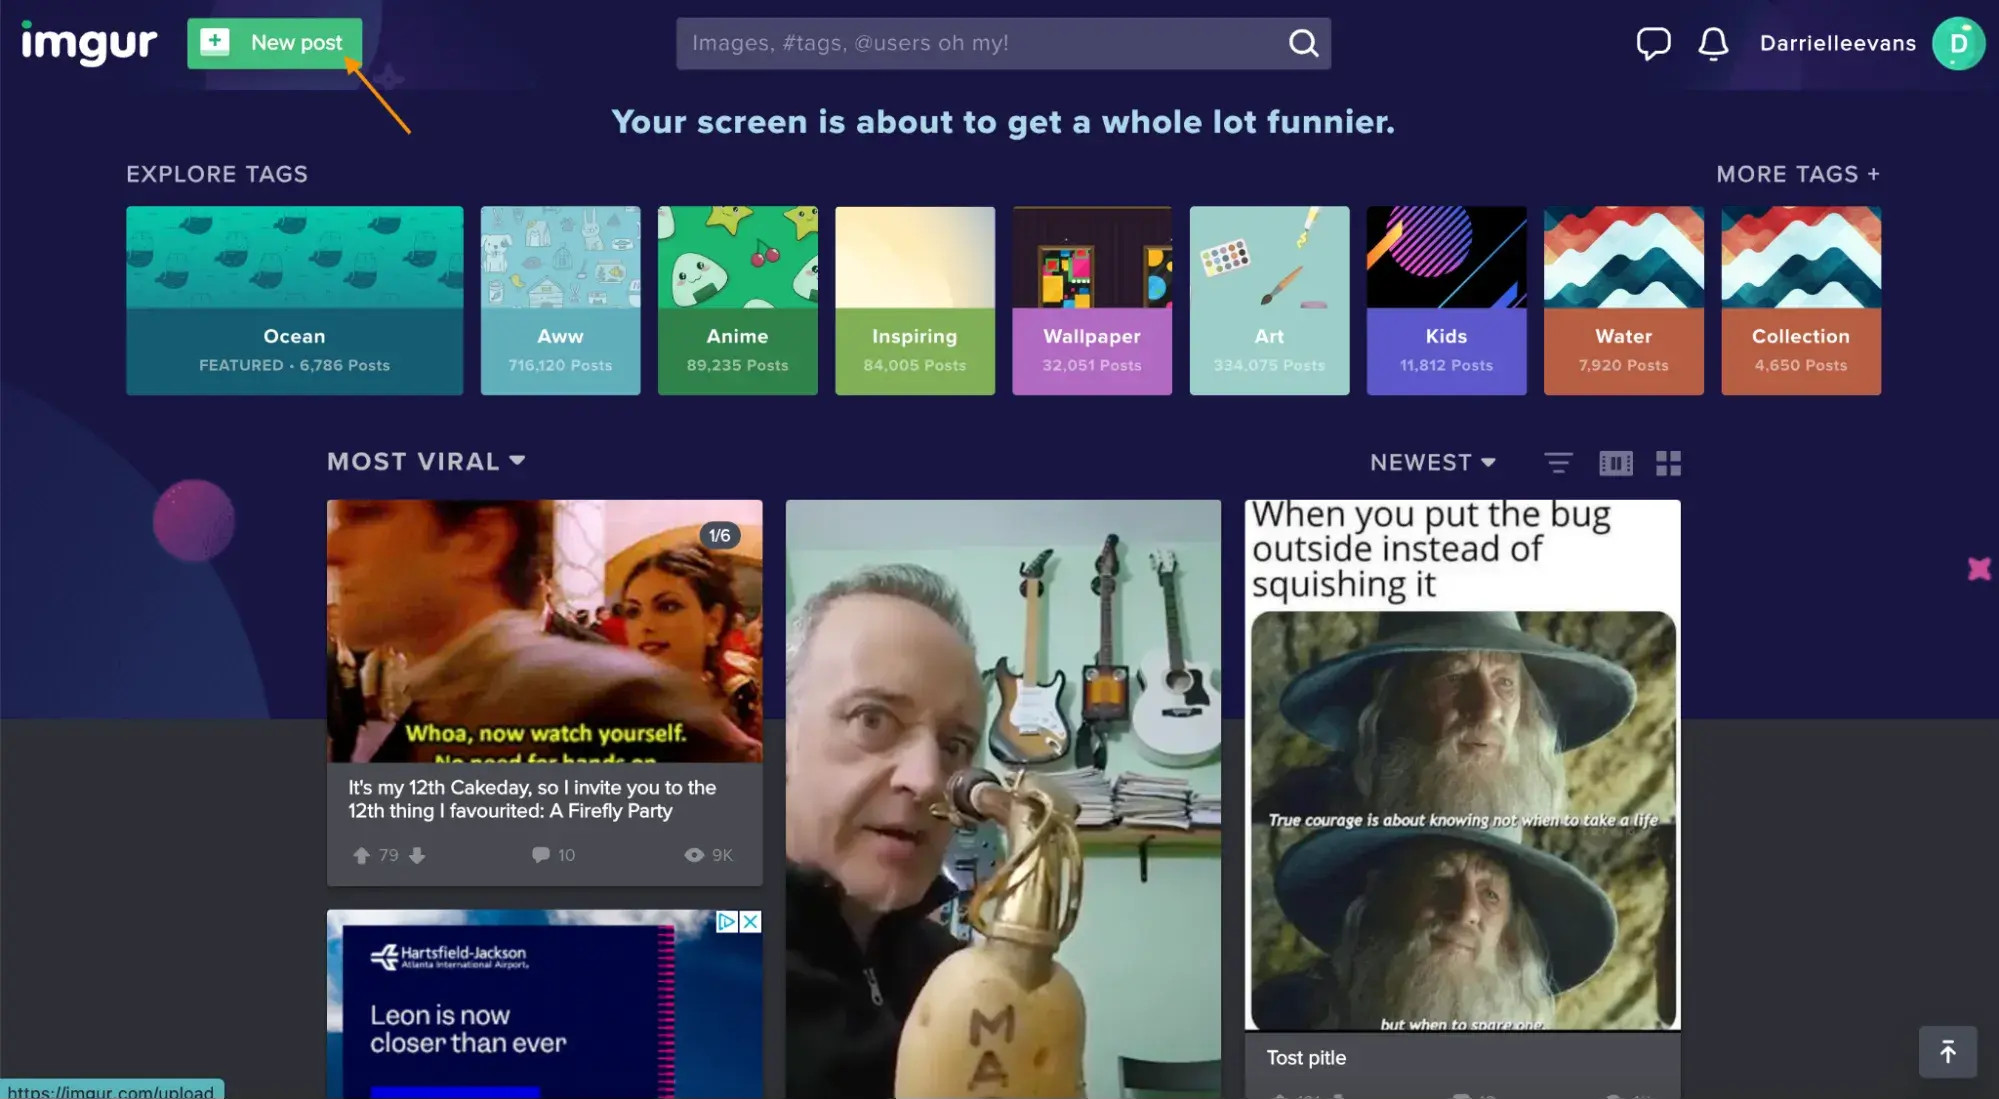 The Imgur dashboard for creating a new post to use an HTML image link, highlighting the '+' button.
4.3.2. Upload Image
Upload a new image or paste an image URL. Add a title and description to improve visibility in search results.
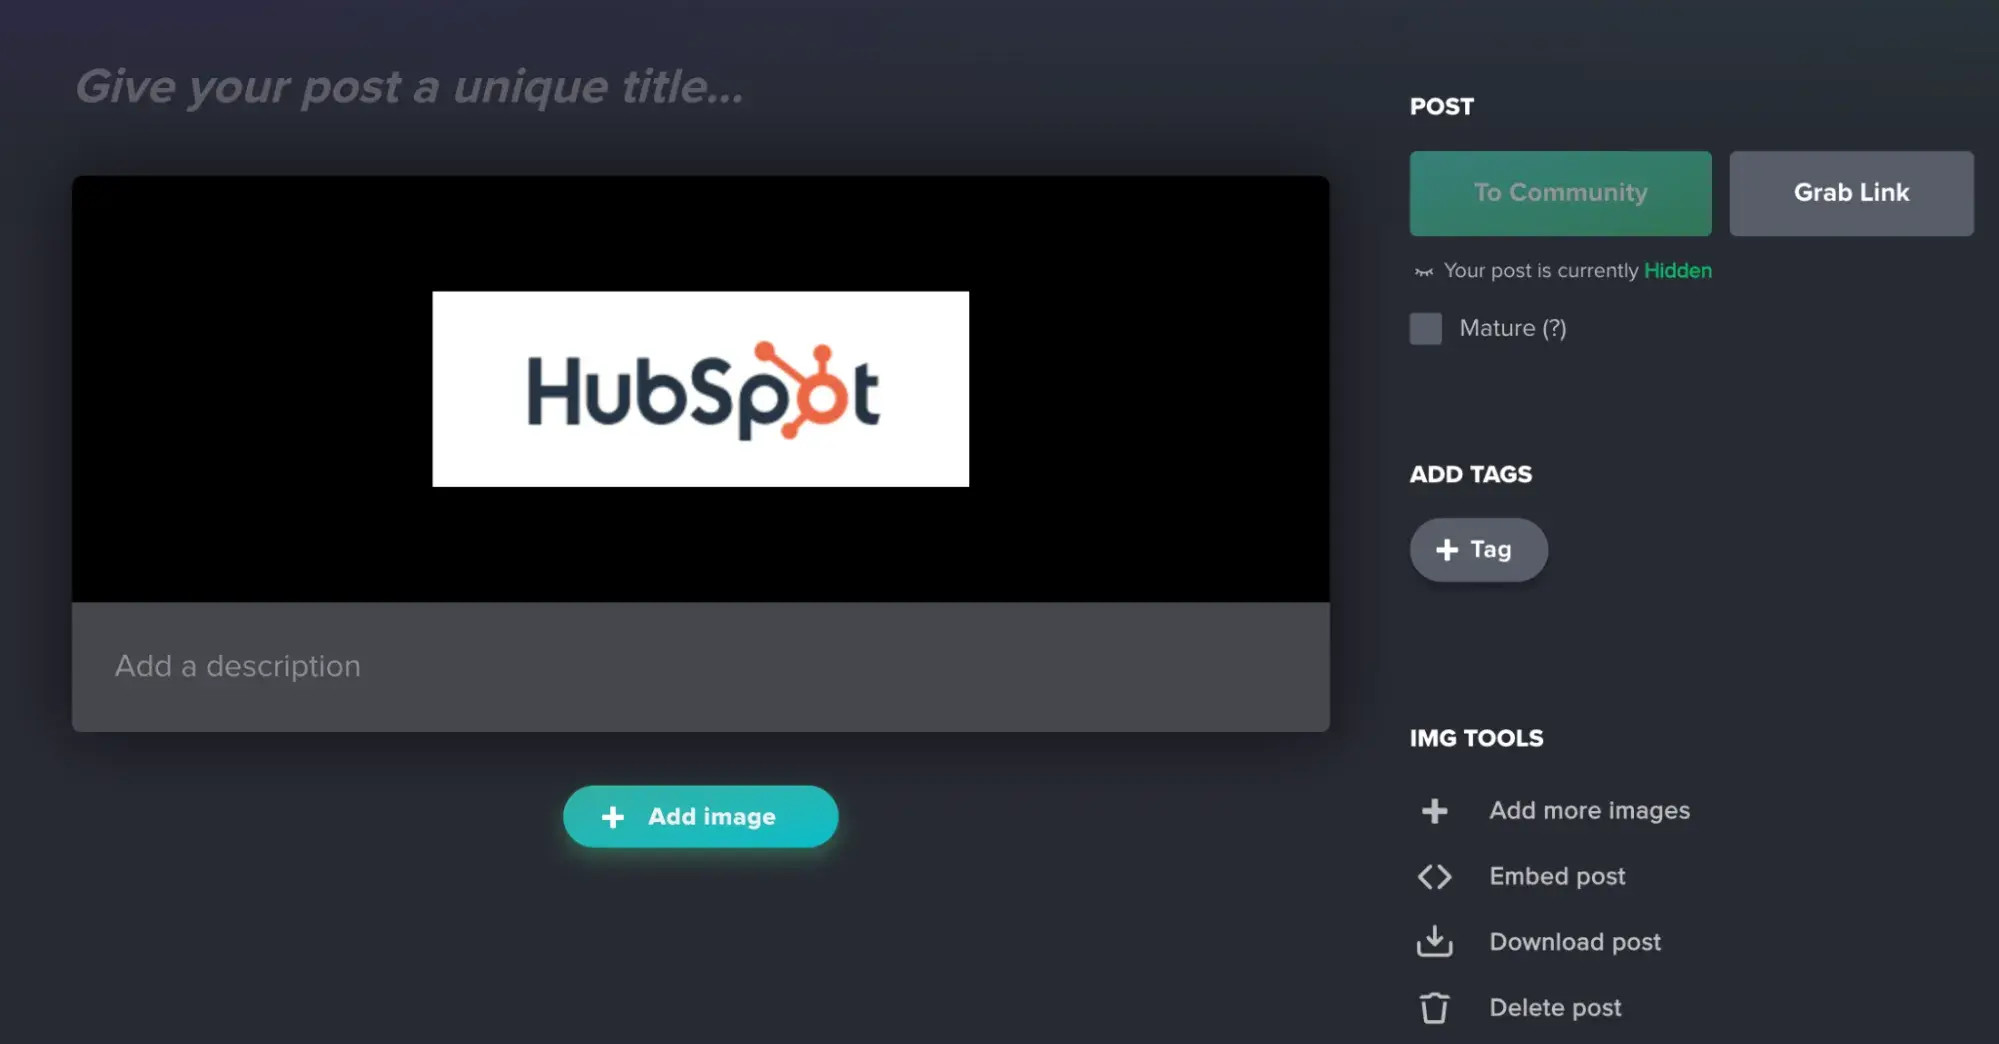 Adding an image to Imgur to create an HTML image link, showing the options to upload or paste an image URL.
4.3.3. Generate Link
Click on “Grab Link” to generate the link to your image.
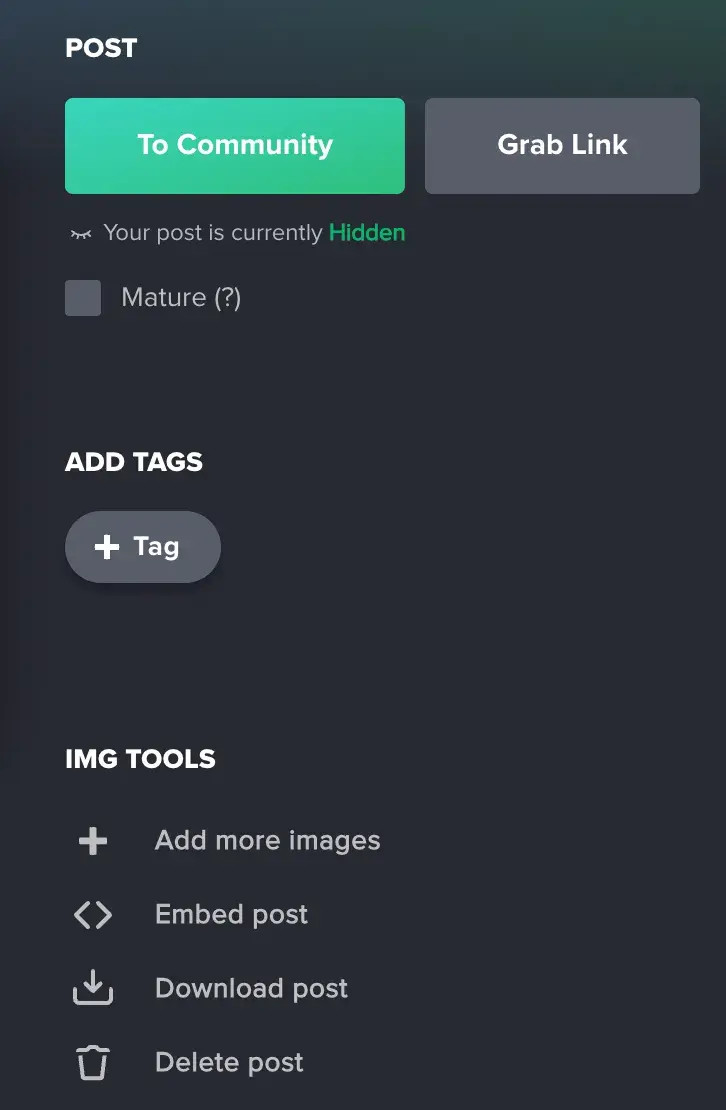 The 'Grab Link' button in Imgur, used to generate a shareable link for the uploaded image.
4.3.4. Share and Copy
You can now see the image’s URL and share it on various social sites.
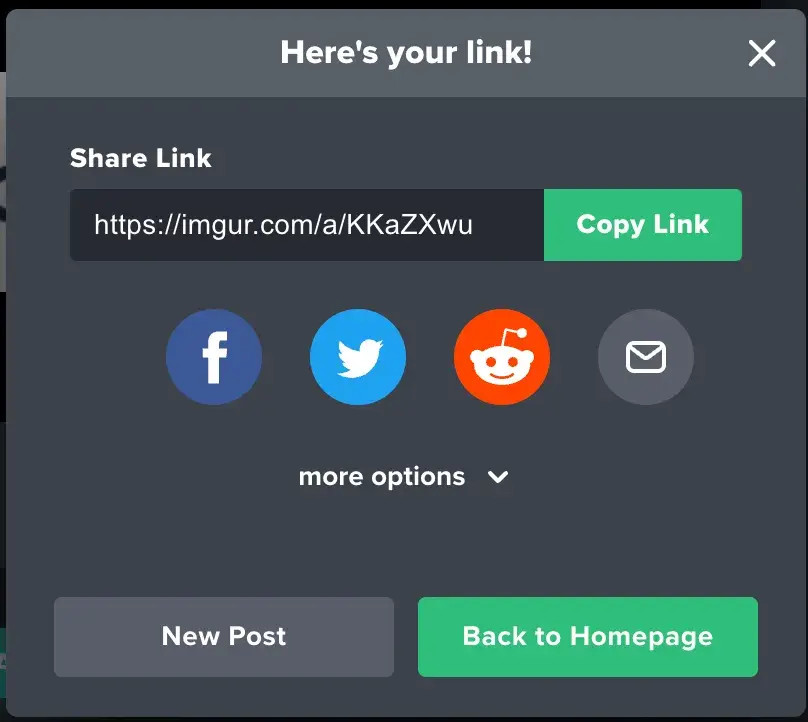 The share and copy link options in Imgur, providing various links for sharing the image on different platforms.
5. How I Turn a Picture Into a Link Using HTML?
Turning a picture into a link using HTML involves a few straightforward steps. This method gives you full control over how your images behave on your site.
5.1. Select Your Image
Choose the image you want to link. If it’s a product photo on your site, pick the one that shows it best. If you don’t have a photo, take a high-quality one or use a license-free stock image.
5.2. Optimize Size and Scale
Optimize your photo’s size and scale before uploading. Large image files slow download times and may not scale correctly. I use Squoosh, a free compression tool from Google, to adjust the quality and output format.
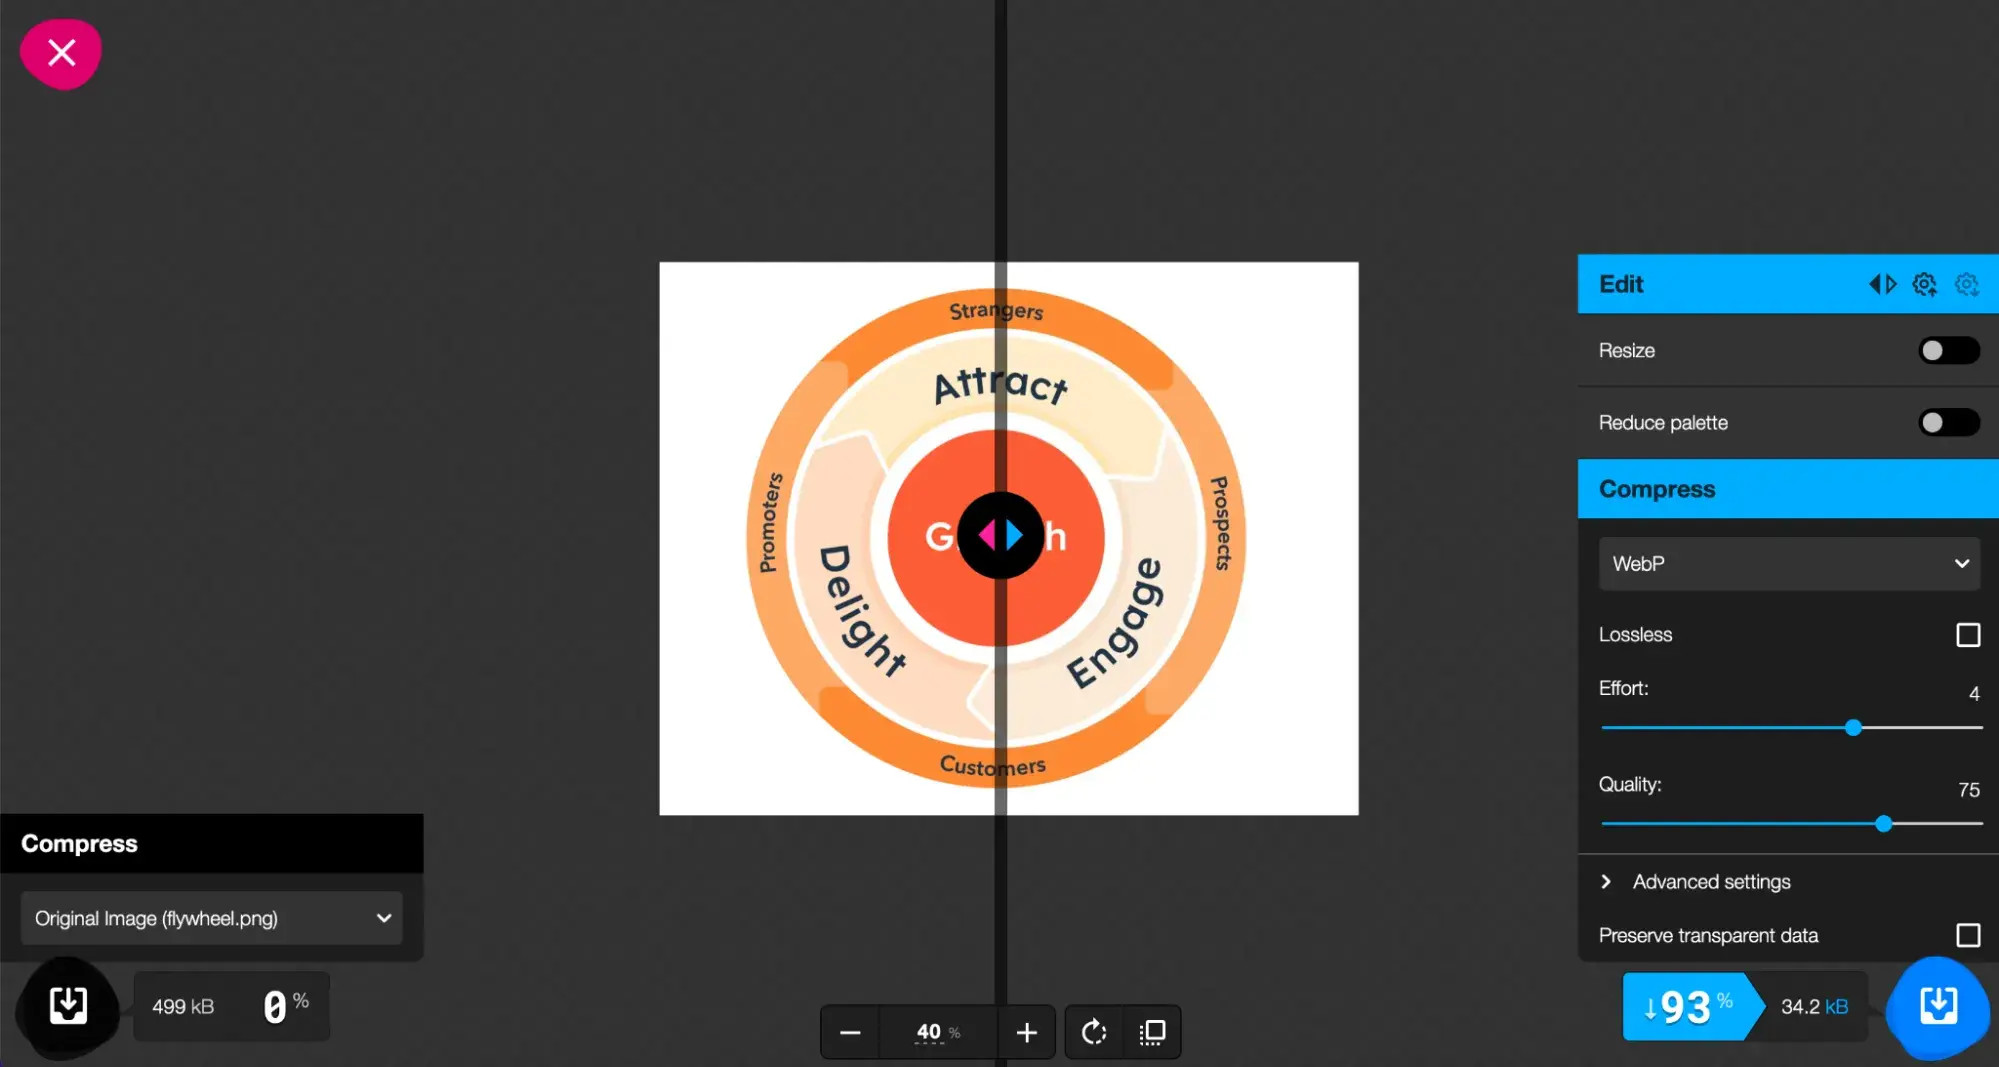 Resizing an image in Squoosh to create an HTML image link, showing the compression options and quality adjustments.
5.3. Upload and Get URL
Upload your image to your web server via your website builder, CMS, or a free image hosting site like ImgBB. You need the image’s URL for your HTML code.
5.4. Specify Destination URL
Determine where the link will send users when they click the image, such as a product or checkout page on your website.
5.5. Create HTML Code
Create your HTML code using this template:
<a href="ProductPageURL">
  <img src="ImageURL" alt="text">
</a>
Here’s a breakdown:
- The
andtags create a link. - The anchor element () contains an href attribute. Replace “ProductPageURL” with the URL of the page you want to direct users to.
- The tag represents an image.
- The image element ![]() contains a source attribute. Replace “ImageURL” with the URL of your image.
- It also contains an alt attribute. Replace the placeholder text with a description of the image.
<a href="https://www.hubspot.com/flywheel">
<img src="https://www.hubspot.com/hs-fs/hubfs/HubSpot-English-Flywheel-Jul-27-2020-04-17-18-68-PM.png?width=1360&name=HubSpot-English-Flywheel-Jul-27-2020-04-17-18-68-PM.png" alt="HubSpot Flywheel">
</a>5.6. Paste the Code
Paste your customized HTML code onto any page with HTML support. If done correctly, you’ll have a clickable image that directs users to your chosen URL.
6. Best Practices for Linking Images
Following best practices for linking images ensures a better user experience on your website. These tips help you create a site that’s easy to navigate and aesthetically pleasing.
6.1. Keep It Simple
Links and images should be logically connected. The image should give users a clear idea of where the link will take them before they click.
For instance, if an image shows a specific clothing item, the link should go directly to that item, not just the category page.
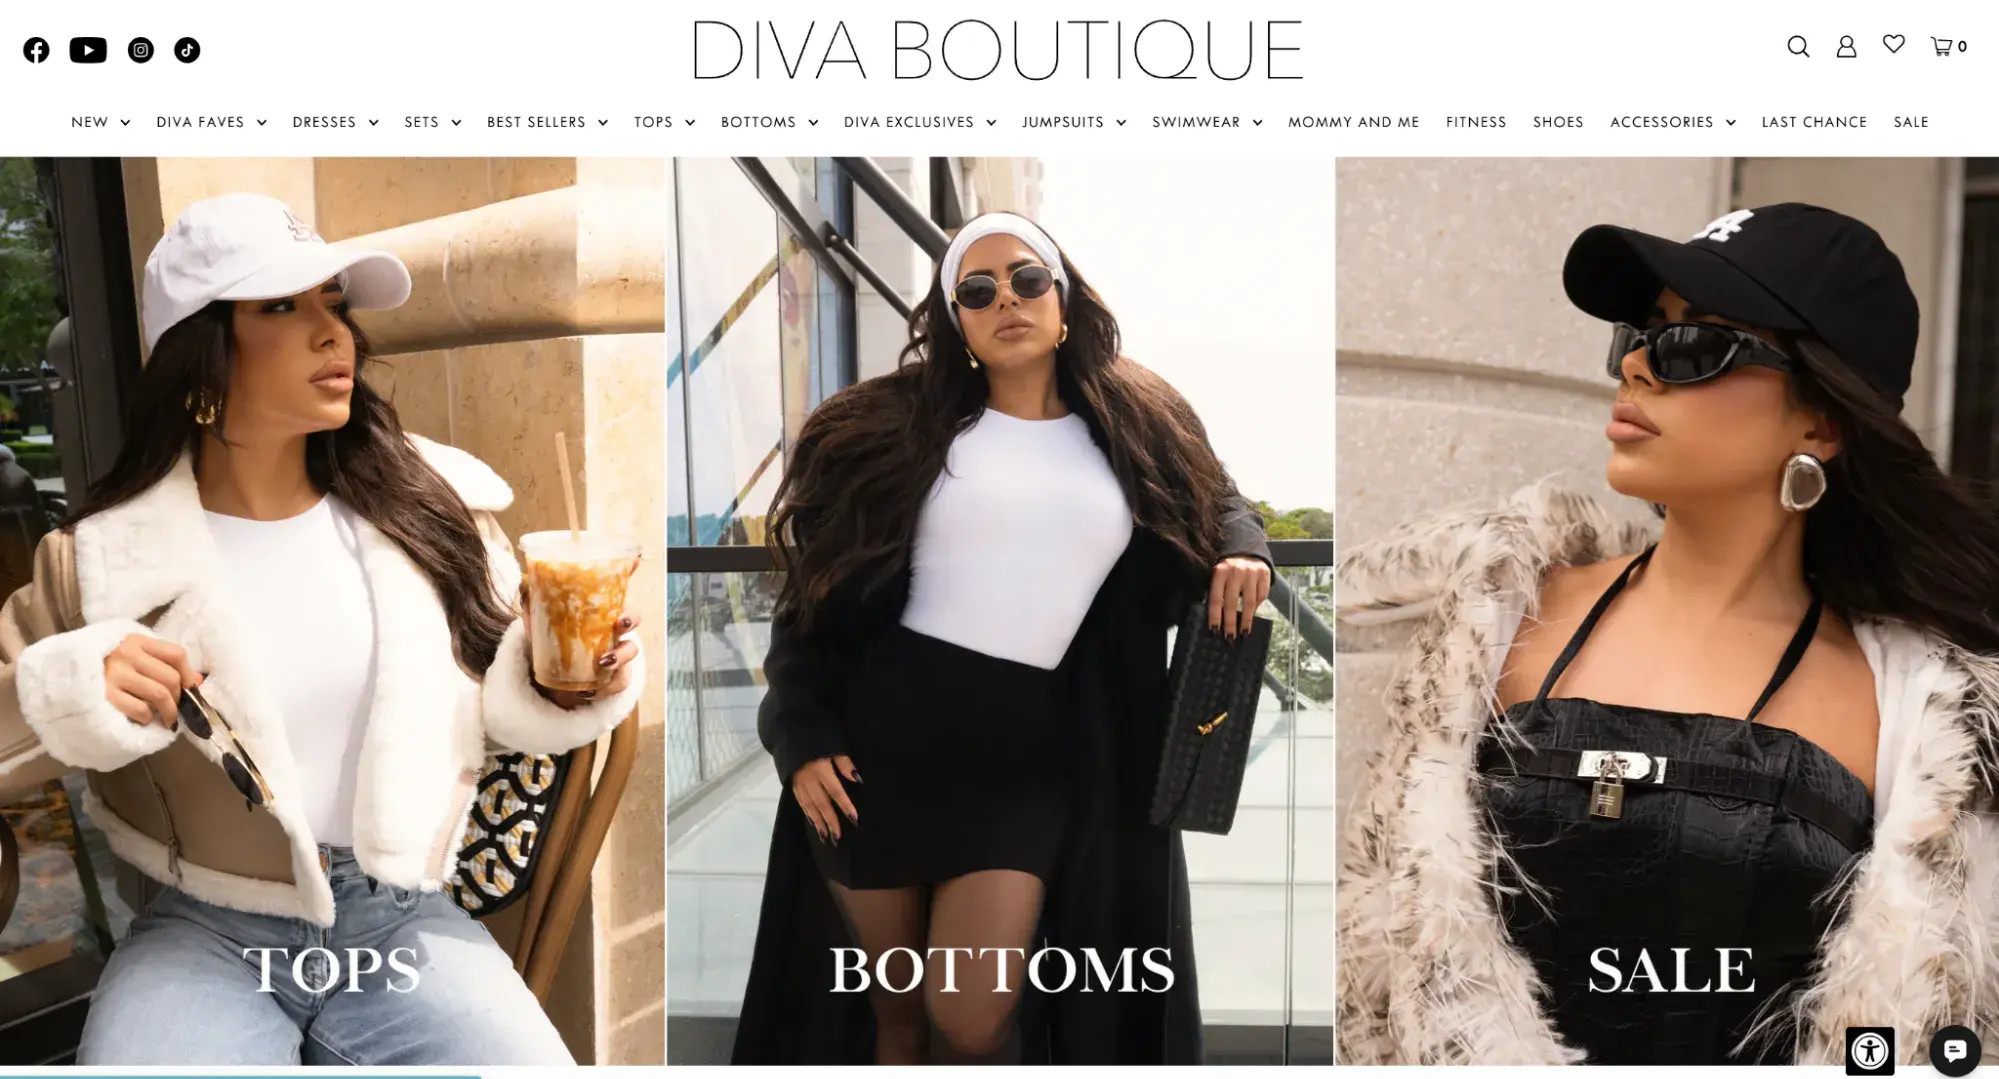 An example of a clothing item linked directly from the image, ensuring users land on the exact product page they expect.
6.2. Offer a Backup Link
While classic blue, underlined hyperlinks may seem outdated, many users still recognize them instantly.
Provide a familiar, text-based backup to any image link to ensure users understand it’s a link.
6.3. Don’t Overdo It
Too many links on a page can be overwhelming, especially with images. Not every image needs a link.
Prioritize purpose. Ask yourself, “Why am I linking this image?” If there’s no good reason, leave it unlinked.
6.4. Review Your Links
Regularly check your links to ensure they are current and relevant. Outdated links can frustrate customers and lead to 404 errors.
This applies to all links on your page, not just image links. Consistent reviews keep your site user-friendly.
6.5. Open in a New Tab
Set your links to open in a new tab. This keeps users on your original page, reducing bounce rates. It also prevents frustration by making it easy for users to return to the previous page.
7. How Can dfphoto.net Help You?
At dfphoto.net, we offer comprehensive guides, tutorials, and resources to help you master photography and website management. Whether you’re looking to enhance your photo editing skills, find inspiration for your next shoot, or optimize your website for better user engagement, we have something for you.
Our platform provides in-depth articles on various photography techniques, gear reviews, and creative ideas to elevate your craft. Additionally, we offer insights into website design and SEO strategies, ensuring your online presence is as captivating as your photographs.
We invite you to explore our website, where you can discover a wealth of knowledge and connect with a vibrant community of photography enthusiasts. Here are some highlights of what you can find on dfphoto.net:
- Detailed Photography Tutorials: Learn essential techniques such as composition, lighting, and post-processing to take your photography to the next level.
- Gear Reviews and Recommendations: Stay updated with the latest camera equipment and accessories, with expert reviews to help you make informed decisions.
- Inspirational Photo Galleries: Browse stunning images from talented photographers around the world, providing creative inspiration for your own work.
- Website Optimization Tips: Discover how to create an engaging and user-friendly website to showcase your photography and attract more visitors.
Visit dfphoto.net today and start your journey towards becoming a more skilled and successful photographer. Let us help you turn your passion into a profession.
Address: 1600 St Michael’s Dr, Santa Fe, NM 87505, United States
Phone: +1 (505) 471-6001
Website: dfphoto.net
8. Make the Most of Links on Your Site
Adding a URL to your images enriches the user experience. It enhances navigation and can boost conversion rates. Plus, it helps your SEO by giving the image more context through a URL.
Using a CMS like Content Hub can streamline this process by managing your images and links in one place. But the best approach depends on your site’s needs. Now that you’re an expert on images and URLs, give it a try.
9. FAQ: How to Turn a Photo Into a Link
9.1. What is the easiest way to turn a photo into a link?
The easiest way to turn a photo into a link is by using a CMS like HubSpot, where you can upload an image and add a URL directly through the image settings.
9.2. How do I create an image link in HTML?
To create an image link in HTML, use the following code: <a href="URL"><img src="imageURL" alt="description"></a>.
9.3. Can I turn a photo into a link on social media?
Yes, you can upload a photo to an image hosting site like Imgur, get the URL, and then share the link on social media.
9.4. What is the best image hosting site for creating image links?
Imgur is a popular and reliable image hosting site for creating image links. It’s easy to use and provides direct links for sharing.
9.5. How do I ensure my image link is SEO-friendly?
To make your image link SEO-friendly, use descriptive alt text for the image and ensure the linked page is relevant to the image content.
9.6. Why is it important to optimize image sizes before creating links?
Optimizing image sizes ensures faster loading times, which improves user experience and SEO. Use tools like Squoosh to compress images without significant quality loss.
9.7. Should I open image links in a new tab?
Yes, opening image links in a new tab is recommended to keep users on your site and reduce bounce rates.
9.8. How often should I review my image links?
You should review your image links regularly, at least every few months, to ensure they are still active and relevant.
9.9. What are the benefits of adding a URL to an image?
Adding a URL to an image enhances navigation, improves user engagement, and provides more context to search engines, which can boost SEO.
9.10. Can I use dfphoto.net to learn more about image linking?
Yes, dfphoto.net offers comprehensive guides and tutorials on image linking, website optimization, and photography techniques to help you succeed.