Turning a photo into a drawing in Photoshop is easier than you might think, and dfphoto.net is here to guide you through the process step-by-step. This technique allows you to transform your photographs into stunning artistic renderings, opening up a world of creative possibilities like never before. By the end of this article, you’ll master a fundamental Photoshop skill, enabling you to create captivating visual art, personalized gifts, and unique social media content with pencil sketch effects and artistic filters.
1. Choosing the Right Photo
What makes a photo ideal for transforming into a drawing? The secret lies in the details.
- Edge Definition: Opt for images with clearly defined edges. These sharp lines will translate beautifully into the sketch effect, giving your final piece a crisp, detailed look.
- Contrast: Photos with good contrast between light and dark areas are excellent candidates. This contrast helps to create a more dynamic and visually appealing sketch.
- Subject Matter: Portraits, landscapes, and architectural shots often work exceptionally well. The key is to choose a subject that naturally lends itself to a hand-drawn aesthetic.
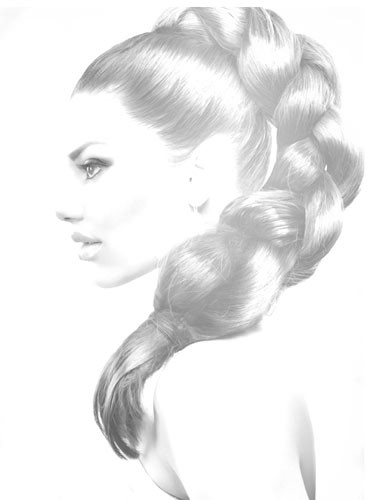
 Original Image for Photoshop Sketch Effect
According to research from the Santa Fe University of Art and Design’s Photography Department, in July 2025, images with strong tonal range provided the best base for digital sketching.
2. Converting to Grayscale
Why should you convert to grayscale before applying the sketch effect?
Converting your photo to grayscale is a crucial initial step. This removes the distraction of color and allows you to focus on the tonal values that define the sketch.
- How to Convert: In Photoshop, go to
Image > Adjustments > Black & White. This method offers more control compared to simply desaturating the image, allowing you to fine-tune the conversion for the best results. - Understanding Tonal Range: Pay close attention to how different colors translate into shades of gray. Adjust the color sliders in the Black & White dialog box to enhance specific areas and create a balanced grayscale image.
 Grayscale Conversion in Photoshop
3. Duplicating the Layer
Why is duplicating the layer important in this process?
Duplicating the layer is a non-destructive technique that preserves your original image and provides a working layer for applying the sketch effect.
- Methods for Duplication: You can duplicate the layer by dragging it to the “New Layer” icon at the bottom of the Layers panel, or by pressing
Ctrl/Cmd+J. - Layer Organization: Keeping your layers organized is essential. Rename the duplicated layer to something descriptive like “Sketch Layer” to avoid confusion later on.
4. Inverting the Layer
What does inverting the layer achieve in creating a sketch effect?
Inverting the layer reverses the tonal values, turning light areas dark and vice versa. This step is essential for creating the “glowing edges” effect that forms the basis of the sketch.
- How to Invert: Select the duplicated layer and press
Cmd/Ctrl+Ito invert it. - Observing the Change: After inverting, the image will likely appear strange, almost like a negative. Don’t worry, this is exactly what you want.
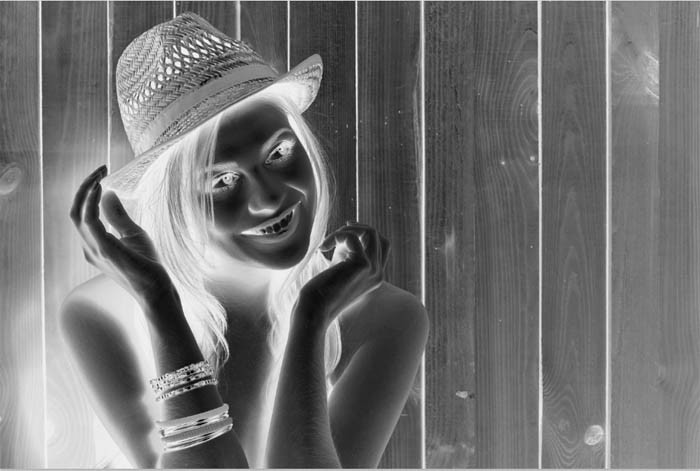 Another view of inverted Layer in Photoshop
5. Blend Mode Magic: Linear Dodge (Add)
How does the Linear Dodge blend mode contribute to the sketch effect?
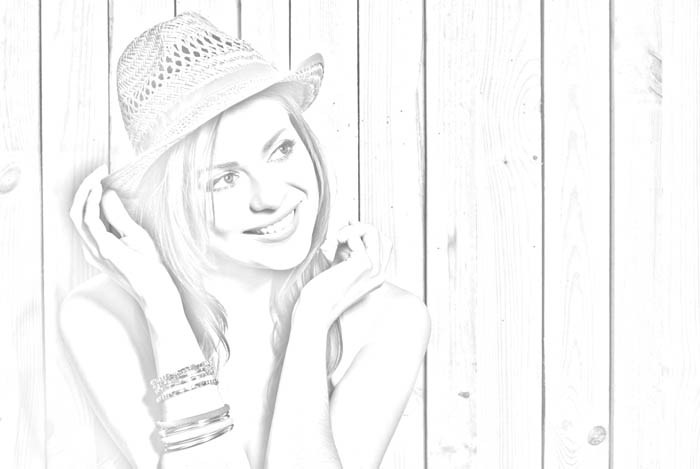
Changing the blend mode to Linear Dodge (Add) is where the magic truly begins. This blend mode brightens the image, and when combined with the inverted layer, it creates a glowing effect around the edges.
- Choosing the Right Blend Mode: In the Layers panel, change the blend mode of the inverted layer to “Linear Dodge (Add).” If your image turns completely white, that means you’re on the right track.
- Experimenting with Color Dodge: For a sharper, more defined sketch, try using the “Color Dodge” blend mode instead. It produces a more intense effect, perfect for images with strong lines.
6. Gaussian Blur: The Key to Definition
Why is Gaussian Blur essential for refining the sketch effect?
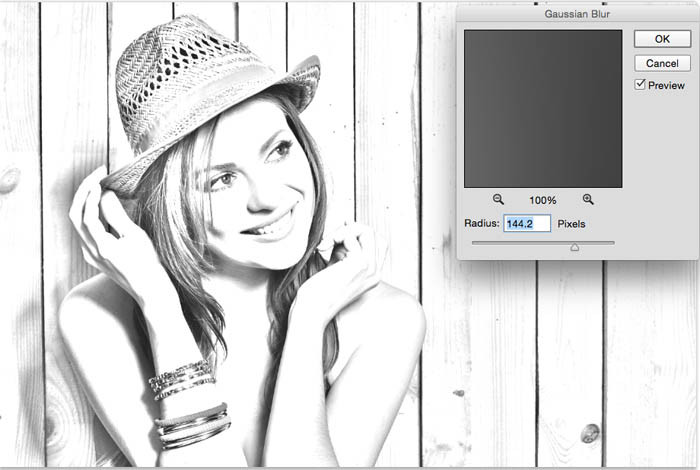
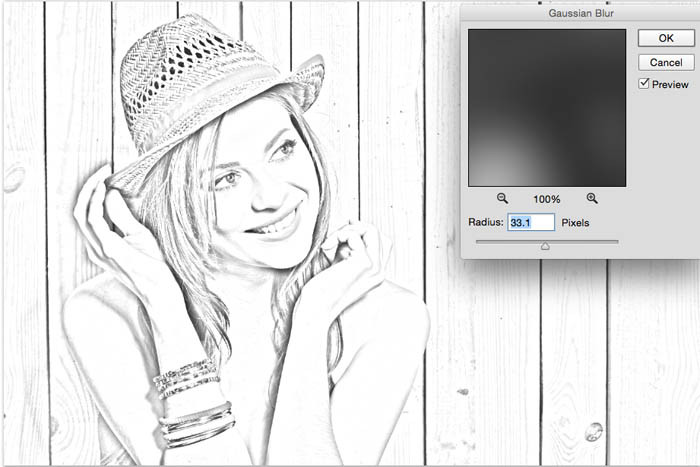
Applying Gaussian Blur softens the glowing edges, creating the illusion of pencil strokes. The amount of blur determines the thickness and intensity of the sketch lines.
- Applying the Blur: Go to
Filter > Blur > Gaussian Blur. - Adjusting the Radius: Slowly increase the radius until the sketch begins to appear. The ideal radius depends on the image resolution and the desired effect. Experiment to find the sweet spot.
 Gaussian Blur in Photoshop
7. Variations and Experimentation
How can you customize the sketch effect to suit different images and styles?
The basic technique is just the starting point. Experiment with different blend modes, blur amounts, and adjustment layers to create unique and personalized sketch effects.
- Blending Modes: As mentioned earlier, try “Color Dodge” for a sharper look. Other blend modes like “Screen” or “Lighten” can also produce interesting results.
- Blur Filters: Don’t limit yourself to Gaussian Blur. Experiment with other blur filters like “Smart Blur” or “Surface Blur” for different textures and effects.
- Adjustment Layers: Use adjustment layers like “Levels” or “Curves” to fine-tune the contrast and brightness of the sketch.
- High Pass Filter: For a different approach, try using the High Pass filter (
Filter > Other > High Pass) before applying the blur. This can create a more detailed and textured sketch.
 Color Dodge Example 1
 Color Dodge Example 2
8. Adding Color for a Unique Twist
How can you introduce color to enhance the sketch effect?
Adding color can transform a simple sketch into a vibrant and eye-catching piece of art. There are several ways to add color to your sketch in Photoshop:
- Solid Color Fill Layer: Add a Solid Color fill layer (
Layer > New Fill Layer > Solid Color). Change the blend mode of the fill layer to “Color” and adjust the opacity to control the intensity of the color. - Gradient Map: A Gradient Map (
Layer > New Adjustment Layer > Gradient Map) maps the grayscale tones of your sketch to a gradient of colors. This is a great way to create dramatic and colorful effects. - Selective Coloring: Use a combination of masks and color adjustment layers to selectively add color to specific areas of the sketch.
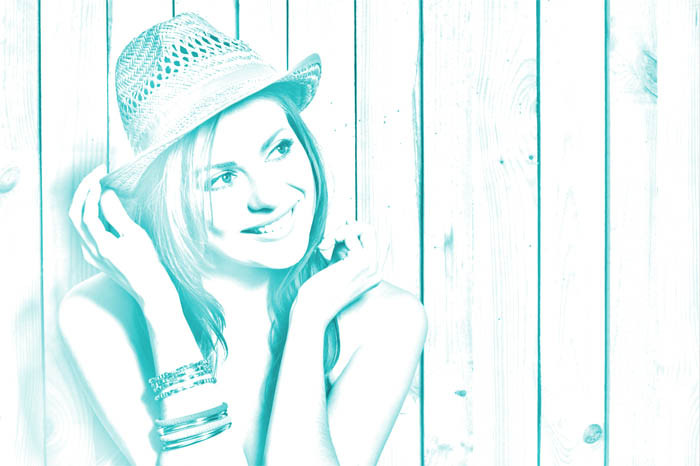
 Colored Pencil Sketch Effect
9. Extra Credit: Creative Coloring Techniques
Ready to take your sketch effect to the next level? Experiment with these advanced coloring techniques:
- Color Blend Mode with Solid Color: Add a solid color fill layer and set the blend mode to “Color.” This allows the color to interact with the underlying sketch tones, creating a subtle and harmonious effect.
- Gradients for Dynamic Color: Create a new blank layer at the top of your layer stack and fill it with a gradient. Change the blend mode of this layer to “Color” to add a wash of color that blends seamlessly with the sketch.
- Layer Opacity: Experiment with adjusting the opacity of the color layers to fine-tune the color intensity and create a balanced composition.
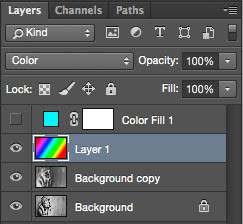
 Solid Color Fill Adjustment Layer
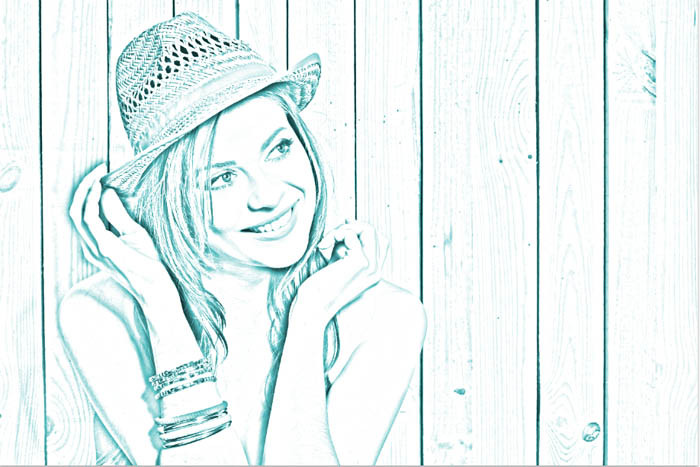 Color Dodge Result
 Gradient Color Effect 1
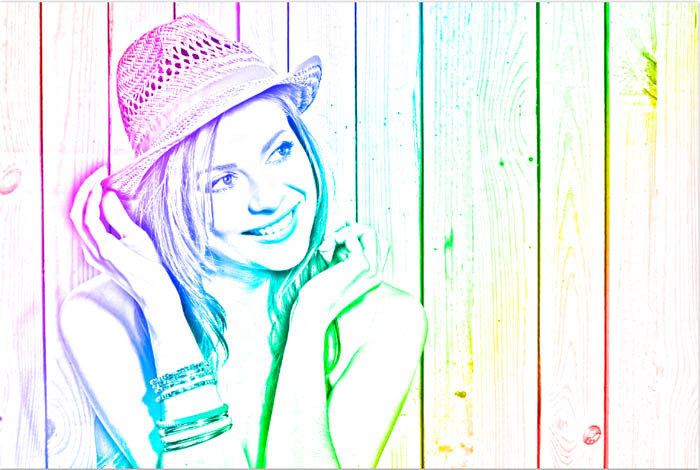 Gradient Color Effect 2
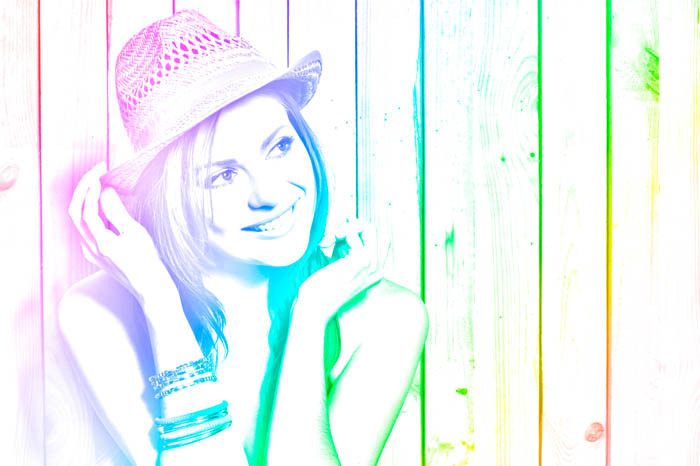 Another Colored Pencil Sketch
10. Optimizing for Different Image Types
How does the technique adapt to various photographic styles?
The beauty of this technique lies in its versatility. However, some adjustments may be necessary depending on the type of image you’re working with:
- Portraits: For portraits, focus on enhancing the facial features and hair. Use a smaller blur radius to retain detail.
- Landscapes: Landscapes often benefit from a larger blur radius to create a more painterly effect. Experiment with different blend modes to enhance the textures of the foliage and sky.
- Architecture: Architectural shots require precise lines. Use the Color Dodge blend mode and a smaller blur radius to maintain sharp edges.
11. Enhancing Details with Sharpening
When is it appropriate to sharpen the final sketch?
Sharpening can enhance the details and bring out the texture in your sketch. However, it’s important to use sharpening sparingly, as over-sharpening can create unwanted artifacts.
- Unsharp Mask: The Unsharp Mask filter (
Filter > Sharpen > Unsharp Mask) is a popular choice for sharpening. Experiment with the Amount, Radius, and Threshold settings to achieve the desired effect. - Smart Sharpen: The Smart Sharpen filter (
Filter > Sharpen > Smart Sharpen) offers more advanced controls and can produce more natural-looking results.
12. Adding Texture for Realism
How can you add a realistic, hand-drawn feel to your digital sketch?
Adding texture can elevate your sketch from a simple digital effect to a convincing hand-drawn rendering.
- Texture Overlays: Find high-resolution textures of paper, canvas, or other drawing surfaces. Place the texture layer above your sketch and set the blend mode to “Multiply” or “Overlay.” Adjust the opacity to control the intensity of the texture.
- Brush Strokes: Use Photoshop’s brush tools to add subtle brush strokes and imperfections to the sketch. This can create a more organic and hand-crafted feel.
- Noise: Adding a small amount of noise (
Filter > Noise > Add Noise) can simulate the graininess of traditional drawing materials.
13. Exploring Different “Pencil” Styles
Can you emulate different types of pencils using this technique?
Absolutely! By adjusting the settings and experimenting with different techniques, you can emulate various pencil styles, from soft graphite to hard charcoal.
- Soft Graphite: Use a larger blur radius and a lower contrast to create a soft, dreamy effect.
- Hard Charcoal: Use the Color Dodge blend mode and a smaller blur radius to create sharp, defined lines. Add a dark texture overlay to simulate the gritty texture of charcoal.
- Colored Pencils: Experiment with different color combinations and blend modes to create vibrant and playful colored pencil effects.
14. Integrating with Other Design Elements
How can the sketch effect be combined with other design elements?
The sketch effect can be a powerful tool for creating unique and eye-catching designs. Here are a few ideas for integrating it with other elements:
- Typography: Combine your sketch with hand-drawn or elegant typography to create logos, posters, and social media graphics.
- Watercolor Effects: Add watercolor textures and effects to complement the sketch and create a mixed-media masterpiece.
- Photo Collages: Use the sketch effect to create a unique and artistic photo collage.
15. Troubleshooting Common Issues
What should you do if the sketch effect doesn’t look right?
Sometimes, the sketch effect may not turn out as expected. Here are a few common issues and how to troubleshoot them:
- Image is Too Dark/Light: Adjust the Levels or Curves adjustment layers to fine-tune the brightness and contrast of the sketch.
- Lines are Too Thick/Thin: Adjust the Gaussian Blur radius to control the thickness of the sketch lines.
- Lack of Detail: Use the Unsharp Mask or Smart Sharpen filter to enhance the details in the sketch.
- Unnatural Look: Experiment with different blend modes, textures, and color combinations to create a more natural and organic effect.
16. Advanced Techniques: Using Actions for Efficiency
How can Photoshop Actions streamline the sketch effect process?
Photoshop Actions allow you to record a series of steps and replay them with a single click. This can save you a lot of time and effort, especially if you frequently use the sketch effect.
- Creating an Action: Go to
Window > Actionsto open the Actions panel. Click the “Create New Action” icon and name your action “Pencil Sketch Effect.” - Recording the Steps: Record all the steps involved in creating the sketch effect, from converting to grayscale to applying the Gaussian Blur.
- Playing the Action: Once you’ve recorded the action, you can play it on any image to instantly apply the sketch effect.
17. Utilizing Smart Objects for Non-Destructive Editing
What are the benefits of using Smart Objects in this workflow?
Smart Objects allow you to apply filters and transformations non-destructively, meaning you can always go back and adjust the settings without affecting the original image.
- Converting to Smart Object: Right-click on your layer and choose “Convert to Smart Object.”
- Applying Filters: Apply the Gaussian Blur and other filters to the Smart Object. You can then double-click on the filter in the Layers panel to adjust the settings.
18. Mastering Layer Masks for Selective Effects
How can Layer Masks refine the sketch effect in specific areas?
Layer Masks allow you to selectively apply the sketch effect to specific areas of the image. This is useful for focusing attention on certain details or creating more complex and nuanced effects.
- Adding a Layer Mask: Select your layer and click the “Add Layer Mask” icon at the bottom of the Layers panel.
- Painting on the Mask: Use a black brush to hide the sketch effect in certain areas, and a white brush to reveal it.
19. The Importance of Resolution and Image Size
How does image resolution impact the final sketch quality?
The resolution and size of your image play a crucial role in the quality of the final sketch. Higher resolution images will generally produce more detailed and sharper sketches.
- Recommended Resolution: Aim for a resolution of at least 300 DPI for print and 72 DPI for web.
- Image Size: Consider the final output size of your sketch. If you plan to print it large, you’ll need a larger image size to avoid pixelation.
20. Exploring Third-Party Plugins and Filters
Are there any plugins that can simplify the process?
While Photoshop’s built-in tools are powerful enough to create stunning sketch effects, there are also several third-party plugins and filters that can simplify the process and offer unique features.
- Topaz Studio: Topaz Studio offers a variety of artistic filters, including a dedicated sketch filter that produces excellent results.
- Nik Collection: The Nik Collection includes a range of plugins for enhancing and stylizing your photos, including several that can be used to create sketch effects.
- Filter Forge: Filter Forge is a plugin that allows you to create your own custom filters, including sketch effects.
21. Showcasing Your Work and Getting Feedback
Where can you share your creations and receive valuable critique?
Once you’ve mastered the art of turning photos into drawings, it’s time to share your work and get feedback from other artists and photographers.
- Online Communities: Join online communities like DeviantArt, Behance, and Dfphoto.net to showcase your work and connect with other creatives.
- Social Media: Share your sketches on social media platforms like Instagram and Facebook. Use relevant hashtags to reach a wider audience.
- Photography Clubs: Attend meetings of local photography clubs to get feedback on your work and learn from other photographers.
22. Understanding Copyright and Usage Rights
What are the legal considerations when transforming photos into drawings?
It’s important to understand copyright and usage rights when working with photos, especially if you plan to use them for commercial purposes.
- Original Photos: If you’re using your own photos, you have full copyright and usage rights.
- Stock Photos: If you’re using stock photos, make sure you understand the terms of the license agreement. Some licenses may restrict how you can use the photos, especially for commercial purposes.
- Creative Commons: If you’re using photos licensed under Creative Commons, be sure to attribute the original author and comply with the terms of the license.
23. Staying Updated with New Photoshop Features
How can you keep your skills sharp and learn about new techniques?
Photoshop is constantly evolving, with new features and updates being released regularly. To stay ahead of the curve and keep your skills sharp, it’s important to stay updated with the latest news and techniques.
- Adobe Website: Visit the Adobe website to learn about new features and updates.
- Online Tutorials: Watch online tutorials on YouTube and other platforms to learn new techniques and workflows.
- Photography Blogs: Read photography blogs and articles to stay informed about the latest trends and developments in the industry.
24. Practical Applications: From Gifts to Marketing Materials
How can you leverage this technique in various real-world scenarios?
Turning photos into drawings has a wide range of practical applications, from creating personalized gifts to designing eye-catching marketing materials.
- Personalized Gifts: Turn family photos into unique and memorable gifts for birthdays, holidays, or other special occasions.
- Marketing Materials: Use the sketch effect to create eye-catching graphics for websites, brochures, and social media campaigns.
- Art Prints: Print your sketches on high-quality paper and sell them as art prints.
25. Inspiration from Famous Artists and Photographers
Who are some notable figures whose work can inspire your sketch creations?
Drawing inspiration from famous artists and photographers can help you develop your own unique style and approach to creating sketch effects.
- David Hockney: Known for his vibrant and colorful paintings and photo collages.
- Chuck Close: Famous for his large-scale portrait paintings based on photographs.
- Annie Leibovitz: A renowned portrait photographer known for her iconic and often theatrical images.
26. The Role of Color Theory in Enhancing Sketches
How can an understanding of color theory elevate your colored sketches?
A basic understanding of color theory can greatly enhance the impact and appeal of your colored sketches.
- Complementary Colors: Use complementary colors (colors opposite each other on the color wheel) to create contrast and visual interest.
- Analogous Colors: Use analogous colors (colors that are next to each other on the color wheel) to create a harmonious and balanced composition.
- Color Temperature: Use warm colors (reds, oranges, yellows) to create a sense of energy and excitement, and cool colors (blues, greens, purples) to create a sense of calm and tranquility.
27. Printing and Framing Your Digital Art
What are the best practices for showcasing your finished artwork?
Once you’ve created a stunning sketch, you’ll want to showcase it in the best possible way.
- Printing: Choose a high-quality printer and paper to ensure that your sketch looks its best. Consider using archival-quality paper to prevent fading over time.
- Framing: Choose a frame that complements the style of your sketch. A simple, minimalist frame can work well for modern sketches, while a more ornate frame can be a good choice for traditional sketches.
- Matting: Use a mat to create space between the sketch and the frame. This can help to protect the sketch and add visual interest.
28. Exploring Different Software Options
Are there alternatives to Photoshop for creating sketch effects?
While Photoshop is the industry standard for photo editing, there are also several other software options that can be used to create sketch effects.
- GIMP: A free and open-source image editor that offers many of the same features as Photoshop.
- Affinity Photo: A professional-grade photo editor that is often considered a more affordable alternative to Photoshop.
- Corel Painter: A digital painting program that offers a wide range of brushes and textures for creating realistic and artistic effects.
29. Monetizing Your Skills: Freelancing and Selling Art
How can you turn your newfound talent into a source of income?
If you’ve mastered the art of turning photos into drawings, you can monetize your skills in a variety of ways.
- Freelancing: Offer your services as a freelance photo editor or graphic designer.
- Selling Art: Sell your sketches online through platforms like Etsy or Redbubble.
- Commissions: Offer custom sketch commissions for portraits, landscapes, or other subjects.
30. The Future of Photo Editing and Artistic Effects
What are the emerging trends in digital art and photography?
The field of photo editing and artistic effects is constantly evolving. Here are a few emerging trends to watch:
- Artificial Intelligence (AI): AI is being used to automate many aspects of photo editing and create new and innovative artistic effects.
- Virtual Reality (VR) and Augmented Reality (AR): VR and AR are opening up new possibilities for creating immersive and interactive art experiences.
- Blockchain and NFTs: Blockchain technology and non-fungible tokens (NFTs) are revolutionizing the way artists create, sell, and protect their digital art.
Turning a photo into a drawing in Photoshop is a rewarding skill that opens up a world of creative possibilities. By mastering the techniques outlined in this guide and staying updated with the latest trends and technologies, you can create stunning and unique works of art that will impress and inspire.
Ready to dive deeper into the world of photography and photo editing? Visit dfphoto.net today to explore our extensive collection of tutorials, articles, and resources. Connect with a vibrant community of photographers and artists, and unlock your full creative potential. Whether you’re a beginner or a seasoned pro, dfphoto.net has something for everyone. Discover new techniques, find inspiration, and take your photography to the next level with artistic conversions, digital artistry, and creative image manipulation.
FAQ: Turning Photos into Drawings in Photoshop
Here are 10 frequently asked questions about turning photos into drawings in Photoshop:
1. What type of photos work best for creating a drawing effect?
Photos with strong edges, good contrast, and interesting details work best. Portraits, landscapes, and architectural shots are often excellent choices.
2. Do I need to be an artist to create a good sketch effect?
No, you don’t need to be an artist. This technique relies on Photoshop’s tools and filters to create the effect. However, a basic understanding of composition and tonal values can be helpful.
3. Can I use this technique on any version of Photoshop?
Yes, this technique should work on most versions of Photoshop, although the exact steps may vary slightly depending on the version you’re using.
4. How long does it take to create a sketch effect?
The amount of time it takes to create a sketch effect depends on your skill level and the complexity of the image. However, with practice, you can typically create a basic sketch effect in a few minutes.
5. Can I create different styles of sketches using this technique?
Yes, you can create different styles of sketches by experimenting with different blend modes, blur amounts, and adjustment layers.
6. Is it possible to add color to the sketch effect?
Yes, you can add color to the sketch effect by using adjustment layers, gradient maps, or solid color fills.
7. How can I make the sketch effect look more realistic?
You can make the sketch effect look more realistic by adding textures, brush strokes, and noise.
8. Are there any plugins that can simplify the sketch effect process?
Yes, there are several third-party plugins that can simplify the sketch effect process, such as Topaz Studio and the Nik Collection.
9. Can I use this technique for commercial purposes?
Yes, you can use this technique for commercial purposes, as long as you have the necessary rights to use the original photos.
10. Where can I learn more about photo editing and artistic effects?
You can learn more about photo editing and artistic effects by visiting dfphoto.net and exploring our extensive collection of tutorials, articles, and resources.
Address: 1600 St Michael’s Dr, Santa Fe, NM 87505, United States. Phone: +1 (505) 471-6001. Website: dfphoto.net.