Transforming plain fabric with your favorite images opens up a world of creative possibilities, from personalized home décor to unique fashion pieces. Many believe that transferring photos to fabric is a time-consuming process, often involving lengthy drying times. However, with a simple technique using a heat gun, you can achieve stunning image transfers onto fabric in just about 10 minutes. This guide will walk you through each step, making this speedy method your new go-to for fabric photo transfers.
Materials You’ll Need for a Fast Fabric Photo Transfer
Before you begin, gather these essential supplies:
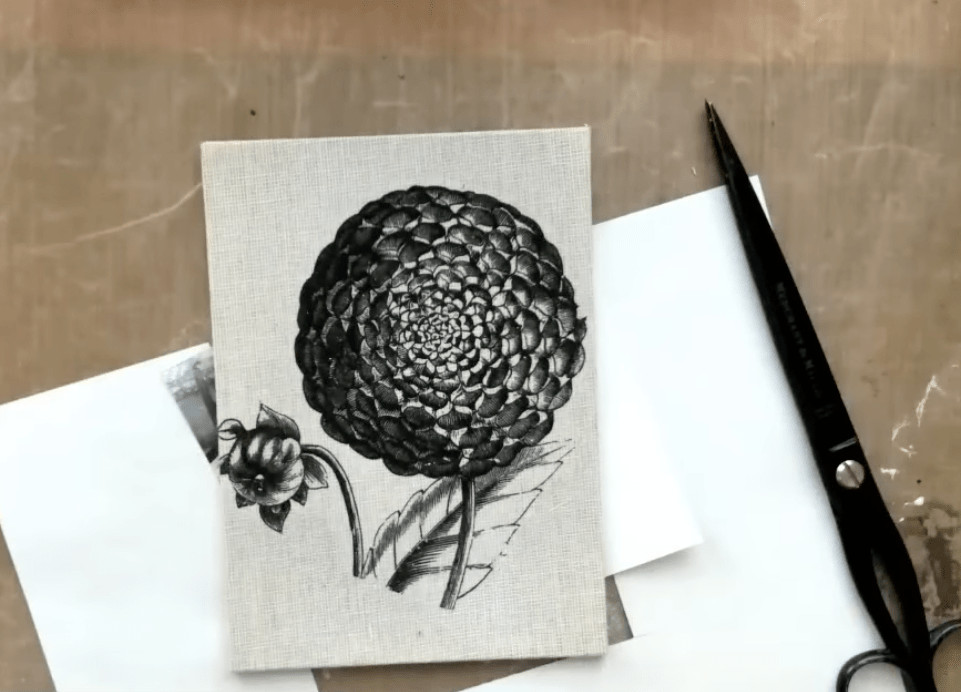
- Image Printed on Paper: Use a laser or inkjet printer to print your chosen high-contrast image.
- Scissors or Craft Knife: For precisely cutting out your image.
- Non-Stick Surface: Plastic or silicone mats work perfectly to protect your work area.
- Matte Medium: This crucial component acts as the adhesive and transfer agent.
- Fabric: Select your desired fabric – cotton, linen, or blends work well.
- Heat Gun: The key to speeding up the drying process.
- Bone Folder or Fingers: To smooth the fabric onto the image.
- Water: For soaking and removing the paper backing.
- Rag or Sponge: To gently rub away the paper.
- Magic Eraser (Optional): To remove any remaining haze.
Step-by-Step Guide to 10-Minute Photo Transfer on Fabric
Follow these simple steps to quickly and effectively transfer your photos to fabric:
1. Prepare Your Image
Begin by printing your high-contrast image using either a laser or inkjet printer. High contrast images tend to transfer more vividly. Once printed, carefully cut out your image, removing any excess paper from the edges to ensure a clean transfer.
2. Set Up Your Workspace
Place a non-stick surface, like a plastic or silicone mat, on your work area. This prevents the medium from sticking to your table and makes cleanup easier.
3. Apply Matte Medium
Apply a thin, even layer of matte medium to the front side of your printed image. Ensure you cover the entire image area for a complete transfer.
4. Adhere Fabric to Image
Carefully place your fabric face down onto the wet, medium-covered image. Make sure the fabric is aligned correctly over the image you want to transfer.
5. Smooth and Secure
Using a bone folder or your fingers, gently but firmly smooth the fabric onto the image. This step is crucial for ensuring good contact between the image and the fabric, which is essential for a clear transfer. Smooth from the center outwards to eliminate any air bubbles.
6. Speed Dry with Heat Gun
Now, use your heat gun to dry the medium. Move the heat gun evenly over the fabric in a sweeping motion for several minutes. This significantly reduces the drying time compared to air drying. You’ll notice the medium becoming less opaque as it dries.
 Close-up shot demonstrating the application of matte medium to a printed image for fabric transfer
7. Soak in Water
Submerge the fabric and image in water for about 3 minutes. This soaking process helps to loosen the paper from the transferred image, making it easier to remove.
8. Rub Away the Paper
Gently rub the top layer of paper off with your finger. Start lightly and gradually increase pressure as the paper softens.
9. Remove Paper Residue
Take a rag or sponge and carefully remove the remaining paper from the center outwards. Work gently to avoid damaging the transferred image.
10. Final Dry and Refine
As the paper pieces become smaller and more difficult to remove, use the heat gun again to dry the area. This can help in lifting off the last bits of paper. For any remaining haze, a magic eraser can be used very gently to clean up the transferred image.
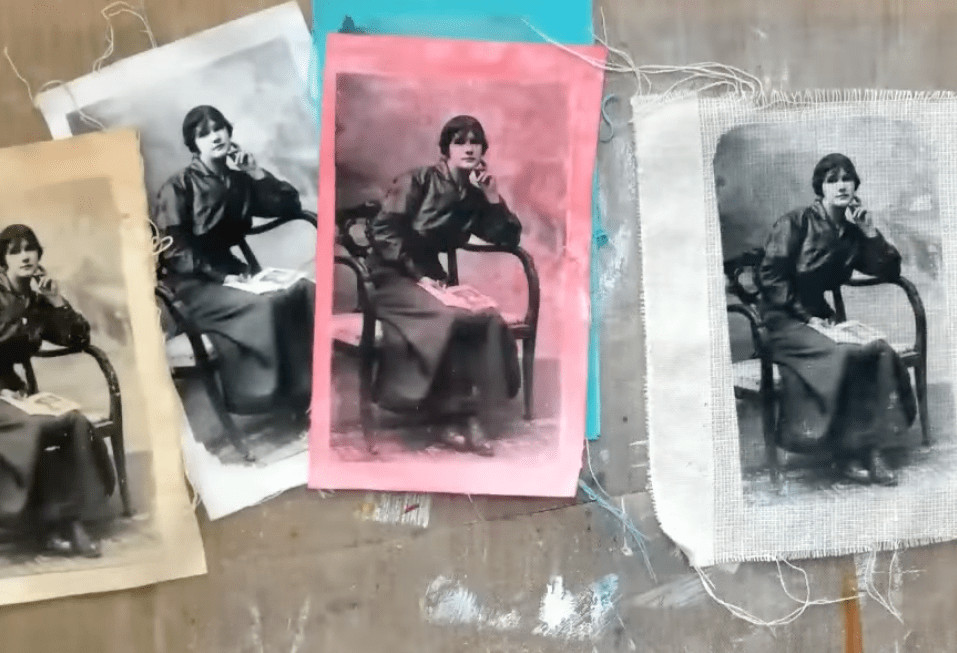 Image showcasing the process of rubbing off paper from fabric after image transfer with a heat gun method
Your Fast Fabric Photo Transfer is Complete!
With these simple steps, you can quickly and easily transfer images onto fabric in just minutes. This method is perfect for crafters looking for speedy results without compromising on quality. Experiment with different images and fabrics to explore the full potential of this fast image transfer technique. Have you tried transferring photos to material before? Share your experiences and tips!