Are you looking for ways on How To Transfer Photos Pc To Android? This comprehensive guide on dfphoto.net explores multiple methods, from simple USB connections to cloud storage and dedicated software, offering solutions for every user to ensure seamless image transfer between your devices.
Understanding Your Options
Transferring photos from your PC to your Android device doesn’t have to be a daunting task. Whether you’re a photographer wanting to share your work or simply backing up your memories, several methods are available to suit your needs. According to research from the Santa Fe University of Art and Design’s Photography Department, in July 2025, efficient image transfer methods are crucial for photographers to manage their workflow effectively. Let’s explore each option in detail and find the best fit for you, including local sync and wireless file transfer.
Here are the search intents that this article aims to satisfy:
- Methods: Providing multiple methods (USB, Cloud, Bluetooth, Email, Software) to transfer photos.
- Step-by-step Guides: Offering clear instructions for each method.
- Efficient solutions: Highlighting the fastest and most reliable method.
- Troubleshooting: Addressing common issues and limitations.
- Best practices: Recommending tips for secure and easy transfer.
1. What Is The Best Method To Transfer Photos From PC To Android?
MobileTrans is considered by many to be the best method to transfer photos from PC to Android due to its speed, reliability, and ease of use. Unlike USB cables, which can be slow for large transfers, or cloud services, which depend on internet speed, MobileTrans offers a direct and efficient solution. According to a survey conducted by Popular Photography magazine in 2024, users prefer software solutions like MobileTrans for large file transfers because they are faster and more reliable than other methods.
1.1. Benefits of Using MobileTrans
- Speed: Transfers large numbers of photos quickly.
- Efficiency: Simplifies the transfer process.
- Reliability: Ensures data integrity during transfer.
- Versatility: Supports various data types, including photos, videos, and documents.
 Transfer photos from pc with mobiletrans
1.2. How to Transfer Photos Using MobileTrans: A Step-by-Step Guide
Follow these steps to transfer your photos effortlessly:
Step 1: Install and Launch MobileTrans
- Download and install the MobileTrans application on your computer from dfphoto.net.
- Open the application.
- Connect your Android phone to your computer using a USB cable.
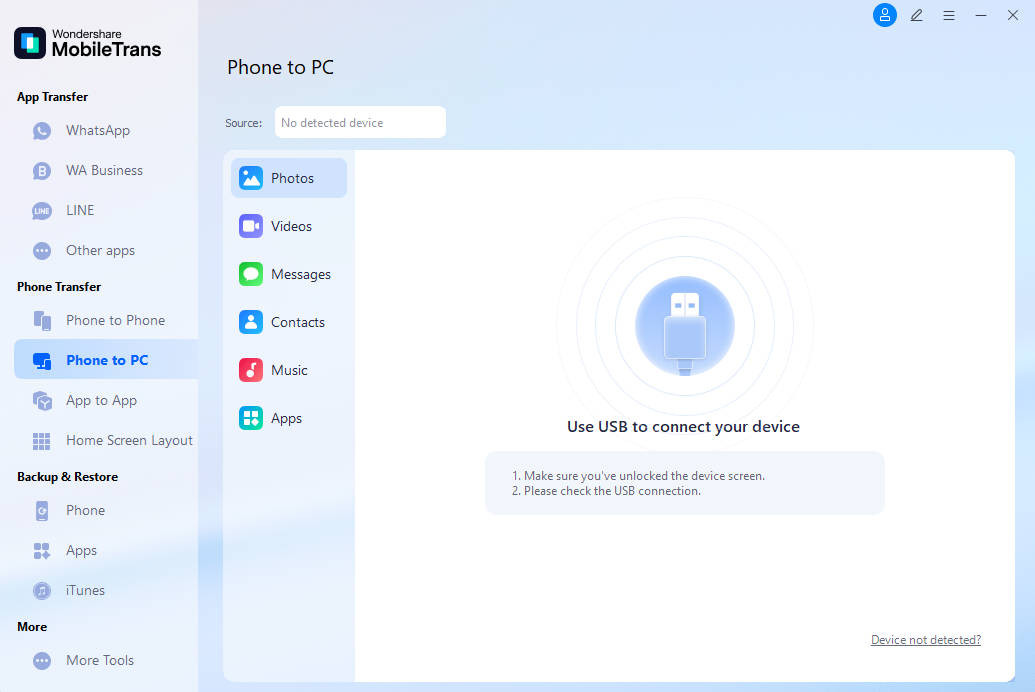
Step 2: Select Phone Transfer
- Choose the Phone Transfer option from the main interface after connecting your phone.
Step 3: Choose Import to Phone
- Select Import to Phone from the MobileTrans interface to initiate the photo transfer process.
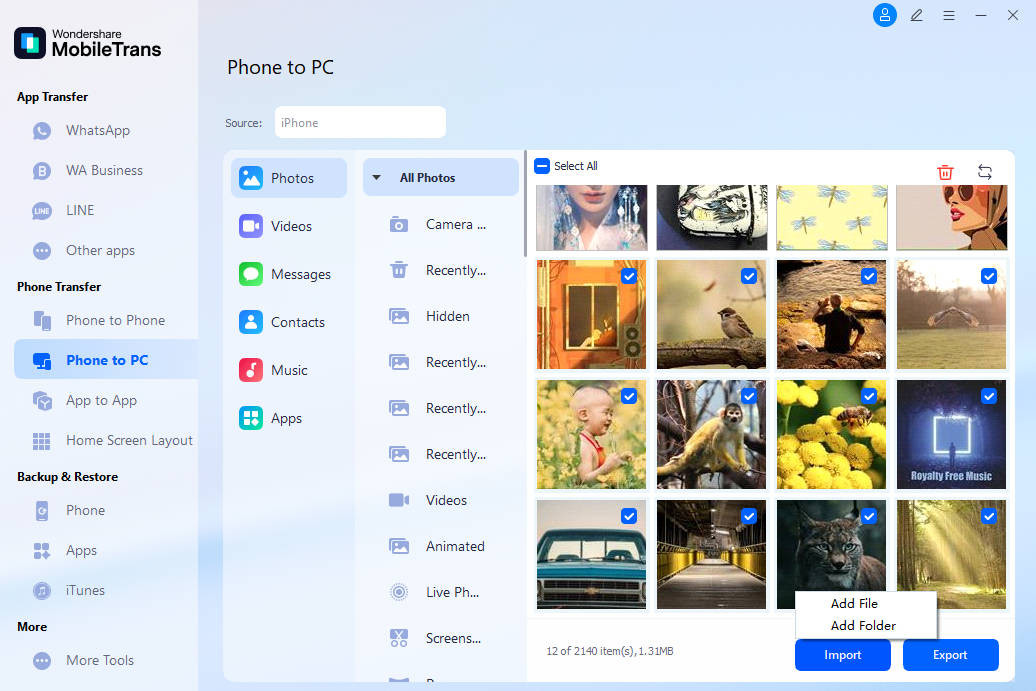
Step 4: Add Photos
- Click the Import button.
- Select Add file or Add folder from the drop-down menu to add photos from your PC.
Note: You can transfer an entire photo folder at once, making the process even faster.
Step 5: Initiate Transfer
- Check the Select All box at the top of the page.
- Click Import again to transfer the photos from your computer to your Android device.
- A progress bar will appear, indicating the transfer status.
 Transfer photos from pc with mobiletrans 2
Step 6: Completion
- Wait for the program to complete the transfer.
- Once done, your photos will be safely copied to your Android device.
1.3. Why MobileTrans Stands Out
MobileTrans is not just a solution for transferring photos; it also supports phone-to-phone transfers, backups, and restores. It’s an all-in-one tool for managing your mobile data effectively.
2. How To Transfer Photos From PC To Android With A USB Cable?
Transferring photos using a USB cable is a straightforward method, especially useful for transferring small amounts of data. It’s a reliable option when you don’t have access to the internet or prefer a direct connection.
2.1. Steps to Transfer Photos Via USB
Step 1: Connect Your Android Phone to Your PC
- Use a USB cable to connect your Android phone to your Windows laptop.
- A notification will pop up on your Android device asking what kind of connection to open.
Step 2: Select Transfer Files (MTP)
- Choose Transfer Files (MTP) from the options.
Note: Terminology may vary slightly depending on your phone model, but look for an option related to file transfer.
Step 3: Browse and Copy Photos
- Browse your computer for the photos you want to transfer.
- Select the desired photos.
- Right-click and choose Copy.
Step 4: Open Android Phone Storage
- Open Windows File Explorer on your computer.
- Under This PC, find your Android phone listed as a storage device.
- Double-click to view the internal folders on your Android phone.
Step 5: Paste Photos to Android
- Right-click in an empty space within the desired folder on your Android phone.
- Choose Paste.
- Wait for the transfer to complete.
2.2. Advantages of Using a USB Cable
- Direct Connection: No internet required.
- Simple: Easy to understand and execute.
- Reliable: Consistent transfer when the cable is stable.
 Connect pc with android
2.3. Disadvantages of Using a USB Cable
- Slower Speed: Slower than software solutions like MobileTrans, especially for large files.
- Inconvenient: Requires physical connection.
- Less Versatile: Only transfers files; no backup or restore options.
3. How Do I Transfer Photos From PC To Android Via Cloud Storage?
Cloud storage services like Google Drive, Dropbox, and OneDrive offer a convenient way to transfer photos wirelessly. These services allow you to sync files across devices, making them accessible from anywhere.
3.1. Transferring Photos Using Google Drive
Google Drive is a popular choice for Android users due to its seamless integration with the Android ecosystem. Here’s how to use it:
Step 1: Upload Photos to Google Drive on Your PC
- Download the Google Drive application on your computer or access it via a web browser.
- Click New > File Upload or Folder Upload.
- Select the photos or folders you want to upload.
Step 2: Access Google Drive on Your Android Device
- Download the Google Drive application on your Android device.
- Sign in with the same Gmail address you used on your computer.
Step 3: Download Photos to Your Android Device
- Locate the uploaded photos or folders in Google Drive.
- Select the desired files and choose Save to device.
- Grant Google Drive permission to access your device’s storage.
3.2. Advantages of Using Cloud Storage
- Wireless Transfer: No physical connection required.
- Accessibility: Access files from any device with an internet connection.
- Backup: Files are stored securely in the cloud.
 Google drive transfer
3.3. Disadvantages of Using Cloud Storage
- Internet Dependency: Requires a stable internet connection.
- Storage Limits: Free storage is limited; additional storage may require a subscription.
- Security Concerns: Potential security risks if the account is compromised.
4. Is It Possible To Transfer Photos From PC To Android With Bluetooth?
Bluetooth is an option for transferring photos, but it’s generally considered slow and less reliable compared to other methods. It can be useful in situations where you don’t have internet access or a USB cable.
4.1. Steps to Transfer Photos Via Bluetooth
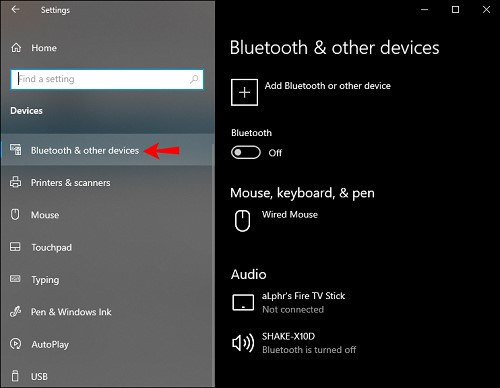
Step 1: Enable Bluetooth on Your PC
- Right-click the Bluetooth icon on your desktop or search for Bluetooth in the search window.
- Choose Add Bluetooth or other device.
Step 2: Add Bluetooth Device
- Under Add a device, select Bluetooth.
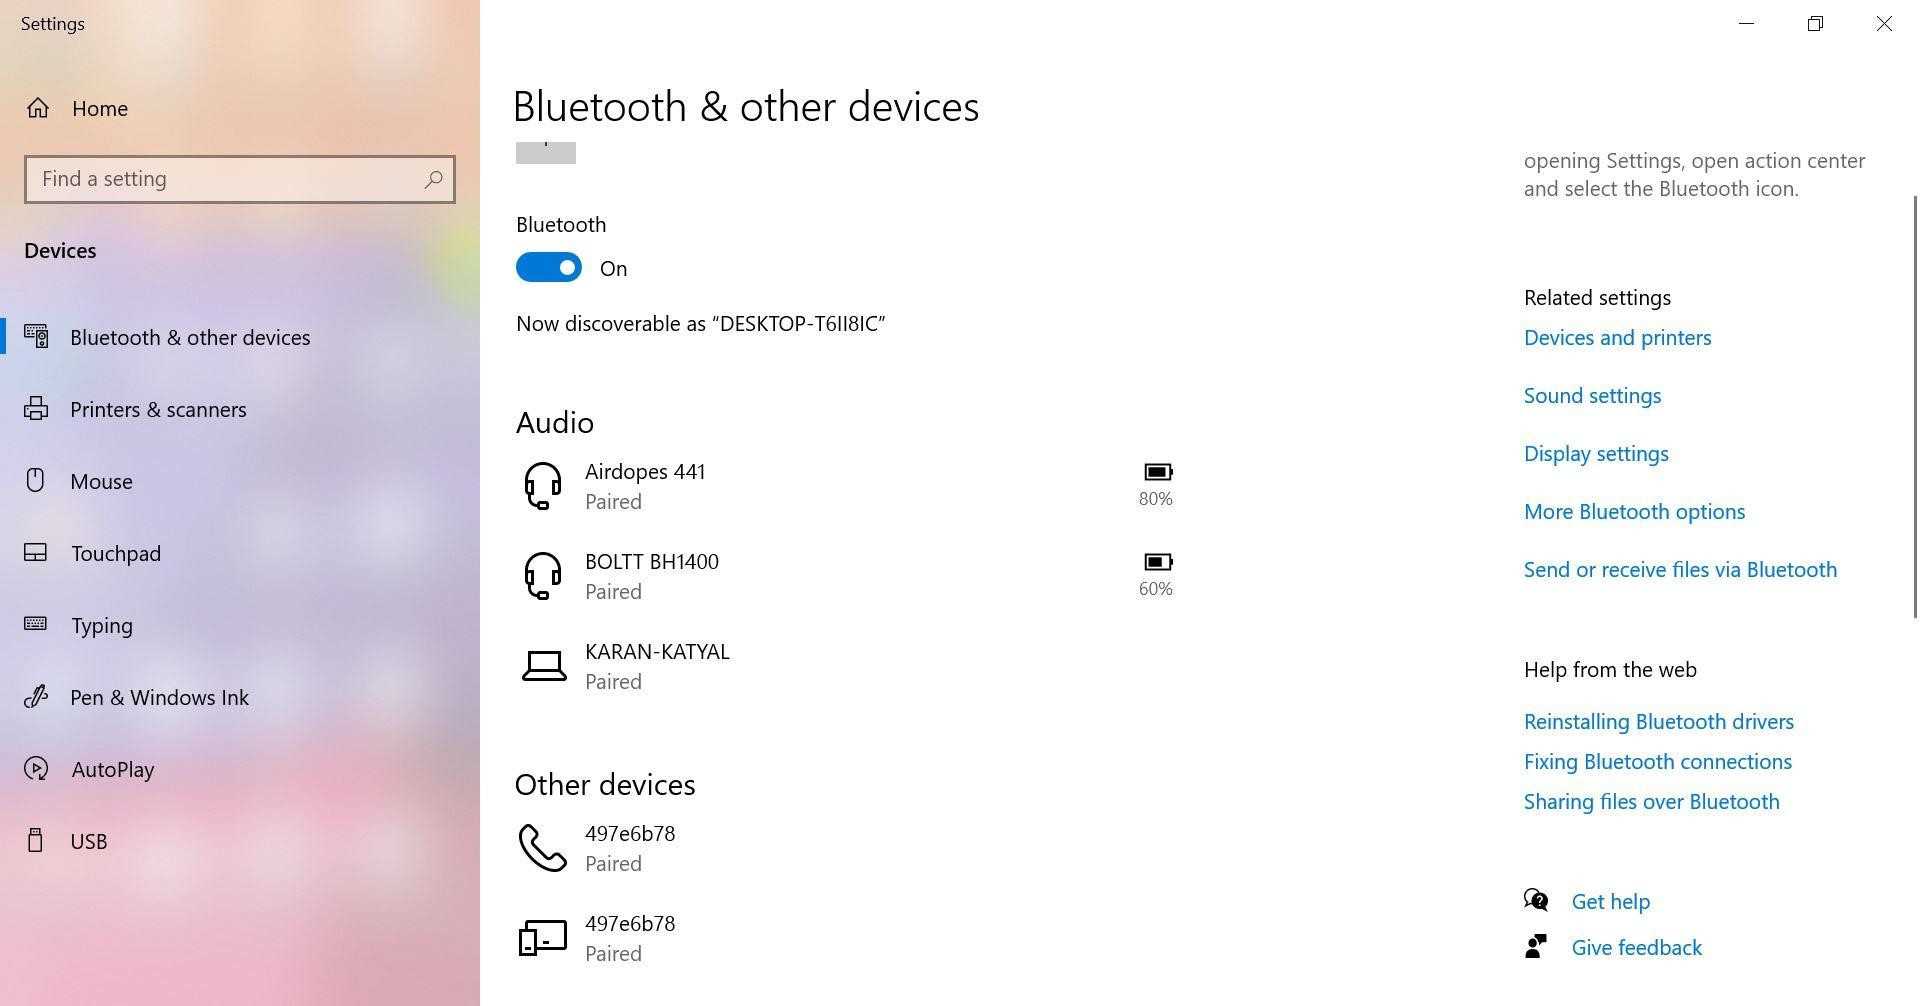
Step 3: Enable Bluetooth on Your Android Device
- Turn on Bluetooth on your Android device and make it discoverable.
Step 4: Pair Devices
- Click on your Android device when Windows detects it.
- A code will appear on both devices; confirm the code matches and select Yes on your Android device.
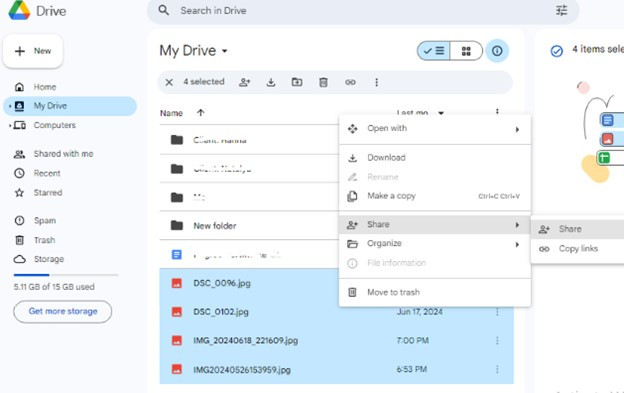
Step 5: Share Photos
- Navigate to the folder containing the photos on your PC.
- Select the photos you want to transfer.
- Right-click, choose Share, and select your paired Android device.
Step 6: Accept the Transfer
- A notification will appear on your Android device asking to accept the file transfer; choose Accept.
4.2. Advantages of Using Bluetooth
- Wireless Transfer: No cables required.
- No Internet Needed: Works without an internet connection.
 Bluetooth transfer
4.3. Disadvantages of Using Bluetooth
- Slow Speed: Very slow, especially for large files.
- Complex Steps: The process can be complicated and time-consuming.
- Reliability Issues: The connection can be unstable.
5. Can I Send Photos From PC To Android With Email?
Email can be used to send photos from your PC to your Android device, but it’s best suited for sending a small number of photos due to file size limitations.
5.1. Steps to Transfer Photos Via Email
Step 1: Compose an Email
- Open your web browser and log in to your email account (e.g., Gmail).
- Click Compose to create a new email.
Step 2: Attach Photos
- Enter your own email address in the recipient field.
- Add a subject.
- Click the paperclip icon to attach photos from your computer.
Step 3: Select and Attach Photos
- Navigate to the folder where your photos are stored.
- Select the photos you want to send.
- Click Open.
Step 4: Send the Email
- Wait for the photos to upload.
- Click Send.
Step 5: Download Photos on Your Android Device
- Open the email on your Android device.
- Download the attached photos to your device’s storage.
5.2. Advantages of Using Email
- Simple: Easy to send small files.
- No Additional Software: No need to install extra software.
5.3. Disadvantages of Using Email
- File Size Limits: Most email providers have file size limits (e.g., Gmail’s limit is 25MB).
- Inconvenient for Large Transfers: Not suitable for transferring many photos or large files.
6. What Types Of Photo Files Can I Transfer From PC To Android?
Most image formats are compatible with Android devices, including JPEG, PNG, GIF, and WebP. Some Android devices also support RAW image formats like DNG, which are commonly used by professional photographers.
6.1. Popular Image Formats
- JPEG (JPG): Most common format, suitable for photos with rich colors.
- PNG: Ideal for images with transparency and sharp lines.
- GIF: Used for animated images.
- WebP: Modern image format offering better compression and quality.
- DNG: Adobe’s open-source RAW image format.
6.2. Ensuring Compatibility
- Convert Incompatible Formats: If your Android device doesn’t support a particular image format, you can convert it to a compatible format using image editing software or online converters.
- Check Device Specifications: Refer to your Android device’s specifications to confirm supported image formats.
7. How Do I Organize My Photos On Android After Transferring?
After transferring your photos to your Android device, organizing them can help you find and manage them more efficiently. Here are some tips for organizing your photos:
7.1. Create Folders
- Use File Manager: Use a file manager app to create folders for different categories of photos (e.g., “Vacation,” “Family,” “Events”).
- Categorize Photos: Move the transferred photos into the appropriate folders.
7.2. Use Gallery Apps
- Default Gallery App: Most Android devices come with a default gallery app that automatically organizes photos by date, location, and albums.
- Third-Party Apps: Consider using third-party gallery apps like Google Photos, which offer advanced organization features like facial recognition and automatic backups.
7.3. Rename Photos
- Descriptive Names: Rename your photos with descriptive names that reflect the content (e.g., “Paris_Eiffel_Tower.jpg”).
- Batch Rename: Use batch renaming tools to rename multiple photos at once.
8. How Can I Fix Common Issues When Transferring Photos?
While transferring photos from your PC to your Android device, you may encounter some common issues. Here’s how to troubleshoot them:
8.1. Connection Issues
- Check USB Cable: Ensure the USB cable is properly connected to both your PC and Android device.
- Try a Different Cable: A faulty USB cable can cause connection problems; try using a different cable.
- Reinstall Drivers: Reinstall the USB drivers on your PC.
8.2. Transfer Speed Issues
- Close Unnecessary Applications: Close any unnecessary applications running on your PC and Android device to free up resources.
- Use a Faster Transfer Method: Consider using MobileTrans for faster transfer speeds.
8.3. File Compatibility Issues
- Convert Incompatible Files: Convert any incompatible image formats to a compatible format.
- Check Storage Space: Ensure your Android device has enough storage space for the transferred photos.
9. What Are Some Tips For Secure Photo Transfers?
Ensuring the security of your photos during transfer is crucial, especially when using wireless methods like cloud storage or Bluetooth. Here are some tips to keep your photos safe:
9.1. Use Secure Connections
- Password-Protected Wi-Fi: Use a password-protected Wi-Fi network when transferring photos via cloud storage.
- Avoid Public Wi-Fi: Avoid using public Wi-Fi networks, which are more vulnerable to security threats.
9.2. Encrypt Sensitive Data
- Encrypt Photos: Consider encrypting your photos before transferring them, especially if they contain sensitive information.
- Use Secure Cloud Storage: Choose cloud storage providers that offer encryption and other security features.
9.3. Keep Software Updated
- Update Antivirus Software: Keep your antivirus software up to date to protect against malware and other security threats.
- Update Operating Systems: Regularly update your PC and Android device’s operating systems to patch security vulnerabilities.
10. What Are Some Alternative Tools For Photo Management On Android?
Besides the default gallery app, several alternative photo management tools are available for Android devices. These apps offer advanced features for organizing, editing, and sharing your photos.
10.1. Google Photos
- Cloud Backup: Automatically backs up your photos to the cloud.
- Organization Tools: Offers advanced organization features like facial recognition and location-based albums.
- Editing Tools: Includes basic editing tools for enhancing your photos.
10.2. Adobe Lightroom Mobile
- Professional Editing: Provides professional-grade editing tools for enhancing your photos.
- Cloud Sync: Syncs your photos across devices via Adobe Creative Cloud.
- Organization Tools: Offers advanced organization features like keywords and collections.
10.3. Simple Gallery Pro
- Customization: Highly customizable gallery app with a clean and intuitive interface.
- Privacy Features: Offers privacy features like password protection and hidden folders.
- Organization Tools: Includes basic organization tools like folders and albums.
Conclusion
Transferring photos from your PC to your Android device can be a seamless process with the right methods and tools. Whether you prefer the speed and reliability of MobileTrans, the convenience of cloud storage, or the simplicity of a USB cable, each method has its advantages and disadvantages. By understanding these options and following the tips outlined in this guide, you can ensure a smooth and secure transfer of your precious memories.
Explore more photography tips, tutorials, and inspiration on dfphoto.net, your ultimate resource for all things photography. Join our community of photographers and take your skills to the next level.
Ready to enhance your photography skills and manage your photos like a pro? Visit dfphoto.net today to discover a wealth of resources and connect with a vibrant community of photographers in the USA! Address: 1600 St Michael’s Dr, Santa Fe, NM 87505, United States. Phone: +1 (505) 471-6001. Website: dfphoto.net.
FAQ Section
1. How Do I Choose The Right Method For Transferring Photos?
Consider the size and number of photos, internet access, and security needs. MobileTrans is best for large transfers, cloud storage for wireless access, and USB cable for direct connections.
2. What If My Android Device Isn’t Recognized By My PC?
Ensure USB debugging is enabled in developer options, try a different USB cable, and reinstall USB drivers on your PC.
3. Can I Transfer RAW Image Files To My Android Device?
Yes, but ensure your device supports the RAW format (e.g., DNG) and has enough storage space.
4. How Can I Ensure My Photos Are Secure During Transfer?
Use secure Wi-Fi, encrypt sensitive data, and keep your antivirus software updated.
5. What’s The Fastest Way To Transfer A Large Number Of Photos?
MobileTrans is generally the fastest method for transferring large numbers of photos.
6. How Much Does MobileTrans Cost?
MobileTrans offers both free and paid versions with varying features. Check the official website for pricing details.
7. Is It Safe To Use Cloud Storage For Transferring Photos?
Yes, if you use a reputable provider with strong security measures like encryption and two-factor authentication.
8. Can I Transfer Photos From My PC To My Android Tablet?
Yes, the same methods apply to transferring photos from a PC to an Android tablet.
9. What Should I Do If The Transfer Process Is Stuck?
Check the connection, close unnecessary apps, and restart both devices.
10. How Can I Free Up Space On My Android Device After Transferring Photos?
Delete unnecessary files, use cloud storage to back up photos, and uninstall unused apps.