Transferring photos onto fabric for quilting allows you to create personalized and memorable quilts. At dfphoto.net, we’ll explore safe and effective methods for transferring your cherished photos onto fabric, ensuring your quilt lasts for years to come, blending photography with textile art seamlessly. Let’s dive into the art of photographic quilting, unlocking ways to infuse emotion and artistry into every stitch, with a focus on preserving memories through photo quilting, fabric photo transfer, and personalized quilting projects.
1. Understanding the Essentials for Photo Transfer
Before diving into specific techniques, it’s crucial to gather the necessary tools and materials. Regardless of the method you choose, a few core items remain consistent. What materials do you need to transfer photos to fabric?
You’ll generally need a printer, fabric suitable for photo transfer, and lukewarm water. Depending on the method, additional supplies might include photo transfer paper, gel medium, or freezer paper. According to research from the Santa Fe University of Art and Design’s Photography Department, in July 2025, the quality of your print significantly impacts the final result. High-resolution images and the right type of printer are key to success. It’s the fusion of photography and quilting that makes this process so special, requiring careful attention to both the image and the fabric.
2. Method 1: Utilizing Photo Transfer Paper
Photo transfer paper is a popular choice, often used for printing images on t-shirts. It’s equally effective for transferring photos onto fabric for quilting. How do you use photo transfer paper?
This method involves purchasing photo transfer paper, selecting and printing your photo (remember to reverse the image!), transferring the image using an iron, and carefully removing the transfer paper. Make sure to select photo transfer paper compatible with your printer and fabric type. According to Popular Photography magazine, selecting the correct type of paper is 80% of the battle! This technique is perfect for those looking to integrate digital photographs directly into fabric, allowing for detailed images and vibrant colors.
2.1. Selecting the Right Photo Transfer Paper
When selecting photo transfer paper, consider your printer type (inkjet or laser) and the fabric you’ll be using. Different papers are designed for specific fabric types, such as cotton or polyester. For example, a paper designed for dark fabrics will have a different coating than one for light fabrics. Using the wrong paper can result in poor image quality or adhesion.
2.2. Preparing Your Image for Printing
Before printing, it’s essential to prepare your image properly. Use photo editing software to adjust the image’s color and brightness. Most importantly, reverse the image horizontally (mirror image) before printing. This ensures that the final image on the fabric will appear correctly. Additionally, use high-resolution photos to prevent blurriness.
2.3. Printing Your Photo
Load the photo transfer paper into your printer, ensuring it’s facing the correct direction for printing. Print your photo using the printer’s highest quality settings to achieve the best results. After printing, trim the edges of the photo, leaving a small border if desired.
2.4. Transferring the Image onto Fabric
Place a pillowcase or clean cloth on a hard surface to protect it. Place your fabric right-side up, smoothing out any wrinkles. Position the printed photo transfer paper right-side down onto the fabric, ensuring it’s centered and aligned correctly.
Using a hot, dry iron (no steam), press firmly on the transfer paper, following the manufacturer’s instructions for time and temperature. Apply even pressure and move the iron in a smooth, consistent motion.
2.5. Removing the Transfer Paper
Allow the transfer to cool completely before carefully peeling away the paper backing. Start at one corner and peel slowly and smoothly to avoid tearing the image. If the image doesn’t fully adhere to the fabric, re-iron the area with the paper still attached.
2.6. Caring for Your Transferred Image
To prolong the life of your transferred image, wash the fabric inside out in cold water. Avoid using harsh detergents or bleach. Tumble dry on low heat or hang to dry. Do not iron directly over the transferred image; instead, iron on the reverse side or place a cloth between the iron and the image.
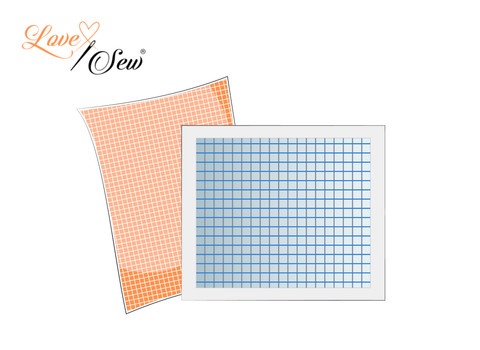 Photo Transfer Paper
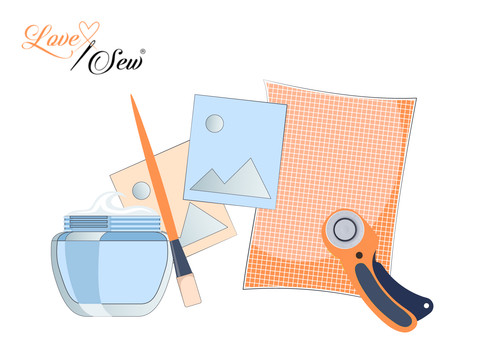
3. Method 2: Applying Gel Medium for Detailed Transfers
Gel medium is excellent for transferring photos with intricate details and a wide range of colors. However, it requires specific materials and a patient approach. What are the steps for using gel medium?
The process involves transferring your photos onto paper using a dry-toner printer, applying a thick coat of gel medium, pressing the photo onto the fabric, soaking the paper, peeling off the paper, rinsing the image, and letting the fabric dry. This method is particularly effective for achieving a vintage or textured look, blending the photo into the fabric’s fibers. It’s like painting with light and memories, creating a unique piece of art.
3.1. Selecting the Right Gel Medium
Choosing the right gel medium is crucial for successful photo transfers. Liquitex gel medium is a popular choice due to its consistency and ability to create a strong bond between the image and the fabric. Other brands like Golden and Ranger also offer excellent gel mediums suitable for photo transfers. Consider the finish you desire, such as glossy or matte, as gel mediums come in various finishes.
3.2. Printing Your Image with Dry Toner
For the gel medium method to work effectively, you need to print your image using a dry-toner printer. Inkjet prints are not suitable for this method as the ink will bleed and smear when exposed to water. Laser printers use dry toner, which adheres to the paper through heat, making it ideal for this technique. Ensure your print is clear and high-quality for the best transfer results.
3.3. Applying Gel Medium to Your Image
Using a paintbrush, apply a generous, even coat of gel medium to the front side of your printed image. Make sure to cover the entire surface, paying attention to the edges. The layer of gel medium should be thick enough to create a strong bond but not so thick that it causes the image to become distorted.
3.4. Pressing the Image Onto Fabric
Carefully place the gel medium-covered image face down onto your fabric. Smooth out any wrinkles or bubbles with your fingers or a brayer. Apply firm, even pressure to ensure good contact between the image and the fabric. Place a heavy book or object on top of the image to weigh it down while it dries. Allow the image to dry completely for at least 24 hours.
3.5. Removing the Paper Backing
Once the image is completely dry, use a spray bottle or damp cloth to wet the paper backing thoroughly. Allow the water to soak into the paper for a few minutes. Gently begin to rub away the paper backing with your fingers or a soft sponge. Be patient and work in small sections to avoid damaging the transferred image. Continue until all the paper is removed, revealing the photo transferred onto the fabric.
3.6. Sealing Your Transferred Image
After removing the paper backing, allow the fabric to dry completely. To protect and seal the transferred image, apply a thin layer of gel medium over the surface. This will help to prevent the image from fading or peeling over time. Allow the sealant to dry completely before washing or using the fabric.
 Gel Medium
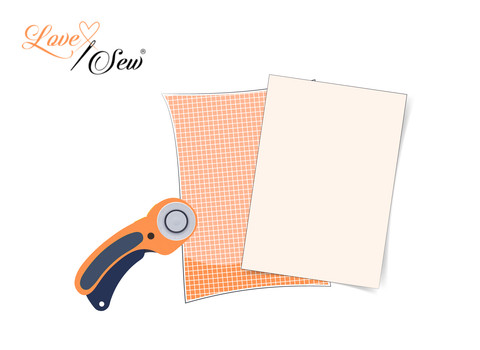
4. Method 3: Printing Directly with Freezer Paper
Freezer paper offers a unique approach by allowing you to print directly onto fabric. This method is convenient and yields excellent results, especially with a laserjet printer. What is the freezer paper method?
This technique involves preparing the fabric and freezer paper, fusing them together with an iron, and printing directly onto the fabric. The freezer paper stabilizes the fabric, preventing warping during printing. This method is ideal for creating precise and detailed photo transfers, perfect for intricate quilting projects. According to quilting expert Sarah Miller, using freezer paper is like giving your fabric a temporary backbone, allowing for crisp and clear prints.
4.1. Selecting the Right Freezer Paper
When choosing freezer paper, ensure it is specifically designed for kitchen use, as this type has a plastic coating on one side that adheres to the fabric when heated. Avoid using wax paper or parchment paper, as they will not fuse properly to the fabric and can damage your printer. Reynolds Freezer Paper is a popular and reliable choice.
4.2. Preparing Fabric and Freezer Paper
Cut both the fabric and freezer paper into standard printer paper size (8.5″ x 11″). Use a rotary cutter or scissors to ensure clean and accurate cuts. It’s crucial that both pieces are the same size to prevent jamming in the printer. A sturdy piece of cardstock can serve as a template for precise measurements.
4.3. Fusing Fabric and Freezer Paper Together
Place the fabric on an ironing board with the wrong side facing up. Position the freezer paper on top of the fabric with the plastic-coated side facing down (touching the fabric). Use a hot, dry iron to fuse the two pieces together. Press firmly and evenly, ensuring that the freezer paper adheres completely to the fabric. This creates a stable surface for printing.
4.4. Printing Directly Onto Fabric
Load the fused fabric and freezer paper into your printer, making sure the fabric side is facing up. Select the “photo” or “high-quality” print mode for the best results. Before printing your final image, run a test sheet of plain paper through the printer to confirm the correct orientation. This prevents wasting fabric and ensures the image prints on the cloth side.
4.5. Removing Freezer Paper After Printing
After printing, carefully remove the fabric from the printer. Gently peel away the freezer paper from the fabric. The freezer paper should come off easily, leaving the printed image on the fabric. If any adhesive residue remains, use a warm iron and a clean cloth to remove it.
4.6. Setting the Image on Fabric
To ensure the printed image is permanent and washable, heat-set the fabric using a hot iron. Place a clean cloth over the printed image and press firmly for several minutes. This helps the ink to bond with the fabric fibers, preventing fading or bleeding during washing. Follow the fabric and ink manufacturer’s instructions for best results.
 Freezer Paper
5. Optimizing Photos for Fabric Transfer
Regardless of the method you choose, optimizing your photos beforehand can significantly improve the final result. What are the best practices for photo optimization?
Consider factors such as image resolution, color correction, and resizing. High-resolution images ensure clarity and detail, while color correction ensures accurate color reproduction. Resizing the image to the desired dimensions prevents distortion or pixelation.
5.1. Selecting High-Resolution Images
High-resolution images are essential for achieving clear and detailed photo transfers. Images with a resolution of at least 300 DPI (dots per inch) are recommended. Low-resolution images may appear blurry or pixelated when transferred to fabric.
5.2. Adjusting Color and Brightness
Use photo editing software to adjust the color and brightness of your images. Correct any color imbalances and ensure the image is well-lit. Adjusting these factors before transferring can help to achieve more accurate and vibrant colors on the fabric.
5.3. Cropping and Resizing Images
Crop and resize your images to the desired dimensions before printing. This ensures that the image fits properly on the fabric and avoids distortion. Maintain the aspect ratio of the image to prevent stretching or squeezing.
5.4. Converting to Grayscale or Sepia
Consider converting your images to grayscale or sepia for a unique and vintage look. This can add a touch of elegance and sophistication to your quilting projects. Use photo editing software to apply these effects before transferring the images to fabric.
5.5. Adding Text or Graphics
Enhance your photo transfers by adding text or graphics to your images. Use photo editing software to incorporate personalized messages, quotes, or decorative elements. This can make your quilting projects even more special and meaningful.
5.6. Creating Photo Collages
Create photo collages by combining multiple images into a single design. This allows you to tell a story or showcase a variety of memories in one quilting project. Use photo editing software or online collage makers to create unique and visually appealing collages.
6. Choosing the Right Fabric
The type of fabric you choose can significantly impact the quality and durability of your photo transfer. What fabrics work best for photo transfer?
Solid linens, cotton blends, and canvas fabrics are generally recommended. Avoid stretchy or loosely woven fabrics, as they can distort the image during transfer. Consider the fabric’s color and texture, as they can affect the final appearance of the photo.
6.1. Cotton Fabrics
Cotton fabrics are a popular choice for photo transfers due to their affordability, versatility, and ease of use. They are available in a variety of weights and weaves, making them suitable for different quilting projects. Look for 100% cotton fabrics with a tight weave for the best results.
6.2. Linen Fabrics
Linen fabrics offer a unique texture and natural look that can enhance your photo transfers. They are durable and absorbent, making them a good choice for quilts that will be washed frequently. Linen fabrics can be more expensive than cotton, but their distinctive appearance is worth the investment.
6.3. Canvas Fabrics
Canvas fabrics are sturdy and durable, making them ideal for photo transfers that require a robust base. They are available in different weights and textures, providing a variety of options for your quilting projects. Canvas fabrics can be more challenging to work with than cotton or linen, but their durability makes them a worthwhile choice.
6.4. Blended Fabrics
Blended fabrics, such as cotton-polyester blends, offer a combination of the benefits of both materials. They are wrinkle-resistant, durable, and easy to care for, making them a practical choice for photo transfers. Look for blends with a high percentage of cotton for the best results.
6.5. Fabric Preparation
Before transferring photos to fabric, it’s essential to prepare the fabric properly. Wash and dry the fabric to remove any sizing or finishes that may interfere with the transfer process. Iron the fabric to remove any wrinkles or creases. This ensures a smooth and even surface for transferring your photos.
6.6. Testing Fabric Compatibility
Before transferring photos to a large piece of fabric, test the compatibility of the fabric with your chosen method. Transfer a small image to a scrap piece of fabric and evaluate the results. This helps you to identify any potential issues and make adjustments before committing to the final project.
7. Troubleshooting Common Issues
Photo transfers don’t always go as planned. Knowing how to troubleshoot common issues can save you time and frustration. What are some common problems and how can you fix them?
Problems like blurry images, uneven transfers, or fading colors can often be resolved with simple adjustments to your technique or materials. Patience and experimentation are key to achieving the best results.
7.1. Blurry Images
Blurry images can be caused by low-resolution photos, incorrect printer settings, or movement during the transfer process. Ensure you are using high-resolution images and select the “photo” or “high-quality” print mode on your printer. Keep the fabric and transfer paper stable during the transfer process to prevent movement.
7.2. Uneven Transfers
Uneven transfers can be caused by uneven pressure during ironing, incorrect temperature settings, or insufficient gel medium application. Apply even pressure and maintain a consistent temperature throughout the transfer process. Ensure you are using enough gel medium to create a strong bond between the image and the fabric.
7.3. Fading Colors
Fading colors can be caused by using low-quality inks, washing the fabric with harsh detergents, or exposing the fabric to direct sunlight. Use high-quality inks that are designed for fabric printing. Wash the fabric inside out in cold water with mild detergent. Avoid exposing the fabric to direct sunlight for extended periods.
7.4. Peeling or Cracking
Peeling or cracking can be caused by using the wrong type of transfer paper, applying too much heat, or not sealing the image properly. Select the appropriate transfer paper for your fabric type and follow the manufacturer’s instructions for heat settings. Seal the transferred image with a thin layer of gel medium to protect it from peeling or cracking.
7.5. Paper Residue
Paper residue can be caused by not soaking the paper thoroughly enough during the gel medium method or by rubbing too hard during paper removal. Ensure you are soaking the paper completely and allowing it to absorb the water before attempting to remove it. Use gentle rubbing motions to avoid leaving paper residue on the fabric.
7.6. Image Distortion
Image distortion can be caused by stretching or warping the fabric during the transfer process. Use a stable and non-stretch fabric for your photo transfers. Avoid pulling or stretching the fabric during ironing or gel medium application.
8. Preserving Your Photo Quilts
Once you’ve created your photo quilt, it’s essential to care for it properly to ensure it lasts for generations. How do you preserve photo quilts?
Proper washing, drying, and storage techniques can help protect your quilt from damage and fading. Consider displaying your quilt in a low-light area to prevent color degradation.
8.1. Washing Instructions
Wash your photo quilt inside out in cold water with a mild detergent. Avoid using bleach or harsh chemicals. Hand washing is recommended for delicate quilts. If using a washing machine, select the gentle cycle.
8.2. Drying Instructions
Tumble dry your photo quilt on low heat or hang it to dry. Avoid using high heat, as it can damage the transferred images. If hanging to dry, avoid direct sunlight, which can cause fading.
8.3. Storage Tips
Store your photo quilt in a cool, dry place away from direct sunlight. Fold the quilt carefully and place it in a breathable cotton bag or acid-free storage box. Avoid storing the quilt in plastic bags, as they can trap moisture and cause mildew.
8.4. Displaying Your Quilt
Display your photo quilt in a low-light area to prevent color fading. Avoid displaying the quilt in direct sunlight or near sources of heat. Consider using a quilt hanger or display rack to showcase your quilt without causing damage.
8.5. Repairing Your Quilt
Repair any damage to your photo quilt promptly to prevent further deterioration. Mend tears or holes with matching fabric and thread. Replace any damaged binding or edging. Consult with a professional quilt restorer for more extensive repairs.
8.6. Archiving Your Quilt
Document your photo quilt by taking detailed photographs and recording information about its creation. Include the date of completion, materials used, and any special stories or memories associated with the quilt. This documentation can be invaluable for future generations.
9. Exploring Creative Applications
Transferring photos to fabric opens up a world of creative possibilities beyond traditional quilts. What are some other creative applications?
Consider using photo-transferred fabric for creating personalized pillows, tote bags, wall hangings, or even clothing. The possibilities are endless, limited only by your imagination. According to designer Emily Carter, “Photo transfer allows you to wear your memories, transforming everyday items into cherished keepsakes.”
9.1. Personalized Pillows
Create personalized pillows by transferring photos to fabric and sewing them into pillow covers. These make great gifts or additions to your home decor. Use different fabrics and embellishments to create unique and eye-catching designs.
9.2. Custom Tote Bags
Design custom tote bags by transferring photos to fabric and sewing them into sturdy and stylish bags. These are perfect for carrying groceries, books, or everyday essentials. Add pockets, straps, and other features to customize your tote bags to your specific needs.
9.3. Unique Wall Hangings
Create unique wall hangings by transferring photos to fabric and mounting them on wooden frames or canvases. These make stunning focal points for any room. Experiment with different layouts, sizes, and textures to create one-of-a-kind wall art.
9.4. Personalized Clothing
Personalize clothing by transferring photos to fabric and incorporating them into your designs. Add photo patches to jackets, t-shirts, or jeans for a unique and personal touch. Use fabric paint, embroidery, and other embellishments to enhance your designs.
9.5. Memory Albums
Create memory albums by transferring photos to fabric and binding them into book form. These make cherished keepsakes for special occasions or as a way to preserve family history. Add handwritten captions, embellishments, and other personal touches to make your memory albums even more special.
9.6. Fabric Coasters
Design custom fabric coasters by transferring photos to fabric and layering them with batting and backing. These are perfect for protecting furniture from scratches and spills while adding a personalized touch to your home decor. Experiment with different shapes, sizes, and patterns to create unique and functional coasters.
10. Where to Find Inspiration and Supplies
Ready to embark on your photo quilting journey? Knowing where to find inspiration and supplies is essential. Where can you find inspiration and supplies?
Websites like dfphoto.net offer a wealth of tutorials, tips, and inspiration for photo quilting projects. Local craft stores and online retailers provide a wide range of fabrics, transfer papers, and other supplies. Check out our catalog at dfphoto.net for more inspiration.
10.1. Online Tutorials
Explore online tutorials for step-by-step instructions and creative ideas for photo quilting projects. Websites like dfphoto.net offer a wealth of resources for beginners and experienced quilters alike. Look for tutorials that match your skill level and interests.
10.2. Local Craft Stores
Visit local craft stores for a wide selection of fabrics, transfer papers, and other supplies. Support local businesses and get personalized advice from knowledgeable staff. Attend workshops and classes to learn new techniques and connect with other quilters. Address: 1600 St Michael’s Dr, Santa Fe, NM 87505, United States. Phone: +1 (505) 471-6001. Website: dfphoto.net.
10.3. Online Retailers
Shop online retailers for a vast selection of fabrics, transfer papers, and other supplies at competitive prices. Take advantage of sales, discounts, and free shipping offers. Read customer reviews to find the best products for your needs.
10.4. Quilting Magazines
Subscribe to quilting magazines for inspiration, patterns, and techniques. Stay up-to-date on the latest trends and innovations in the quilting world. Discover new designers and artists and learn from their expertise.
10.5. Social Media
Connect with other quilters on social media platforms like Instagram, Pinterest, and Facebook. Share your projects, ask questions, and get feedback from a supportive community. Follow your favorite quilting designers and brands for inspiration and updates.
10.6. Quilting Retreats
Attend quilting retreats for immersive learning experiences and opportunities to connect with other quilters. Learn from experienced instructors and work on projects in a relaxed and supportive environment. Explore new destinations and immerse yourself in the world of quilting.
Transferring photos onto fabric for quilting is a rewarding way to personalize your creations and preserve cherished memories. Whether you choose photo transfer paper, gel medium, or freezer paper, the possibilities are endless. Visit dfphoto.net for more inspiration and resources to help you on your quilting journey.
FAQ: How To Transfer Photos Onto Fabric For Quilting
1. What is the best method for transferring photos onto fabric for quilting?
The best method depends on the desired look and the materials available. Photo transfer paper is quick and easy, gel medium offers detailed transfers, and freezer paper allows for direct printing onto fabric.
2. Can I use any type of fabric for photo transfer?
Solid linens, cotton blends, and canvas fabrics generally work best. Avoid stretchy or loosely woven fabrics.
3. Do I need a special printer for photo transfer?
A dry-toner printer is recommended for the gel medium method. Laserjet printers work well with freezer paper. Photo transfer paper is compatible with most inkjet printers.
4. How do I prevent the image from fading after transferring it to fabric?
Use high-quality inks, wash the fabric inside out in cold water, and avoid exposing it to direct sunlight. Sealing the image with a thin layer of gel medium can also help.
5. What should I do if the image is blurry after transferring it?
Use a high-resolution photo, ensure the printer settings are correct, and keep the fabric stable during the transfer process.
6. How do I remove paper residue after using the gel medium method?
Soak the paper thoroughly and rub gently in circular motions. Rinse the fabric with running water to remove any remaining crumbs.
7. Can I wash a quilt with photo-transferred fabric?
Yes, but wash it inside out in cold water with a mild detergent. Avoid using bleach or harsh chemicals. Tumble dry on low heat or hang to dry.
8. How do I store a quilt with photo-transferred fabric?
Store it in a cool, dry place away from direct sunlight. Fold the quilt carefully and place it in a breathable cotton bag or acid-free storage box.
9. What other creative projects can I do with photo-transferred fabric?
You can create personalized pillows, tote bags, wall hangings, clothing, and memory albums.
10. Where can I find inspiration and supplies for photo quilting?
Websites like dfphoto.net, local craft stores, and online retailers offer a wealth of resources. Also, check out our catalog at dfphoto.net for more inspiration.
Explore the world of photography and quilting with dfphoto.net. Discover inspiring images, expert tips, and a vibrant community of photography enthusiasts. Start your creative journey today!