In today’s digital age, our phones have become powerful cameras, capturing countless precious moments. Whether it’s breathtaking landscapes or cherished family gatherings, these photos hold immense value. However, managing these ever-growing photo libraries directly on our phones can become cumbersome. You might want to back them up, free up phone storage, or simply view them on a larger screen. So, the question arises: How To Transfer Photos From Phone To Laptop Wirelessly?
While connecting your phone to your laptop with a USB cable is a traditional method, wireless options offer greater convenience and flexibility. This article dives into the best wireless methods to transfer photos from your phone to your laptop, ensuring your precious memories are safely stored and easily accessible without the hassle of cables. We’ll explore user-friendly and secure techniques to transfer your photos without compromising image quality.
Recommended Reading: Discover secure methods to transfer videos from Android and iPhone to your computer.
Part 1: Transfer Photos Wirelessly Using Cloud Services like iCloud
Cloud services provide a seamless way to transfer photos from your phone to your laptop wirelessly. iCloud, specifically designed for Apple users, is a popular and efficient option. It offers automatic syncing capabilities, ensuring your photos are readily available across all your Apple devices and accessible on your Windows laptop.
Apple provides 5GB of free iCloud storage, which might be sufficient for basic photo syncing. For larger photo libraries, upgrading to iCloud+ provides more storage options.
Transferring Photos from iPhone to Mac Wirelessly with iCloud
For users within the Apple ecosystem, transferring photos from iPhone to Mac using iCloud is incredibly straightforward.
- Enable iCloud Photos on your iPhone: Navigate to Settings on your iPhone, tap on your Apple ID profile at the top, and then select iCloud.
- Turn on iCloud Photos: Within the iCloud settings, find and toggle Photos to the ON position.
 Enable iCloud Photos on iPhone
Once iCloud Photos is enabled, your iPhone photos will automatically sync to iCloud and become accessible on your Mac. To access them on your Mac:
- Open the Photos app on your Mac.
- Ensure you are signed in with the same Apple ID as your iPhone.
- Your photos will automatically download and appear in the Photos app on your Mac.
Transferring Photos from iPhone to Windows Laptop Wirelessly with iCloud for Windows
If you’re using a Windows laptop, you can still leverage the power of iCloud to wirelessly transfer your iPhone photos.
- Enable iCloud Photos on your iPhone: Follow steps 1 & 2 from the “iPhone to Mac” section above to enable iCloud Photos on your iPhone.
- Download and Install iCloud for Windows: On your Windows laptop, download the iCloud for Windows application from the official Apple website or the Microsoft Store.
- Sign in to iCloud for Windows: Open iCloud for Windows and sign in using your Apple ID and password.
- Select Photos: In the iCloud for Windows interface, ensure that the Photos option is checked. You can also change the download location for your iCloud photos on your PC by clicking “Options” next to Photos.
- Access Photos: Your iCloud photos will now be synced to your Windows laptop. You can access them through File Explorer in the iCloud Photos folder, typically located under “This PC.”
Important Note: Keep in mind that using cellular data for iCloud sync can consume your data allowance if you are not connected to Wi-Fi. Also, the syncing speed depends on your internet connection and the size of your photo library. For large libraries, initial syncing might take some time. It’s also worth checking if any photos are hidden on your iPhone if you can’t find them in iCloud. Learn how to find hidden photos on your iPhone.
Part 2: Wireless Photo Transfer via Bluetooth
Bluetooth offers another wireless way to transfer photos from your phone to your laptop, particularly useful for transferring a small number of images. Bluetooth is generally slower than Wi-Fi, making it less ideal for large photo libraries, but it can be convenient for occasional transfers.
Steps to Transfer Photos via Bluetooth
- Enable Bluetooth on both iPhone and Laptop:
- On iPhone: Go to Settings > Bluetooth and toggle Bluetooth to ON. Make sure your device is discoverable.
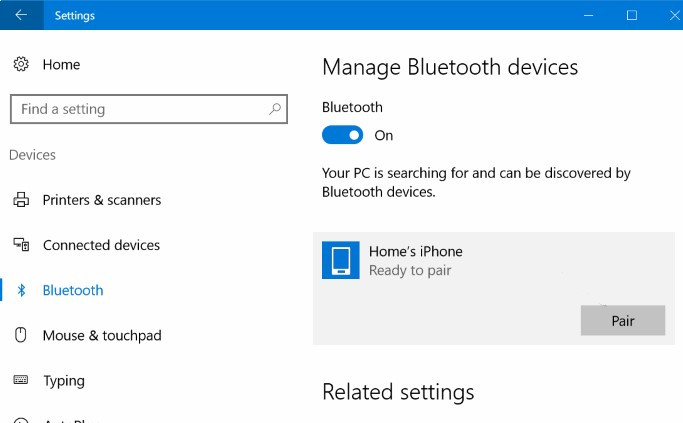
- On Laptop (Windows): Click the Start button, then Settings > Devices > Bluetooth & other devices. Turn Bluetooth ON and ensure your laptop is discoverable.
- Pair your iPhone and Laptop:
- On your iPhone: In the Bluetooth settings, your laptop’s name should appear under “Other Devices.” Tap on your laptop’s name.
- On your Laptop: You might receive a pairing request. Confirm the pairing request on both devices.
- Send Photos via Bluetooth from iPhone:
- Open the Photos app on your iPhone and select the photos you wish to transfer.
- Tap the Share icon (usually a square with an arrow pointing upwards).
- In the share sheet, scroll through the options and tap Bluetooth.
- Choose your laptop’s name from the list of Bluetooth devices.
- Receive Photos on your Laptop:
- Your laptop should receive a notification asking to accept the incoming file transfer. Accept the transfer.
- The photos will be saved in the default Bluetooth transfer folder on your laptop (usually in your “Downloads” folder or “Bluetooth Exchange Folder”).
Enable iCloud Photos on iPhone
Bluetooth is suitable for transferring a few photos occasionally. However, for larger batches, the process can become tedious due to the slower transfer speed and the need to manually select and send photos individually (or in small groups).
Part 3: Emailing Photos Wirelessly
Email provides a simple, albeit less efficient, method for wirelessly transferring photos from your phone to your laptop, especially for sending a handful of pictures. Most email providers have file size limits, making this method impractical for transferring large numbers of high-resolution photos or videos.
Steps to Email Photos from iPhone to Laptop
- Select Photos on your iPhone: Open the Photos app and choose the photos you want to send.
- Share via Email: Tap the Share icon, and select Mail (or your preferred email app).
- Compose Email: Enter your own email address (or an email address you can access on your laptop) in the “To” field. You can add a subject if you wish.
- Send Email: Tap the Send button.
- Download Photos on your Laptop:
- Open your email account in a web browser or email client on your laptop.
- Locate the email you sent from your phone.
- Download the attached photos to your laptop. You may need to click “Download All Attachments” if you sent multiple photos.
Emailing is straightforward for sending a few photos. However, attaching and downloading numerous high-resolution images can be time-consuming and may hit email attachment size limits.
Bonus Tip: Consider a Wired Transfer with MobileTrans for Large Photo Libraries
While this article focuses on wireless methods, for transferring very large photo libraries or for users seeking the fastest and most reliable transfer, a wired connection using software like MobileTrans is highly recommended.
MobileTrans provides a robust solution for transferring various types of data, including photos, between phones, computers, and tablets. While it utilizes a USB cable for connection, it simplifies the transfer process and offers several advantages:
- Versatile Data Transfer: Transfer photos, videos, contacts, messages, and more between iPhones, Android phones, Macs, and Windows PCs.
- Selective Transfer: Choose specific photos or albums to transfer, giving you control over what is moved.
- User-Friendly Interface: MobileTrans guides you through the transfer process with clear on-screen instructions.
- Preserves Original Quality: Transfers photos without compression, maintaining 100% original image quality.
How to Transfer Photos Using MobileTrans (Wired)
- Connect iPhone to Laptop: Connect your iPhone to your laptop using a USB cable. Ensure your phone is unlocked and trust the computer if prompted.
- Launch MobileTrans and Select “Phone Transfer”: Open MobileTrans on your laptop and choose the Phone Transfer module. Then, select Export to Computer.
 Export photos to computer with MobileTrans
- Select Photos to Transfer: MobileTrans will detect your iPhone and display different data categories. Select Photos and choose the specific albums or photos you want to transfer. Click Start.
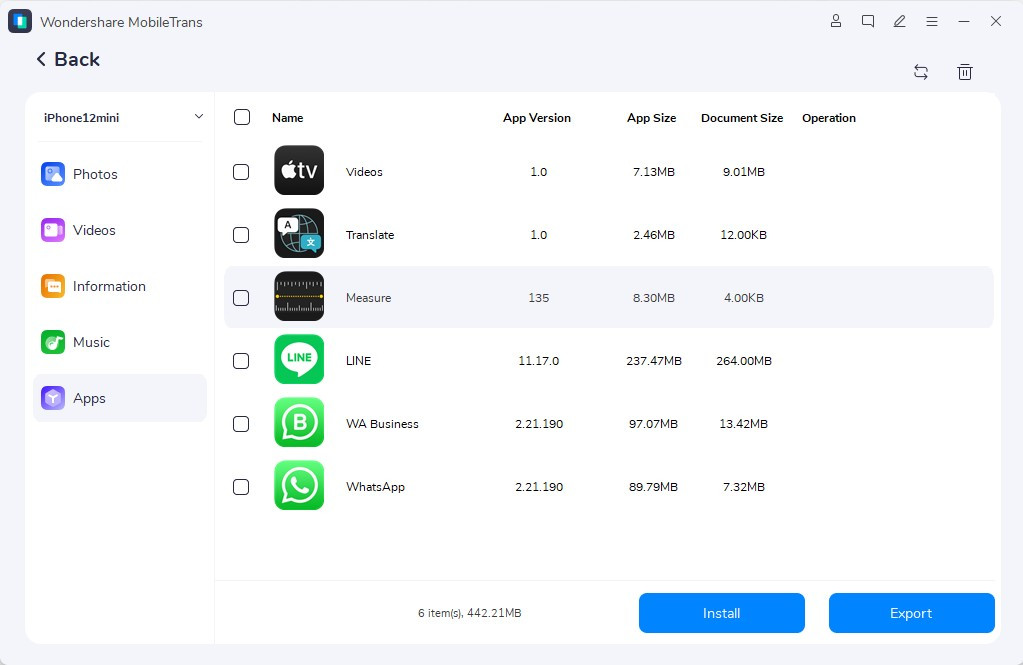 Select photos to export with MobileTrans
- Wait for Transfer Completion: MobileTrans will transfer your selected photos to your laptop. Keep the connection stable during the process. Once complete, you’ll see a confirmation message.
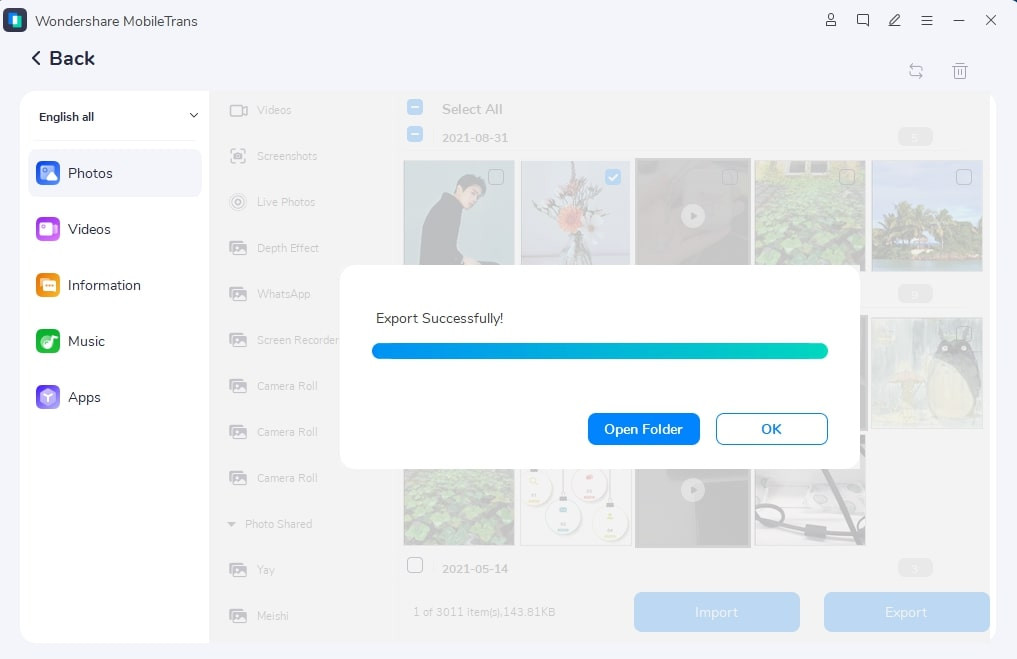 Photo transfer successful with MobileTrans
Wrap Up: Choosing the Right Wireless Photo Transfer Method
This article has explored several effective wireless methods to transfer photos from your phone to your laptop.
- iCloud/Cloud Services: Ideal for Apple users for automatic syncing and accessibility across devices. Best for ongoing syncing and accessing photos on multiple devices.
- Bluetooth: Convenient for transferring a small number of photos occasionally when speed is not a priority.
- Email: Suitable for sending a few photos quickly, but limited by attachment size and less efficient for large transfers.
For users needing to transfer large photo libraries quickly and reliably, especially for backup purposes, consider the speed and efficiency of a wired solution like MobileTrans. While not wireless, it offers a robust and user-friendly alternative for managing your valuable photo memories.
Explore the full capabilities of the MobileTrans tool on our website to discover how it can simplify your data transfer needs.
Explore More:
##### How to Transfer MP3 to iPhone: 7 Quick and Easy Methods
##### How to Transfer Music from iPhone Android: 5 Step-by-Step Guides
##### How To Transfer Files From iPhone To Mac
##### How to Copy Contacts from iPhone to Huawei | 5 Efficient Guides
 Navkiran Dhaliwal
Navkiran Dhaliwal
Staff Editor