Transferring photos from your PC to your iPhone can seem tricky, but it’s actually quite straightforward once you know the right methods. Whether you want to back up precious memories, add images for creative projects, or simply enjoy your photos on the go, this guide will walk you through various ways to seamlessly transfer your photos from your PC computer to your iPhone.
Method 1: Using iTunes or Finder for Photo Syncing
For a long time, iTunes was the go-to method for managing and syncing content between your PC and iPhone. While iTunes is no longer the primary tool on macOS (replaced by Finder in newer versions), it remains a viable option for Windows users and older macOS versions. Here’s how to use iTunes or Finder to sync photos:
- Install or Open iTunes/Finder: If you are using a Windows PC, ensure you have the latest version of iTunes installed. Mac users on macOS Catalina or later can use Finder.
- Connect Your iPhone to Your PC: Use a USB cable to connect your iPhone to your computer. Unlock your iPhone and tap “Trust This Computer” if prompted.
- Access Your iPhone in iTunes/Finder:
- iTunes (Windows & older macOS): Your iPhone icon will appear in the top left corner of the iTunes window. Click on it.
- Finder (macOS Catalina and later): Your iPhone will appear in the sidebar under “Locations”. Click on it.
- Navigate to the Photos Sync Options: In iTunes or Finder, find and click on the “Photos” tab (it might be under “Summary” in Finder, then look for “Photos”).
- Configure Photo Syncing:
- Check the box next to “Sync Photos.”
- Choose to sync photos from either “All folders” or “Selected folders.”
- If you select “Selected folders,” choose the specific folders on your PC that contain the photos you want to transfer. You can organize your photos into folders on your PC to easily manage albums on your iPhone.
- Apply and Sync: Click “Apply” in iTunes or “Sync” in Finder. This will start the photo syncing process. Wait for the sync to complete.
Important Considerations for iTunes/Finder Sync:
- One-Way Sync: Photo syncing via iTunes or Finder is primarily a one-way process from your PC to your iPhone. Changes made to albums on your iPhone synced this way will not be reflected back on your PC.
- Photo App, Not Camera Roll: Photos synced via iTunes/Finder will appear in the “Photos” app on your iPhone, but they will be placed in albums, not directly in your “Camera Roll” (now called “Recents” in newer iOS versions).
- Replacing Existing Synced Photos: The next time you sync, any new photos in the selected folders on your PC will be added to your iPhone. If you remove photos from these folders on your PC and sync again, those photos will also be removed from your iPhone albums created via syncing.
Method 2: Utilizing iCloud Photos for Seamless Transfer
iCloud Photos offers a more flexible and wireless way to transfer photos and keep them synced across all your Apple devices, including your iPhone and PC. To use iCloud Photos for transferring photos from your PC to your iPhone, follow these steps:
- Set Up iCloud for Windows on Your PC: Download and install iCloud for Windows from the Microsoft Store.
- Sign in to iCloud for Windows: Open iCloud for Windows and sign in with your Apple ID and password – the same Apple ID you use on your iPhone.
- Enable iCloud Photos: In iCloud for Windows, check the box next to “Photos.” Click “Options…” next to Photos.
- Choose iCloud Photo Library and Upload Location: In the Photos Options window, ensure “iCloud Photo Library” is checked. You can change the “iCloud Photos Library” location on your PC if desired, but the default location is usually fine.
- Copy Photos to the iCloud Photos Upload Folder: Open File Explorer on your PC and navigate to the “iCloud Photos” folder (usually found under Quick Access or in your user folder). Inside, you will find an “Uploads” folder. Copy the photos you want to transfer to your iPhone into this “Uploads” folder.
- Wait for iCloud to Sync: iCloud for Windows will automatically upload the photos from the “Uploads” folder to your iCloud Photo Library. This process may take some time depending on the number and size of photos and your internet connection speed.
- Access Photos on Your iPhone: On your iPhone, ensure that iCloud Photos is enabled (Settings > Photos > iCloud Photos). Once synced, the photos you uploaded from your PC will automatically appear in your Photos app on your iPhone.
Advantages of Using iCloud Photos:
- Wireless Transfer: No need for cables; transfers happen wirelessly over the internet.
- Automatic Syncing: Photos are automatically synced across all devices logged in with the same Apple ID and iCloud Photos enabled.
- Two-Way Sync: Changes made on one device (like deleting or editing photos) will be reflected on other devices.
- Accessibility: Access your photos on any device with iCloud access, including Macs, iPads, and even through iCloud.com.
Considerations for iCloud Photos:
- iCloud Storage: iCloud Photos uses your iCloud storage. If you have a large photo library, you might need to upgrade your iCloud storage plan.
- Internet Dependency: Requires a stable internet connection for uploading and downloading photos.
Method 3: Emailing Photos – Best for Small Transfers
For transferring just a few photos, especially single images, emailing them to yourself is a quick and simple method that doesn’t require any special software or syncing.
- Compose an Email: On your PC, start a new email in your preferred email client or webmail service.
- Attach Photos: Attach the photos you want to transfer to the email. Be mindful of attachment size limits, which can vary depending on your email provider. For a large number of photos, or large files, this method is not ideal.
- Send to Yourself: Address the email to your own email address – the one you access on your iPhone.
- Open Email on iPhone: Open the Mail app on your iPhone and find the email you just sent.
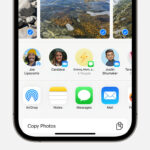
- Save Photos: Open the email and tap on each attached photo. Tap the share icon (usually a box with an arrow pointing upwards) and select “Save Image.” This will save the photo to your Photos app on your iPhone.
Pros of Emailing Photos:
- Simple and Quick for a Few Photos: Very easy for transferring a small number of images.
- No Software Required: Uses standard email functionality.
Cons of Emailing Photos:
- Not Efficient for Large Transfers: Time-consuming and impractical for transferring many photos.
- Image Compression: Email providers might compress images, potentially reducing quality.
- One Photo at a Time Saving: You typically need to save each photo individually.
Method 4: Third-Party Apps for Photo Transfer
Several third-party apps are designed to simplify photo transfers between PCs and iPhones, often offering more features or flexibility than built-in methods. Some popular options include:
- Dropbox, Google Drive, OneDrive: Cloud storage services like Dropbox, Google Drive, and OneDrive allow you to upload photos from your PC to the cloud and then access and download them on your iPhone using their respective apps. This is similar to iCloud Photos in concept but uses different cloud platforms.
- Photo Transfer Apps (e.g., WALTR HEIC for Windows): Apps specifically designed for photo and video transfer, like WALTR HEIC for Windows, often offer drag-and-drop interfaces and support various file formats. Some may focus on transferring HEIC images smoothly.
- Wireless Transfer Apps (e.g., Documents by Readdle): Apps like Documents by Readdle can create a Wi-Fi transfer connection between your PC and iPhone, allowing you to easily transfer files, including photos, wirelessly through a web browser interface.
To use these apps, typically you would:
- Install the App: Install the chosen app on both your PC and your iPhone (if required).
- Connect Devices (if necessary): Some apps use Wi-Fi direct connections, while cloud services use internet syncing.
- Transfer Photos: Follow the app’s specific instructions to upload photos from your PC and download them to your iPhone.
Benefits of Third-Party Apps:
- Variety of Features: Some offer features like batch transfer, format conversion, or more control over organization.
- Platform Independence: Often work across different operating systems (Windows, macOS, Android).
- Potentially Faster Transfers: Some apps may optimize transfer speeds, especially for wireless methods.
Drawbacks of Third-Party Apps:
- App Installation: Requires installing and potentially learning to use new software.
- Cost: Some apps are paid or offer premium features for a cost.
- Security/Privacy: Consider the app’s reputation and privacy policy when handling your photos.
Choosing the Best Method
The best method for transferring photos from your PC to your iPhone depends on your specific needs and preferences:
- For syncing large photo libraries and ongoing management: iTunes/Finder Sync or iCloud Photos are good choices. iCloud Photos offers more convenience and wireless syncing.
- For occasional transfer of many photos: iCloud Photos or Third-Party Apps (cloud storage or transfer apps) are efficient.
- For transferring just a few photos quickly: Emailing is the simplest option.
No matter which method you choose, transferring photos from your PC to your iPhone is a manageable task. By following these guidelines, you can easily enjoy your photos on your iPhone wherever you go.