Transferring photos from your Mac to a USB flash drive is a straightforward process that allows you to create backups, share images, or free up space on your computer, and dfphoto.net is here to guide you through each step. This comprehensive guide will walk you through the process of moving your cherished memories to a portable storage solution, covering everything from formatting your USB drive to troubleshooting common issues and ensuring the safety of your valuable images. Whether you’re an amateur photographer or a seasoned professional, understanding how to efficiently transfer your photos is essential. Let’s explore photo management, file transfer, and digital archiving together.
1. Why Transfer Photos From Your Mac to a USB Flash Drive?
There are several compelling reasons to transfer your photos from a Mac to a USB flash drive:
- Backups: Creating a backup of your photo library on a USB drive ensures that your memories are safe even if something happens to your Mac’s internal storage.
- Portability: A USB drive allows you to carry your photos with you and easily share them with friends, family, or clients.
- Freeing Up Space: Moving your photo library to an external drive can free up valuable storage space on your Mac, improving its performance.
- Organization: USB drives can be used to organize photos by event, date, or project, making it easier to find specific images when needed.
- Archiving: Storing photos on a USB drive is a simple way to archive them for long-term preservation, ensuring that they are protected from potential data loss.
2. Preparing Your USB Flash Drive
Before you begin transferring your photos, it’s important to prepare your USB flash drive. Here’s how:
2.1. Choosing the Right USB Flash Drive
- Storage Capacity: Determine how much storage space you need based on the size of your photo library. A good rule of thumb is to choose a USB drive with at least twice the capacity of your photo library to allow for future growth.
- USB Standard: USB drives come in different standards, such as USB 2.0, USB 3.0, and USB 3.1. USB 3.0 and 3.1 offer faster transfer speeds, which can save you a significant amount of time when transferring large photo libraries.
- Durability: If you plan to carry your USB drive with you frequently, consider choosing a ruggedized model that can withstand physical wear and tear.
- Brand Reputation: Opt for a reputable brand known for producing reliable USB drives, such as SanDisk, Samsung, or Kingston.
2.2. Formatting Your USB Flash Drive for Mac
To ensure compatibility with your Mac and prevent potential data loss, it’s recommended to format your USB flash drive using the correct file system. MacOS supports several file systems, but the most common and recommended options are APFS (Apple File System) and Mac OS Extended (Journaled), also known as HFS+.
Here’s how to format your USB flash drive on a Mac:
- Connect the USB Drive: Plug your USB flash drive into an available USB port on your Mac.
- Open Disk Utility: Disk Utility is a built-in MacOS application used for managing disks and volumes. You can find it by going to Applications > Utilities > Disk Utility, or by searching for it using Spotlight.
- Select the USB Drive: In the Disk Utility window, you’ll see a list of available disks and volumes in the left sidebar. Select your USB flash drive from the list. Be sure to select the physical drive itself, not just a volume on the drive.
- Erase the USB Drive: Click the “Erase” button in the top toolbar. This will open a dialog box where you can specify the formatting options.
- Name the USB Drive: Enter a descriptive name for your USB drive in the “Name” field. This name will be displayed in the Finder when the drive is mounted.
- Choose the File System: From the “Format” dropdown menu, select either “APFS” or “Mac OS Extended (Journaled)”.
- APFS (Apple File System): This is the modern file system developed by Apple, optimized for SSDs and flash storage. It offers improved performance, security, and reliability compared to HFS+. If you’re using MacOS High Sierra (10.13) or later, APFS is the recommended choice.
- Mac OS Extended (Journaled) (HFS+): This is the traditional file system used by MacOS for many years. It’s still a viable option, especially if you need to maintain compatibility with older versions of MacOS.
- Choose the Scheme: From the “Scheme” dropdown menu, select “GUID Partition Map.” This is the standard partitioning scheme for Mac drives.
- Erase the Drive: Click the “Erase” button to begin the formatting process. Disk Utility will erase all data on the USB drive and format it with the specified file system.
- Wait for Completion: The formatting process may take a few minutes, depending on the size and speed of your USB drive. Once it’s complete, Disk Utility will display a confirmation message.
- Done: Click “Done” to close the dialog box. Your USB flash drive is now formatted and ready to use.
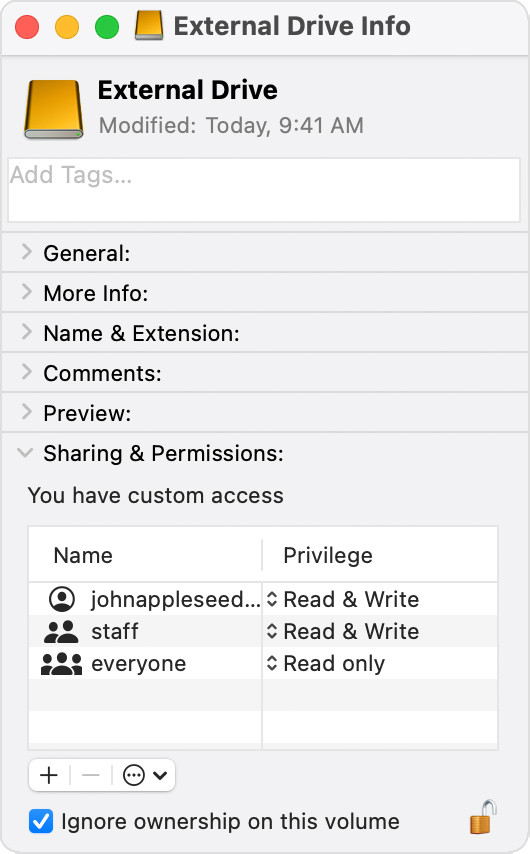 USB drive selected in Disk Utility, ready to be erased and formatted
2.3. Important Considerations
- Backup: Formatting a USB drive will erase all data on it, so make sure to back up any important files before proceeding.
- Compatibility: If you plan to use the USB drive with both Macs and Windows computers, you may want to consider formatting it with the exFAT file system, which is compatible with both operating systems. However, exFAT is not as robust as APFS or HFS+ and may be more prone to data corruption.
- Time Machine: Avoid using a USB drive that is used for Time Machine backups to store your photo library. This can cause conflicts and potentially lead to data loss.
- Removable Storage: Do not store your photo library on a removable storage device like an SD card or a USB flash drive for long-term use. These devices are not designed for continuous operation and may fail prematurely.
3. Transferring Photos to Your USB Flash Drive
Now that your USB flash drive is prepared, you can begin transferring your photos. There are several ways to do this, depending on how your photos are organized and where they are stored on your Mac.
3.1. Transferring Photos from the Photos App
If you use the Photos app to manage your photo library, here’s how to transfer your photos to a USB flash drive:
- Open the Photos App: Launch the Photos app on your Mac.
- Select Photos: Select the photos you want to transfer. You can select individual photos by clicking on them, or select a range of photos by clicking on the first photo, holding down the Shift key, and then clicking on the last photo. You can also select entire albums or moments by clicking on them in the sidebar.
- Export Photos: Go to File > Export > Export [Number] Photos. This will open a dialog box where you can specify the export settings.
- Choose Export Settings:
- Photo Kind: Choose the file format for your exported photos. JPEG is the most common format and is suitable for most purposes. However, if you want to preserve the original quality of your photos, you can choose to export them as TIFF or PNG.
- Quality: Adjust the quality slider to control the level of compression applied to your photos. Higher quality settings will result in larger file sizes.
- Size: Choose the size of your exported photos. You can choose to export them at their original size, or scale them down to a smaller size.
- Metadata: Choose whether to include metadata, such as camera settings, date, and location, in your exported photos.
- Choose Export Location: Click the “Export” button and choose your USB flash drive as the destination.
- Wait for Completion: The export process may take a few minutes, depending on the number and size of the photos you are exporting. Once it’s complete, your photos will be copied to your USB flash drive.
3.2. Transferring Photos from Finder
If your photos are stored in folders on your Mac, you can transfer them to a USB flash drive using the Finder:
- Open Finder: Launch the Finder on your Mac.
- Locate Photos: Navigate to the folder that contains the photos you want to transfer.
- Select Photos: Select the photos you want to transfer. You can select individual photos by clicking on them, or select a range of photos by clicking on the first photo, holding down the Shift key, and then clicking on the last photo. You can also select entire folders by clicking on them.
- Copy Photos: Right-click on the selected photos and choose “Copy” from the context menu. Alternatively, you can press Command-C to copy the photos.
- Open USB Drive: Navigate to your USB flash drive in the Finder.
- Paste Photos: Right-click in the USB drive window and choose “Paste” from the context menu. Alternatively, you can press Command-V to paste the photos.
- Wait for Completion: The copying process may take a few minutes, depending on the number and size of the photos you are copying. Once it’s complete, your photos will be copied to your USB flash drive.
3.3. Drag and Drop Method
A simple and intuitive way to transfer photos is by using the drag-and-drop method:
- Open Finder Windows: Open two Finder windows. In one window, navigate to the folder containing the photos you want to transfer. In the other window, open your USB flash drive.
- Select Photos: In the source folder, select the photos you want to transfer.
- Drag and Drop: Click and drag the selected photos from the source folder to the USB drive window. Release the mouse button to drop the photos into the USB drive.
- Wait for Completion: The copying process may take a few minutes, depending on the number and size of the photos you are copying. Once it’s complete, your photos will be copied to your USB flash drive.
3.4. Using the Command Line (Terminal)
For advanced users, the command line interface provides a powerful way to transfer photos:
- Open Terminal: Launch the Terminal application on your Mac (Applications > Utilities > Terminal).
- Navigate to Source Directory: Use the
cdcommand to navigate to the directory containing the photos you want to transfer. For example, if your photos are in the “Pictures” folder, you would typecd Picturesand press Enter. - Copy Photos: Use the
cpcommand to copy the photos to your USB flash drive. For example, to copy all JPEG files from the current directory to a USB drive named “MyUSB,” you would typecp *.jpg /Volumes/MyUSBand press Enter. - Wait for Completion: The copying process may take a few minutes, depending on the number and size of the photos you are copying.
4. Verifying the Transfer
After transferring your photos, it’s important to verify that all files have been copied correctly and that they are not corrupted. Here’s how:
- Check File Count: Compare the number of photos in the source folder with the number of photos on the USB drive. If the numbers don’t match, it means that some files were not copied correctly.
- Open Photos: Open a few photos from the USB drive to make sure that they are not corrupted and that they display correctly.
- Calculate Checksums: For more advanced verification, you can calculate checksums (e.g., MD5 or SHA-256) for the source files and the copied files, and then compare the checksums to make sure that they match.
5. Best Practices for Managing Your Photo Library on a USB Drive
Here are some best practices for managing your photo library on a USB drive:
- Organize Your Photos: Create a folder structure on your USB drive to organize your photos by event, date, or project. This will make it easier to find specific images when needed.
- Use Descriptive File Names: Rename your photos with descriptive file names that include the date, event, or subject matter. This will make it easier to identify the photos without having to open them.
- Create Backups: Create backups of your photo library on a regular basis. You can use Time Machine or another backup solution to create a backup of your entire USB drive, or you can simply copy your photos to another storage device.
- Store USB Drive Safely: Store your USB drive in a safe place where it will not be damaged by physical wear and tear, extreme temperatures, or moisture.
- Eject Properly: Always eject your USB drive properly before disconnecting it from your Mac. This will prevent data corruption and ensure that your photos are safe.
6. Troubleshooting Common Issues
Here are some common issues that you may encounter when transferring photos from your Mac to a USB flash drive, and how to troubleshoot them:
- USB Drive Not Recognized: If your Mac does not recognize your USB drive, try the following:
- Make sure that the USB drive is properly connected to your Mac.
- Try connecting the USB drive to a different USB port on your Mac.
- Restart your Mac.
- Check the USB drive in Disk Utility to see if it’s being detected. If it is, try mounting the drive.
- If the USB drive is still not recognized, it may be damaged and need to be replaced.
- Slow Transfer Speeds: If you are experiencing slow transfer speeds, try the following:
- Use a USB 3.0 or 3.1 port on your Mac, if available. These ports offer faster transfer speeds than USB 2.0 ports.
- Make sure that your USB drive supports USB 3.0 or 3.1.
- Close any other applications that are using your Mac’s resources.
- Defragment your Mac’s hard drive.
- If you are transferring a large number of small files, try compressing them into a single archive file before transferring them.
- Files Not Copying Correctly: If some files are not copying correctly, try the following:
- Make sure that you have enough free space on your USB drive.
- Check the files for errors or corruption.
- Try copying the files in smaller batches.
- Use a different copying method, such as the command line interface.
- Error Messages: If you receive an error message during the transfer process, consult the error message documentation or search online for a solution.
7. Advanced Tips and Tricks
Here are some advanced tips and tricks for transferring photos from your Mac to a USB flash drive:
- Use a File Transfer Utility: Consider using a dedicated file transfer utility, such as ChronoSync or Carbon Copy Cloner, to transfer your photos. These utilities offer advanced features such as file synchronization, incremental backups, and error checking.
- Automate the Transfer Process: Use Automator or AppleScript to automate the transfer process. This can save you time and effort if you need to transfer photos on a regular basis.
- Use a Network-Attached Storage (NAS) Device: If you have a large photo library, consider using a NAS device instead of a USB drive. NAS devices offer more storage space, faster transfer speeds, and advanced features such as remote access and automatic backups.
8. The Role of dfphoto.net in Your Photography Journey
At dfphoto.net, we understand the passion and dedication that goes into capturing the perfect shot. That’s why we’re committed to providing you with the resources, inspiration, and community you need to excel in your photography journey.
8.1. Explore Techniques
Whether you’re mastering composition, understanding exposure, or experimenting with creative effects, dfphoto.net offers a wealth of educational content to enhance your skills. Dive into detailed tutorials, expert tips, and insightful articles that cater to photographers of all levels.
8.2. Get Inspired
Browse our curated galleries featuring breathtaking images from talented photographers around the globe. Discover new perspectives, uncover hidden gems, and ignite your creativity with the power of visual storytelling.
8.3. Stay Informed
Keep up with the latest trends, gear reviews, and industry news in the world of photography. Our comprehensive coverage ensures that you’re always in the know, empowering you to make informed decisions and stay ahead of the curve.
8.4. Connect with the Community
Join our vibrant community of photographers, where you can share your work, receive feedback, and connect with like-minded individuals. Collaborate on projects, participate in discussions, and forge lasting relationships with fellow enthusiasts.
9. Ensuring the Safety of Your Photos
Data loss can be devastating, especially when it comes to irreplaceable memories. Here are some essential tips to protect your photos:
9.1. Use High-Quality USB Drives
Invest in USB drives from reputable brands to minimize the risk of hardware failure.
9.2. Handle with Care
Avoid exposing your USB drives to extreme temperatures, moisture, or physical shock.
9.3. Scan for Viruses
Regularly scan your USB drives for viruses and malware to prevent data corruption.
9.4. Eject Safely
Always eject your USB drive properly before disconnecting it from your Mac to prevent data loss.
9.5. Consider Cloud Storage
Back up your photos to a cloud storage service like iCloud, Google Photos, or Dropbox for added protection.
10. Conclusion
Transferring photos from your Mac to a USB flash drive is a simple but essential task for any photographer. By following the steps outlined in this guide, you can safely and efficiently move your photos to a portable storage solution, ensuring that your memories are protected and accessible. Remember to format your USB drive correctly, verify the transfer, and follow best practices for managing your photo library. And don’t forget to explore dfphoto.net for more tips, inspiration, and resources to enhance your photography journey.
FAQ: Transferring Photos from Mac to USB Flash Drive
1. Can I transfer photos from my iPhone to a USB flash drive using my Mac?
Yes, you can transfer photos from your iPhone to a USB flash drive using your Mac. First, connect your iPhone to your Mac using a USB cable. Then, open the Photos app on your Mac and import the photos from your iPhone. Once the photos are imported, you can transfer them to your USB flash drive using one of the methods described above.
2. What if I don’t have enough space on my Mac to import all of my iPhone photos?
If you don’t have enough space on your Mac to import all of your iPhone photos, you can use iCloud Photos to store your photos in the cloud. With iCloud Photos, your photos are automatically uploaded to iCloud, where they are stored securely and accessible from all of your devices. You can then download the photos from iCloud to your USB flash drive.
3. How do I transfer large video files to a USB flash drive?
Transferring large video files to a USB flash drive is similar to transferring photos. However, video files are typically much larger than photo files, so the transfer process may take longer. To speed up the transfer process, make sure that you are using a USB 3.0 or 3.1 port and that your USB drive supports USB 3.0 or 3.1. You can also try compressing the video file before transferring it.
4. Can I password-protect my USB flash drive to keep my photos safe?
Yes, you can password-protect your USB flash drive to keep your photos safe. MacOS offers a built-in encryption feature called FileVault that you can use to encrypt your USB drive. To enable FileVault, go to System Preferences > Security & Privacy > FileVault and click “Turn On FileVault.” You will be prompted to create a password that will be required to unlock the USB drive.
5. What is the best way to organize my photos on a USB flash drive?
The best way to organize your photos on a USB flash drive is to create a folder structure that makes sense for you. You can organize your photos by event, date, or project. For example, you could create a folder for each year, and then subfolders for each month or event. You can also use descriptive file names to make it easier to identify the photos without having to open them.
6. How do I delete photos from my Mac after transferring them to a USB flash drive?
After transferring your photos to a USB flash drive, you may want to delete them from your Mac to free up storage space. To do this, simply drag the photos from their original location to the Trash. Then, empty the Trash to permanently delete the photos.
7. Can I edit photos directly on a USB flash drive?
While it is technically possible to edit photos directly on a USB flash drive, it is not recommended. Editing photos directly on a USB drive can be slow and can potentially lead to data corruption. It is better to copy the photos to your Mac’s hard drive, edit them there, and then copy them back to the USB drive.
8. How often should I back up my photos to a USB flash drive?
How often you should back up your photos to a USB flash drive depends on how often you take photos and how important those photos are to you. If you take photos frequently, you should back them up at least once a week. If you only take photos occasionally, you can back them up less frequently.
9. Can I use a USB flash drive to transfer photos between a Mac and a Windows computer?
Yes, you can use a USB flash drive to transfer photos between a Mac and a Windows computer. However, you need to make sure that the USB drive is formatted with a file system that is compatible with both operating systems. The exFAT file system is a good choice, as it is compatible with both MacOS and Windows.
10. What are the best alternatives to using a USB flash drive for storing photos?
While USB flash drives are a convenient way to store photos, there are several alternatives to consider:
- External Hard Drives: External hard drives offer more storage space and faster transfer speeds than USB flash drives.
- Network-Attached Storage (NAS) Devices: NAS devices are ideal for storing large photo libraries and offer advanced features such as remote access and automatic backups.
- Cloud Storage Services: Cloud storage services like iCloud, Google Photos, and Dropbox offer a convenient way to store your photos securely in the cloud.
Connect with dfphoto.net Today!
Ready to take your photography to the next level? Visit dfphoto.net to explore our comprehensive resources, connect with our vibrant community, and unlock your creative potential.
Address: 1600 St Michael’s Dr, Santa Fe, NM 87505, United States
Phone: +1 (505) 471-6001
Website: dfphoto.net