Transferring photos from your iPhone to a Windows 7 PC can seem tricky, but it’s definitely achievable. At dfphoto.net, we help you navigate the process easily, ensuring your precious memories are safely backed up and accessible on your computer. We provide various solutions, including using the built-in Windows features, third-party software, and cloud services, to transfer your images from iOS devices to your Windows PC. Explore dfphoto.net for more photography tips, secure photo backups, and efficient file transfer solutions.
1. Understanding the Basics of iPhone Photo Transfer
Before diving into specific methods, it’s essential to understand how iPhones and Windows 7 PCs communicate. By understanding the process, you’ll be able to solve any problems you may encounter.
1.1. Why Transfer Photos From Your iPhone to a PC?
There are several compelling reasons to transfer your iPhone photos to a Windows 7 PC.
- Backup: Safeguarding your photos against device loss, damage, or theft is essential.
- Storage: iPhones have limited storage, and transferring photos frees up space.
- Editing: PCs offer robust photo editing software for enhancing your images.
- Sharing: Easily share photos with family and friends via email or social media.
- Printing: Prepare your photos for printing and creating physical albums.
1.2. Common Challenges When Transferring Photos
While transferring photos seems straightforward, you might encounter a few challenges.
- Compatibility Issues: Older Windows versions might not fully support newer iPhone formats.
- Driver Problems: Incompatible or outdated drivers can prevent your PC from recognizing your iPhone.
- Large File Sizes: High-resolution photos and videos can take significant time and storage space.
- HEIC Format: iPhones use HEIC format, which isn’t natively supported by Windows 7, requiring conversion.
- Security Settings: iPhone security settings might restrict access to your photos.
1.3. Essential Preparations Before You Start
Before beginning the transfer process, take these preparatory steps.
- Update iTunes: Ensure you have the latest version of iTunes installed, as it provides necessary drivers.
- Unlock Your iPhone: Keep your iPhone unlocked during the transfer to allow access to your photos. According to photography experts at Santa Fe University of Art and Design, keeping your device unlocked prevents potential interruptions during file access.
- Sufficient Storage: Confirm your PC has enough storage for all the photos you intend to transfer.
- USB Cable: Use a reliable USB cable to ensure a stable connection between your iPhone and PC.
- Trust This Computer: When prompted on your iPhone, tap “Trust This Computer” to grant access to your files.
2. Direct Transfer Using Windows Explorer
One of the simplest methods to transfer photos is using Windows Explorer, which allows you to directly access your iPhone’s storage.
2.1. Connecting Your iPhone to Your Windows 7 PC
-
Connect: Use a USB cable to connect your iPhone to your Windows 7 PC.
-
Trust: If prompted, tap “Trust This Computer” on your iPhone.
-
AutoPlay: An AutoPlay window might appear; if so, select “Import pictures and videos using Windows.” If it doesn’t appear, proceed to the next step.
2.2. Accessing Your iPhone’s DCIM Folder
-
Open Windows Explorer: Click the Start button and select “Computer” (or “My Computer”).
-
Locate Your iPhone: Your iPhone should appear as a portable device under “Devices and Drives.”
-
Navigate to DCIM: Double-click your iPhone, then open the “Internal Storage” folder, followed by the “DCIM” folder. This folder contains subfolders like “100APPLE,” “101APPLE,” etc., where your photos are stored.
 Accessing the DCIM folder on an iPhone connected to a Windows 7 PC
2.3. Copying Photos From iPhone to Your PC
-
Select Photos: Browse through the DCIM folders and select the photos you want to transfer.
-
Copy: Right-click on the selected photos and choose “Copy.”
-
Paste: Navigate to your desired folder on your PC, right-click, and select “Paste.”
2.4. Troubleshooting Common Issues With Windows Explorer Transfer
- iPhone Not Showing Up:
- Ensure iTunes is installed and updated.
- Check the USB cable connection.
- Restart both your iPhone and PC.
- Update the Apple Mobile Device USB Driver in Device Manager.
- Missing Photos:
- Make sure your iPhone is unlocked.
- Check all DCIM subfolders.
- Ensure hidden files and folders are visible in Windows Explorer settings.
- Slow Transfer Speed:
- Use a USB 2.0 or higher port.
- Close unnecessary applications on both your iPhone and PC.
- Transfer photos in smaller batches.
3. Using iTunes to Sync Photos
iTunes can also be used to sync photos from your PC to your iPhone, but it’s primarily designed for transferring photos from your computer to your iPhone, not the other way around.
3.1. Setting Up iTunes for Photo Syncing
- Install iTunes: If you haven’t already, download and install the latest version of iTunes from Apple’s website.
- Connect Your iPhone: Connect your iPhone to your PC using a USB cable.
- Trust This Computer: If prompted, tap “Trust This Computer” on your iPhone.
- Launch iTunes: Open iTunes on your PC.
3.2. Syncing Photos From PC to iPhone
- Select Device: In iTunes, click on the iPhone icon when it appears.
- Go to Photos: In the left sidebar, click on “Photos.”
- Sync Photos: Check the box next to “Sync Photos.”
- Choose Folder: Select either “All photos” or “Selected folders.” If you choose “Selected folders,” select the folders you want to sync.
- Apply: Click “Apply” at the bottom right to start syncing.
3.3. Limitations of Using iTunes for iPhone to PC Transfer
- One-Way Sync: iTunes primarily syncs photos from your PC to your iPhone, not the other way around.
- Overwriting: Syncing can overwrite existing photos on your iPhone.
- Limited Control: iTunes offers less granular control over which photos are transferred.
4. Leveraging Cloud Storage Services
Cloud storage services provide a convenient way to transfer photos between your iPhone and Windows 7 PC wirelessly.
4.1. Overview of Popular Cloud Storage Options
- iCloud Photos: Apple’s native cloud storage solution.
- Google Photos: A popular option with generous free storage.
- Dropbox: Versatile cloud storage with file-sharing capabilities.
- Microsoft OneDrive: Integrated with Windows and Microsoft services.
4.2. Using iCloud Photos
- Enable iCloud Photos on iPhone:
- Go to “Settings” > [Your Name] > “iCloud” > “Photos.”
- Toggle on “iCloud Photos.”
- Install iCloud for Windows:
- Download and install iCloud for Windows from Apple’s website.
- Configure iCloud for Windows:
- Open iCloud for Windows and sign in with your Apple ID.
- Check the box next to “Photos” and click “Apply.”
- Access Photos on PC:
- Your iCloud photos will be synced to a folder in Windows Explorer, typically located at “C:Users[Your Username]PicturesiCloud Photos.”
4.3. Using Google Photos
- Install Google Photos App on iPhone:
- Download and install the Google Photos app from the App Store.
- Backup & Sync:
- Open the Google Photos app and sign in with your Google account.
- Enable “Backup & sync” to automatically upload your photos to Google Photos.
- Access Photos on PC:
- Visit the Google Photos website (photos.google.com) on your Windows 7 PC.
- Sign in with the same Google account.
- View and download your photos.
4.4. Advantages and Disadvantages of Cloud Storage
Advantages:
- Wireless: No USB cable required.
- Automatic Backup: Photos are automatically backed up to the cloud.
- Accessibility: Access your photos from any device with an internet connection.
Disadvantages:
- Storage Limits: Free storage is limited; you might need to pay for additional storage.
- Internet Dependency: Requires a stable internet connection.
- Privacy Concerns: Storing photos in the cloud raises privacy concerns.
5. Utilizing Third-Party Photo Transfer Software
Several third-party software options are designed to simplify the process of transferring photos from your iPhone to your Windows 7 PC.
5.1. Overview of Popular Software Options
- Apowersoft Phone Manager: A comprehensive phone management tool.
- WinX MediaTrans: Designed specifically for transferring media files between iPhone and PC.
- iMazing: Offers advanced features for managing iPhone data.
- AnyTrans: Provides a user-friendly interface for transferring and managing iOS content.
5.2. Step-by-Step Guide Using Apowersoft Phone Manager
- Download and Install: Download Apowersoft Phone Manager from the Apowersoft website and install it on your PC.
- Launch and Connect: Launch the software and connect your iPhone to your PC via USB.
- Trust This Computer: Tap “Trust This Computer” on your iPhone.
- Go to Pictures: In Apowersoft Phone Manager, go to the “Pictures” tab.
- Select Photos: Select the photos you want to transfer.
- Export: Click “Export” and choose a folder on your PC to save the photos.
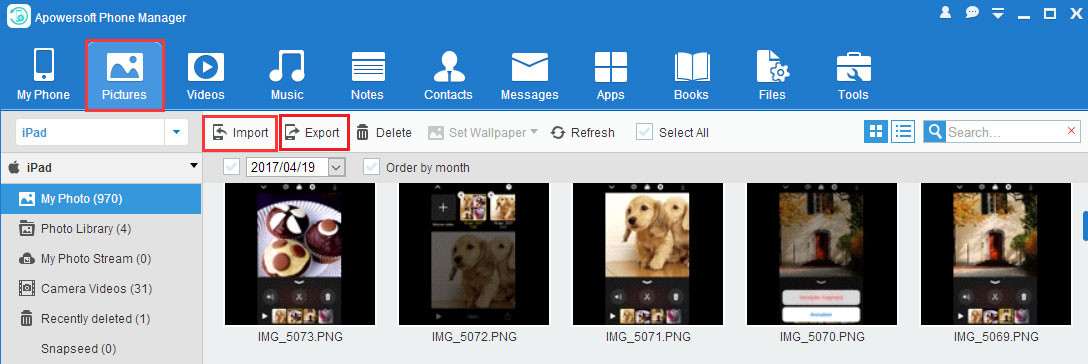 Transferring photos with Apowersoft Phone Manager
5.3. Key Features and Benefits of Third-Party Software
- User-Friendly Interface: Simplifies the transfer process.
- Batch Transfer: Allows you to transfer multiple photos at once.
- HEIC Conversion: Automatically converts HEIC photos to JPEG.
- Two-Way Transfer: Supports transferring photos from iPhone to PC and vice versa.
- Additional Features: Often includes features like backup, restore, and file management.
5.4. Considerations When Choosing Software
- Cost: Some software is free, while others require a paid license.
- Features: Consider the features you need, such as HEIC conversion or two-way transfer.
- User Reviews: Read reviews to ensure the software is reliable and user-friendly.
- Compatibility: Verify the software is compatible with your iPhone and Windows 7 PC.
6. Converting HEIC Photos to JPEG
iPhones capture photos in HEIC (High Efficiency Image Container) format by default, which offers better compression and image quality compared to JPEG. However, Windows 7 doesn’t natively support HEIC, so you’ll need to convert these photos to JPEG for compatibility.
6.1. Understanding the HEIC Format
- Advantages:
- Smaller File Size: HEIC files are smaller than JPEGs, saving storage space.
- Better Image Quality: HEIC retains more detail and dynamic range.
- Disadvantages:
- Compatibility Issues: Not supported by all operating systems and software.
- Conversion Required: Needs to be converted for use on older systems.
6.2. Methods to Convert HEIC to JPEG
- Using Third-Party Software:
- Many third-party photo transfer software options, like Apowersoft Phone Manager and iMazing, automatically convert HEIC photos to JPEG during transfer.
- Online Converters:
- Websites like HEICtoJPEG and FreeConvert allow you to upload HEIC files and convert them to JPEG.
- CopyTrans HEIC for Windows:
- A free plugin that enables Windows to natively support HEIC files.
6.3. Step-by-Step Guide Using an Online Converter
- Visit Online Converter: Go to a website like HEICtoJPEG.
- Upload HEIC File: Click “Choose File” and select the HEIC photo from your computer.
- Convert: Click “Convert” to start the conversion process.
- Download JPEG: Once converted, download the JPEG file to your computer.
6.4. Preserving Image Quality During Conversion
- Choose High-Quality Settings: If the converter offers quality settings, select the highest available option.
- Avoid Multiple Conversions: Converting a JPEG back to HEIC and then back to JPEG can degrade image quality.
- Use Professional Software: Software like Adobe Photoshop or specialized HEIC converters often provide better quality conversion options.
7. Advanced Tips and Tricks for Efficient Photo Transfer
To ensure a smooth and efficient photo transfer experience, consider these advanced tips and tricks.
7.1. Optimizing iPhone Storage Before Transfer
- Delete Unnecessary Photos and Videos: Remove duplicates and unwanted files to reduce transfer time and storage space.
- Compress Photos: Use apps like Image Size to compress photos without significant quality loss.
- Offload Unused Apps: Remove apps you no longer use to free up storage space.
7.2. Managing Large Photo Libraries
- Organize Photos Into Folders: Create folders on your PC to categorize your photos by date, event, or subject.
- Use Metadata: Add tags, descriptions, and ratings to your photos to make them easier to search and manage.
- Implement a Backup Strategy: Regularly back up your photo library to an external hard drive or cloud storage service.
7.3. Automating the Transfer Process
- Use Cloud Services: Set up automatic backup to cloud services like iCloud Photos or Google Photos.
- Create Scheduled Tasks: Use Windows Task Scheduler to create a task that automatically copies photos from your iPhone to your PC at regular intervals.
7.4. Addressing Compatibility Issues
- Update Drivers: Keep your Apple Mobile Device USB Driver updated through Device Manager.
- Run Compatibility Troubleshooter: Use the Windows Compatibility Troubleshooter to identify and fix compatibility issues with photo transfer software.
- Consider Upgrading Your OS: If possible, consider upgrading to a newer version of Windows for better compatibility with modern devices and file formats.
8. Troubleshooting Common Transfer Errors
Even with careful preparation, you might encounter errors during the photo transfer process. Here are some common issues and their solutions.
8.1. “Device Not Recognized” Error
- Check USB Connection: Ensure the USB cable is securely connected to both your iPhone and PC.
- Try a Different USB Port: Some USB ports might not provide enough power or data transfer speed.
- Update Drivers: Update the Apple Mobile Device USB Driver in Device Manager.
- Restart Devices: Restart both your iPhone and PC.
- Reinstall iTunes: Uninstall and reinstall iTunes to ensure all necessary components are properly installed.
8.2. “Not Enough Space” Error
- Free Up Storage Space: Delete unnecessary files from your PC’s hard drive.
- Use External Storage: Transfer photos to an external hard drive or USB drive.
- Compress Photos: Compress photos to reduce their file size.
8.3. “Files Cannot Be Copied” Error
- Check File Permissions: Ensure you have the necessary permissions to write to the destination folder.
- Close Conflicting Applications: Close any applications that might be accessing the photos, such as photo editing software.
- Run as Administrator: Run Windows Explorer or your photo transfer software as an administrator.
8.4. “HEIC Format Not Supported” Error
- Convert HEIC to JPEG: Use one of the methods described earlier to convert HEIC photos to JPEG before transferring.
- Install HEIC Codec: Install the CopyTrans HEIC for Windows plugin to enable native HEIC support in Windows.
- Use Software With HEIC Support: Use photo transfer software that automatically converts HEIC to JPEG.
9. The Future of iPhone Photo Management
As technology evolves, the methods for managing and transferring iPhone photos will continue to improve.
9.1. Emerging Technologies in Photo Transfer
- Wireless Direct Transfer: Future iPhones and PCs might support direct wireless transfer protocols for faster and more convenient file sharing.
- AI-Powered Photo Management: Artificial intelligence could automate photo organization, tagging, and editing, making it easier to manage large photo libraries.
- Enhanced Cloud Integration: Cloud services will likely offer more seamless integration with devices and operating systems, simplifying photo backup and access.
9.2. Predictions for iPhone and Windows Compatibility
- Improved HEIC Support: Windows might eventually offer native support for HEIC format, eliminating the need for conversion.
- Better Driver Management: Apple and Microsoft could collaborate to improve driver compatibility and reduce transfer errors.
- Unified Photo Management Ecosystem: A more unified ecosystem could emerge, allowing for seamless photo transfer and management across all devices and platforms.
9.3. Staying Updated With the Latest Trends
- Follow Tech Blogs and News Sites: Stay informed about the latest developments in photo management and transfer technologies.
- Join Online Communities: Participate in forums and online communities to share tips and troubleshoot issues.
- Attend Workshops and Seminars: Attend photography workshops and seminars to learn about the latest techniques and technologies.
10. Conclusion: Your Photos, Your Way
Transferring photos from your iPhone to your Windows 7 PC doesn’t have to be a daunting task. With the right methods and a bit of preparation, you can easily back up your memories, free up storage space, and enhance your photos with powerful editing tools. Whether you prefer the simplicity of Windows Explorer, the convenience of cloud storage, or the advanced features of third-party software, there’s a solution that fits your needs.
Remember to stay updated with the latest trends and technologies to ensure a smooth and efficient photo management experience. And for more photography tips, stunning photo collections, and a vibrant community of photography enthusiasts, visit dfphoto.net.
Are you ready to elevate your photography skills and discover a world of visual inspiration? Visit dfphoto.net today to explore our comprehensive guides, breathtaking galleries, and a thriving community of photographers. Join us and unlock your creative potential!
Address: 1600 St Michael’s Dr, Santa Fe, NM 87505, United States.
Phone: +1 (505) 471-6001.
Website: dfphoto.net.
Frequently Asked Questions
1. Why aren’t all my photos showing up when I connect my iPhone to my Windows 7 PC?
Ensure your iPhone is unlocked when connected. An iPhone that’s locked may not display all the photos in the DCIM folder. According to a guide by Popular Photography, unlocking your device grants immediate access to all media files.
2. What do I do if my Windows 7 PC doesn’t recognize my iPhone?
First, verify that you have the latest version of iTunes installed, as it provides necessary drivers for your PC to recognize your iPhone. Try using a different USB port and restart both your iPhone and PC to refresh the connection.
3. How can I transfer photos from my iPhone to my Windows 7 PC without using a USB cable?
Cloud storage services like iCloud Photos, Google Photos, Dropbox, and Microsoft OneDrive allow wireless photo transfers. Simply upload your photos from your iPhone to the cloud and then access them from your Windows 7 PC.
4. Is it safe to use third-party software to transfer photos from my iPhone?
Yes, but make sure to download software from reputable sources to avoid malware or security risks. Research user reviews and ratings before installing any third-party software.
5. What is the HEIC format, and how do I open HEIC files on my Windows 7 PC?
HEIC (High Efficiency Image Container) is a modern image format used by iPhones. Since Windows 7 doesn’t natively support HEIC, you can convert HEIC files to JPEG using online converters or install a codec like CopyTrans HEIC for Windows.
6. How can I ensure the quality of my photos isn’t lost during the transfer process?
When using cloud services or third-party software, select the highest quality settings available. Avoid compressing photos excessively before transferring them.
7. How do I transfer large video files from my iPhone to my Windows 7 PC?
For large video files, using a USB connection is generally faster and more reliable than wireless methods. Make sure your USB cable is in good condition and connected to a USB 2.0 or 3.0 port for the best transfer speeds.
8. What are the best ways to organize my photos after transferring them to my Windows 7 PC?
Create folders based on date, event, or subject. Use metadata like tags and descriptions to make your photos easily searchable. Photo management software like Adobe Lightroom or Windows Photo Gallery can also help with organization.
9. How can I automatically back up my iPhone photos to my Windows 7 PC?
Use cloud storage services with automatic backup features, or create a scheduled task on your Windows 7 PC to regularly copy photos from your iPhone when it’s connected.
10. What should I do if I encounter an error message during the photo transfer process?
Note the error message and search online for specific solutions. Common troubleshooting steps include checking your USB connection, updating drivers, freeing up storage space, and running software as an administrator.