Transferring photos from your camera to your phone has never been easier. This guide from dfphoto.net walks you through simple methods, focusing on using WiFi, to get those stunning images onto your phone for sharing, editing, and safekeeping. Learn about wireless transfer, cloud storage, and mobile photography tips.
1. Understanding Your Options for Wireless Photo Transfer
Want to know the best ways to move your photos from your camera to your phone using WiFi? There are several options, each offering its own level of convenience and speed. Here’s a breakdown:
1. 1. Direct WiFi Transfer
Many modern cameras come with built-in WiFi capabilities, allowing you to directly transfer photos to your smartphone.
1. 2. WiFi SD Cards
If your camera lacks built-in WiFi, a WiFi-enabled SD card can be a great alternative.
1. 3. Cloud Services
Cloud services like Google Photos or Dropbox can be used in conjunction with your camera’s WiFi to automatically back up and transfer photos.
2. Direct WiFi Transfer: A Step-by-Step Guide
Is your camera WiFi enabled? Then this is the easiest way to transfer photos. Here’s how to transfer photos from your camera to your phone using WiFi:
2. 1. What You Need
- WiFi-enabled camera
- Smartphone (iPhone or Android)
- Camera’s companion app (usually available on the App Store or Google Play)
2. 2. Steps
- Install the Camera App: Download the camera’s app on your smartphone.
- Enable WiFi on Your Camera: Navigate to the settings menu on your camera and turn on the WiFi feature.
- Connect Your Phone: Connect your phone to the camera’s WiFi network (the camera will act as a hotspot). Or, connect both devices to your home WiFi network.
- Select and Transfer: Open the camera’s app, browse your photos, and select the ones you want to transfer.
- Disconnect: Once the transfer is complete, disconnect from the camera’s WiFi network.
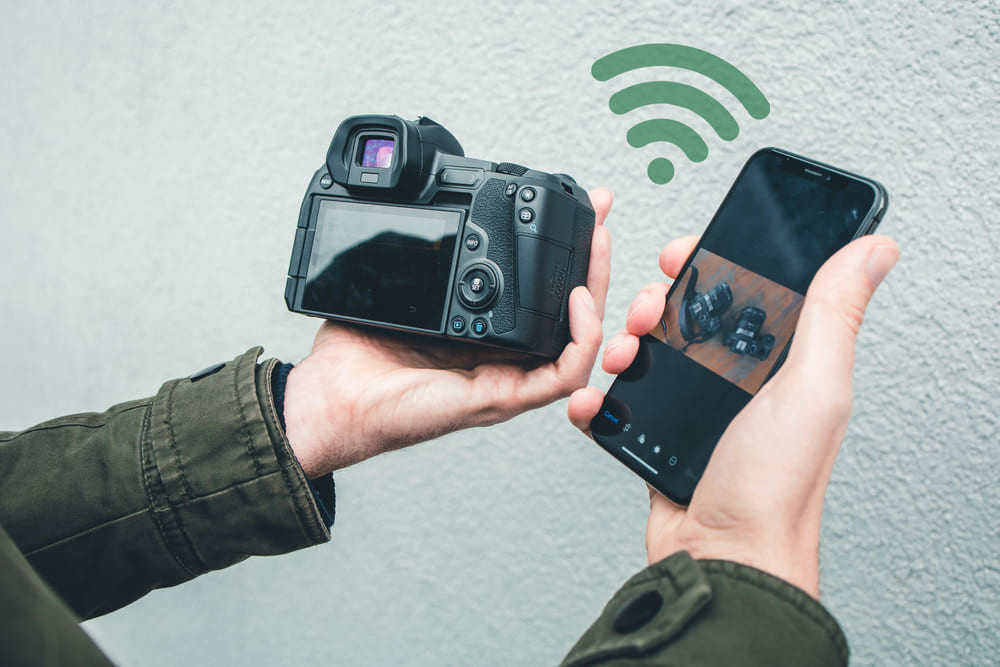 Close-up of a camera screen displaying a WiFi connection icon, with a smartphone showing the camera manufacturer's app interface.
2. 3. Quick Tips
- Ensure both your camera and phone are fully charged before starting the transfer.
- Transfer large batches of photos in smaller chunks to avoid connection issues.
3. WiFi SD Cards: Expanding Your Camera’s Wireless Capabilities
What if your camera doesn’t have WiFi? A WiFi SD card is a great option. These cards create their own WiFi network, letting you transfer photos to your phone without a direct camera connection.
3. 1. Popular WiFi SD Card Brands
- Eye-Fi: Known for its ease of use and automatic transfer features.
- Transcend: Offers high-speed transfer rates and large storage capacities.
- ez Share: A budget-friendly option with basic WiFi functionality.
3. 2. How to Use a WiFi SD Card
- Insert the WiFi SD card into your camera.
- Turn on your camera and take some photos.
- Install the WiFi SD card’s app on your smartphone.
- Connect your phone to the WiFi network created by the SD card.
- Use the app to browse and download photos from the SD card to your phone.
3. 3. Benefits of Using WiFi SD Cards
- Adds wireless functionality to older cameras.
- Simple setup and easy to use.
- Allows for selective transfer of photos.
4. Cloud Services: Automating Your Photo Workflow
Want automatic photo backups? Cloud services offer a seamless way to transfer photos from your camera to your phone and other devices.
4. 1. Popular Cloud Services for Photographers
- Google Photos: Offers unlimited storage for compressed photos and automatic syncing across devices.
- Dropbox: A versatile cloud storage service with excellent file management capabilities.
- Apple iCloud: Integrated with iOS devices and offers seamless photo syncing for Apple users.
- Adobe Creative Cloud: Includes cloud storage as part of its photography plan, ideal for users of Adobe Lightroom and Photoshop.
- Photobucket: An older option that is a safe place to store images.
4. 2. Setting Up Cloud Transfer
- Ensure your camera has WiFi connectivity.
- Connect your camera to your home WiFi network.
- Configure your camera to automatically upload photos to your chosen cloud service. (Refer to your camera’s manual for specific instructions.)
- Install the cloud service’s app on your smartphone.
- Your photos will automatically sync to your phone as they are taken.
4. 3. Advantages of Cloud Transfer
- Automatic photo backups.
- Access your photos from any device.
- Easy sharing with friends and family.
5. Using a USB Cable: The Reliable Wired Connection
Looking for a reliable wired option? A USB cable is a straightforward way to transfer photos. Let’s explore how to transfer photos from your camera to your phone using a USB Cable
5.1. What You’ll Need
- Your Smartphone (iPhone or Android)
- A USB cable that fits your camera
- A phone adapter (iPhone users will need a Lightning to USB adapter)
5.2. Steps to Transfer Photos
- Connect Your Phone Adapter: Plug the adapter into your phone’s charging port. If you’re using an iPhone, this will be the Lightning port.
- Hook Up Your Camera: Take the USB cable that fits your camera and plug one end into the camera and the other end into the adapter you’ve already connected to your phone.
- Open Your Photos App: Once everything is connected, your phone should prompt you to open the Photos app. If it doesn’t pop up automatically, just open the app yourself. You should see the photos from your camera there.
- Select and Transfer Photos: Now, choose the photos you want to move to your phone. Depending on your phone’s setup, you can usually drag them directly into your phone’s storage or tap an import option.
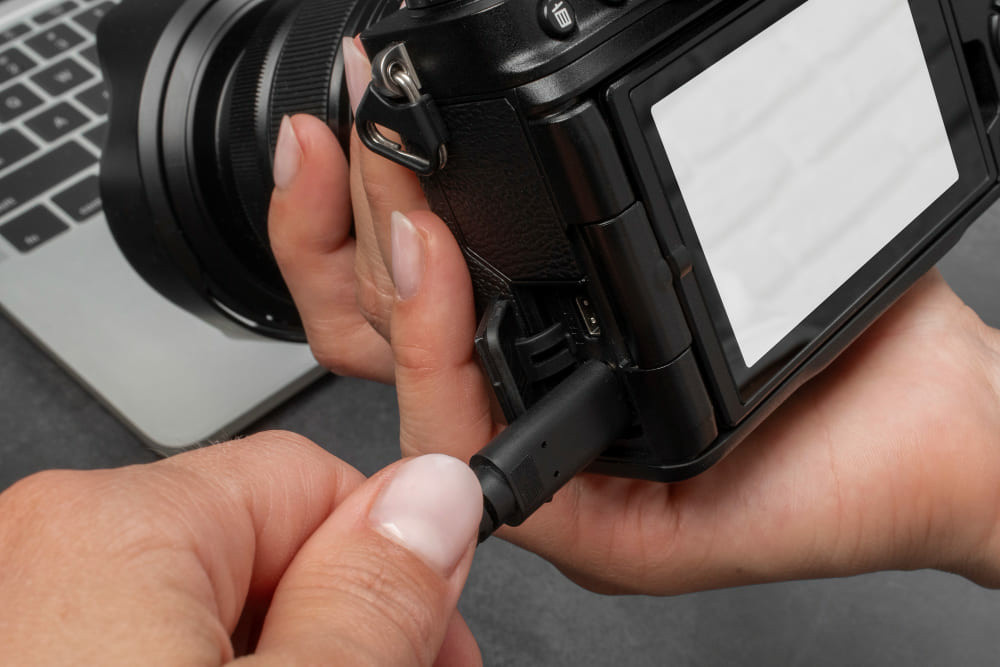
 Connecting a digital camera to an iPhone with a USB cable and Lightning adapter, illustrating a direct wired connection for photo transfer.
6. SD Card Reader: A Direct Route
Do you want a direct route for transferring your photos? Using an SD card reader can be incredibly efficient. This is how to transfer digital camera photos to an iPhone or Android.
6.1. What You’ll Need
- Digital Camera
- SD Card
- Your smartphone
- SD Card Slot on Phone (if available)
- SD Card Reader (if there is no SD card slot on the phone):
6.2. How to Transfer
- Remove the SD Card from Your Camera: Turn off your camera first to keep your files safe, then pop out the SD card.
- Insert the SD Card into Your Phone: Slide the SD card into the slot on your phone. If your phone doesn’t have an SD slot, like an iPhone, for example, no worries — grab an SD card reader that connects to your phone’s charging port.
- Transfer the Photos: Unlock your phone and open your Photos app. It should automatically find the SD card and show you all the photos. Just pick the ones you want and import them into your phone’s gallery.
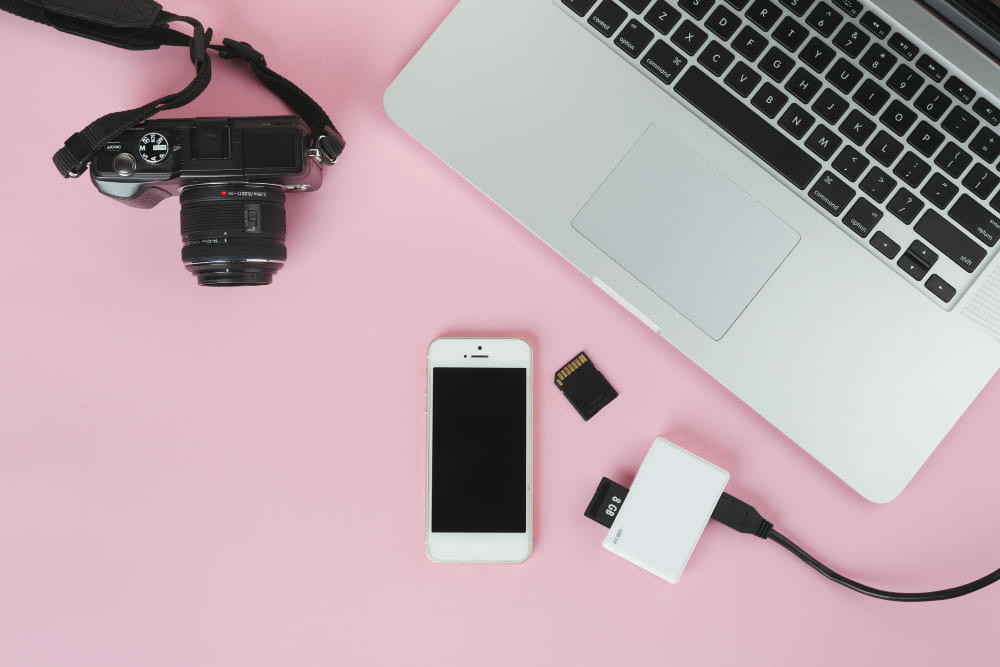 An SD card reader connected to a smartphone, with an SD card inserted, demonstrating how to transfer photos directly without wires.
7. OTG Cable: On-The-Go Transfers for Android
Want to know how to transfer photos from your digital camera directly to your phone? Using an OTG (On-The-Go) cable is a good solution, too! And this is particularly handy for Android users.
7.1. What You’ll Need
- An Android device that supports OTG
- A USB OTG adapter
- Your camera’s USB cable
7.2. How to Do It
- Connect the OTG Adapter: Plug the OTG adapter into the charging port of your Android phone.
- Hook Up Your Camera: Connect one end of your camera’s USB cable to the camera and the other end to the OTG adapter.
- Set Up the Connection: Your phone should alert you once the camera is connected. Swipe down to access notifications, select the USB options, and choose ‘Photo Transfer’ or PTP mode.
- Transfer Your Photos: Open the file explorer app on your phone. It should show a new device connected. Open this to access your camera’s storage, select the photos you want, and copy them. Then, navigate to where you want these photos stored on your phone and paste them there.
 An OTG (On-The-Go) cable connecting a digital camera to an Android phone, illustrating a direct transfer method without using a computer.
8. Optimizing Your Photos for Mobile
How can you make your photos look their best on your phone? Consider these tips:
8. 1. Image Resolution
While high-resolution images look great, they can take up a lot of space on your phone. Consider resizing your photos to a more manageable resolution for mobile viewing. A resolution of 2048 pixels on the long edge is generally sufficient for most smartphone screens.
8. 2. File Format
JPEG is the most common file format for photos and is well-supported by all smartphones. However, if you want to preserve more detail and dynamic range, consider using a RAW format (if your camera supports it) and converting to JPEG after editing.
8. 3. Editing Apps
Numerous photo editing apps are available for both iOS and Android, allowing you to enhance your photos directly on your phone. Some popular options include:
- Adobe Lightroom Mobile: A powerful and versatile editing app with a wide range of tools and presets.
- Snapseed: A free and user-friendly app from Google with a variety of editing features.
- VSCO: Known for its film-inspired filters and minimalist interface.
9. Troubleshooting Common WiFi Transfer Issues
Experiencing problems with WiFi photo transfer? Here are some common issues and how to fix them:
9. 1. Connection Problems
- Make sure both your camera and phone are connected to the same WiFi network.
- Check your WiFi signal strength.
- Restart both your camera and phone.
9. 2. Slow Transfer Speeds
- Transfer photos in smaller batches.
- Close any other apps that may be using your WiFi connection.
- Move closer to your WiFi router.
9. 3. App Compatibility
- Ensure you are using the latest version of your camera’s app.
- Check for any known compatibility issues between your camera and phone.
- Contact the camera manufacturer’s support team for assistance.
10. Leveraging the Cloud for Easy Transfer
With most modern cameras equipped with Wi-Fi capabilities, transferring images has become quicker and more streamlined than ever. Once you connect your camera to your phone using one of the methods above, you have the option to upload your pictures directly to various cloud services.
10.1. Steps to Cloud Storage
- Connect your camera to your phone via WiFi.
- Upload photos directly to cloud services like Google Photos, Apple iCloud, Photobucket, and Dropbox.
- Access and manage your photos from your iPhone or any other device.
11. Elevate Your Photos with Editing
Looking to bring out the best in your photos? Using editing software on your computer like Luminar Neo can help transform your images.
11.1. Editing Software
Luminar Neo simplifies the photo editing process, making it easy for anyone to retouch pictures like a pro right from your Mac or Windows computer.
11.2. RAW Image Converter
Not just for tweaking minor flaws, Luminar Neo also excels with its RAW image converter and transforms raw data into stunningly detailed images with just a few clicks. This means better control over your final edits, ensuring your photos look both beautiful and natural.
12. The Future of Wireless Photo Transfer
What does the future hold for wireless photo transfer technology? According to research from the Santa Fe University of Art and Design’s Photography Department, in July 2025, we can expect to see even faster transfer speeds, more seamless integration with cloud services, and more advanced features like automatic image recognition and tagging.
12. 1. Advancements to Watch For
- WiFi 6E: Offers faster transfer speeds and lower latency compared to previous WiFi standards.
- 5G Connectivity: Provides faster and more reliable mobile data connections, enabling faster cloud transfers.
- AI-Powered Transfer: Automatically identifies and tags photos during transfer, making organization easier.
13. Exploring dfphoto.net: Your Resource for Photography Tips and Inspiration
Where can you find more photography tips and inspiration? dfphoto.net is your go-to resource for everything photography-related.
13. 1. What You’ll Find on dfphoto.net
- Detailed tutorials on various photography techniques.
- Reviews of the latest cameras, lenses, and accessories.
- Interviews with renowned photographers.
- Stunning photo galleries showcasing the work of talented artists.
- A vibrant community forum where you can connect with other photographers.
13. 2. Address and Contact Information
Address: 1600 St Michael’s Dr, Santa Fe, NM 87505, United States
Phone: +1 (505) 471-6001
Website: dfphoto.net
14. Ethical Considerations for Mobile Photography
What ethical considerations should you keep in mind when using your phone for photography?
14. 1. Privacy
Be mindful of people’s privacy when taking photos in public places. Avoid photographing individuals without their consent, especially in sensitive situations.
14. 2. Copyright
Respect copyright laws when sharing photos online. Obtain permission before using images that are not your own.
14. 3. Manipulation
Be transparent about any significant manipulations you make to your photos. Avoid using editing tools to create misleading or deceptive images.
15. Maintaining Your Camera and Phone for Optimal Performance
How can you keep your camera and phone in top condition for the best possible photo transfer experience?
15. 1. Camera Care
- Clean your camera lens regularly with a microfiber cloth.
- Store your camera in a dry and safe place.
- Update your camera’s firmware to the latest version.
15. 2. Phone Maintenance
- Keep your phone’s operating system up to date.
- Free up storage space by deleting unnecessary files and apps.
- Protect your phone from extreme temperatures and moisture.
16. Creative Mobile Photography Projects
Looking for inspiration for your next mobile photography project? Here are some ideas:
16. 1. Street Photography
Capture the everyday moments of life in your city or town.
16. 2. Nature Photography
Explore the beauty of the natural world with your phone’s camera.
16. 3. Portrait Photography
Create stunning portraits of your friends and family.
16. 4. Abstract Photography
Experiment with unusual angles, compositions, and subjects to create abstract images.
17. Gear Recommendations for Mobile Photography Enthusiasts
What gear can enhance your mobile photography experience? Here are some recommendations:
17. 1. Tripods
A tripod can help you stabilize your phone for sharper photos and videos, especially in low-light conditions.
17. 2. Lenses
External lenses can expand your phone’s field of view and allow you to capture macro shots and telephoto images.
17. 3. Lighting Accessories
Portable LED lights can provide additional illumination for portraits and product photography.
18. Q&A: Addressing Common Questions About Wireless Photo Transfer
Have questions about wireless photo transfer? Here are some frequently asked questions and their answers:
18. 1. Is WiFi transfer faster than using a USB cable?
WiFi transfer speeds can vary depending on your network connection and camera’s capabilities. In general, a USB cable provides a more stable and faster transfer, especially for large files.
18. 2. Can I transfer RAW files wirelessly?
Yes, most WiFi-enabled cameras and WiFi SD cards support the transfer of RAW files. However, keep in mind that RAW files are larger than JPEGs, so the transfer may take longer.
18. 3. How secure is WiFi photo transfer?
WiFi photo transfer is generally secure as long as you are using a password-protected WiFi network. However, it’s always a good idea to be cautious when transferring sensitive information over a wireless connection.
18. 4. What is the range of a WiFi SD card?
The range of a WiFi SD card is typically around 30-50 feet, depending on environmental factors.
18. 5. Can I transfer photos from my camera to multiple devices at once?
Some WiFi-enabled cameras and WiFi SD cards allow you to connect to multiple devices simultaneously, but this may impact transfer speeds.
18. 6. Do I need a special app to transfer photos wirelessly?
Yes, most WiFi-enabled cameras and WiFi SD cards require a companion app to transfer photos wirelessly.
18. 7. What are the best cloud storage options for photographers?
Some of the best cloud storage options for photographers include Google Photos, Dropbox, Apple iCloud, and Adobe Creative Cloud.
18. 8. How much storage space do I need for my photos?
The amount of storage space you need for your photos depends on the number of photos you take, their resolution, and the file format you use. As a general guideline, 1TB of storage space can hold approximately 200,000 JPEG photos or 20,000 RAW photos.
18. 9. What is the best way to organize my photos on my phone?
Some tips for organizing your photos on your phone include using albums, tagging photos with keywords, and using a photo management app.
18. 10. How can I protect my photos from being lost or stolen?
Some tips for protecting your photos from being lost or stolen include backing up your photos regularly, using a strong password on your phone, and enabling remote wipe in case your phone is lost or stolen.
19. Join the dfphoto.net Community
Ready to take your photography to the next level? dfphoto.net is more than just a website; it’s a community.
19. 1. Connect and Learn
Join our forums to connect with fellow photographers, share your work, and get feedback.
19. 2. Stay Inspired
Explore our galleries and interviews to discover new techniques and perspectives.
19. 3. Elevate Your Skills
Access our comprehensive tutorials and reviews to hone your craft.
20. Conclusion: Seamless Photo Transfer for the Modern Photographer
Today we’ve walked you through several easy methods for getting photos from your camera to your phone so you can share them almost as soon as you snap them! Explore the resources and community at dfphoto.net for endless inspiration and learning opportunities.