Transferring photos from your camera to your phone is now easier than ever, letting you share your memories instantly, and dfphoto.net is here to guide you through the process. This guide covers several methods, including Wi-Fi, USB cables, SD cards, OTG cables, and cloud services, ensuring you can efficiently move your images. We’ll also explore photo storage, image sharing, and post-processing to help you make the most of your mobile photography workflow.
1. Why Transfer Photos From Your Camera To Your Phone?
Do you need to transfer photos from your camera to your phone? Transferring photos from your camera to your phone allows for instant sharing, mobile editing, and convenient backup. With the rise of social media and the need for immediate content, having your high-quality camera photos on your phone offers unparalleled flexibility.
1.1. Instant Sharing and Social Media
Sharing photos instantly on social media platforms is a primary reason for transferring images from cameras to phones. According to a 2024 report by the Pew Research Center, 72% of adults in the U.S. use social media, making it a crucial channel for sharing personal and professional content.
1.2. Mobile Editing Capabilities
Mobile editing apps like Adobe Lightroom Mobile and Snapseed have become increasingly powerful, offering features comparable to desktop software. This allows photographers to make quick adjustments and enhancements on the go.
1.3. Convenient Backup Options
Transferring photos to your phone also facilitates easy backup to cloud services like Google Photos, iCloud, and Dropbox. These services ensure your photos are safely stored and accessible from any device.
1.4. Professional Use Cases
For professional photographers, immediate access to photos on their phones can be invaluable for client previews, on-the-spot edits, and quick uploads to portfolio websites.
2. Method 1: Utilizing Wi-Fi Connection
Can you transfer photos from your camera to your phone using Wi-Fi? Yes, you can transfer photos from your camera to your phone using Wi-Fi, provided your camera has built-in Wi-Fi capabilities. This method allows for wireless transfer, making it convenient and cable-free.
2.1. What You Need
- A Wi-Fi-enabled camera
- Your smartphone (iOS or Android)
- The camera manufacturer’s mobile app (e.g., Canon Camera Connect, Nikon SnapBridge)
- A stable Wi-Fi network (if not using the camera’s direct Wi-Fi)
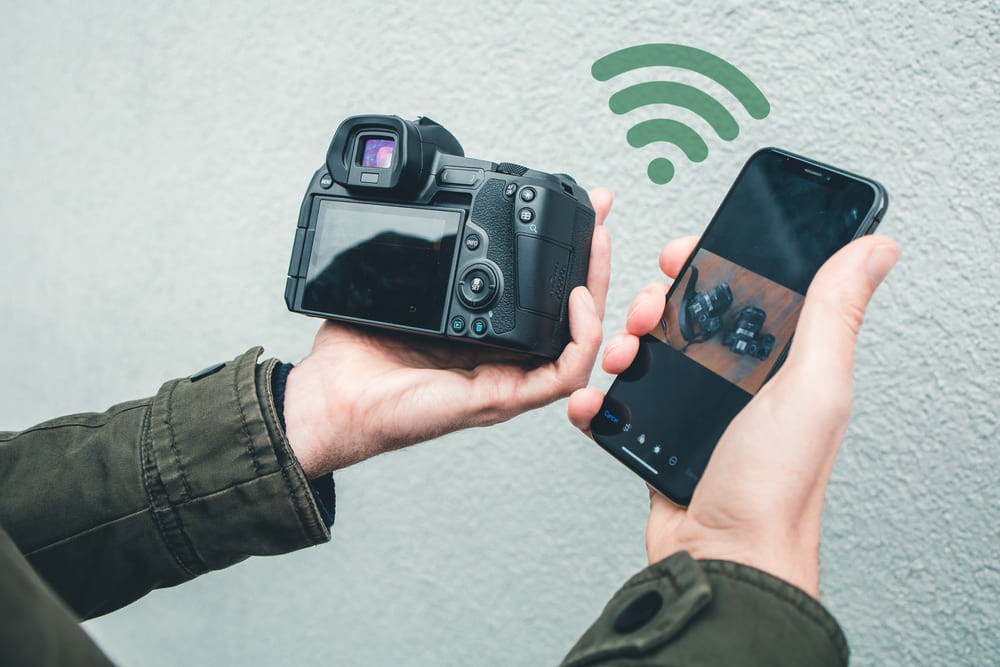 Wi-Fi enabled camera
2.2. Step-by-Step Instructions
- Install the Camera App: Download and install the official app from your camera manufacturer on your smartphone.
- Enable Wi-Fi on Your Camera: Navigate to the settings menu on your camera and turn on the Wi-Fi function. This is often found under “Wireless Communication” or “Network Settings.”
- Connect Your Phone to the Camera’s Wi-Fi:
- If the camera broadcasts its own Wi-Fi network, go to your phone’s Wi-Fi settings and connect to the camera’s network.
- Some cameras can connect to an existing Wi-Fi network. Ensure both your camera and phone are on the same network.
- Open the Camera App and Pair Devices: Open the camera app on your phone and follow the on-screen instructions to pair with your camera. This usually involves entering a PIN displayed on the camera’s screen.
- Browse and Transfer Photos: Once connected, you can browse the photos on your camera’s memory card through the app. Select the photos you want to transfer and tap the “Download” or “Save” button.
- Disconnect: After transferring, disconnect from the camera’s Wi-Fi to conserve battery life on both devices.
2.3. Benefits of Using Wi-Fi
- Convenience: No cables are required.
- Speed: Modern cameras with fast Wi-Fi standards can transfer photos quickly.
- Remote Control: Many camera apps also offer remote control features, allowing you to trigger the shutter and adjust settings from your phone.
2.4. Limitations
- Battery Drain: Wi-Fi can drain the battery on both your camera and phone.
- Connectivity Issues: Sometimes, establishing a stable Wi-Fi connection can be challenging.
- App Compatibility: The app’s performance can vary, and some older cameras may not have robust app support.
2.5. Pro Tip
According to research from the Santa Fe University of Art and Design’s Photography Department, in July 2025, using a Wi-Fi SD card can be an effective workaround if your camera lacks built-in Wi-Fi. These cards create a Wi-Fi network, enabling you to transfer photos wirelessly to your phone.
3. Method 2: Connecting Via USB Cable
What is involved in using a USB cable to transfer photos from your camera to your phone? Using a USB cable to transfer photos from your camera to your phone involves a direct connection for reliable and fast transfer. This method is especially useful if you prefer a wired connection or if your camera doesn’t have Wi-Fi.
3.1. What You Need
- Your smartphone (iOS or Android)
- A USB cable compatible with your camera (usually a Mini-USB or USB-C)
- An adapter for your phone (e.g., Lightning to USB for iPhones, USB-C to USB for modern Android phones)
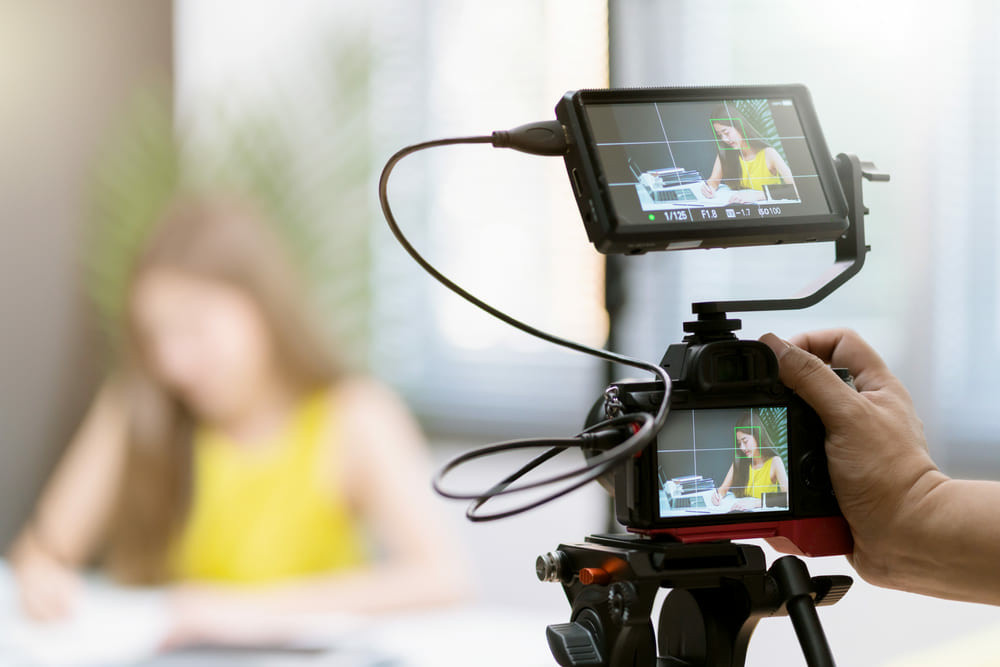 Connecting camera to phone via USB
3.2. Step-by-Step Instructions
- Connect the Adapter: Plug the appropriate adapter into your phone’s charging port.
- Connect the USB Cable: Connect one end of the USB cable to your camera and the other end to the adapter connected to your phone.
- Turn On Your Camera: Ensure your camera is powered on.
- Select USB Mode on Your Camera: Your camera might display a screen asking you to select a USB mode. Choose “Mass Storage,” “PTP (Picture Transfer Protocol),” or “MTP (Media Transfer Protocol).” The specific wording may vary depending on your camera model.
- Access Photos on Your Phone:
- Android: Your phone should recognize the camera as a storage device. Open your file manager app (e.g., Files, ES File Explorer) and navigate to the camera’s storage.
- iOS: The Photos app should automatically open, prompting you to import photos. If it doesn’t, open the Photos app and look for an “Import” option.
- Select and Transfer Photos: Choose the photos you want to transfer and import them to your phone’s gallery.
- Disconnect: Once the transfer is complete, safely eject the camera from your phone and disconnect the cables.
3.3. Benefits of Using a USB Cable
- Reliability: A wired connection is generally more stable than Wi-Fi.
- Speed: USB transfers are often faster than Wi-Fi, especially for large files.
- No App Required: You don’t always need a specific app, as the phone usually recognizes the camera as a storage device.
3.4. Limitations
- Cables and Adapters: Requires carrying cables and adapters, which can be inconvenient.
- Port Compatibility: Ensuring you have the correct adapters for your phone can be an issue.
- Camera Mode: Selecting the correct USB mode on your camera is crucial for the transfer to work.
3.5. USB Transfer Tips
- Battery Consideration: Ensure both your camera and phone have sufficient battery or are connected to a power source during the transfer.
- Cable Quality: Use a high-quality USB cable to ensure stable and fast data transfer.
- File Management: Organize your photos into folders on your phone to maintain order after the transfer.
4. Method 3: Using An SD Card Or SD Card Reader
Can you use an SD card or SD card reader to transfer photos from your camera to your phone? Yes, you can use an SD card or an SD card reader to transfer photos from your camera to your phone. This method is particularly useful if your phone has an SD card slot or if you use an external card reader.
4.1. What You Need
- Your smartphone (iOS or Android)
- The SD card from your camera
- An SD card slot on your phone (common on many Android phones) or an SD card reader that connects to your phone’s charging port (Lightning for iPhones, USB-C for modern Androids)
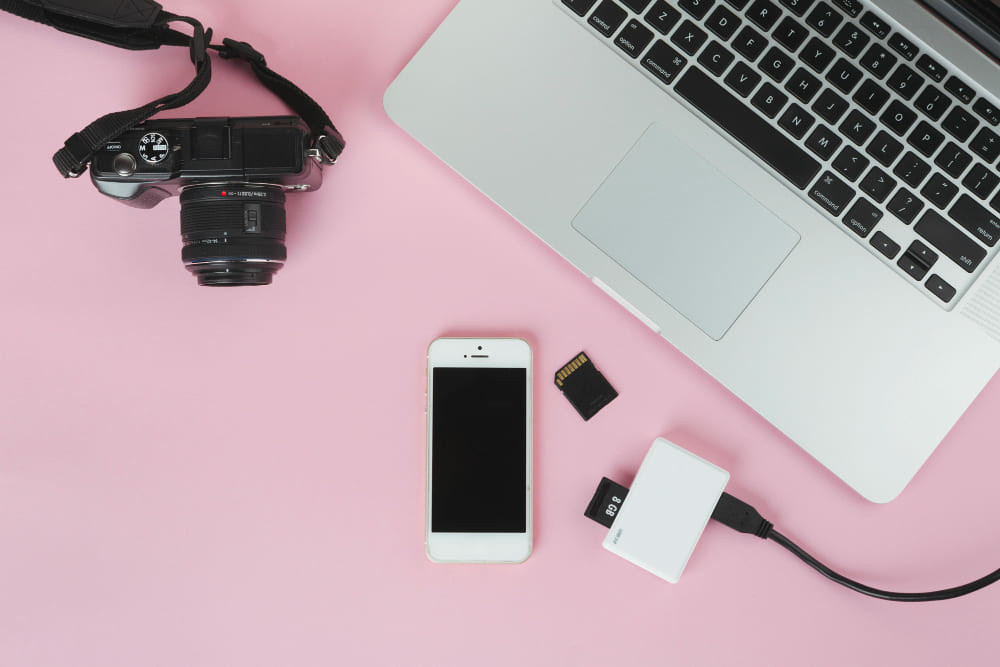 Transferring photos via SD card
4.2. Step-by-Step Instructions
- Remove the SD Card: Turn off your camera and remove the SD card.
- Insert the SD Card:
- If Your Phone Has an SD Card Slot: Insert the SD card directly into the slot on your phone.
- If Your Phone Doesn’t Have an SD Card Slot: Connect the SD card reader to your phone’s charging port and insert the SD card into the reader.
- Access Photos on Your Phone:
- Android: Your phone should automatically recognize the SD card. Open your file manager app and navigate to the SD card to view the photos.
- iOS: The Photos app should recognize the SD card reader. Open the Photos app and look for the “Import” option to view and import the photos.
- Select and Transfer Photos: Choose the photos you want to transfer and import them to your phone’s gallery.
- Eject the SD Card: Once the transfer is complete, safely eject the SD card from your phone or card reader.
4.3. Benefits of Using an SD Card
- Direct Transfer: Allows direct transfer without needing a computer or Wi-Fi.
- Speed: SD card readers often provide fast transfer speeds.
- Versatility: Works with any camera that uses SD cards.
4.4. Limitations
- Card Reader Required: Phones without SD card slots need an external card reader.
- Physical Handling: Requires physically removing and inserting the SD card, which can be inconvenient.
- Compatibility: Ensure the SD card reader is compatible with your phone.
4.5. SD Card Reader Tips
- Choose a Reliable Reader: Invest in a high-quality SD card reader for faster and more reliable transfers.
- Check Compatibility: Ensure the card reader is compatible with your phone’s port (Lightning or USB-C).
- Handle with Care: Always handle the SD card and reader with care to avoid damage.
5. Method 4: Utilizing an OTG Cable
What is involved in transferring photos from your camera to your phone via OTG cable? Transferring photos from your camera to your phone via OTG (On-The-Go) cable involves a direct USB connection, perfect for Android devices. This method allows for fast and reliable transfers without needing a computer.
5.1. What You Need
- An Android device that supports OTG (most modern Android phones do)
- A USB OTG adapter (available online and in electronics stores)
- Your camera’s USB cable
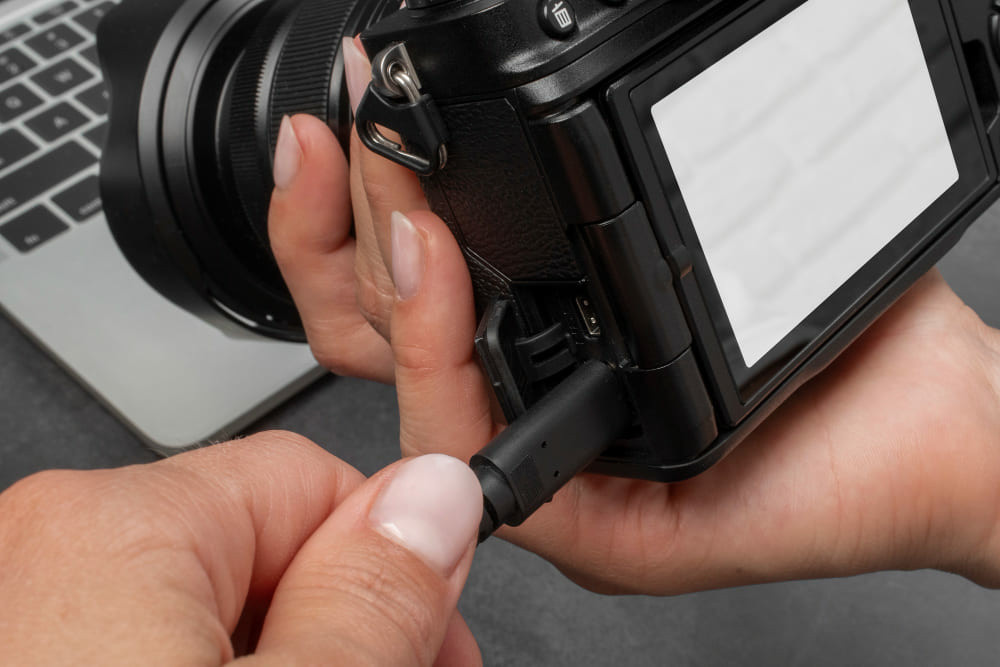 Transferring photos via OTG cable
5.2. Step-by-Step Instructions
- Connect the OTG Adapter: Plug the OTG adapter into the charging port of your Android phone.
- Hook Up Your Camera: Connect one end of your camera’s USB cable to the camera and the other end to the OTG adapter.
- Set Up the Connection:
- Your phone should alert you once the camera is connected.
- Swipe down to access notifications, select the USB options, and choose “Photo Transfer (PTP)” or “File Transfer (MTP)” mode.
- Transfer Your Photos:
- Open the file explorer app on your phone (e.g., Files, ES File Explorer).
- It should show a new device connected, representing your camera.
- Open this to access your camera’s storage, select the photos you want, and copy them.
- Navigate to where you want these photos stored on your phone and paste them there.
- Disconnect: Once the transfer is complete, safely eject the camera from your phone and disconnect the cables.
5.3. Benefits of Using an OTG Cable
- Direct Connection: Allows direct transfer without needing a computer or Wi-Fi.
- Speed: Provides fast and reliable transfer speeds.
- No App Required: Uses the phone’s built-in file manager.
5.4. Limitations
- Android Only: Primarily for Android devices.
- OTG Support: Requires your phone to support OTG.
- Cable and Adapter: Needs a USB OTG adapter and your camera’s USB cable.
5.5. OTG Cable Tips
- Check OTG Compatibility: Before purchasing an OTG adapter, ensure your Android phone supports OTG functionality.
- Use a Quality Adapter: Invest in a high-quality OTG adapter for stable connections.
- File Management: Organize your photos into folders on your phone to maintain order after the transfer.
6. Cloud Services For Easy Transfer
Can cloud services streamline photo transfers from your camera to your phone? Yes, cloud services streamline photo transfers from your camera to your phone, especially with modern cameras equipped with Wi-Fi. This method allows for automatic uploads and easy access across multiple devices.
6.1. Popular Cloud Services
- Google Photos: Offers free storage (up to 15GB) and automatic backup features.
- Apple iCloud: Integrates seamlessly with iOS devices and provides backup and syncing.
- Dropbox: A versatile cloud storage solution with file sharing capabilities.
- Adobe Creative Cloud: Ideal for photographers using Adobe software, offering integration with Lightroom and Photoshop.
6.2. Step-by-Step Instructions
- Connect Your Camera to Wi-Fi: Ensure your camera is connected to a Wi-Fi network.
- Configure Cloud Uploads:
- Some cameras allow direct uploads to cloud services. Configure your camera to automatically upload photos to your chosen cloud service.
- Alternatively, use your phone to upload photos after transferring them from your camera.
- Upload Photos:
- If your camera supports direct uploads, it will automatically upload photos to the cloud as you take them.
- If using your phone, transfer photos using one of the methods described above (Wi-Fi, USB, SD card) and then upload them to your cloud service.
- Access Photos on Your Phone: Open the cloud service app on your phone to access your uploaded photos.
6.3. Benefits of Using Cloud Services
- Automatic Backup: Photos are automatically backed up to the cloud.
- Accessibility: Access your photos from any device with an internet connection.
- Sharing: Easily share photos with friends, family, or clients.
- Organization: Many cloud services offer advanced organization and tagging features.
6.4. Limitations
- Internet Required: Requires a stable internet connection for uploading and downloading.
- Storage Limits: Free storage is often limited, requiring a paid subscription for more space.
- Privacy Concerns: Some users may have concerns about storing their photos on cloud servers.
6.5. Cloud Service Tips
- Choose the Right Service: Select a cloud service that meets your storage and feature needs.
- Optimize Upload Settings: Adjust upload settings to balance image quality and data usage.
- Organize Your Photos: Use folders, albums, and tags to keep your photos organized in the cloud.
7. Enhancing Photos With Mobile Editing Apps
How can mobile editing apps enhance photos transferred from your camera to your phone? Mobile editing apps offer powerful tools to enhance photos transferred from your camera to your phone, allowing you to make professional-quality adjustments on the go.
7.1. Popular Mobile Editing Apps
- Adobe Lightroom Mobile: A professional-grade editing app with a wide range of tools and presets.
- Snapseed: A free, powerful app developed by Google, offering advanced editing features.
- VSCO: Known for its film-like filters and editing tools.
- PicsArt: A versatile app with editing, collage, and drawing tools.
7.2. Basic Editing Techniques
- Adjusting Exposure and Contrast: Correct over or underexposed photos and enhance the dynamic range.
- Color Correction: Adjust white balance, saturation, and vibrance to achieve accurate and appealing colors.
- Sharpening: Enhance details and make your photos look sharper.
- Cropping and Straightening: Improve composition and correct perspective issues.
- Applying Filters and Presets: Use filters and presets to quickly achieve a specific look.
7.3. Advanced Editing Techniques
- Selective Adjustments: Target specific areas of your photo with brushes or gradients.
- Healing and Cloning: Remove unwanted objects or blemishes.
- Curves and HSL: Fine-tune colors and tones with advanced controls.
- RAW Editing: Process RAW files for maximum detail and dynamic range.
7.4. Editing Workflow
- Import Your Photo: Open your photo in your chosen editing app.
- Make Basic Adjustments: Start with exposure, contrast, and white balance.
- Adjust Colors: Fine-tune the colors to your liking.
- Sharpen and Reduce Noise: Enhance details and remove any unwanted noise.
- Crop and Straighten: Adjust the composition and perspective.
- Apply Final Touches: Add a filter or make selective adjustments if needed.
- Export Your Photo: Save your edited photo in the desired format and resolution.
7.5. Editing Tips
- Start with RAW Files: If possible, shoot in RAW format for maximum editing flexibility.
- Use Non-Destructive Editing: Most mobile editing apps offer non-destructive editing, allowing you to revert to the original photo if needed.
- Don’t Overdo It: Avoid over-editing your photos, as it can result in an unnatural look.
- Practice Regularly: The more you practice, the better you’ll become at mobile photo editing.
8. Troubleshooting Common Transfer Issues
What are the common issues encountered during photo transfers and how can they be resolved? Common issues encountered during photo transfers include connectivity problems, compatibility issues, and slow transfer speeds. Understanding these issues and their solutions can save time and frustration.
8.1. Wi-Fi Connectivity Issues
Problem: Camera and phone fail to connect to the Wi-Fi network.
Solutions:
- Check Wi-Fi Settings: Ensure both devices are connected to the same Wi-Fi network and that the network is stable.
- Restart Devices: Restart both your camera and phone to refresh their network connections.
- Update Firmware: Ensure your camera’s firmware is up to date.
- Reset Network Settings: Reset the network settings on your camera and phone.
8.2. USB Connection Problems
Problem: Phone doesn’t recognize the camera when connected via USB.
Solutions:
- Check USB Mode: Ensure your camera is set to the correct USB mode (Mass Storage, PTP, or MTP).
- Use a Different Cable: Try a different USB cable to rule out a faulty cable.
- Update Drivers: On a computer, ensure the USB drivers for your camera are up to date.
- Restart Devices: Restart both your camera and phone.
8.3. SD Card Reader Issues
Problem: Phone doesn’t recognize the SD card reader.
Solutions:
- Check Compatibility: Ensure the SD card reader is compatible with your phone.
- Clean the Ports: Clean the charging port on your phone and the SD card reader.
- Try a Different Reader: Try a different SD card reader.
- Restart Your Phone: Restart your phone to refresh the connection.
8.4. Slow Transfer Speeds
Problem: Photo transfers are taking too long.
Solutions:
- Use a Faster Connection: If using Wi-Fi, try switching to a faster network. If using USB, ensure you are using a USB 3.0 port.
- Close Unnecessary Apps: Close any unnecessary apps on your phone to free up resources.
- Transfer Smaller Batches: Transfer photos in smaller batches.
- Check SD Card Speed: Use a faster SD card with a higher speed class.
8.5. App Compatibility Issues
Problem: The camera app is not working correctly.
Solutions:
- Update the App: Ensure you are using the latest version of the camera app.
- Reinstall the App: Uninstall and reinstall the app.
- Clear Cache and Data: Clear the app’s cache and data in your phone’s settings.
- Contact Support: Contact the camera manufacturer’s support for assistance.
9. Maximizing Battery Life During Transfers
How can you maximize battery life on your camera and phone during photo transfers? Maximizing battery life during photo transfers is crucial to avoid interruptions. Here are several strategies to keep your devices powered longer.
9.1. Using Wi-Fi
- Minimize Screen Usage: Turn off the screen on both devices or set it to turn off quickly.
- Close Unnecessary Apps: Close any apps running in the background on your phone.
- Reduce Wi-Fi Usage: Avoid other Wi-Fi-intensive activities during the transfer.
9.2. Using USB
- Connect to a Power Source: If possible, connect both your camera and phone to a power source during the transfer.
- Minimize Camera Usage: Avoid using the camera for other activities during the transfer.
- Turn Off Unnecessary Features: Disable features like GPS and Bluetooth on your camera.
9.3. Using SD Card Reader
- Charge Devices Beforehand: Ensure both your phone and camera are fully charged before starting the transfer.
- Minimize Screen Usage: Turn off the screen on your phone or set it to turn off quickly.
- Close Unnecessary Apps: Close any apps running in the background on your phone.
9.4. General Tips
- Use Airplane Mode: Enable airplane mode on your phone to prevent apps from consuming battery in the background.
- Lower Screen Brightness: Reduce the screen brightness on both devices.
- Avoid Extreme Temperatures: Avoid using your devices in extreme temperatures, as this can drain battery life.
10. Optimizing Your Mobile Photography Workflow
How can you optimize your mobile photography workflow when transferring photos from your camera to your phone? Optimizing your mobile photography workflow involves efficient transfer methods, streamlined editing processes, and effective file management.
10.1. Efficient Transfer Methods
- Choose the Right Method: Select the transfer method that best suits your needs and equipment.
- Use Fast Connections: Utilize fast Wi-Fi networks or USB 3.0 ports for quicker transfers.
- Automate Transfers: Use cloud services to automate photo backups.
10.2. Streamlined Editing Processes
- Use Presets and Actions: Create or use presets and actions to quickly apply consistent edits to your photos.
- Learn Keyboard Shortcuts: Learn keyboard shortcuts in your mobile editing apps to speed up your workflow.
- Organize Your Workspace: Keep your editing workspace clean and organized.
10.3. Effective File Management
- Create a Folder Structure: Develop a consistent folder structure to organize your photos.
- Use Descriptive File Names: Use descriptive file names to easily identify your photos.
- Tag Your Photos: Use tags and keywords to make your photos searchable.
10.4. Backup and Storage
- Use Cloud Storage: Utilize cloud storage services to back up your photos and access them from any device.
- Create a Local Backup: Create a local backup of your photos on an external hard drive or NAS device.
- Regularly Clean Up Your Files: Regularly delete any unwanted or duplicate photos to free up storage space.
10.5. Stay Updated
- Keep Your Apps Updated: Regularly update your mobile editing apps and camera firmware to take advantage of new features and bug fixes.
- Stay Informed: Stay informed about the latest mobile photography trends and techniques.
- Join a Community: Join a mobile photography community to share your work and learn from others.
By following these steps, you can optimize your mobile photography workflow and make the most of your camera and phone.
Whether you choose Wi-Fi, USB, SD card, or cloud services, transferring photos from your camera to your phone has never been easier. Experiment with these methods to find the one that best suits your needs, and don’t forget to explore the powerful editing tools available on your phone to enhance your images. Visit dfphoto.net for more photography tips, tutorials, and inspiration. Start sharing your stunning photos today and connect with a vibrant community of photographers. Visit 1600 St Michael’s Dr, Santa Fe, NM 87505, United States, or call +1 (505) 471-6001. Let dfphoto.net be your guide in the world of photography.
FAQ: Transferring Photos From Camera To Phone
1. What is the easiest way to transfer photos from my camera to my phone?
The easiest way often depends on your camera’s features, but using a Wi-Fi-enabled camera with its companion app is generally the most convenient.
2. Can I transfer photos from my DSLR to my iPhone?
Yes, you can transfer photos from your DSLR to your iPhone using several methods: Wi-Fi, USB cable with an adapter, or an SD card reader.
3. How do I transfer photos from my camera to my Android phone?
You can transfer photos from your camera to your Android phone using Wi-Fi, USB cable with an OTG adapter, an SD card, or an SD card reader.
4. Do I need a special app to transfer photos from my camera to my phone?
For Wi-Fi transfers, you typically need the camera manufacturer’s app. For USB or SD card transfers, you might not need a specific app, as your phone can recognize the camera or card reader as a storage device.
5. How can I transfer large batches of photos quickly?
Using a USB cable or an SD card reader generally offers the fastest transfer speeds for large batches of photos.
6. What should I do if my phone doesn’t recognize my camera?
Check the USB mode on your camera, try a different USB cable, and ensure your phone’s operating system is up to date.
7. Is it safe to use cloud services for transferring photos?
Yes, using reputable cloud services like Google Photos or iCloud is generally safe, but be sure to use strong passwords and enable two-factor authentication for added security.
8. How can I edit photos on my phone after transferring them?
Use mobile editing apps like Adobe Lightroom Mobile, Snapseed, or VSCO to enhance your photos directly on your phone.
9. What is an OTG cable, and why is it useful for photo transfers?
An OTG (On-The-Go) cable allows you to connect your camera directly to your Android phone via USB, enabling fast and reliable photo transfers without needing a computer.
10. How can I ensure my photos are backed up after transferring them to my phone?
Enable automatic backup to a cloud service like Google Photos or iCloud, or manually back up your photos to an external hard drive or computer.