Transferring photos from your Android phone to your Mac should be a seamless process, allowing you to back up precious memories or edit them on a larger screen. However, users sometimes encounter difficulties in establishing a connection or finding the most efficient method. This guide provides you with several straightforward ways to transfer your photos from your Android device to your Mac, ensuring you never lose a snapshot.
Method 1: Using a USB Cable and Android File Transfer
The most direct method involves using a USB cable to physically connect your Android phone to your Mac. This method is reliable and especially useful for transferring large numbers of photos or videos.
Steps to Transfer Photos via USB Cable:
- Download and Install Android File Transfer: Your Mac requires a special application to recognize your Android device’s file system. Download the official Android File Transfer tool from the Android website. Install it by opening the downloaded
.dmgfile and dragging the Android File Transfer icon to your Applications folder. - Connect Your Android Phone: Use a USB cable to connect your Android phone to your Mac. Ensure the cable is properly connected to both devices.
- Set USB Connection to File Transfer (MTP): On your Android phone, a notification should appear regarding the USB connection. Tap on this notification and select “File Transfer” or “MTP” (Media Transfer Protocol). The exact wording may vary depending on your Android phone model and Android version. This step is crucial as it allows your Mac to access your phone’s storage.
- Open Android File Transfer on Mac: Once the USB connection is set to file transfer mode, Android File Transfer should automatically open on your Mac. If it doesn’t, manually launch it from your Applications folder.
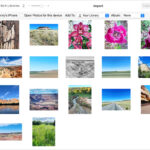
- Navigate and Copy Photos: Android File Transfer will display the file directories of your Android phone. Locate the “DCIM” folder, which typically contains your photos and videos. You can then drag and drop the photo files or folders from the Android File Transfer window to a folder on your Mac.
Troubleshooting Android File Transfer Issues:
If Android File Transfer doesn’t recognize your device, consider these troubleshooting steps:
- Check USB Connection: Ensure the USB cable is working correctly and securely connected. Try a different USB port on your Mac or a different USB cable.
- Restart Devices: Restart both your Android phone and your Mac. Sometimes a simple restart can resolve connection issues.
- Reinstall Android File Transfer: If the application is corrupted, try uninstalling and reinstalling Android File Transfer on your Mac.
- Software Updates: Ensure your Mac operating system is up to date. While Sonoma 14.2.1 was mentioned as a potential issue in a user forum, keeping your system updated generally resolves compatibility problems.
- Android USB Settings: Double-check your Android phone’s USB settings after connecting. Sometimes, even after selecting “File Transfer,” the connection might revert to “Charging Only.”
Method 2: Utilizing Cloud Storage Services (Google Drive or Google Photos)
Cloud services offer a wireless and convenient way to transfer photos, especially if you prefer not to use cables. Google Drive and Google Photos are excellent options for Android users, as they are often pre-installed or readily available.
Transferring Photos via Google Drive or Google Photos:
- Upload Photos from Android to Google Drive/Photos:
- Google Photos: Open the Google Photos app on your Android phone. Ensure backup and sync is enabled to automatically upload your photos to the cloud. Alternatively, you can manually select photos and upload them.
- Google Drive: Open the Google Drive app on your Android phone. Create a new folder if desired, and upload your photos to Google Drive.
- Access Photos on Your Mac:
- Via Web Browser: On your Mac, open a web browser and go to Google Photos or Google Drive. Sign in with the same Google account you used on your Android phone. You can then download the photos directly to your Mac.
- Google Drive Desktop App: Download and install the Google Drive desktop application on your Mac. This app syncs a Google Drive folder to your Mac, allowing you to access your uploaded photos directly from your Finder. Any photos you uploaded from your Android phone to Google Drive will automatically appear in the synced folder on your Mac.
Advantages of Cloud Services:
- Wireless Transfer: No need for cables, offering greater convenience.
- Backup Solution: Google Photos also serves as a backup for your photos, protecting them even if you lose your phone.
- Selective Transfer: You can choose specific photos or albums to upload and download.
Conclusion
Transferring photos from Android to Mac is achievable through various methods, each with its own advantages. Using a USB cable and Android File Transfer is a reliable method for bulk transfer, while cloud services like Google Drive and Google Photos provide wireless convenience and backup options. Choose the method that best suits your needs and enjoy your photos on your Mac!