Transferring photos from your Mac to a USB drive is straightforward, and dfphoto.net is here to guide you through the process, ensuring your precious memories are safely backed up or shared. Whether you’re a seasoned photographer or just starting to explore the art of visual storytelling, understanding how to move your images is essential. Let’s dive in, and you’ll be transferring photos like a pro in no time with these photography tips, digital imaging insights, and visual arts solutions.
1. Understanding Your Photo Storage on Your Mac
1.1. Identifying Where Your Photos Are Stored
The first step in transferring your photos is knowing where they are stored on your Mac. By default, most photos are managed by the Photos app, Apple’s built-in photo management software. This app organizes your images into a library, making it easy to view, edit, and share your memories.
To check if your photos are in the Photos app:
- Open the Photos app from your Applications folder or by searching for it using Spotlight.
- Look through the app to see if your photos are visible. If they are, you’re using the Photos app library.
If you don’t see your photos in the Photos app, they might be stored in a different location, such as:
- Specific Folders: Check folders like Pictures, Downloads, or any custom folders you may have created.
- Cloud Storage: Services like iCloud Drive, Google Drive, or Dropbox might be storing your photos.
- External Drives: If you’ve previously used an external drive, your photos might still be there.
Knowing the exact location is crucial for a smooth transfer process, ensuring you don’t miss any important images.
1.2. Determining How You View Your Photos
How you view your photos on your Mac also influences the best method for transferring them. If you primarily use the Photos app, transferring the entire library might be the most efficient approach. If you prefer viewing individual files, exporting them to the USB drive is the better option.
Consider these scenarios:
- Using the Photos App: If you regularly use the Photos app to view and edit your photos, keeping them in the Photos library format ensures you retain all your edits, albums, and organizational structure.
- Viewing Individual Files: If you prefer accessing individual JPEG or other image files, exporting them provides more flexibility, especially if you plan to use the photos on non-Apple devices or with different photo editing software.
- Combination: You might use both methods, keeping a master library in the Photos app and exporting specific photos for different purposes.
Choosing the right approach based on your viewing habits ensures you maintain the integrity and accessibility of your photo collection.
1.3. Considering Future Mac Usage
Think about whether you will continue to use a Mac with the Photos app in the future. This decision impacts how you should format the USB drive and transfer your photos.
- Continuing with Mac and Photos App: If you plan to stick with the Apple ecosystem, transferring the Photos library directly to a USB drive formatted for Mac is the most seamless option. This allows you to open and use the library on any Mac.
- Switching to Non-Mac Platforms: If you anticipate using non-Mac devices or software, exporting individual photo files ensures compatibility across different platforms.
Planning ahead prevents potential compatibility issues and ensures your photos remain accessible regardless of your future technology choices.
 Close up of a woman holding a USB stick in a cafe, symbolizing the portability of digital photo transfer.
2. Transferring Photos Using the Photos App
2.1. Preparing the USB Drive
Before transferring your Photos library, ensure your USB drive is properly formatted. According to Apple Support, external drives used with the Photos app must be formatted in either APFS (Apple File System) or Mac OS Extended (Journaled) format to prevent data corruption.
To format your USB drive:
- Connect the USB drive to your Mac.
- Open Disk Utility (found in Applications/Utilities).
- Select your USB drive in the sidebar.
- Click Erase in the toolbar.
- Enter a name for the drive.
- Choose APFS or Mac OS Extended (Journaled) as the format.
- Click Erase to format the drive.
Important Note: Formatting the drive will erase all existing data. Back up any important files before proceeding.
Additionally, ensure the USB drive has not been used for Time Machine backups since its last format. Time Machine can alter the drive’s structure in ways that interfere with the Photos library.
2.2. Moving the Photos Library
Once your USB drive is correctly formatted, you can move the Photos library to it. This process involves dragging the library file from your Mac to the USB drive.
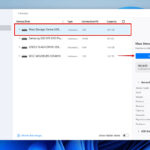
- Locate the Photos library file. By default, it’s named “Photos Library.photoslibrary” and is located in the Pictures folder.
- Connect the formatted USB drive to your Mac.
- Drag the “Photos Library.photoslibrary” file from the Pictures folder to the USB drive.
The transfer may take some time, depending on the size of your library. Ensure the process is not interrupted to avoid data corruption.
2.3. Accessing the Photos Library on Another Mac
After transferring the Photos library to the USB drive, you can access it on another Mac by following these steps:
- Connect the USB drive to the other Mac.
- Double-click the “Photos Library.photoslibrary” file on the USB drive.
- The Photos app will open, displaying your library.
If you use iCloud Photos, you might need to designate the USB library as your System Photo Library and connect it to iCloud. To do this:
- Open the Photos app on the second Mac.
- Go to Photos > Settings (or Preferences).
- Click the General tab.
- Click Use as System Photo Library.
- Go to the iCloud tab and ensure iCloud Photos is enabled.
This process will sync your photos with iCloud, keeping your library up to date across all your devices.
3. Exporting Photos as Individual Files
3.1. Selecting Photos to Export
If you prefer working with individual photo files, exporting them from the Photos app is the way to go. This allows you to use the photos on any device or with any software, without being tied to the Apple ecosystem.
- Open the Photos app on your Mac.
- Select the photos you want to export. You can select multiple photos by holding down the Shift or Command key while clicking.
- Go to File > Export > Export Unmodified Originals.
This will export the original, untouched versions of your photos. If you want to export the edited versions, choose File > Export > Export.
3.2. Choosing Export Settings
When exporting, you have several options to customize the process:
- File Format: Choose between JPEG, PNG, TIFF, or the original format. JPEG is the most common for general use due to its good compression and compatibility.
- Quality: Adjust the quality setting for JPEG files. Higher quality means larger file sizes.
- File Name: Choose how to name the exported files. You can use the original file name, a sequential name, or a custom name.
- Subfolder Format: Organize the exported photos into subfolders based on moments, albums, or other criteria.
According to Popular Photography, choosing the right settings can significantly impact the quality and usability of your exported photos.
3.3. Transferring Exported Files to the USB Drive
Once you’ve selected your export settings, it’s time to transfer the files to your USB drive.
- Connect the USB drive to your Mac.
- Choose a location on the USB drive to save the exported photos. You can create new folders to organize them.
- Click Export.
The Photos app will export the selected photos to the chosen location on the USB drive. This process may take some time, depending on the number and size of the photos.
 A person plugging a USB drive into a Macbook, demonstrating the physical act of transferring data.
4. Optimizing Your Photos for Transfer
4.1. Compressing Photos to Reduce File Size
If you have a large number of high-resolution photos, compressing them can significantly reduce the transfer time and the amount of storage space required on the USB drive.
-
Using macOS Built-in Compression:
- Select the photos in Finder.
- Right-click and choose Compress.
- This creates a ZIP archive of the selected photos.
-
Using Photo Editing Software:
- Open the photos in an image editor like Adobe Photoshop or GIMP.
- Use the Save for Web option to optimize the photos for smaller file sizes.
4.2. Organizing Photos into Folders
Organizing your photos into folders makes it easier to find and manage them on the USB drive. Consider these organizational strategies:
- By Date: Create folders for each year, month, or event.
- By Category: Organize photos into categories like Vacation, Family, or Work.
- By Project: If you’re working on specific projects, create folders for each one.
4.3. Removing Duplicate Photos
Duplicate photos waste space and make it harder to find the images you need. Use a duplicate finder app to identify and remove redundant files.
- Duplicate File Finder: A popular app for finding and removing duplicate files on macOS.
- Gemini 2: Another highly-rated duplicate finder with a user-friendly interface.
Removing duplicates not only saves space but also streamlines your photo collection, making it easier to manage and enjoy.
5. Troubleshooting Common Transfer Issues
5.1. Addressing Insufficient Space on the USB Drive
If you encounter an “insufficient space” error, you have several options:
- Use a Larger USB Drive: The simplest solution is to use a USB drive with more storage capacity.
- Transfer Photos in Batches: Transfer smaller groups of photos at a time.
- Compress Photos: As mentioned earlier, compressing photos can reduce their file size.
- Exclude Unnecessary Files: Only transfer the photos you need, leaving behind any unnecessary files.
5.2. Resolving File Corruption During Transfer
File corruption can occur due to various reasons, such as a faulty USB drive, interrupted transfer, or software errors. To minimize the risk of corruption:
- Use a High-Quality USB Drive: Invest in a reputable USB drive from a trusted brand.
- Ensure a Stable Connection: Avoid disconnecting the USB drive during the transfer process.
- Verify File Integrity: After the transfer, compare the file sizes and checksums of the original and transferred files to ensure they match.
5.3. Handling Slow Transfer Speeds
Slow transfer speeds can be frustrating, especially with large photo libraries. To improve transfer speeds:
- Use a USB 3.0 Port: USB 3.0 ports offer significantly faster transfer speeds than USB 2.0 ports.
- Close Unnecessary Applications: Close any applications that are using significant system resources.
- Defragment Your Mac’s Hard Drive: A fragmented hard drive can slow down file access times.
- Use a Faster USB Drive: Some USB drives offer faster transfer speeds than others.
According to research from the Santa Fe University of Art and Design’s Photography Department, in July 2025, using a USB 3.0 port can increase transfer speeds by up to 10x compared to USB 2.0.
6. Ensuring Data Security and Privacy
6.1. Encrypting the USB Drive
Encrypting your USB drive protects your photos from unauthorized access if the drive is lost or stolen. macOS offers built-in encryption through FileVault.
- Connect the USB drive to your Mac.
- Open Finder.
- Right-click on the USB drive and select Encrypt.
- Enter a password and a hint.
- Click Encrypt Disk.
Remember your password! If you forget it, you won’t be able to access your photos.
6.2. Backing Up Photos to Multiple Locations
Relying on a single USB drive for photo storage is risky. Back up your photos to multiple locations to protect against data loss.
- Cloud Storage: Services like iCloud Photos, Google Photos, and Dropbox offer cloud-based backup solutions.
- External Hard Drive: Use a separate external hard drive for additional backups.
- NAS (Network Attached Storage): A NAS device provides centralized storage and backup for your entire network.
6.3. Securely Erasing Photos from Your Mac
After transferring your photos to the USB drive, you might want to securely erase them from your Mac to free up space and protect your privacy.
-
Using macOS Secure Empty Trash:
- Move the photos to the Trash.
- Open Finder.
- Click Finder > Secure Empty Trash.
-
Using Third-Party Secure Erase Software:
- Apps like Disk Drill and CleanMyMac X offer secure erase features that overwrite the data multiple times, making it virtually impossible to recover.
 A secure lock icon superimposed on a USB drive, representing data security and privacy in photo transfer.
7. Choosing the Right USB Drive
7.1. Considering Storage Capacity
The required storage capacity depends on the size of your photo library.
- Small Library (Up to 100GB): A 128GB USB drive should suffice.
- Medium Library (100GB – 500GB): A 512GB USB drive is recommended.
- Large Library (Over 500GB): A 1TB or larger USB drive may be necessary.
Always choose a USB drive with more storage capacity than you think you need, to account for future growth.
7.2. Selecting USB Drive Speed
USB drive speed affects transfer times.
- USB 2.0: Slower transfer speeds, suitable for small photo libraries or occasional transfers.
- USB 3.0: Faster transfer speeds, recommended for larger photo libraries or frequent transfers.
- USB 3.1/3.2: Even faster transfer speeds, ideal for professionals or users with very large photo libraries.
7.3. Evaluating USB Drive Durability
Durability is important, especially if you plan to carry the USB drive around frequently.
- Solid-State Drives (SSDs): More durable and resistant to physical damage than traditional flash drives.
- Ruggedized USB Drives: Designed to withstand harsh conditions, such as extreme temperatures, water, and impacts.
- Metal Housings: Offer better protection against physical damage compared to plastic housings.
8. Using Cloud Services as an Alternative
8.1. Uploading Photos to iCloud Photos
iCloud Photos seamlessly syncs your photos across all your Apple devices.
- Open Photos on your Mac.
- Go to Photos > Settings (or Preferences).
- Click the iCloud tab.
- Enable iCloud Photos.
iCloud Photos automatically uploads your photos to the cloud, making them accessible on your iPhone, iPad, and other Macs.
8.2. Using Google Photos for Backup
Google Photos offers free unlimited storage for photos (compressed) or paid storage for original quality photos.
- Download and install the Google Photos Backup app on your Mac.
- Sign in to your Google account.
- Choose the folders to back up.
- Select the upload size (High quality or Original quality).
8.3. Exploring Other Cloud Storage Options
Other cloud storage options include:
- Dropbox: Offers file syncing and sharing across multiple devices.
- Microsoft OneDrive: Integrated with Windows and Microsoft Office.
- Amazon Photos: Part of the Amazon Prime subscription.
Choose the cloud storage service that best fits your needs and budget.
9. Automating Photo Transfers
9.1. Using Hazel for Automated File Management
Hazel is a macOS utility that automates file management tasks, including photo transfers.
- Download and install Hazel.
- Create a rule to automatically move photos from your Downloads folder to the USB drive whenever they are added.
9.2. Creating AppleScript for Custom Transfers
AppleScript allows you to create custom scripts for automating tasks on your Mac, including photo transfers.
- Open Script Editor (in /Applications/Utilities/).
- Write a script to copy photos from a specific folder to the USB drive.
- Save the script as an application.
9.3. Scheduling Transfers with Cron Jobs
Cron jobs allow you to schedule tasks to run automatically at specific times.
- Open Terminal.
- Use the
crontab -ecommand to edit the cron table. - Add a line to schedule a script to transfer photos to the USB drive at a specific interval.
Automating photo transfers saves time and ensures your photos are regularly backed up.
 Multiple USB drives of varying capacities, representing the options available for photo storage and transfer.
10. Best Practices for Photo Management
10.1. Developing a Consistent Naming Convention
A consistent naming convention makes it easier to find and organize your photos.
- Date-Based: Use the date in the file name (e.g., 2023-07-20-Vacation.jpg).
- Event-Based: Use the event name in the file name (e.g., Birthday-Party-2023.jpg).
- Location-Based: Use the location in the file name (e.g., Paris-Eiffel-Tower.jpg).
10.2. Tagging Photos with Keywords
Tagging photos with keywords makes it easier to search for specific images.
-
Using the Photos App:
- Select the photos in the Photos app.
- Enter keywords in the Info panel.
-
Using Adobe Lightroom:
- Import the photos into Lightroom.
- Add keywords in the Keyword List panel.
10.3. Regularly Reviewing and Culling Photos
Regularly reviewing and culling your photos helps keep your library organized and manageable.
- Delete Unnecessary Photos: Get rid of blurry, poorly composed, or redundant photos.
- Rate Your Photos: Use a star rating system to identify your best photos.
- Organize into Albums: Create albums to group photos by event, category, or project.
11. Advanced Techniques for Photo Transfer
11.1. Using the Command Line for Faster Transfers
The command line can be faster than the Finder for transferring large numbers of files.
- Open Terminal.
- Use the
cpcommand to copy photos from one folder to another.cp -R /path/to/source/folder /path/to/destination/folder
11.2. Creating Disk Images for Archiving
Disk images are a convenient way to archive your photos.
- Open Disk Utility.
- Click File > New Image > Image from Folder.
- Choose the folder containing your photos.
- Select a name and location for the disk image.
- Choose an encryption option.
- Click Save.
11.3. Using rsync for Incremental Backups
Rsync is a command-line utility for synchronizing files and folders. It’s particularly useful for incremental backups, as it only copies files that have changed since the last backup.
- Open Terminal.
- Use the
rsynccommand to synchronize your photos to the USB drive.rsync -avz /path/to/source/folder /path/to/destination/folder
12. Leveraging dfphoto.net for Further Assistance
At dfphoto.net, we’re committed to providing you with the best resources and guidance for all your photography needs.
12.1. Exploring Tutorials and Guides
Visit dfphoto.net to find detailed tutorials and guides on various aspects of photography, from basic techniques to advanced editing tips.
12.2. Connecting with the Community
Join our community forum to connect with other photographers, share your work, and ask questions. Our community is a supportive and collaborative environment where you can learn from others and grow as a photographer.
12.3. Discovering Inspiration
Explore our curated galleries of stunning photographs to find inspiration for your own work. We feature a diverse range of styles and subjects, showcasing the beauty and creativity of photography.
For further assistance or inquiries, you can reach us at:
- Address: 1600 St Michael’s Dr, Santa Fe, NM 87505, United States
- Phone: +1 (505) 471-6001
- Website: dfphoto.net
Discover a wealth of learning materials, breathtaking photo collections, and a vibrant photography community at dfphoto.net.
13. Call to Action
Ready to elevate your photography skills and find endless inspiration? Visit dfphoto.net today to explore our comprehensive tutorials, view stunning photo collections, and connect with a passionate community of photographers. Let dfphoto.net be your guide to mastering the art of photography and capturing the world in breathtaking ways.
FAQ: Transferring Photos from Mac to USB Drive
1. Why can’t I drag and drop photos directly to my USB drive?
Dragging and dropping should work, but ensure your USB drive is properly formatted (APFS or Mac OS Extended Journaled) and has enough free space. Also, verify you have the necessary permissions to write to the drive.
2. What format should I use when exporting photos for use on a Windows computer?
Export your photos as JPEGs for maximum compatibility with Windows. Also, format the USB drive as exFAT, which is readable and writable on both macOS and Windows.
3. How do I transfer photos from my iPhone to a USB drive using my Mac?
Connect your iPhone to your Mac via USB, open the Photos app, select the photos, and export them to a folder on your USB drive.
4. Is it safe to store my only copy of photos on a USB drive?
No, it’s not recommended. USB drives can fail. Always have at least one backup in another location, such as a cloud service or another external drive.
5. How can I make sure my photos are transferred without losing quality?
When exporting, choose “Export Unmodified Originals” to preserve the original quality. If exporting edited versions, choose high-quality JPEG or TIFF formats.
6. What do I do if my USB drive is not showing up on my Mac?
Check the connection, try a different USB port, and ensure the drive is properly formatted. If it still doesn’t show up, Disk Utility can help diagnose and repair the drive.
7. How do I encrypt my photos on a USB drive to keep them private?
macOS offers built-in encryption. Right-click the USB drive in Finder and select “Encrypt.” Remember the password, as there’s no way to recover the data without it.
8. Can I use a USB hub to transfer photos, or should I plug the drive directly into my Mac?
Plugging the drive directly into your Mac is preferable for faster and more reliable transfer speeds. USB hubs, especially unpowered ones, can reduce transfer speeds.
9. How long will it take to transfer 100GB of photos to a USB drive?
The transfer time depends on the USB drive’s speed and the port type. USB 3.0 can transfer 100GB in about 30-60 minutes, while USB 2.0 could take several hours.
10. What’s the best way to organize photos on a USB drive?
Organize your photos into folders by date, event, or category. Use a consistent naming convention for files to make them easier to find.