Transferring photos from a digital camera to a computer is essential for photographers, whether amateur or professional. How To Transfer Photos From A Digital Camera To Computer is a breeze with the right methods, ensuring your precious memories are safe and accessible for editing, sharing, and archiving. This guide by dfphoto.net will walk you through various techniques and provide tips for a smooth and efficient photo transfer process, helping you master image transfers, manage digital assets, and enhance your photography workflow.
1. What Are The Main Methods To Transfer Photos From A Digital Camera To A Computer?
The main methods to transfer photos from a digital camera to a computer include using a USB cable, a card reader, or wireless transfer. Using a USB cable is a straightforward approach. A card reader offers a faster alternative, while wireless transfer provides convenience without physical connections.
- USB Cable: Connecting your camera to your computer via USB (Universal Serial Bus) is a direct and reliable method. Most digital cameras come with a USB cable, allowing you to plug the camera directly into your computer. Once connected, your computer should recognize the camera as an external drive, enabling you to access and transfer the photo files.
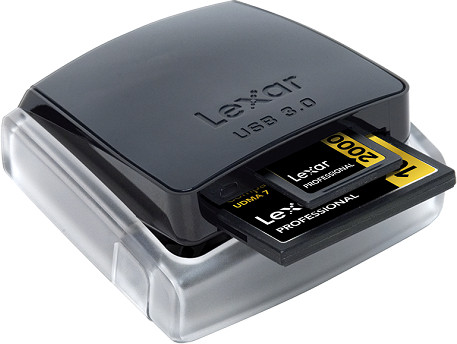
- Card Reader: A card reader is a device that reads the memory card directly from your camera. This method often provides faster transfer speeds compared to using a USB cable. Simply remove the memory card from your camera and insert it into the card reader, which is then connected to your computer.
- Wireless Transfer: Some cameras support wireless transfer via Wi-Fi or Bluetooth. This allows you to transfer photos to your computer without any physical connections. You may need to install specific software or use a mobile app provided by the camera manufacturer to facilitate the wireless transfer process.
2. How Do I Transfer Photos From My Camera To My Computer Using A USB Cable?
Transferring photos using a USB cable is generally the easiest method. First, connect your camera to your computer using the USB cable. Turn on your camera and set it to the appropriate USB mode (usually “PC Connection” or “Mass Storage”). Your computer should recognize the camera as a removable disk drive. Open the drive and locate the folder containing your photos (usually labeled “DCIM”). From there, you can drag and drop or copy and paste the photos to your desired folder on your computer.
To elaborate, here’s a step-by-step guide:
-
Connect the Camera: Use the USB cable to connect your digital camera to your computer. Ensure that both ends are securely plugged in.
-
Turn on the Camera: Power on your camera. In most cases, the computer will automatically detect the device. If not, refer to your camera’s manual for specific instructions on USB connection settings.
-
Select USB Mode: Your camera might display a menu asking you to select a USB connection mode. Choose the mode that allows file transfer, often labeled as “Mass Storage,” “PC Connection,” or similar.
-
Access the Camera on Your Computer:
- Windows: The camera should appear as a removable disk drive in File Explorer.
- macOS: The camera will show up on your desktop or in the Finder sidebar under “Devices.”
-
Locate the Photo Files: Open the camera drive. Typically, photos are stored in a folder named “DCIM” (Digital Camera Images). Inside this folder, you may find subfolders organized by date or event.
-
Copy the Photos:
- Drag and Drop: Select the photos you want to transfer and drag them to the desired folder on your computer.
- Copy and Paste: Alternatively, you can copy the photos and paste them into a folder on your computer.
-
Eject the Camera: Once the transfer is complete, safely eject the camera from your computer.
- Windows: Right-click on the camera drive in File Explorer and select “Eject.”
- macOS: Drag the camera icon from your desktop to the Trash or right-click and select “Eject.”
 Connect camera to computer via USB
3. What Are The Benefits Of Using A Card Reader To Transfer Photos?
Using a card reader offers several benefits, including faster transfer speeds, convenience, and preserving camera battery life. Card readers typically transfer data more quickly than USB connections because they are designed specifically for reading memory cards. By removing the memory card and using a card reader, you avoid draining the camera’s battery during the transfer process.
Here’s a detailed breakdown of the benefits:
- Faster Transfer Speeds: Card readers are generally faster than connecting the camera via USB because they are designed specifically for reading memory cards. This can save you a significant amount of time, especially when transferring large files or numerous photos.
- Battery Conservation: Transferring photos directly from the camera using a USB cable can drain the camera’s battery. Using a card reader eliminates this issue, as it doesn’t require the camera to be powered on during the transfer process.
- Convenience: Card readers are small and portable, making them easy to carry around. They also eliminate the need to keep the camera nearby during the transfer, providing more flexibility.
- Compatibility: Most card readers support various memory card formats, including SD cards, microSD cards, and CompactFlash cards. This versatility allows you to transfer photos from different types of cameras and devices.
- No Camera Software Required: When you use a card reader, you don’t need to install any specific camera software on your computer. The card reader is recognized as a standard storage device, making the transfer process straightforward.
4. How Do I Transfer Photos Using A Card Reader On Windows And MacOS?
To transfer photos using a card reader, first, remove the memory card from your camera and insert it into the card reader. Connect the card reader to your computer. On Windows, the memory card will appear as a new drive in File Explorer. On macOS, it will appear on your desktop or in the Finder sidebar. Open the drive and locate the folder containing your photos (usually “DCIM”). Then, drag and drop or copy and paste the photos to your desired folder on your computer.
-
Windows:
- Insert the Card Reader: Plug the card reader into an available USB port on your computer.
- Insert the Memory Card: Insert the memory card from your camera into the appropriate slot on the card reader.
- Open File Explorer: The memory card should appear as a new drive in File Explorer. If it doesn’t appear automatically, open File Explorer and look for it under “This PC” or “Devices and drives.”
- Locate the Photos: Open the memory card drive. Typically, the photos are stored in a folder named “DCIM.”
- Copy the Photos:
- Drag and Drop: Select the photos you want to transfer and drag them to the desired folder on your computer.
- Copy and Paste: Alternatively, you can copy the photos and paste them into a folder on your computer.
- Eject the Card Reader: Once the transfer is complete, safely eject the card reader from your computer. Right-click on the drive in File Explorer and select “Eject.”
-
macOS:
- Insert the Card Reader: Plug the card reader into an available USB port on your computer.
- Insert the Memory Card: Insert the memory card from your camera into the appropriate slot on the card reader.
- Access the Memory Card: The memory card will appear on your desktop or in the Finder sidebar under “Devices.”
- Locate the Photos: Open the memory card. Typically, the photos are stored in a folder named “DCIM.”
- Copy the Photos:
- Drag and Drop: Select the photos you want to transfer and drag them to the desired folder on your computer.
- Copy and Paste: Alternatively, you can copy the photos and paste them into a folder on your computer.
- Eject the Card Reader: Once the transfer is complete, safely eject the card reader from your computer. Drag the card reader icon from your desktop to the Trash or right-click and select “Eject.”
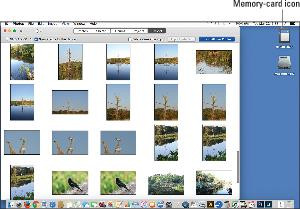 Memory card displaying as a drive on the computer
5. How Do I Transfer Photos Wirelessly From My Camera To My Computer?
To transfer photos wirelessly, ensure both your camera and computer are connected to the same Wi-Fi network. Enable the wireless transfer feature on your camera, which might require installing a specific app or software provided by the camera manufacturer. On your computer, open the corresponding app or software and follow the instructions to establish a connection with your camera. Once connected, you can browse and select the photos you want to transfer.
Here’s a detailed guide on how to transfer photos wirelessly:
- Check Camera Compatibility: Ensure that your digital camera supports wireless transfer via Wi-Fi or Bluetooth. Refer to your camera’s manual for details on wireless capabilities.
- Connect to Wi-Fi:
- Camera: Go to your camera’s settings menu and find the Wi-Fi settings. Select your home or preferred Wi-Fi network and enter the password if prompted.
- Computer: Make sure your computer is connected to the same Wi-Fi network.
- Install Necessary Software:
- Camera Software: Many camera manufacturers provide software or mobile apps to facilitate wireless transfer. Download and install the appropriate software for your camera model on your computer or smartphone.
- Examples: Canon Camera Connect, Nikon Wireless Mobile Utility, Sony Imaging Edge Mobile.
- Enable Wireless Transfer:
- Camera Settings: Open the camera software on your computer and follow the prompts to connect to your camera. You may need to enable a wireless transfer mode on your camera.
- Pairing: Some cameras require pairing with your computer. Follow the on-screen instructions on both your camera and computer to complete the pairing process.
- Select and Transfer Photos:
- Browse Photos: Once connected, use the camera software to browse the photos stored on your camera’s memory card.
- Select Photos: Choose the photos you want to transfer to your computer.
- Initiate Transfer: Click the transfer button in the software to start the wireless transfer process.
- Verify Transfer:
- Check Destination Folder: After the transfer is complete, check the designated folder on your computer to ensure all the selected photos have been successfully transferred.
6. What Steps Should I Take If My Computer Doesn’t Recognize My Camera?
If your computer doesn’t recognize your camera, first, ensure the USB cable is securely connected to both the camera and the computer. Try using a different USB port or a different USB cable to rule out connection issues. Make sure the camera is turned on and set to the correct USB mode for file transfer. If the problem persists, check the device manager (Windows) or system information (macOS) to see if the camera is listed and properly installed. You may need to install or update the camera drivers.
Here’s a more detailed troubleshooting guide:
- Check USB Connections:
- Secure Connection: Make sure the USB cable is securely plugged into both the camera and the computer.
- Try Different Ports: Try using a different USB port on your computer. Some ports may not provide enough power or data transfer capability.
- Test with Another Cable: Use a different USB cable to rule out the possibility of a faulty cable.
- Camera Settings:
- Turn On Camera: Ensure the camera is turned on.
- Select USB Mode: Check the camera’s menu settings for a USB connection mode. Select the appropriate mode for file transfer, such as “Mass Storage,” “PC Connection,” or similar.
- Restart Computer and Camera:
- Restart: Sometimes, a simple restart of both your computer and camera can resolve connectivity issues.
- Check Device Manager (Windows):
- Open Device Manager:
- Press
Win + Xand select “Device Manager.” - Alternatively, search for “Device Manager” in the Start menu.
- Press
- Look for Unknown Devices: Check for any unknown devices or devices with a yellow exclamation mark under “Other devices” or “Universal Serial Bus controllers.”
- Update Drivers:
- Right-click on the unknown device and select “Update driver.”
- Choose “Search automatically for drivers” to let Windows find and install the driver.
- If that doesn’t work, try “Browse my computer for drivers” and navigate to the driver file if you have it.
- Open Device Manager:
- Check System Information (macOS):
- Open System Information:
- Click the Apple menu in the top-left corner of your screen.
- Select “About This Mac.”
- Click “System Report.”
- Check USB Devices:
- In the left sidebar, click on “USB” under “Hardware.”
- See if your camera is listed. If it’s not, there may be a hardware issue or driver problem.
- Open System Information:
- Install or Update Camera Drivers:
- Download Drivers: Visit the camera manufacturer’s website and download the latest drivers for your camera model.
- Install Drivers: Follow the installation instructions provided with the driver.
- Check for Software Conflicts:
- Conflicting Software: Some software programs can interfere with USB device recognition. Temporarily disable any recently installed software that might be causing conflicts.
- Test on Another Computer:
- Another Computer: Try connecting the camera to another computer to see if the issue is with the camera or your computer.
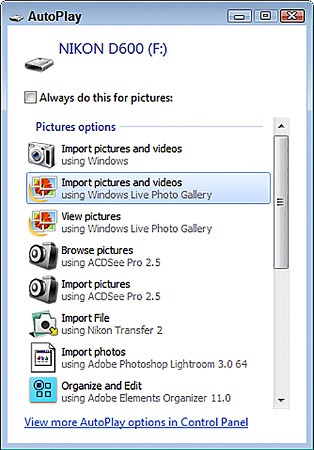 Windows 7 initial transfer options
7. What Is The DCIM Folder And Why Is It Important?
The DCIM (Digital Camera Images) folder is a standard directory structure used by most digital cameras and smartphones to store images and videos. It’s important because it provides a consistent way for devices and software to locate and organize media files. Inside the DCIM folder, you’ll typically find subfolders named with a numerical sequence (e.g., 100Camera, 101Camera), which help organize photos by date or event.
Here’s a more detailed explanation:
- Standard Directory Structure: DCIM stands for “Digital Camera Images.” It is a standard directory structure used by digital cameras and smartphones to store image and video files.
- Organization: The DCIM folder provides a consistent and organized way for cameras and devices to store media files. This standardization ensures that computers and software can easily locate and access these files.
- Subfolders: Inside the DCIM folder, you’ll typically find subfolders named with a numerical sequence (e.g., 100Camera, 101Camera, etc.). These subfolders help organize photos by date, event, or camera settings.
- File Naming Convention: Within the subfolders, image and video files are usually named using a specific convention, such as IMG_0001.jpg or VID_0001.mp4.
- Importance:
- Compatibility: The DCIM standard ensures compatibility across different devices and operating systems.
- Easy Access: It makes it easy for computers and software to locate and access media files stored on digital cameras and smartphones.
- Organization: It provides a structured way to organize and manage large numbers of photos and videos.
8. How Do I Select And Copy Photos From My Camera To A Specific Folder On My Computer?
To select and copy photos, open the camera drive or memory card in File Explorer (Windows) or Finder (macOS). Navigate to the DCIM folder and the subfolder containing your photos. You can select individual photos by clicking on them or select multiple photos by holding down the Ctrl key (Windows) or Command key (macOS) while clicking. Alternatively, you can select all photos by pressing Ctrl+A (Windows) or Command+A (macOS). Once selected, right-click and choose “Copy,” then navigate to your desired folder on your computer, right-click, and choose “Paste.”
Here’s a step-by-step guide:
-
Open Camera Drive or Memory Card:
- Windows: Open File Explorer and locate the camera drive or memory card under “This PC” or “Devices and drives.”
- macOS: Open Finder and locate the camera drive or memory card on your desktop or in the Finder sidebar under “Devices.”
-
Navigate to the DCIM Folder:
- Open the camera drive or memory card.
- Find the DCIM folder and open it.
- Inside the DCIM folder, locate the subfolder containing the photos you want to transfer (e.g., 100Camera, 101Camera).
-
Select Photos:
- Select Individual Photos: Click on the first photo you want to select. Then, hold down the
Ctrlkey (Windows) orCommandkey (macOS) and click on each additional photo you want to select. - Select Multiple Adjacent Photos: Click on the first photo you want to select. Then, hold down the
Shiftkey and click on the last photo in the range you want to select. This will select all photos between the first and last selected photos. - Select All Photos: Press
Ctrl + A(Windows) orCommand + A(macOS) to select all photos in the folder.
- Select Individual Photos: Click on the first photo you want to select. Then, hold down the
-
Copy Photos:
- Right-Click and Copy: Right-click on any of the selected photos.
- Choose “Copy” from the context menu.
- Alternatively, you can press
Ctrl + C(Windows) orCommand + C(macOS) to copy the selected photos.
-
Navigate to Destination Folder:
- Open File Explorer (Windows) or Finder (macOS).
- Navigate to the folder on your computer where you want to store the photos.
-
Paste Photos:
- Right-Click and Paste: Right-click in the destination folder.
- Choose “Paste” from the context menu.
- Alternatively, you can press
Ctrl + V(Windows) orCommand + V(macOS) to paste the copied photos.
-
Verify Transfer:
- Check the destination folder to ensure that all the selected photos have been successfully transferred.
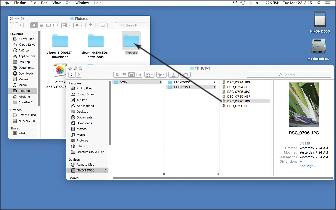 Drag and drop files from memory card using Finder on a Mac
9. What Is The Best Way To Organize My Photos After Transferring Them?
The best way to organize your photos after transferring them involves creating a clear and consistent folder structure, using descriptive naming conventions, and tagging your photos with relevant keywords. Consider organizing your photos by date, event, or project. Use a naming convention that includes the date, location, and a brief description (e.g., 2023-07-15_SantaFe_Vacation). Tagging your photos with keywords helps you quickly find specific images later.
Here’s a more detailed guide on how to organize your photos:
-
Create a Central Photo Folder:
- Dedicated Folder: Create a central folder on your computer or external hard drive to store all your photos. Name it something descriptive, such as “Photos,” “My Images,” or “Photography Archive.”
-
Establish a Folder Structure:
- Date-Based Folders: Organize your photos by date, creating folders for each year, month, or day. For example:
- Photos
- 2023
- 01 January
- 02 February
- …
- 2023
- Photos
- Event-Based Folders: Organize your photos by event or occasion. For example:
- Photos
- 2023
- Santa Fe Vacation
- Family Reunion
- …
- 2023
- Photos
- Project-Based Folders: Organize your photos by specific projects or themes. For example:
- Photos
- Landscapes
- Portraits
- Street Photography
- …
- Photos
- Combine Structures: You can also combine these structures to create a more detailed organization. For example:
- Photos
- 2023
- 07 July
- Santa Fe Vacation
- 07 July
- 2023
- Photos
- Date-Based Folders: Organize your photos by date, creating folders for each year, month, or day. For example:
-
Use Descriptive Naming Conventions:
- Consistent Naming: Rename your photo files using a consistent and descriptive naming convention. This makes it easier to find and identify your photos later.
- Include Date, Location, and Description: Include the date, location, and a brief description in the file name. For example:
- 2023-07-15_SantaFe_Landscape.jpg
- 2023-07-16_FamilyReunion_GroupPhoto.jpg
-
Tag Photos with Keywords:
- Metadata Tagging: Use photo editing software (such as Adobe Lightroom, Adobe Bridge, or Capture One) to tag your photos with relevant keywords.
- Descriptive Keywords: Use descriptive keywords that reflect the content of the photo, such as:
- People (e.g., “John,” “Jane,” “Family”)
- Places (e.g., “Santa Fe,” “New Mexico,” “Mountains”)
- Events (e.g., “Vacation,” “Wedding,” “Birthday”)
- Objects (e.g., “Car,” “House,” “Tree”)
- Themes (e.g., “Landscape,” “Portrait,” “Sunset”)
-
Use Photo Management Software:
- Software Tools: Use photo management software to organize, edit, and manage your photo library. Some popular options include:
- Adobe Lightroom
- Adobe Bridge
- Capture One
- Apple Photos
- Google Photos
- Software Tools: Use photo management software to organize, edit, and manage your photo library. Some popular options include:
-
Backup Your Photo Library:
- Multiple Backups: Create multiple backups of your photo library to protect against data loss.
- Backup Locations: Store backups in different locations, such as:
- External Hard Drive
- Cloud Storage (e.g., Google Drive, Dropbox, iCloud)
- NAS (Network Attached Storage)
-
Regularly Review and Update:
- Periodic Review: Regularly review your photo library to ensure it remains organized and up-to-date.
- Update Keywords and Metadata: Add new keywords and update metadata as needed to keep your photos easily searchable.
10. What Are Some Common Problems Encountered While Transferring Photos And How Can I Fix Them?
Common problems include slow transfer speeds, interrupted transfers, corrupted files, and software compatibility issues. To fix slow transfer speeds, use a card reader instead of a USB cable or try a different USB port. If the transfer is interrupted, ensure the cable is securely connected and avoid using the computer for other tasks during the transfer. For corrupted files, try transferring the photos again or use a different transfer method. Check for software updates or compatibility issues if you encounter software-related problems.
Here’s a more detailed troubleshooting guide:
-
Slow Transfer Speeds:
- Problem: Transferring photos takes a long time.
- Solutions:
- Use a Card Reader: Card readers are generally faster than USB connections.
- Check USB Port: Use a USB 3.0 port (if available) for faster transfer speeds.
- Close Other Applications: Close any unnecessary applications running on your computer to free up system resources.
- Defragment Hard Drive: If your hard drive is fragmented, defragmenting it can improve transfer speeds.
-
Interrupted Transfers:
- Problem: The photo transfer process is interrupted or stalls.
- Solutions:
- Check USB Connection: Ensure the USB cable is securely connected to both the camera and the computer.
- Avoid Multitasking: Avoid using the computer for other tasks during the transfer to prevent interruptions.
- Disable Sleep Mode: Disable sleep mode on your computer to prevent the transfer from being interrupted.
- Check Memory Card: Make sure the memory card is not full or corrupted.
-
Corrupted Files:
- Problem: Some or all of the transferred photos are corrupted or unreadable.
- Solutions:
- Retransfer Photos: Try transferring the photos again using a different method (e.g., card reader instead of USB cable).
- Check Memory Card: The memory card may be damaged or corrupted. Try using a different memory card.
- Use Data Recovery Software: If the files are still unreadable, use data recovery software to attempt to recover them.
-
Software Compatibility Issues:
- Problem: The photo transfer software is not working correctly or is incompatible with your operating system.
- Solutions:
- Update Software: Make sure you have the latest version of the photo transfer software installed.
- Check Compatibility: Ensure that the software is compatible with your operating system.
- Reinstall Software: Try uninstalling and reinstalling the software.
- Use Alternative Software: If the software continues to have issues, try using alternative photo transfer software or the built-in file management tools in your operating system.
-
Camera Not Recognized:
- Problem: The computer does not recognize the camera when connected via USB.
- Solutions:
- Check USB Connections: Ensure the USB cable is securely connected to both the camera and the computer.
- Try Different Ports: Try using a different USB port on your computer.
- Restart Computer and Camera: Restart both the computer and the camera.
- Update Drivers: Check Device Manager (Windows) or System Information (macOS) for driver issues and update the camera drivers if necessary.
-
Wireless Transfer Issues:
- Problem: Unable to transfer photos wirelessly.
- Solutions:
- Check Wi-Fi Connection: Ensure both the camera and the computer are connected to the same Wi-Fi network.
- Update Camera Software: Make sure you have the latest version of the camera software or app installed.
- Reset Network Settings: Reset the network settings on both the camera and the computer.
- Check Firewall Settings: Ensure that firewall settings are not blocking the wireless transfer.
11. How Can I Ensure That My Photos Are Safely Transferred And Not Lost During The Process?
To ensure your photos are safely transferred, always verify that the transfer is complete before disconnecting the camera or card reader. Avoid interrupting the transfer process and make a backup of your photos as soon as possible after transferring them to your computer. It’s also a good idea to disable the “erase after download” option in your photo transfer software to prevent accidental data loss.
Here’s a detailed guide on ensuring safe photo transfers:
-
Verify Complete Transfer:
- Check File Count: After the transfer is complete, verify that all the selected photos have been successfully transferred by comparing the file count in the source and destination folders.
- Preview Photos: Open a few of the transferred photos to ensure they are not corrupted and display correctly.
-
Avoid Interruptions:
- Stable Connection: Ensure a stable connection between the camera or card reader and the computer throughout the transfer process.
- No Multitasking: Avoid using the computer for other tasks during the transfer to prevent interruptions.
- Disable Sleep Mode: Disable sleep mode on your computer to prevent the transfer from being interrupted.
-
Backup Photos Immediately:
- Multiple Backups: Create multiple backups of your photos as soon as possible after transferring them to your computer.
- Backup Locations: Store backups in different locations, such as:
- External Hard Drive
- Cloud Storage (e.g., Google Drive, Dropbox, iCloud)
- NAS (Network Attached Storage)
-
Disable “Erase After Download” Option:
- Photo Transfer Software: Disable the “erase after download” option in your photo transfer software to prevent accidental data loss.
- Manual Deletion: Manually delete the photos from the memory card after you have verified that they are safely stored on your computer and backed up.
-
Check Memory Card Health:
- Regular Checks: Regularly check the health of your memory card to ensure it is not damaged or corrupted.
- Replace Old Cards: Replace old or unreliable memory cards to prevent data loss.
-
Use Reliable Transfer Methods:
- Card Reader: Use a high-quality card reader for faster and more reliable transfers.
- USB Cable: If using a USB cable, ensure it is in good condition and securely connected to both the camera and the computer.
-
Monitor Transfer Process:
- Progress Bar: Keep an eye on the progress bar during the transfer process to ensure it is proceeding smoothly.
- Error Messages: Watch for any error messages that may indicate a problem with the transfer.
-
Safely Eject Devices:
- Eject Properly: Always safely eject the camera or card reader from your computer after the transfer is complete.
- Windows: Right-click on the device in File Explorer and select “Eject.”
- macOS: Drag the device icon from your desktop to the Trash or right-click and select “Eject.”
12. How Do I Choose The Right Photo Transfer Method For My Needs?
Choosing the right photo transfer method depends on your specific needs and priorities. If speed is your primary concern, a card reader is often the best choice. If convenience is more important, wireless transfer might be preferable. If you don’t have a card reader and need a reliable method, using a USB cable is a good option. Consider the size and number of photos you need to transfer, as well as the capabilities of your camera and computer.
Here’s a breakdown to help you choose:
-
Card Reader:
- Best For: Speed and efficiency, especially when transferring large files or numerous photos.
- Pros:
- Faster transfer speeds compared to USB.
- Conserves camera battery life.
- Convenient and portable.
- Supports various memory card formats.
- Cons:
- Requires a card reader device.
- Need to remove the memory card from the camera.
-
USB Cable:
- Best For: Simplicity and reliability, especially when a card reader is not available.
- Pros:
- Direct connection between the camera and computer.
- No additional hardware required (assuming you have the USB cable).
- Cons:
- Slower transfer speeds compared to a card reader.
- Can drain camera battery.
- Requires the camera to be powered on during the transfer.
-
Wireless Transfer:
- Best For: Convenience and ease of use, especially when physical connections are not desired.
- Pros:
- No cables or card readers required.
- Convenient for transferring photos directly from the camera to the computer.
- Cons:
- Can be slower than wired transfer methods.
- Requires a stable Wi-Fi connection.
- May require specific camera software or apps.
- Can drain camera battery.
-
Considerations:
- Transfer Speed: If you need to transfer photos quickly, a card reader is the best option.
- Convenience: If you prefer not to use cables or remove the memory card from the camera, wireless transfer is a good choice.
- Battery Life: If you want to conserve camera battery life, a card reader is the best option.
- Availability: If you don’t have a card reader and need a reliable method, using a USB cable is a good choice.
- File Size and Number: If you are transferring a large number of high-resolution photos or videos, a faster transfer method (such as a card reader) is recommended.
13. What Are The Advantages Of Using Photo Management Software?
Photo management software offers numerous advantages, including streamlined organization, efficient editing, and easy sharing. It helps you organize your photos with features like tagging, keyword assignment, and facial recognition. You can also edit your photos directly within the software, making adjustments to exposure, color, and sharpness. Additionally, photo management software often includes tools for sharing your photos online or creating slideshows and albums.
Here’s a detailed breakdown of the advantages:
-
Streamlined Organization:
- Centralized Library: Photo management software allows you to create a centralized library for all your photos, making it easier to find and access them.
- Tagging and Keywords: You can tag your photos with relevant keywords and metadata, making it easier to search and filter them.
- Facial Recognition: Some software includes facial recognition features, which can automatically identify and tag people in your photos.
- Folder Structure: You can create a logical folder structure to organize your photos by date, event, or project.
-
Efficient Editing:
- Basic Adjustments: Photo management software often includes basic editing tools for adjusting exposure, color, and sharpness.
- Advanced Editing: Some software offers more advanced editing features, such as selective adjustments, noise reduction, and lens correction.
- Non-Destructive Editing: Many photo management programs use non-destructive editing techniques, which preserve the original photo files and allow you to revert to the original at any time.
-
Easy Sharing:
- Online Sharing: Photo management software often includes tools for sharing your photos online via social media, email, or dedicated photo-sharing platforms.
- Slideshows and Albums: You can create slideshows and albums to showcase your photos in an organized and visually appealing way.
- Printing: Some software includes features for printing your photos directly from the program.
-
Metadata Management:
- EXIF Data: Photo management software can read and display EXIF (Exchangeable Image File Format) data, which includes information about the camera settings, date, and time the photo was taken.
- IPTC Data: You can add IPTC (International Press Telecommunications Council) data to your photos, which includes information about the photographer, copyright, and caption.
-
Backup and Storage:
- Integration with Cloud Services: Some photo management software integrates with cloud storage services, making it easy to back up your photo library.
- Storage Management: You can use photo management software to manage your storage space and identify duplicate files.
-
Workflow Efficiency:
- Batch Processing: Photo management software allows you to apply the same adjustments or metadata to multiple photos at once, saving you time and effort.
- Presets and Styles: You can create and save presets or styles to quickly apply a consistent look to your photos.
14. What Are Some Best Practices For Backing Up My Photo Library?
Best practices for backing up your photo library include creating multiple backups, storing backups in different locations, and using a combination of local and cloud backups. Use an external hard drive or NAS device for local backups and a cloud storage service like Google Drive, Dropbox, or iCloud for offsite backups. Regularly test your backups
