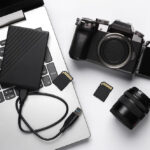
Transferring photos and files from your phone to your laptop is a crucial skill in today’s digital world. Whether you’re a photography enthusiast, a professional needing to back up your work, or simply wanting to free up storage space on your phone, dfphoto.net is here to guide you through various methods to make this process seamless. We’ll cover everything from using USB cables to cloud storage and dedicated apps, ensuring you find the best solution for your needs. Master these techniques to keep your precious memories and important documents safe and accessible using file management, wireless transfer, and data backup.
1. Understanding Your Transfer Needs
Before diving into the technical details, it’s important to assess your specific needs. Understanding what, why, and how you intend to transfer photos and files will help you choose the most efficient method.
1.1. Types of Files
Are you transferring photos, videos, documents, or a mix of everything? Different file types may have different transfer considerations. For example, large video files might benefit from faster transfer methods like USB, while smaller documents can be easily managed with cloud services.
1.2. Frequency of Transfers
How often do you need to transfer files? If it’s a one-time task, a simple method like a USB cable might suffice. However, if you regularly transfer files, a cloud-based solution or dedicated app could save you time and effort.
1.3. Size and Volume
The size and volume of files matter. Transferring a few small photos is different from transferring hundreds of high-resolution images or large video files. Consider the storage capacity of your devices and the transfer speeds of each method.
1.4. Security Considerations
Are your files sensitive or confidential? If so, you’ll want to choose a method that offers secure transfer options, such as encrypted cloud storage or direct USB transfer without relying on third-party services.
1.5. Device Compatibility
Ensure the method you choose is compatible with both your phone and laptop operating systems. For example, Android File Transfer is specifically designed for transferring files between Android devices and Macs.
2. Using a USB Cable: The Direct Approach
Using a USB cable is one of the most direct and reliable methods to transfer files from your phone to your laptop. It provides a secure connection and is often faster than wireless options.
2.1. Connecting Your Phone
- Locate a USB Cable: Use the USB cable that came with your phone or a compatible one.
- Connect Devices: Plug the small end of the USB cable into your phone and the standard end into a USB port on your laptop.
- Unlock Your Phone: Your phone might prompt you to unlock it and allow access to data.
- Choose USB Connection Mode: On your phone, a notification should appear regarding the USB connection. Tap on it and select “File Transfer” or “MTP” (Media Transfer Protocol).
2.2. Accessing Files on Your Computer
-
Windows:
- Open File Explorer: Press
Windows key + Eto open File Explorer. - Locate Your Phone: In the left pane, you should see your phone listed under “Devices and drives.”
- Browse Folders: Double-click on your phone’s name to access its internal storage or SD card (if applicable).
- Find the DCIM Folder: The DCIM (Digital Camera Images) folder is where most photos are stored. You might also find photos in other folders like “Pictures” or custom folders created by apps.
- Open File Explorer: Press
-
Mac:
- Download Android File Transfer: If you’re using a Mac, you’ll need to download and install the Android File Transfer application from the Android website.
- Open Android File Transfer: Once installed, open the application. It should automatically detect your phone.
- Browse Files: The application will display your phone’s folders. Navigate to the DCIM or Pictures folder.
2.3. Transferring Files
- Select Files: Choose the photos and files you want to transfer.
- Copy and Paste or Drag and Drop:
- Windows: You can copy the files by right-clicking and selecting “Copy,” then navigating to a folder on your computer and right-clicking to select “Paste.” Alternatively, you can drag and drop the files from your phone’s folder to a folder on your computer.
- Mac: Drag and drop the files from the Android File Transfer window to a folder on your Mac.
- Verify Transfer: After the transfer is complete, verify that the files are successfully copied to your computer.
2.4. Tips for USB Transfers
- Use a High-Quality Cable: A good quality USB cable ensures a stable connection and faster transfer speeds.
- Avoid Interruptions: Do not disconnect the cable or turn off your phone during the transfer process to prevent data corruption.
- Check Storage Space: Ensure you have enough free space on both your phone and your computer before starting the transfer.
- Organize Files: Create folders on your computer to organize the transferred files for easy access later.
 Connecting Android Phone to Laptop via USB for file transfer
Image alt text: A woman connecting her Android phone to a laptop with a USB cable to transfer files, emphasizing the direct and reliable nature of this method.
3. Leveraging Cloud Storage: Wireless Convenience
Cloud storage services offer a convenient way to transfer files wirelessly between your phone and laptop. These services automatically sync your files, making them accessible from any device with an internet connection.
3.1. Popular Cloud Storage Options
- Google Photos: Ideal for photos and videos, Google Photos offers automatic backup and syncing across devices.
- Google Drive: A versatile cloud storage service for all types of files, offering seamless integration with other Google services.
- Dropbox: A popular choice for file sharing and syncing, with robust features for collaboration.
- Microsoft OneDrive: Integrated with Windows and Microsoft Office, OneDrive is great for users in the Microsoft ecosystem.
- iCloud (for iPhones): If you have an iPhone, iCloud is a seamless option for syncing photos, videos, and other files with your Mac or Windows PC.
3.2. Setting Up Cloud Storage
- Install the App: Download and install the cloud storage app on your phone (e.g., Google Photos, Google Drive, Dropbox, OneDrive).
- Sign In: Sign in with your account credentials or create a new account if you don’t already have one.
- Enable Syncing: Enable the automatic syncing feature to ensure your photos and files are automatically backed up to the cloud.
3.3. Transferring Files via Cloud Storage
-
Upload Files from Your Phone:
- Google Photos: Photos and videos are automatically uploaded if syncing is enabled.
- Google Drive, Dropbox, OneDrive: You can manually upload files by opening the app, navigating to the desired folder, and selecting the files to upload.
-
Access Files on Your Laptop:
- Website: Open a web browser on your laptop and go to the cloud storage service’s website (e.g., photos.google.com, drive.google.com, dropbox.com, onedrive.com).
- Desktop App: Download and install the desktop app on your laptop. This creates a synced folder on your computer, allowing you to access and manage your files directly from File Explorer (Windows) or Finder (Mac).
-
Download Files to Your Laptop:
- Website: Select the files you want to download and click the “Download” button.
- Desktop App: The files are automatically synced to your computer, so you can access them from the synced folder.
3.4. Tips for Using Cloud Storage
- Check Storage Limits: Be aware of the storage limits of your cloud storage plan. You may need to upgrade to a paid plan if you have a large number of files.
- Use Wi-Fi: Uploading and downloading large files can consume a lot of data. Use a Wi-Fi connection to avoid data charges.
- Organize Files: Create folders in your cloud storage to organize your files for easy access and management.
- Enable Two-Factor Authentication: For added security, enable two-factor authentication on your cloud storage account.
- Regularly Back Up: While cloud storage is convenient, it’s still a good idea to have a local backup of your important files in case of unforeseen issues.
Image alt text: A screenshot of a cloud storage interface, illustrating the seamless file synchronization between a phone and a laptop, emphasizing the convenience of wireless transfer.
4. Dedicated Apps for File Transfer: Streamlined Solutions
Several dedicated apps are designed to streamline the process of transferring files between your phone and laptop. These apps often offer additional features like faster transfer speeds, file management tools, and enhanced security.
4.1. Popular File Transfer Apps
- SHAREit: A popular app for transferring files quickly between devices without using the internet.
- Xender: Similar to SHAREit, Xender offers fast file transfers and supports a wide range of file types.
- Send Anywhere: Known for its security features, Send Anywhere allows you to send files with a unique key that expires after a set time.
- AirDroid: A comprehensive device management app that allows you to transfer files, manage SMS messages, and control your phone from your computer.
- Feem: As mentioned earlier, Feem is a user-friendly option that doesn’t require the internet for file sharing and is faster than Bluetooth.
4.2. Using File Transfer Apps
- Download and Install: Download and install the file transfer app on both your phone and your laptop.
- Connect Devices:
- Same Wi-Fi Network: Most file transfer apps require both devices to be connected to the same Wi-Fi network.
- QR Code Scanning: Some apps use QR codes to establish a direct connection between devices.
- Select Files to Transfer: Choose the files you want to transfer from your phone.
- Initiate Transfer: Start the transfer process by clicking the “Send” or “Share” button in the app.
- Receive Files on Your Laptop: Accept the incoming files on your laptop and choose a location to save them.
4.3. Tips for Using File Transfer Apps
- Ensure Compatibility: Make sure the app is compatible with both your phone and laptop operating systems.
- Check Transfer Speeds: Experiment with different apps to find one that offers the fastest transfer speeds for your devices and network.
- Read Reviews: Before installing an app, read user reviews to ensure it’s reliable and secure.
- Update Regularly: Keep the app updated to benefit from the latest features and security enhancements.
- Explore Additional Features: Many file transfer apps offer additional features like file management, remote control, and cloud storage integration.
Image alt text: A screenshot of a file transfer app interface, highlighting the fast wireless transfer speeds and user-friendly design for seamless file sharing between devices.
5. Email and Messaging Apps: Small File Transfers
For transferring a few small files, email or messaging apps can be a quick and convenient option. This method is particularly useful when you don’t have access to a USB cable or prefer not to use cloud storage.
5.1. Sending Files via Email
- Compose an Email: Open your email app on your phone and compose a new email.
- Attach Files: Attach the photos or files you want to transfer to the email.
- Send to Yourself: Enter your own email address as the recipient and send the email.
- Access Email on Your Laptop: Open your email app or webmail on your laptop and find the email you sent.
- Download Files: Download the attached files to your computer.
5.2. Using Messaging Apps
- Choose a Messaging App: Use a messaging app like WhatsApp, Telegram, or Facebook Messenger.
- Send Files to Yourself: Create a group with only yourself in it, or send the files to a contact you trust.
- Access Messaging App on Your Laptop: Open the messaging app on your laptop (either through the desktop app or web version).
- Download Files: Download the files to your computer.
5.3. Tips for Email and Messaging Apps
- File Size Limits: Be aware of the file size limits imposed by your email provider or messaging app.
- Compression: Compress large files into a ZIP archive to reduce their size before sending.
- Security: Email and messaging apps may not be the most secure method for transferring sensitive files. Consider using encrypted cloud storage or a direct USB connection for confidential data.
- Convenience: This method is best for small, occasional file transfers due to its limitations and potential security concerns.
Image alt text: An email interface showing file attachments ready to be downloaded to a laptop, illustrating the simple and convenient method for transferring small files.
6. Phone Link App on Windows: Seamless Integration
For Windows users, the Phone Link app (formerly known as Your Phone app) offers seamless integration between your Android phone and your computer. This app allows you to access your photos, messages, and notifications directly from your laptop, making file transfers easy and convenient.
6.1. Setting Up Phone Link
- Install Phone Link App: Make sure the Phone Link app is installed on your Windows laptop. It usually comes pre-installed, but you can download it from the Microsoft Store if needed.
- Install Link to Windows App: On your Android phone, download and install the “Link to Windows” app from the Google Play Store.
- Link Your Devices:
- Open Phone Link on Your Laptop: Launch the Phone Link app on your laptop and follow the on-screen instructions.
- Sign In with Microsoft Account: Sign in with your Microsoft account.
- Scan QR Code: The app will display a QR code. Open the Link to Windows app on your phone and scan the QR code to link your devices.
- Grant Permissions: Grant the necessary permissions to allow the app to access your photos, messages, and other data.
6.2. Transferring Photos with Phone Link
- Access Photos Tab: In the Phone Link app on your laptop, click on the “Photos” tab.
- Browse Photos: You will see all the photos stored on your Android phone.
- Select Photos: Select the photos you want to transfer.
- Drag and Drop or Copy and Paste: Drag and drop the selected photos to a folder on your computer, or copy and paste them.
6.3. Additional Features of Phone Link
- Messages: Send and receive SMS messages from your computer.
- Notifications: View and manage your phone’s notifications on your laptop.
- Calls: Make and receive phone calls from your computer.
- Screen Mirroring: Mirror your phone’s screen on your laptop for a larger view.
6.4. Tips for Using Phone Link
- Stable Connection: Ensure both your phone and laptop are connected to a stable Wi-Fi network for the best performance.
- Grant Permissions: Grant all necessary permissions to allow the app to function properly.
- Update Apps: Keep both the Phone Link app on your laptop and the Link to Windows app on your phone updated to benefit from the latest features and bug fixes.
- Troubleshooting: If you encounter any issues, check the Microsoft support website for troubleshooting tips.
Image alt text: The Phone Link app interface on Windows, showcasing seamless access to Android photos, messages, and notifications for easy file transfer and device management.
7. Android File Transfer for Mac: Bridging the Gap
For Mac users, Android File Transfer is a dedicated application that allows you to connect your Android phone to your Mac and transfer files easily. This is a must-have tool for anyone who uses both Android and Mac devices.
7.1. Downloading and Installing Android File Transfer
- Download the App: Go to the Android website and download the Android File Transfer application.
- Install the App: Double-click the downloaded file (usually a DMG file) and follow the on-screen instructions to install the application.
- Open the App: Once installed, the application will automatically open when you connect your Android phone to your Mac via USB.
7.2. Transferring Files with Android File Transfer
- Connect Your Phone: Use a USB cable to connect your Android phone to your Mac.
- Unlock Your Phone: Unlock your phone and select “File Transfer” or “MTP” mode when prompted.
- Browse Files: The Android File Transfer window will display your phone’s folders.
- Select Files: Choose the files you want to transfer.
- Drag and Drop: Drag and drop the selected files to a folder on your Mac.
7.3. Tips for Using Android File Transfer
- Ensure Compatibility: Android File Transfer is compatible with most Android devices running Android 3.0 and later.
- Use a Reliable USB Cable: A high-quality USB cable ensures a stable connection and faster transfer speeds.
- Check for Updates: Regularly check for updates to the Android File Transfer application to benefit from bug fixes and performance improvements.
- Alternative Apps: If you encounter issues with Android File Transfer, consider using alternative apps like iMazing or AnyTrans, which offer similar functionality.
Image alt text: The Android File Transfer app interface on a Mac, displaying file directories and allowing users to drag and drop files between their Android phone and Mac computer.
8. Troubleshooting Common Transfer Issues
Despite the straightforward nature of these methods, you might encounter some common issues when transferring files from your phone to your laptop. Here are some troubleshooting tips to help you resolve them:
8.1. USB Connection Problems
-
Cable Issues: Try using a different USB cable to rule out the possibility of a faulty cable.
-
Port Issues: Try connecting your phone to a different USB port on your laptop.
-
Driver Issues:
- Windows: If your computer doesn’t recognize your phone, you might need to update the USB drivers. Go to Device Manager, find your phone under “Portable Devices,” right-click, and select “Update driver.”
- Mac: Android File Transfer usually handles driver installation automatically. If you’re having issues, try reinstalling the application.
-
USB Debugging: In some cases, enabling USB debugging on your phone can help resolve connection issues. Go to Settings > Developer options and enable “USB debugging.” (Note: Developer options might be hidden by default. To enable them, go to Settings > About phone and tap on “Build number” seven times.)
-
MTP Setting: Ensure your phone is set to Media Transfer Protocol (MTP) mode in the USB settings.
8.2. Cloud Storage Syncing Problems
- Internet Connection: Make sure both your phone and laptop are connected to the internet.
- App Updates: Ensure the cloud storage app is updated to the latest version on both devices.
- Account Issues: Verify that you are signed in to the correct account on both devices.
- Sync Settings: Check the sync settings in the app to ensure that the correct folders are being synced.
- Storage Limits: Make sure you haven’t exceeded your cloud storage limit.
8.3. File Transfer App Issues
- Compatibility: Ensure the file transfer app is compatible with both your phone and laptop operating systems.
- Wi-Fi Connection: Make sure both devices are connected to the same Wi-Fi network.
- App Permissions: Grant the necessary permissions to the app to access your files and use the Wi-Fi connection.
- Firewall Issues: Check your firewall settings to ensure that the file transfer app is not being blocked.
- App Updates: Keep the app updated to benefit from bug fixes and performance improvements.
8.4. General Troubleshooting Tips
- Restart Devices: Try restarting both your phone and your laptop.
- Clear Cache: Clear the cache of the file transfer app or cloud storage app.
- Check Storage Space: Ensure you have enough free space on both your phone and your laptop.
- Search Online: Search online for specific error messages or issues you are encountering.
- Contact Support: Contact the support team for the file transfer app or cloud storage service for assistance.
By following these troubleshooting tips, you can resolve most common issues and ensure a smooth file transfer experience.
9. Security Best Practices for File Transfers
When transferring files from your phone to your laptop, it’s important to prioritize security to protect your data from unauthorized access. Here are some best practices to follow:
9.1. Use Strong Passwords
- Cloud Storage: Use strong, unique passwords for your cloud storage accounts and enable two-factor authentication for added security.
- Wi-Fi Networks: Use a strong password for your Wi-Fi network to prevent unauthorized access.
9.2. Encrypt Sensitive Files
- Encryption Tools: Use encryption tools like VeraCrypt or BitLocker to encrypt sensitive files before transferring them.
- Password Protection: Password-protect ZIP archives containing sensitive files.
9.3. Secure Transfer Methods
- USB Connection: Use a direct USB connection for transferring sensitive files to avoid relying on third-party services.
- Encrypted Cloud Storage: Use cloud storage services that offer end-to-end encryption for added security.
- Secure File Transfer Apps: Use file transfer apps that offer secure transfer options, such as password protection or encryption.
9.4. Be Cautious with Public Wi-Fi
- Avoid Sensitive Transfers: Avoid transferring sensitive files over public Wi-Fi networks, as these networks are often unsecured.
- Use a VPN: If you must use public Wi-Fi, use a Virtual Private Network (VPN) to encrypt your internet traffic and protect your data.
9.5. Keep Software Updated
- Operating Systems: Keep your phone and laptop operating systems updated with the latest security patches.
- Apps: Keep your file transfer apps and cloud storage apps updated to benefit from the latest security enhancements.
9.6. Regularly Back Up Your Data
- Multiple Backups: Maintain multiple backups of your important files, including both local backups and cloud backups.
- Backup Schedule: Establish a regular backup schedule to ensure your data is always protected.
By following these security best practices, you can protect your data and ensure a safe file transfer experience.
10. Optimizing Your Photography Workflow with DFphoto.net
Now that you’ve mastered the art of transferring photos and files from your phone to your laptop, let’s explore how you can optimize your photography workflow with DFphoto.net. Our website offers a wealth of resources to help you enhance your skills, find inspiration, and connect with a vibrant community of photographers.
10.1. Educational Resources
- Detailed Tutorials: Access our extensive library of tutorials covering various photography techniques, from basic composition to advanced editing.
- Equipment Reviews: Stay up-to-date with the latest camera gear and accessories through our comprehensive reviews.
- Expert Tips: Learn from seasoned professionals with our exclusive tips and tricks for capturing stunning images.
10.2. Inspiration and Creativity
- Photo Galleries: Explore our curated galleries featuring breathtaking images from talented photographers around the world.
- Featured Photographers: Discover inspiring stories and portfolios from our featured photographers.
- Creative Prompts: Spark your creativity with our weekly photography prompts and challenges.
10.3. Community Engagement
- Forums: Connect with fellow photographers in our active forums to share your work, ask questions, and receive feedback.
- Workshops: Participate in our workshops and webinars to learn new skills and network with industry professionals.
- Contests: Showcase your talent in our photography contests and win exciting prizes.
10.4. Practical Tools and Services
- File Management Tips: Learn how to organize and manage your photos efficiently with our practical tips.
- Editing Software Reviews: Discover the best photo editing software for your needs with our in-depth reviews.
- Printing and Display: Find resources and recommendations for printing and displaying your photos.
10.5. Call to Action
Ready to take your photography to the next level? Visit dfphoto.net today to explore our wealth of resources, connect with a vibrant community, and unleash your creative potential. Whether you’re a beginner or a seasoned pro, we have something for everyone.
Image alt text: A screenshot of the DFphoto.net website interface, showcasing photography tutorials, community features, and resources for photographers of all levels, emphasizing inspiration, education, and practical tools.
Contact Us:
- Address: 1600 St Michael’s Dr, Santa Fe, NM 87505, United States
- Phone: +1 (505) 471-6001
- Website: dfphoto.net
FAQ: Transferring Photos and Files
Q1: What is the easiest way to transfer photos from my phone to my laptop?
The easiest way to transfer photos from your phone to your laptop is typically by using a USB cable. This method provides a direct and reliable connection, ensuring a fast and secure transfer. Simply connect your phone to your laptop, unlock your phone, select “File Transfer” mode, and then copy the photos from your phone’s DCIM folder to a folder on your computer.
Q2: How can I transfer files from my Android phone to my computer wirelessly without using a USB cable?
You can transfer files wirelessly from your Android phone to your computer using cloud storage services like Google Drive, Dropbox, or Microsoft OneDrive. Install the app on both devices, upload the files from your phone, and then access and download them on your computer. Alternatively, you can use file transfer apps like SHAREit or Xender, which create a direct Wi-Fi connection between your devices for fast file transfers.
Q3: How do I transfer photos from my iPhone to my Windows PC without iCloud?
To transfer photos from your iPhone to your Windows PC without iCloud, you can use a USB cable. Connect your iPhone to your PC, unlock your iPhone, and trust the computer if prompted. Open File Explorer on your PC, locate your iPhone under “Devices and drives,” and then copy the photos from the DCIM folder to your computer.
Q4: Why won’t my computer recognize my Android phone when I connect it with a USB cable?
If your computer doesn’t recognize your Android phone, try the following troubleshooting steps:
- Use a different USB cable.
- Try a different USB port on your computer.
- Ensure your phone is set to “File Transfer” or “MTP” mode in the USB settings.
- Update the USB drivers on your computer.
- Enable USB debugging in the Developer options on your phone.
Q5: Can I transfer photos from iCloud to my PC directly?
Yes, you can transfer photos from iCloud to your PC directly. Download and install the iCloud for Windows app on your PC, sign in with your Apple ID, and enable iCloud Photos. Your photos will then be synced to your PC and accessible through File Explorer.
Q6: What is the best app for transferring files between my phone and laptop?
The best app for transferring files between your phone and laptop depends on your specific needs. Some popular options include:
- SHAREit and Xender: For fast, wireless file transfers without using the internet.
- Send Anywhere: For secure file transfers with a unique key.
- AirDroid: For comprehensive device management and file transfers.
- Feem: For fast and easy file sharing without the internet, across multiple platforms
Q7: How do I transfer large video files from my phone to my laptop quickly?
To transfer large video files quickly, use a USB 3.0 cable and ensure both your phone and laptop support USB 3.0 for faster transfer speeds. Alternatively, use a file transfer app like SHAREit or Xender, which can create a direct Wi-Fi connection for faster wireless transfers. You can also compress the video file to reduce its size before transferring.
Q8: Is it safe to transfer sensitive files using cloud storage services?
While cloud storage services offer convenience, they may not be the most secure method for transferring sensitive files. To enhance security, use cloud storage services that offer end-to-end encryption, encrypt your files before uploading them, use strong passwords, and enable two-factor authentication.
Q9: How do I transfer photos from my phone to my laptop without losing quality?
To transfer photos without losing quality, avoid using methods that compress the files, such as email or some messaging apps. Use a direct USB connection or cloud storage services that preserve the original file quality. When using cloud storage, ensure that you have enabled the option to upload photos in their original size.
Q10: What should I do if my file transfer keeps getting interrupted?
If your file transfer keeps getting interrupted, try the following:
- Ensure both your phone and laptop have a stable connection (USB or Wi-Fi).
- Close any unnecessary apps or programs that may be consuming resources.
- Disable any power-saving settings that may be interrupting the transfer.
- Try transferring smaller batches of files instead of one large batch.
- Restart both your phone and laptop.