Creating personalized home décor or heartfelt gifts doesn’t have to be complicated or expensive. Imagine turning your cherished photos into rustic, beautiful pieces of art on wood. This guide will show you exactly how to transfer a photo to wood, a surprisingly simple technique that yields impressive results. Whether you’re aiming to create a unique keepsake or add a personal touch to your living space, transferring photos to wood is a fantastic craft project for beginners and seasoned DIY enthusiasts alike.
This tutorial will walk you through each step, ensuring you achieve the best possible transfer every time. We’ll cover everything from selecting the right materials and tools to mastering the transfer technique itself. Plus, we’ll explore how to personalize your wood photo even further with creative touches like vinyl lettering. Get ready to be amazed at how easy and rewarding it is to transform ordinary wood into extraordinary photo art!
 Photo Transferred to a Wooden Surface next to some pinecones and holly
Let’s dive in and discover the magic of photo to wood transfer!
Materials and Tools for Photo to Wood Transfer
Before you begin, gather all your necessary materials and tools. Having everything at hand will make the process smooth and enjoyable. Here’s a comprehensive list of what you’ll need for successful photo transfer to wood:
Materials
- Unfinished Wood Surface: The type of wood is crucial for successful transfer. Opt for soft, unfinished woods like basswood or natural pine. Avoid hardwoods like oak or birch, and definitely steer clear of pre-finished wood as the image won’t transfer properly. Plaques, planks, or even wood slices work wonderfully.
- Printed Image: Your chosen photo or image needs to be printed on lightweight 20 lb. white copy paper. For the most vibrant results, use a color laser print. While inkjet prints can work, they may yield less vibrant and potentially smudged results.
- Mod Podge (Dishwasher Safe): This is the magic ingredient for transferring your image. Dishwasher Safe Mod Podge is recommended because it’s water-resistant, which is important during the paper removal process.
- Spray Sealant (UV Protective): A spray sealant like Krylon UV sealer spray is essential to protect your transferred image and give it a beautiful, lasting finish.
- Permanent Vinyl (Optional): If you want to add personalized text or designs to your wood photo, permanent vinyl is a great choice.
- Transfer Tape (Optional): Used to transfer vinyl designs smoothly onto the wood.
Tools
- Foam Brush: For applying Mod Podge evenly to your printed image.
- Brayer or Foam Roller: To smooth out air bubbles and ensure good contact between the photo and wood.
- Old Face Towel or Rag: For dampening and gently removing the paper from the wood after the Mod Podge dries.
- Bowl of Water: To dampen the towel or rag.
- Weeding Tool (Optional): For removing excess vinyl from your design.
- Scraper Tool (Optional): To burnish vinyl onto transfer tape and wood.
- Cutting Machine (Optional): Like a Cricut Maker or similar, if you’re adding vinyl elements.
- Cutting Mat (Optional): For use with a cutting machine.
- Safety Glasses, Gloves, and Respirator (Recommended): Especially when using spray sealant, ensure you have proper ventilation and protective gear.
- Butcher Paper or Protective Covering: To protect your work surface from Mod Podge and paper residue.
- Heat Gun or Hair Dryer (Optional): To speed up the drying process.
- Printer (Laser or Inkjet): To print your chosen image.
- Computer: To prepare and mirror your image for printing.
- Measuring Tape (Optional): For sizing vinyl designs or positioning elements precisely.
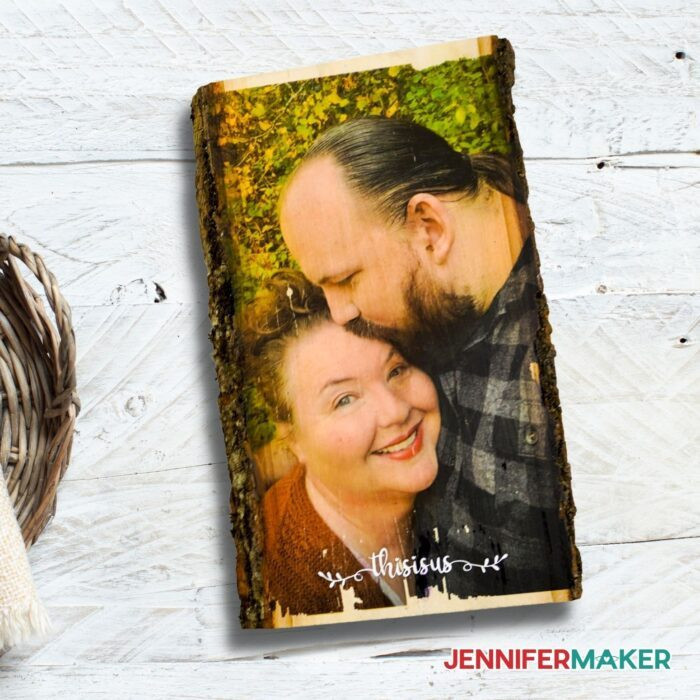 Photo of a man kissing a woman on the forehead transferred to wood on a white background
Step-by-Step Guide: Transferring Your Photo to Wood
Now that you’ve gathered your materials and tools, let’s get started on the photo transfer process. Follow these detailed steps for a successful and beautiful wood photo project.
Step 1: Prepare and Print Your Image
-
Choose Your Photo: Select a high-resolution photo with good contrast and color saturation. Darker and more vibrant images tend to transfer more effectively onto wood. Consider the dimensions of your wood surface and choose a photo that fits well or can be cropped appropriately.
-
Mirror Your Image: This is a crucial step! Since we are transferring the image face-down onto the wood, you need to mirror or flip it horizontally so it appears correctly after the transfer.
- For Mac: Open your photo in “Preview.” Go to “Tools” in the top menu and select “Flip Horizontal.”
- For PC: Open your photo in the “Photos” app. Click “Edit & Create” in the toolbar, then “Edit.” Select “Crop & Rotate” and click the “Flip” button.
-
Print Your Mirrored Image: Print your image on lightweight 20 lb. white copy paper using a laser printer for the best and most vibrant results. If you’re using an inkjet printer, be aware that the colors might be less vivid and there’s a higher chance of smudging.
- Printer Settings: In your print settings, select “Best” quality and ensure the paper type is set appropriately for plain paper.
- Paper Type: Using thin paper is essential for easy paper removal later. Avoid photo paper or cardstock as they are too thick.
Step 2: Apply Mod Podge to Your Image
-
Prepare Your Workspace: Cover your work surface with butcher paper or a protective covering to protect it from Mod Podge and paper residue.
-
Apply Mod Podge: Place your printed photo face-up. Using a foam brush, apply a generous, even coat of Dishwasher Safe Mod Podge to the printed side of your photo. Ensure you cover the entire image, going slightly beyond the edges. Use smooth, even strokes and avoid applying a thick, gloppy layer. A medium, consistent coat is ideal.
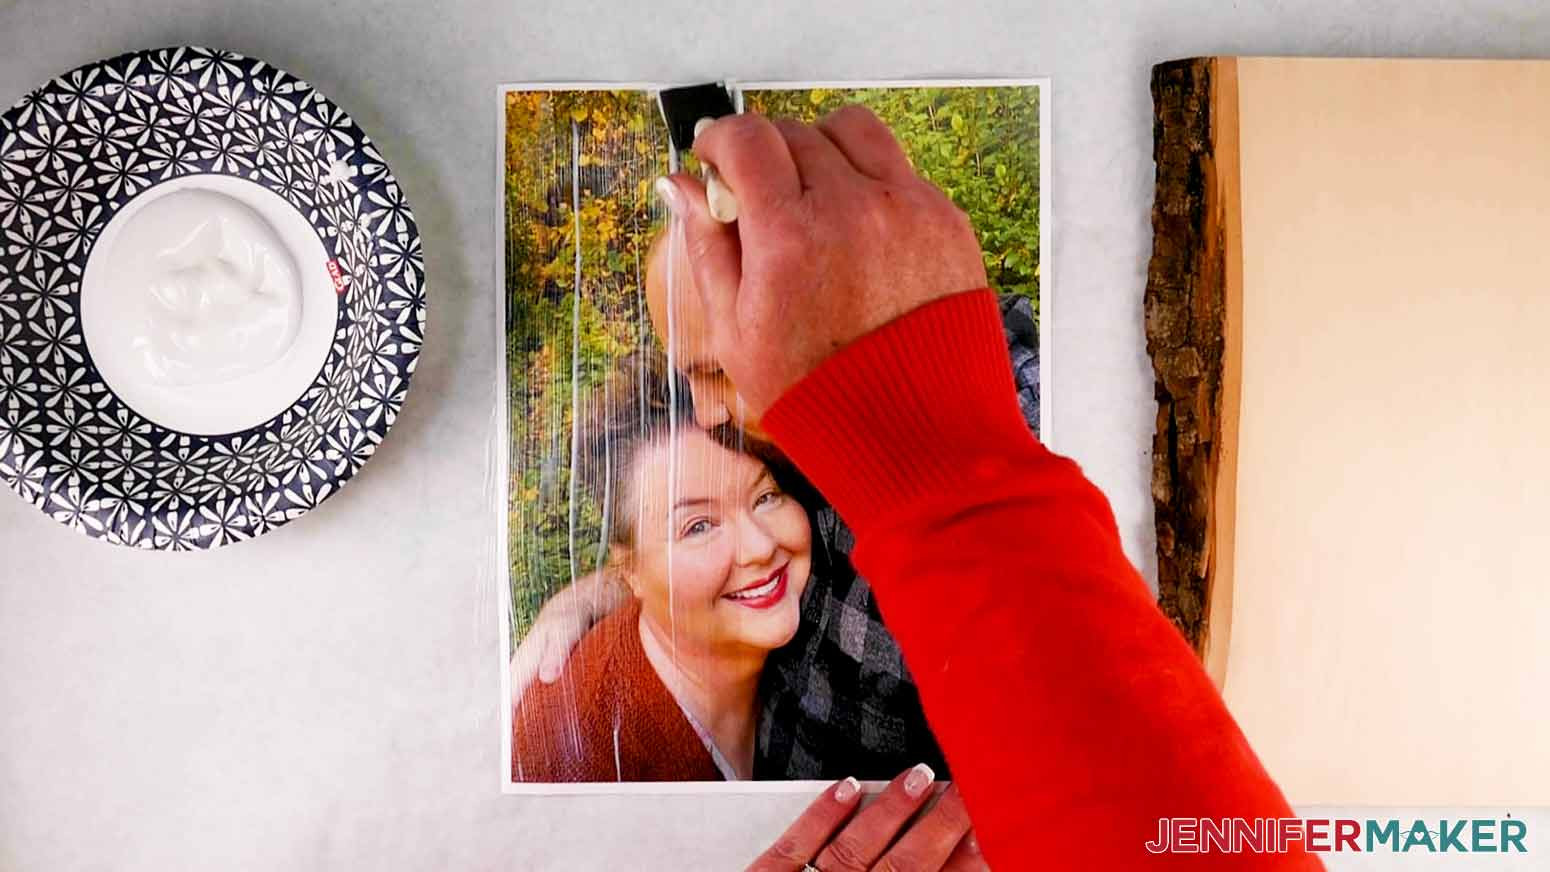 using foam brush to add mod podge to photo of two people
Step 3: Adhere Photo to Wood
- Position the Photo: Carefully pick up your Mod Podge-coated photo and position it face-down onto your chosen wood surface. Center it as desired, keeping in mind that the image is mirrored at this stage.
- Adhere and Smooth: Gently place the photo onto the wood, starting from one edge and slowly laying it down to minimize air bubbles. Once positioned, use a brayer or foam roller to smooth out any air bubbles and ensure firm, even contact between the photo and the wood. Roll firmly over the entire surface of the photo, working from the center outwards.
- Drying Time: Allow the Mod Podge to dry completely. This typically takes several hours, or ideally overnight, for the best results. You can use a heat gun or hair dryer on a low setting to speed up the drying process, but ensure the Mod Podge is fully dry before proceeding.
Step 4: Remove the Paper
-
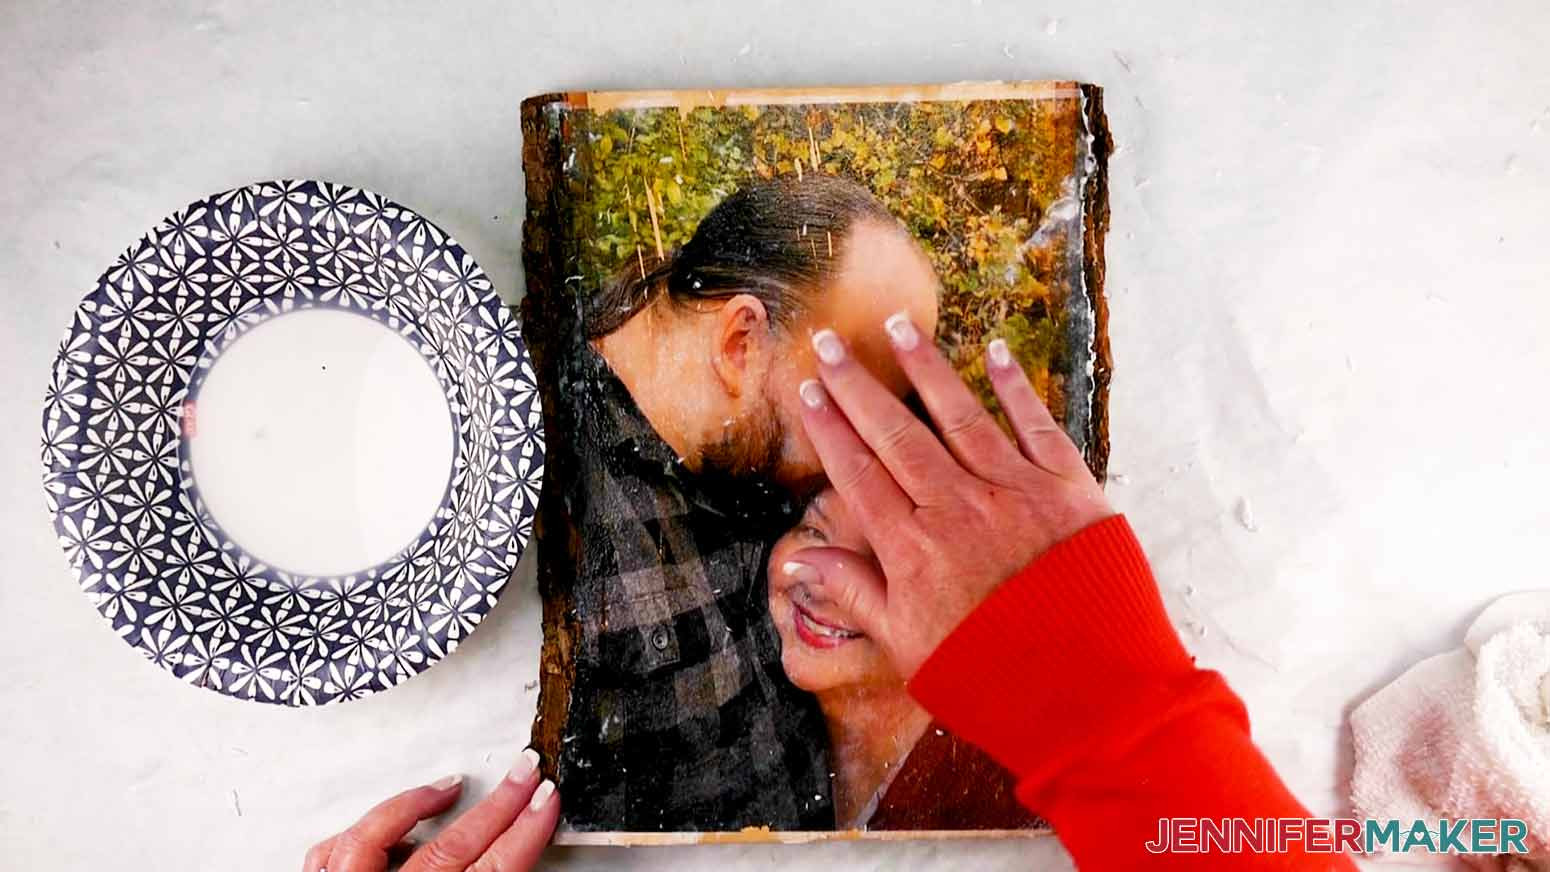
Dampen the Paper: Once the Mod Podge is completely dry, take a damp (not soaking wet) old towel or rag and gently dampen the back of the paper. Allow the water to soak in for a minute or two. This softens the paper and makes it easier to remove.
-
Begin Rubbing: Starting with your damp towel, gently begin rubbing the paper in a circular motion. You’ll notice the paper starting to pill and rub away, revealing the transferred image underneath.
-
Gentle Paper Removal: Continue rubbing gently, using your fingertips to help remove stubborn paper bits. Be patient and avoid scrubbing too hard, as this can damage the transferred image. Keep the paper damp as you work; if it starts to dry out, re-dampen it with your towel.
-
Reveal the Image: Continue rubbing until all the paper is removed and your photo is clearly visible on the wood. This process can take some time, sometimes up to 20 minutes or more, depending on the paper and Mod Podge thickness. Persevere – the result is worth the effort!
Step 5: Seal and Finish
- Apply Sealant: Once the paper is completely removed and the wood is dry, it’s time to seal your transferred image. In a well-ventilated area, apply one or two light, even coats of a clear UV protective spray sealant, such as Krylon UV Sealer. Allow each coat to dry completely according to the product instructions. The sealant will protect your image from fading, enhance its vibrancy, and provide a smooth, finished look.
- Add Vinyl Personalization (Optional): If you prepared a vinyl saying or design, now is the time to apply it. Weed your vinyl design, apply transfer tape, and carefully transfer it onto your wood photo in your desired position. Burnish the vinyl firmly onto the wood and gently remove the transfer tape.
- Final Sealant Coat (Optional): After applying vinyl, you can add another light coat of spray sealant over the entire surface to protect the vinyl and further enhance the finished look.
Step 6: Display and Enjoy!
Congratulations! You have successfully transferred a photo to wood. Allow the final sealant coat to dry completely, and then your personalized wood photo is ready to display or gift.
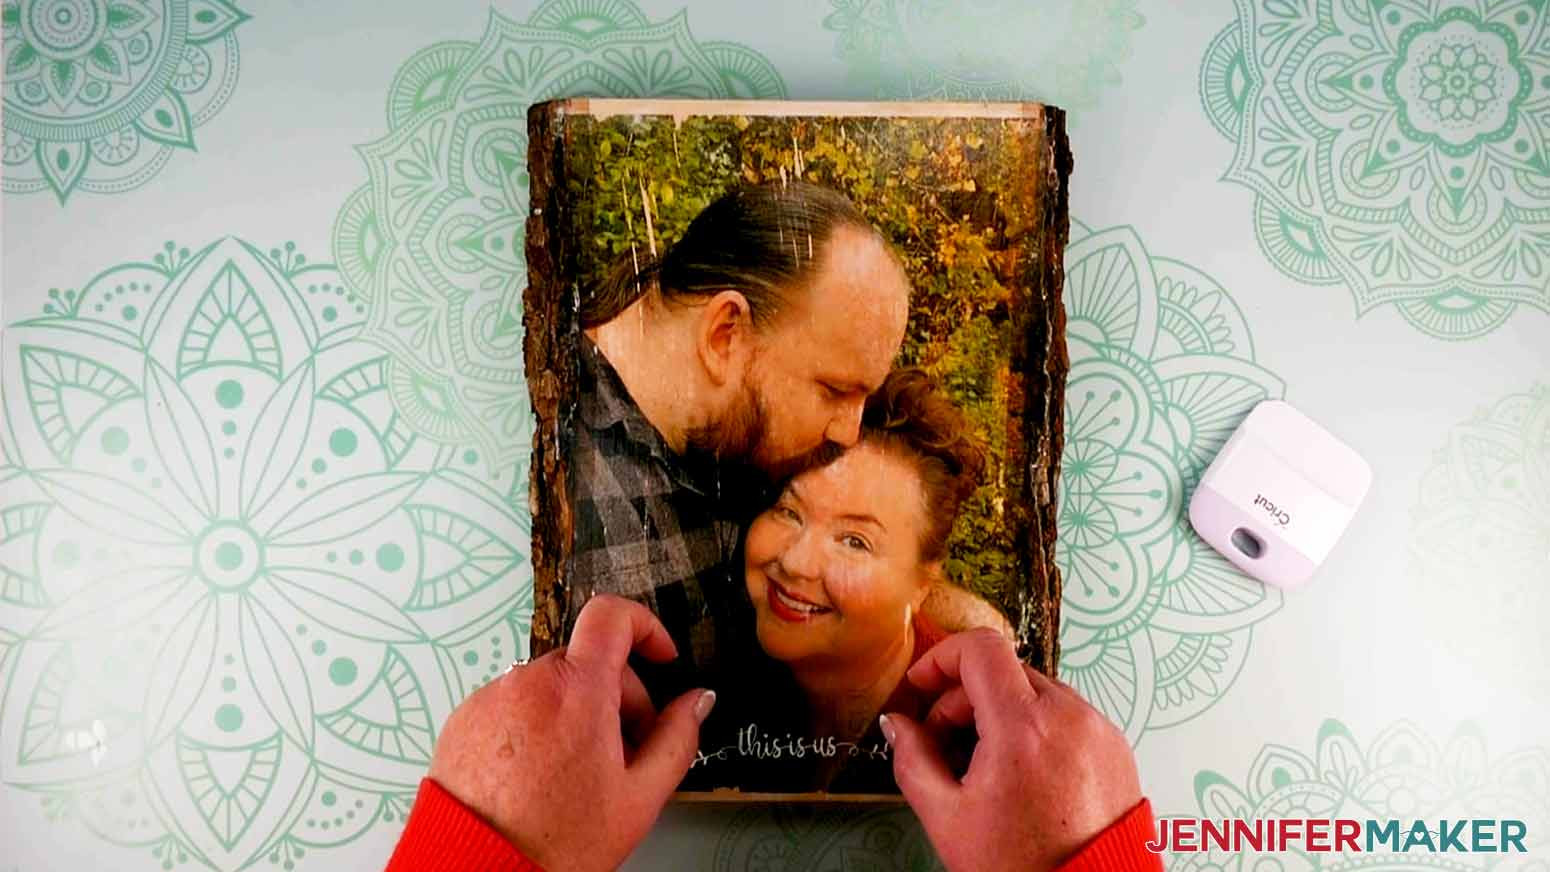 adding vinyl saying this is us to wood photo project
Pro Tips and Troubleshooting for Photo to Wood Transfer
To ensure your photo to wood transfer project is a success, consider these helpful tips and troubleshooting advice:
- Paper Choice is Key: Always use lightweight 20 lb. copy paper. Thicker paper is harder to remove and can lead to a gummy residue.
- Laser vs. Inkjet: Laser prints generally provide sharper and more vibrant transfers. If using inkjet, let the print dry thoroughly before applying Mod Podge to prevent smudging.
- Mod Podge Consistency: Apply a medium, even coat of Mod Podge. Too little Mod Podge may result in an incomplete transfer, while too much can make paper removal difficult.
- Drying Time Matters: Ensure the Mod Podge is completely dry before you start removing the paper. Rushing this step can lead to a blurry or damaged transfer. Using a heat gun can speed up drying, but be cautious not to overheat the Mod Podge.
- Water Application: Use a damp towel, not a soaking wet one, to dampen the paper. Too much water can cause the Mod Podge to become milky or lift the image. Apply water gradually as needed during paper removal.
- Gentle Rubbing: Patience is key during paper removal. Rub gently and in circular motions. Avoid harsh scrubbing, which can peel away the transferred image along with the paper.
- White Film or Gummy Residue: If you encounter a white film or gummy residue during paper removal, it’s often due to paper fibers left behind or Mod Podge that wasn’t fully dried. Try dampening the area again and gently rubbing with a soft cloth. A sealant coat can also help minimize the appearance of a slight white film.
- Uneven Transfer: If parts of your image didn’t transfer well, it could be due to insufficient Mod Podge in those areas, uneven pressure when adhering the photo, or air bubbles. Ensure even Mod Podge application and thorough smoothing with a brayer.
- Practice Makes Perfect: If you’re new to photo transfers, consider practicing on scrap wood with test prints to get a feel for the process before working on your final piece.
- Embrace Imperfection: Photo transfers to wood often have a charming, slightly distressed, and vintage look. Embrace any imperfections as part of the unique character of your handmade piece.
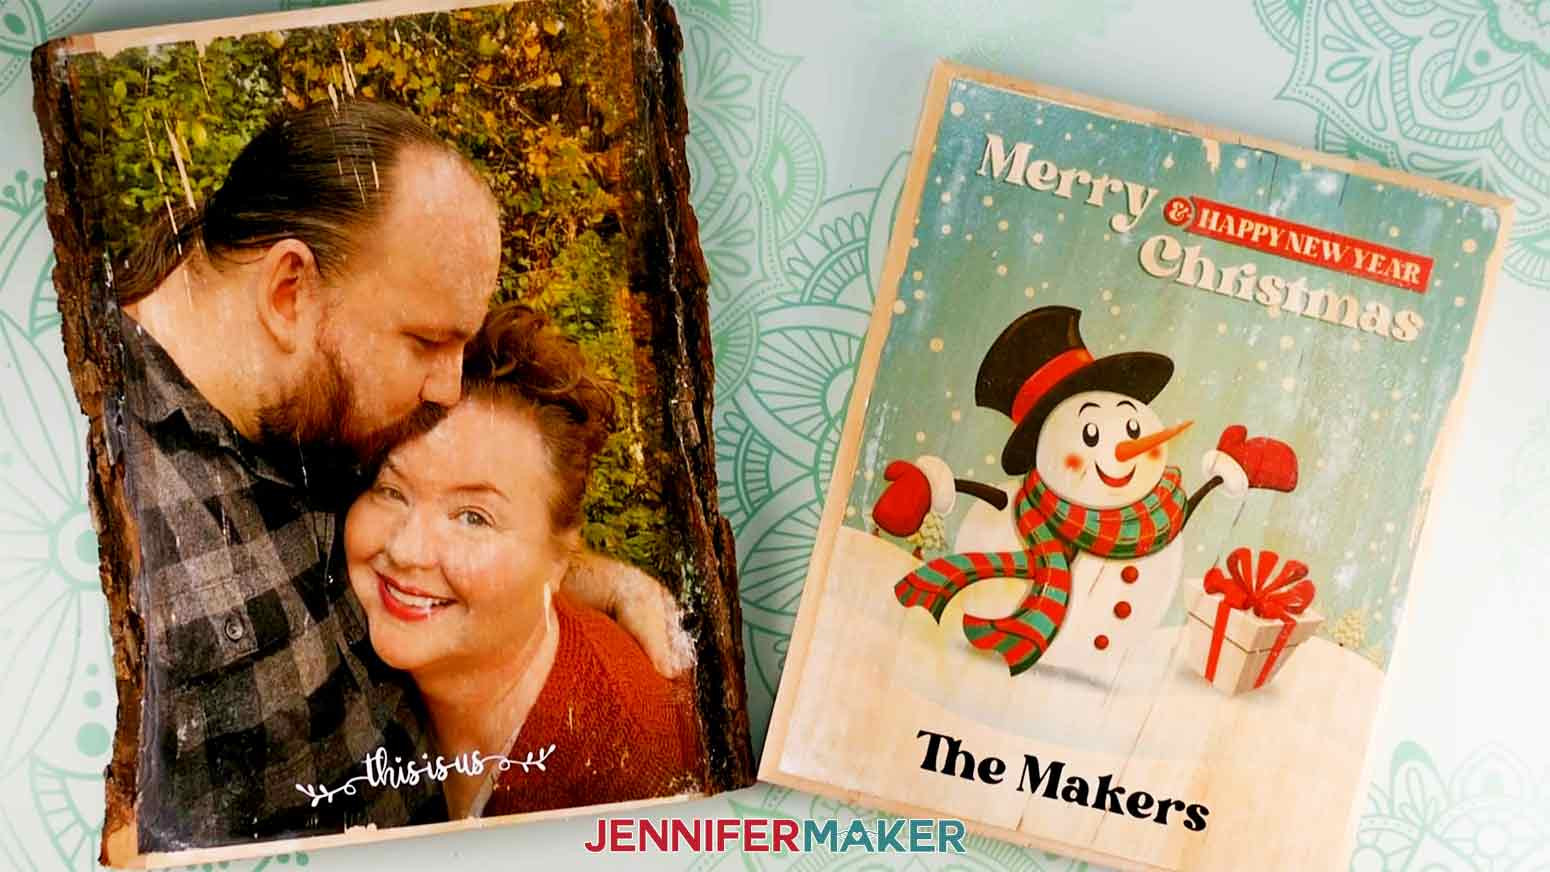 both finished projects, photo transfer on wood with vinyl lettering
Unleash Your Creativity with Photo to Wood Transfers
Transferring photos to wood is a wonderfully versatile craft that opens up a world of creative possibilities. From personalized gifts and home décor to rustic signs and unique keepsakes, this technique adds a special touch to any project. Experiment with different photo styles, wood types, and personalization techniques to create truly one-of-a-kind pieces. Whether you’re preserving precious memories or crafting heartfelt presents, mastering how to transfer photos to wood is a skill you’ll treasure for years to come. So gather your supplies, choose your favorite photos, and start creating beautiful wood photo art today!