Transform your cherished photos into unique and personalized home décor or heartfelt gifts with a simple photo transfer technique onto wood. This step-by-step tutorial will guide you through the process of transferring photos to wood using Mod Podge, making it an accessible and budget-friendly craft for everyone.
 DIY Photo Transfer to Wood
Whether you’re looking to create rustic wall art, personalized ornaments, or memorable gifts for loved ones, transferring photos to wood adds a warm, handmade touch to any image. This method is surprisingly easy to master in just a few steps, with the main waiting time being for drying. With a little preparation, you can create a beautiful piece of photo décor in under an hour, excluding drying time.
This guide offers an updated and streamlined approach to photo transfer, ensuring a quicker and more efficient crafting experience. If you’re new to Mod Podge, it’s a versatile, water-based sealant, glue, and finish that dries clear, available in matte or gloss. For wood transfer projects, a matte finish often complements the natural texture of the wood for a rustic aesthetic.
The possibilities for using photo-transferred wood are endless. Consider turning your favorite family portraits, vacation snapshots, or even pet pictures into lasting keepsakes. Let’s dive into the simple steps to bring your photo memories to life on wood.
Gather Your Supplies: Everything You Need for Photo Transfer to Wood
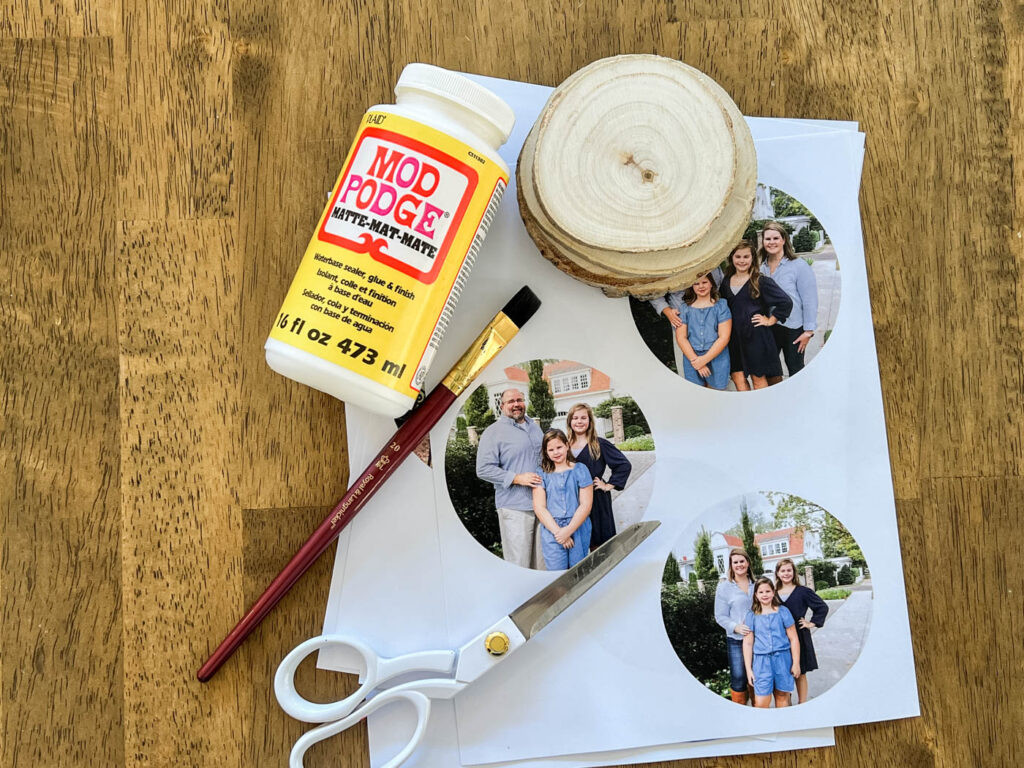
Before you begin, gather all the necessary materials to ensure a smooth and enjoyable crafting process. Having everything at hand will make the photo transfer to wood project efficient and stress-free.
- Wood Piece: The foundation of your project. Options range from rustic round wood slices, ideal for ornaments or gift tags, to wooden plaques for wall décor. Consider the size and shape that best suits your photo and intended use. For plaques, craft stores like Hobby Lobby offer a variety of wood surfaces.
- Laser Printout of Your Photo: This is crucial. The image must be laser printed on thin paper. Inkjet prints will not work with this transfer method. Mirror the image before printing if it includes text or directional elements.
- Scissors: For precisely cutting out your photo print to fit your wood piece.
- Mod Podge: The magic ingredient for transferring and sealing your image. Matte Mod Podge is recommended for a natural wood look.
- Foam Brush or Craft Brush: For applying smooth, even layers of Mod Podge. Foam brushes are particularly good for minimizing brush strokes.
- Wash Cloth or Paper Towel: Dampened, for gently removing the paper backing and revealing your transferred image.
- Optional Hair Dryer: To speed up the drying process, especially helpful when you’re short on time.
- Optional Drill and Drill Bit: If you intend to hang your wood slice as an ornament or wall décor, a drill will be needed to create a hole for hanging.
 supplies for diy photo transfer to wood
Step-by-Step Guide: Transferring Your Photo to Wood
Follow these detailed steps to successfully transfer your photo onto wood and create a personalized piece of art.
Step 1: Prepare Your Wood and Photo
Begin by selecting and preparing your wood piece. Ensure the surface is clean and free of dust or debris. If using raw wood, you may lightly sand it for a smoother finish, though the rustic look of unsanded wood can add character.
Next, prepare your photo. Remember, for successful transfer, you must use a laser print of your image. Inkjet prints will smudge and not transfer correctly.
Consider these points when preparing your photo print:
- Mirror Image: If your photo includes text or a specific direction (like a landscape orientation where direction matters), mirror the image before printing. Photo editing tools like Canva or PicMonkey are user-friendly for mirroring and resizing images. A simple online search for “mirror image online” will also provide free tools.
- Resize: Adjust the image size to fit your wood piece. For round wood slices, creating a circular crop of your photo beforehand can be helpful. Aim for a size that leaves a small wood border for a visually appealing finish.
- Laser Print: Locate a laser printer. Home inkjet printers are not suitable. Options include office supply stores like Staples, local print shops, or your workplace printer if it’s a laser printer.
- Thin Paper: Print on regular, thin printer paper (around 20-24lb weight). Thicker paper is harder to rub away and may hinder the transfer process.
- Cut Out: Carefully cut out your photo print using scissors, trimming closely to the image edge for a clean transfer.
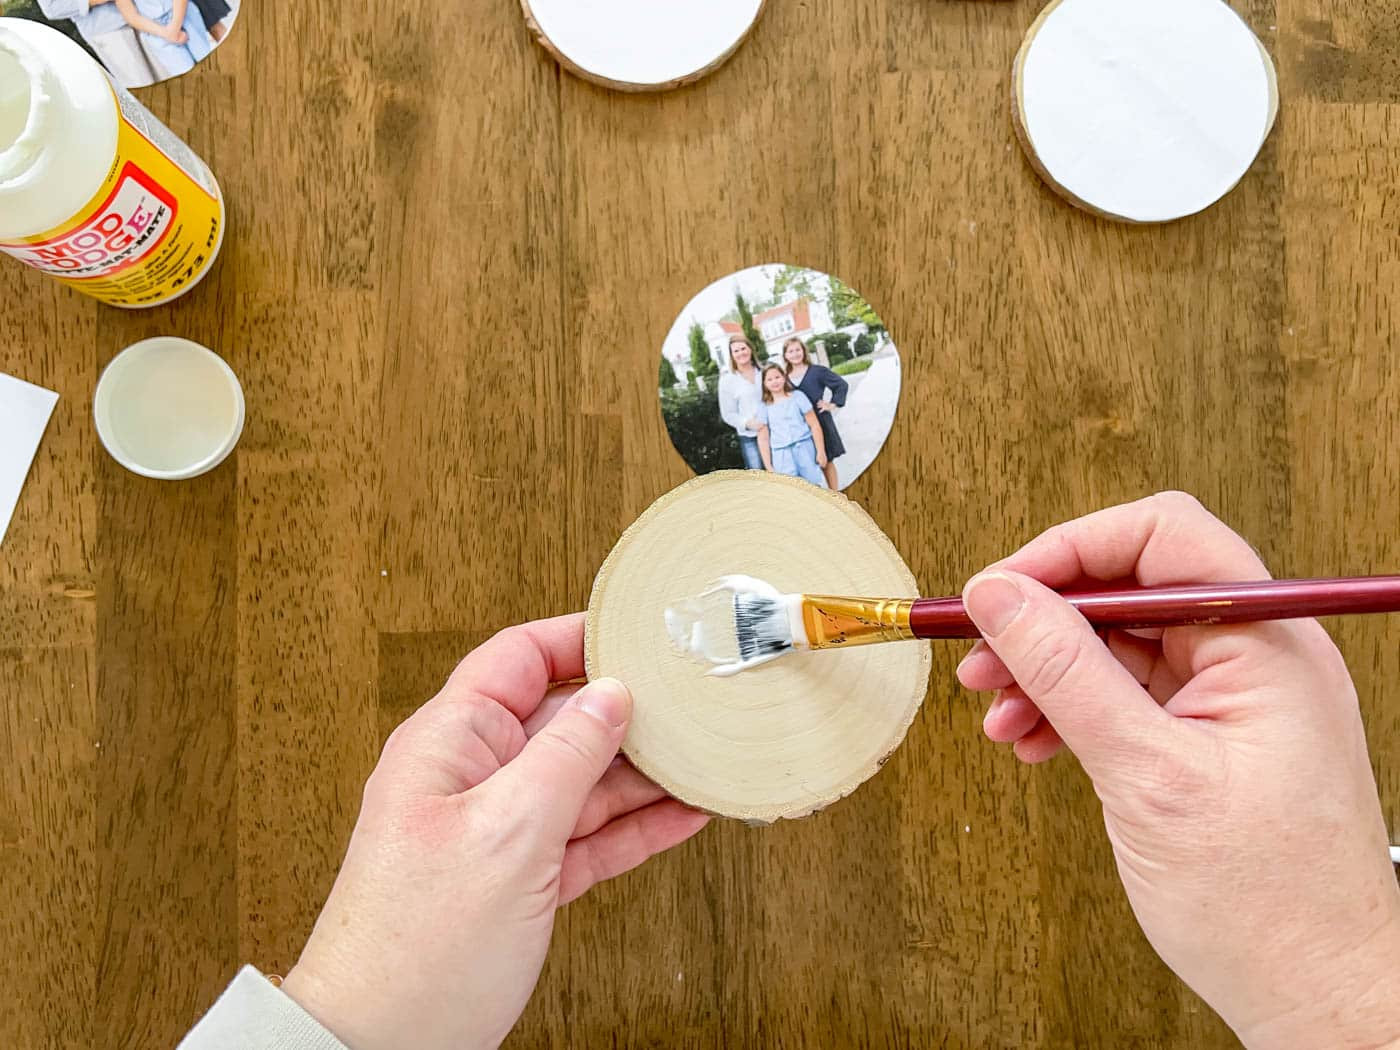
Step 2: Apply Mod Podge to the Wood
With your wood and photo prepared, it’s time to apply the Mod Podge. Use your foam brush or craft brush to apply a medium, even layer of Mod Podge directly onto the wood surface. Ensure the entire area where the photo will be placed is covered, but avoid applying it too thickly, which can lead to drips and longer drying times.
 paint a layer of Mod Podge on the wood slice
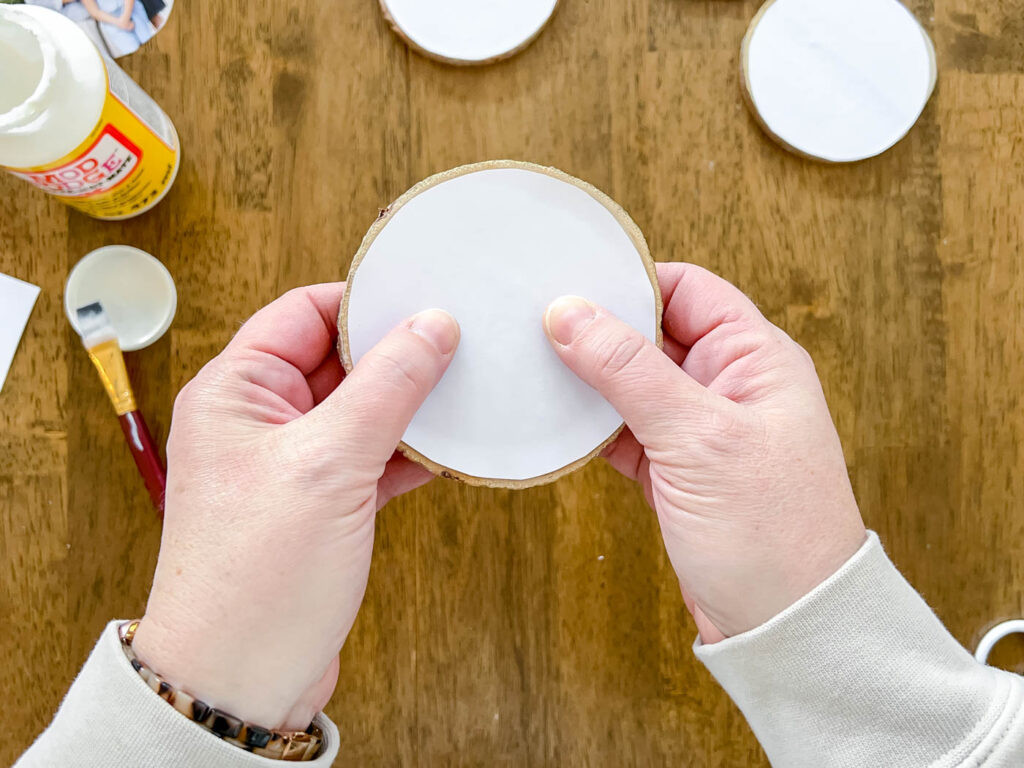
Step 3: Adhere the Photo and Remove Air Bubbles
Carefully place your photo, face down, onto the Mod Podge-covered wood. Align it precisely where you want it to appear on the finished piece.
Once the photo is positioned, gently press out any air bubbles trapped beneath the paper. Use your fingers or a credit card (or a Mod Podge smoothing tool if you have one) to smooth from the center outwards. Thoroughly removing air bubbles ensures good contact between the photo and Mod Podge, critical for a clean image transfer. Areas with trapped air may not transfer properly.
 press bubbles out of wood slice
Step 4: Drying Time is Key
Allow the Mod Podge to dry completely. While some tutorials suggest varying drying times, a 48-hour drying period is generally recommended for optimal results. The longer drying time allows for a better bond between the photo paper and the wood, leading to a clearer image transfer.
Speeding up Drying (Optional): If you’re pressed for time, a hair dryer can be used to accelerate the drying process. Use a medium heat setting and direct the airflow evenly over the wood piece for 2-3 minutes until the photo appears well-adhered. Allow it to cool completely before proceeding to the next step. Even with a hair dryer, ensure the Mod Podge is fully dry before moving on.
Step 5: Reveal Your Image by Removing Paper Backing
Once the Mod Podge is completely dry and cool, the exciting part begins – revealing your transferred image. Wet a washcloth or paper towel with water and wring out any excess moisture; it should be damp, not dripping.
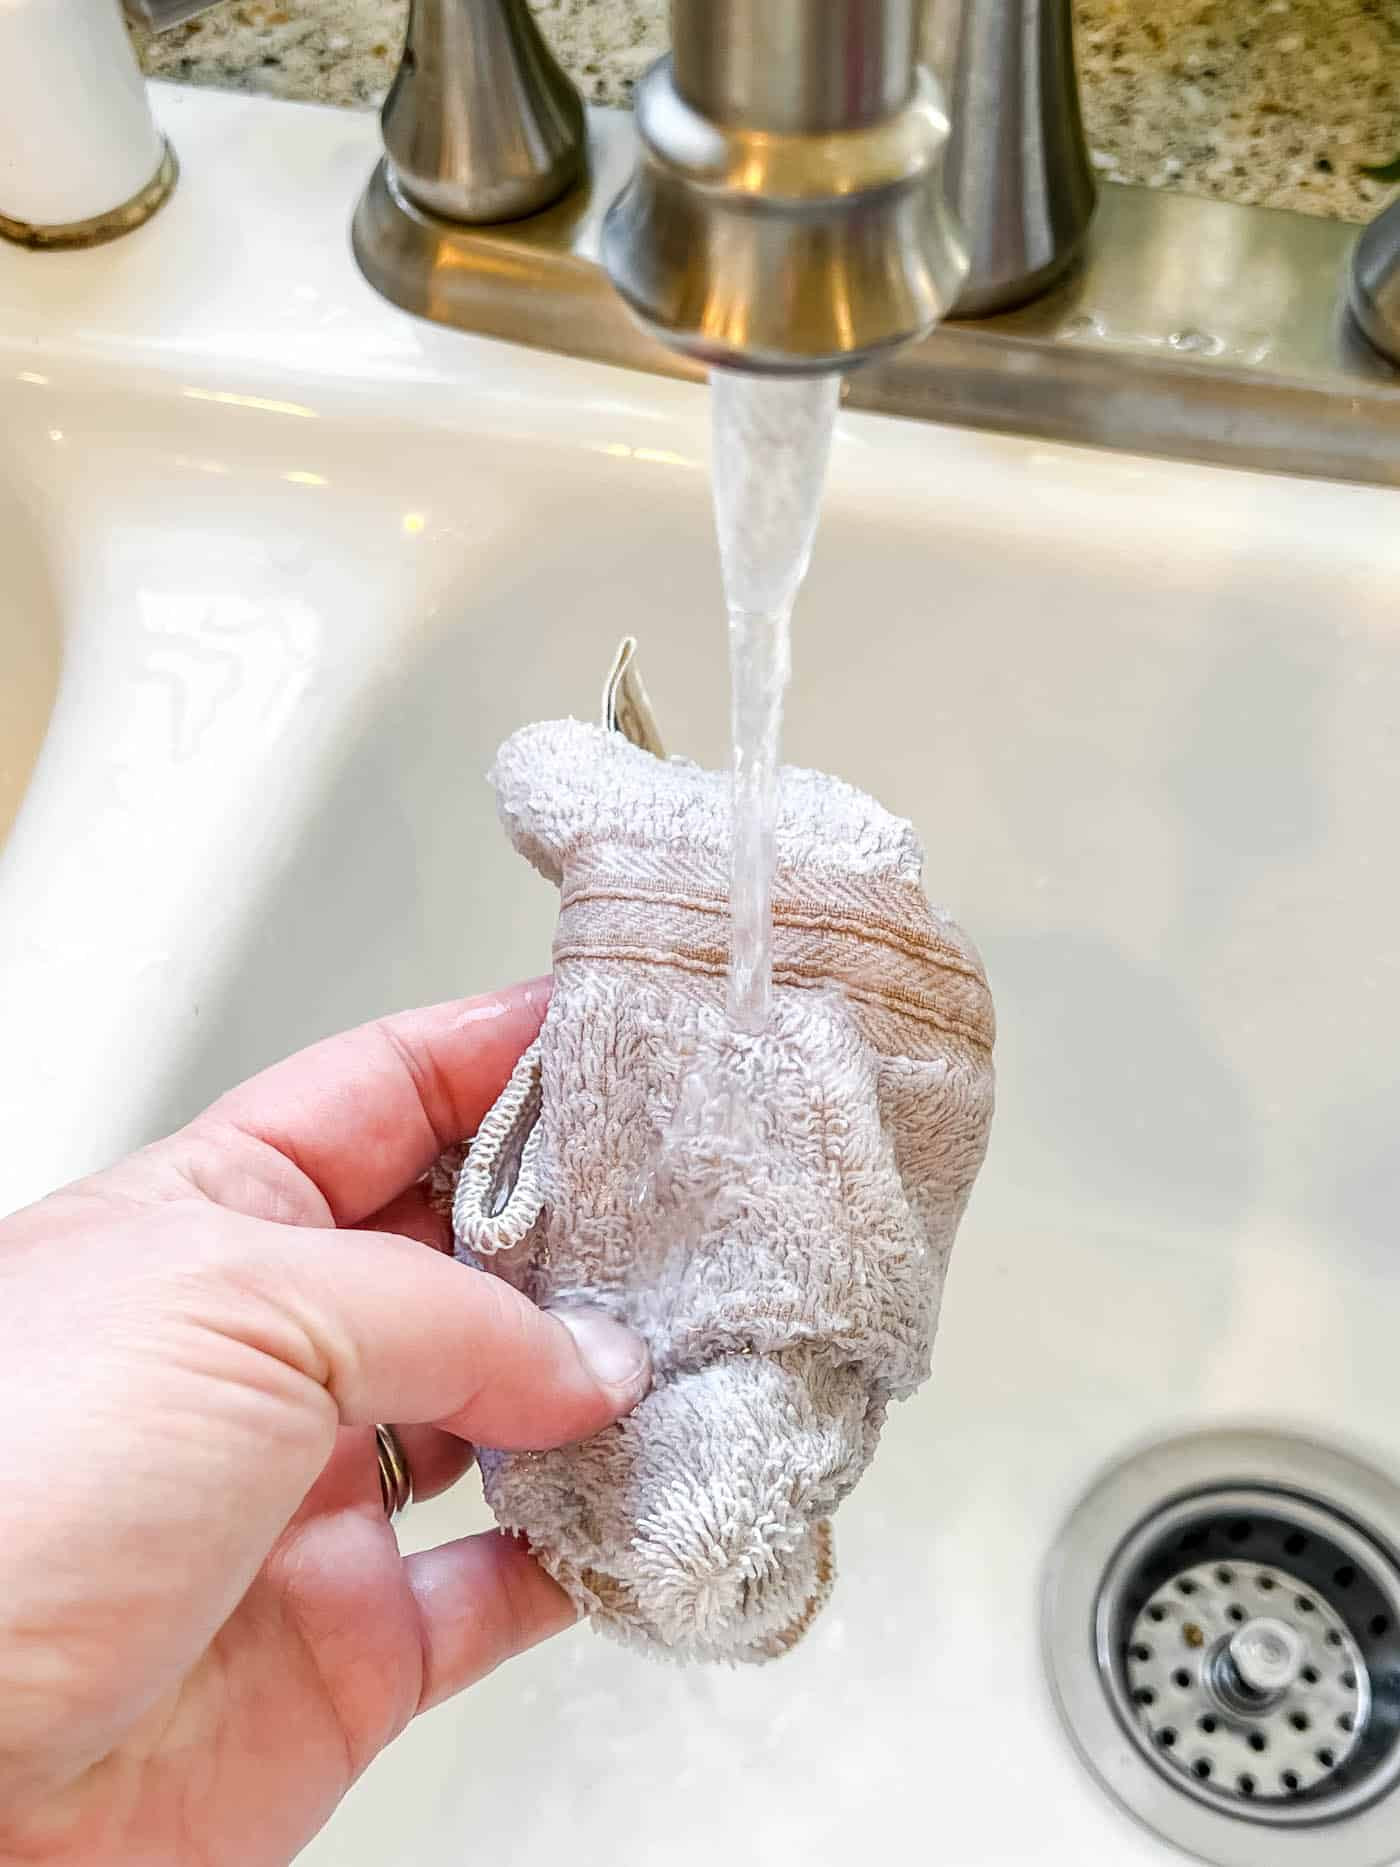 wet a rag to rub the paper off the wood slice
Gently begin rubbing away the paper backing in small, circular motions. Start lightly and gradually increase pressure as needed. Patience is key here. Work slowly and deliberately to avoid accidentally rubbing away the transferred image. As you rub, the white paper will pill and roll away, revealing the photo underneath.
You’ll likely need to repeat this process several times. As the wood dries, you’ll notice remaining paper fibers. Continue gently dampening and rubbing until all the paper is removed and the image is clear. Running your fingers across the surface can help you detect any remaining paper fibers.
Be cautious not to scratch the transferred image. If you notice the image starting to lift or smudge, reduce pressure and use a gentler touch. A slightly rustic or distressed look can also be embraced if some imperfections occur.
Step 6: Seal and Protect Your Transferred Photo
To protect your newly transferred photo on wood and enhance its longevity, apply a thin topcoat of Mod Podge as a sealer. This final layer will safeguard against dust, moisture, and minor damage, preserving your artwork for years to come.
Applying a final coat of Mod Podge as a sealant over the transferred photo on wood for protection.
Apply a thin, even coat of Mod Podge over the entire wood surface, including the transferred image. Allow it to dry completely. This step is crucial for sealing and enhancing the vibrancy of your transferred image. Once dry, your photo transfer to wood project is complete and ready to display or gift!
Creative Ideas for Displaying Your Photo on Wood
Once your photo is beautifully transferred onto wood, explore various ways to showcase your handmade creation. Here are a few inspiring ideas:
-
Decorative Plaques: Transform your wood transfer into a charming wall plaque. Use family photos, scenic landscapes, or even artistic prints. Consider adding hanging hardware to the back for easy display. For a personalized touch, use custom-designed printables or monograms.
-
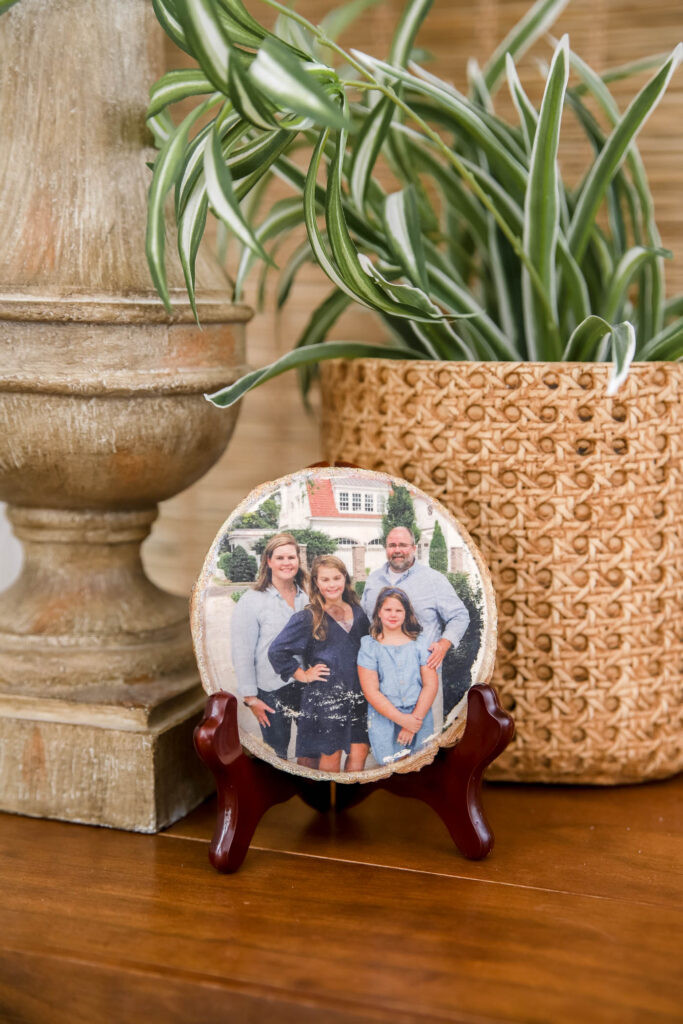
Wood Slice Photo Stands: For a rustic and natural look, display your wood slice photo on a small easel or plate stand. This is perfect for desks, shelves, or mantelpieces. Wood slices add a touch of nature indoors, making them ideal for displaying nature photography or portraits.
 DIY Photo Transfer to Wood
 -
Personalized Christmas Ornaments: Turn smaller wood slices into unique Christmas ornaments. Drill a small hole at the top, thread ribbon or twine through it, and hang on your Christmas tree. Photo ornaments make thoughtful gifts for grandparents, parents, and family members, capturing special moments and memories.
-
Gift Tags with a Personal Touch: Create personalized gift tags by transferring photos of the gift recipient onto small wood pieces. Attach them to presents for a unique and memorable touch. This adds an extra layer of thoughtfulness and personalization to any gift.
A wood slice photo transfer used as a personalized gift tag tied to a wrapped present.
Unleash your creativity and experiment with different photo styles, wood types, and display options. Photo transfer to wood is a versatile craft that allows for endless personalization and artistic expression. Share your creations and inspire others with the beauty of handmade photo décor!