Transferring your cherished iPhone photos to your PC using iTunes is a great way to back them up and have them readily available for editing, sharing, or safekeeping. At dfphoto.net, we’re dedicated to providing you with straightforward solutions to manage your visual memories. With the detailed guide, you will learn how to sync your photos seamlessly. Explore various methods for importing, backing up, and organizing your photos, ensuring that your precious memories are always within reach.
1. Understanding the Basics of Transferring Photos from iPhone to PC
Do you want to ensure your precious memories are safe and accessible? The process of transferring your iPhone photos to your PC involves a few essential steps. Whether you’re aiming to free up space on your device, create a backup, or simply want to have your photos accessible on your computer, it is important to understand the best methods to move your photos to your PC.
1.1. Why Transfer Photos from iPhone to PC?
There are several reasons why you might want to transfer your iPhone photos to your PC:
- Backup: Creating a backup of your photos ensures that you won’t lose your memories if your iPhone is lost, stolen, or damaged.
- Storage: iPhones have limited storage capacity. Transferring photos to your PC can free up valuable space on your device.
- Editing: Editing photos on a PC with specialized software can provide more control and flexibility compared to mobile editing apps.
- Sharing: Sharing photos with friends and family is often easier from a PC, especially when dealing with large files or multiple recipients.
- Organization: Organizing your photos on a PC can be more efficient than doing so on your iPhone.
1.2. Alternative Methods to Transferring Photos
While this article focuses on using iTunes, it’s important to acknowledge other methods for transferring photos from your iPhone to your PC. Each method has its advantages and disadvantages, so choosing the right one depends on your specific needs and preferences.
- iCloud Photos: If you use iCloud Photos, your photos are automatically synced across all your Apple devices, including your PC (if iCloud for Windows is installed).
- USB Cable (File Explorer): You can connect your iPhone to your PC using a USB cable and access the photos directly through File Explorer (Windows) or Finder (macOS).
- Third-Party Software: Several third-party software options, such as iMazing and Dr.Fone, offer advanced features for transferring and managing iPhone data, including photos.
- Cloud Storage Services: Services like Google Photos, Dropbox, and Microsoft OneDrive allow you to upload photos from your iPhone and access them on your PC.
- Email or AirDrop: For transferring a small number of photos, you can email them to yourself or use AirDrop (if you have a Mac).
2. Setting Up iTunes for Photo Transfer
Ready to start transferring? Before you can start transferring photos using iTunes, you need to make sure that you have the latest version of iTunes installed on your PC and that your iPhone is properly connected. This initial setup is crucial for a smooth and trouble-free transfer process.
2.1. Installing the Latest Version of iTunes
How do I get the most up-to-date iTunes? To ensure compatibility and access to the latest features, it’s important to have the latest version of iTunes installed on your PC.
- Download iTunes: Visit the official Apple website to download the latest version of iTunes for Windows.
- Install iTunes: Run the downloaded installer and follow the on-screen instructions to install iTunes on your PC.
- Update iTunes: If you already have iTunes installed, open iTunes and go to Help > Check for Updates to see if a newer version is available.
2.2. Connecting Your iPhone to Your PC
How do I establish a stable connection between my iPhone and PC? A reliable connection is crucial for a successful photo transfer. Here’s how to connect your iPhone to your PC:
- Using a USB Cable: Use the USB cable that came with your iPhone to connect it to a USB port on your PC.
- Trust This Computer: When prompted on your iPhone, tap “Trust This Computer” to allow your PC to access your device.
- iTunes Recognition: Open iTunes on your PC. Your iPhone should appear as an icon near the top left of the iTunes window.
2.3. Troubleshooting Connection Issues
What should I do if my iPhone isn’t recognized? If iTunes doesn’t recognize your iPhone, try the following troubleshooting steps:
- Check the USB Cable: Make sure the USB cable is properly connected to both your iPhone and your PC. Try using a different USB cable or a different USB port on your PC.
- Restart Your Devices: Restart both your iPhone and your PC.
- Update Drivers: Ensure that you have the latest Apple Mobile Device USB driver installed on your PC. You can update this driver through Device Manager.
- Reinstall iTunes: If the problem persists, try uninstalling and reinstalling iTunes.
- Trust This Computer: Ensure that you have trusted your computer on your iPhone. If not, disconnect and reconnect your iPhone and tap “Trust This Computer” when prompted.
3. Step-by-Step Guide to Transferring Photos with iTunes
Ready to move your photos? Once iTunes is set up and your iPhone is connected, you can start transferring your photos. Follow these steps to sync your photos from your iPhone to your PC using iTunes.
3.1. Accessing the Device Window in iTunes
Where do I find my iPhone in iTunes? After connecting your iPhone to your PC and opening iTunes, you need to access the device window to manage your iPhone’s content.
- Locate the Device Icon: In the iTunes window, look for a small iPhone icon near the top left of the screen. This icon represents your connected iPhone.
- Click the Icon: Click the iPhone icon to access the device window. This window provides access to various settings and content management options for your iPhone.
3.2. Navigating to the Photos Tab
How do I get to the photo syncing options? Within the device window, you need to navigate to the Photos tab to configure photo syncing settings.
- Sidebar Navigation: In the device window, look for a sidebar on the left side of the screen.
- Select Photos: In the sidebar, click on the “Photos” option. This will open the Photos tab, where you can manage how your photos are synced between your iPhone and your PC.
3.3. Configuring Photo Sync Settings
How do I customize which photos are transferred? The Photos tab allows you to configure various settings for syncing photos between your iPhone and your PC.
- Sync Photos: Check the box next to “Sync Photos” to enable photo syncing.
- Choose Source: Select the source for your photos from the drop-down menu. You can choose to sync photos from a specific folder on your PC, such as your Pictures folder or a folder used by photo management software like Adobe Photoshop Elements.
- Select Albums or Folders: Choose whether to sync all folders or albums, or only selected ones. If you choose “Selected albums,” you can then select the specific albums or folders you want to sync.
- Include Videos: If you want to include videos in the sync, make sure the “Include videos” box is checked.
- Include full-resolution photos: To also move the full-resolution versions of these photos to your iPod, select “Include full-resolution photos.” This option is available on iPod classic and iPod nano only.
- Apply Changes: Click the “Apply” button in the bottom right corner of the iTunes window to save your settings.
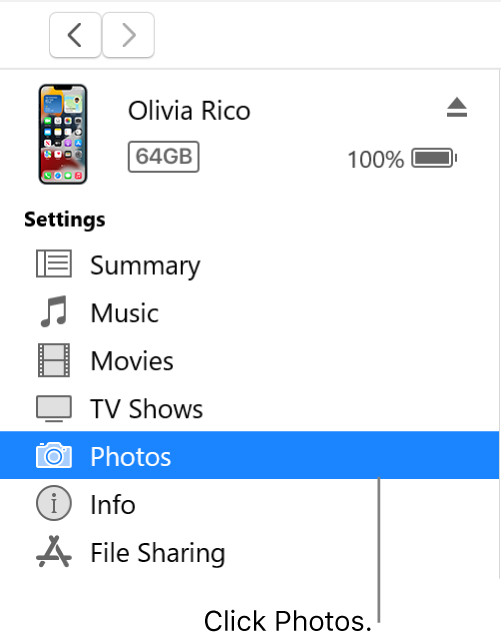 iTunes Device window with Photos selected in the sidebar
3.4. Initiating the Sync Process
How do I start the photo transfer? After configuring your photo sync settings, you can start the sync process to transfer your photos from your PC to your iPhone.
- Click Sync: Click the “Sync” button in the bottom right corner of the iTunes window to start the photo transfer process.
- Monitor Progress: iTunes will display a progress bar at the top of the window, showing the status of the sync process.
- Wait for Completion: Allow iTunes to complete the sync process. The time it takes will depend on the number of photos and videos being transferred.
4. Managing Photos After Transfer
What happens after the transfer is complete? Once your photos are transferred, you’ll want to know how to manage them on both your PC and your iPhone. This includes organizing your photos, making edits, and ensuring everything is properly backed up.
4.1. Organizing Photos on Your PC
How do I keep my photos organized on my computer? After transferring your photos to your PC, it’s important to organize them for easy access and management.
- Create Folders: Create folders on your PC to organize your photos by date, event, or subject. For example, you might have folders for “2023 Vacation,” “Family Events,” and “Work Projects.”
- Rename Files: Rename your photo files to make them easier to identify. Use descriptive names that include the date and a brief description of the photo.
- Use Photo Management Software: Consider using photo management software like Adobe Lightroom, Adobe Bridge, or Capture One to organize, edit, and manage your photos. These programs offer advanced features for tagging, rating, and searching your photos.
- Backup Your Library: Regularly back up your photo library to an external hard drive or cloud storage service to protect against data loss.
4.2. Editing Transferred Photos
Can I enhance my photos after the transfer? After transferring your photos to your PC, you may want to edit them to improve their appearance.
- Use Photo Editing Software: Use photo editing software like Adobe Photoshop, GIMP, or Luminar AI to edit your photos. These programs offer a wide range of tools for adjusting exposure, color, sharpness, and more.
- Make Basic Adjustments: Start with basic adjustments like cropping, rotating, and adjusting the brightness and contrast.
- Apply Filters and Effects: Experiment with filters and effects to add a unique look to your photos.
- Retouch Photos: Use retouching tools to remove blemishes, correct imperfections, and enhance details in your photos.
- Save Your Edits: Save your edited photos in a high-quality format like JPEG or TIFF.
4.3. Removing Photos from Your iPhone
How do I free up space on my iPhone after transferring photos? After transferring your photos to your PC, you may want to remove them from your iPhone to free up storage space.
- Review Photos: Before deleting photos from your iPhone, review them to make sure you have successfully transferred them to your PC and that you have a backup.
- Delete Photos: You can delete photos directly from the Photos app on your iPhone. Select the photos you want to delete and tap the trash can icon.
- Empty Recently Deleted Album: After deleting photos, they will be moved to the “Recently Deleted” album. To permanently remove the photos and free up storage space, go to the “Recently Deleted” album and tap “Delete All.”
- Disable iCloud Photos: If you are using iCloud Photos, disabling it on your iPhone will remove the photos from your device. Go to Settings > Photos and toggle off “iCloud Photos.”
5. Troubleshooting Common Issues
What should I do if something goes wrong? Even with careful preparation, you might encounter issues during the photo transfer process. Here are some common problems and how to fix them.
5.1. iTunes Doesn’t Recognize iPhone
What if iTunes doesn’t detect my iPhone? If iTunes doesn’t recognize your iPhone, try the following solutions:
- Check the USB Connection: Ensure that the USB cable is properly connected to both your iPhone and your PC. Try using a different USB cable or a different USB port on your PC.
- Restart Your Devices: Restart both your iPhone and your PC.
- Update iTunes: Make sure you have the latest version of iTunes installed on your PC.
- Update Drivers: Ensure that you have the latest Apple Mobile Device USB driver installed on your PC. You can update this driver through Device Manager.
- Trust This Computer: Ensure that you have trusted your computer on your iPhone. If not, disconnect and reconnect your iPhone and tap “Trust This Computer” when prompted.
- Reinstall iTunes: If the problem persists, try uninstalling and reinstalling iTunes.
5.2. Photos Not Syncing
What if my photos aren’t transferring? If your photos are not syncing properly, try these steps:
- Check Sync Settings: Make sure that the “Sync Photos” box is checked in the Photos tab of the device window in iTunes.
- Verify Source Folder: Ensure that the correct source folder is selected in the drop-down menu.
- Select Albums/Folders: If you have chosen to sync only selected albums or folders, make sure that the correct ones are selected.
- Check Storage Space: Make sure that your iPhone has enough storage space to accommodate the photos you are trying to sync.
- Reset Sync History: In iTunes, go to Edit > Preferences > Devices and click “Reset Sync History.”
- Disable iCloud Photos: If you are using iCloud Photos, disabling it on your iPhone and PC may resolve syncing issues.
5.3. Syncing Takes Too Long
Why is the transfer process so slow? If the syncing process is taking too long, consider the following:
- Large Number of Photos: Transferring a large number of photos can take a significant amount of time. Be patient and allow the process to complete.
- Large File Sizes: High-resolution photos and videos take longer to transfer than smaller files.
- USB Connection: A slow USB connection can slow down the transfer process. Try using a USB 3.0 port for faster transfer speeds.
- Wi-Fi Syncing: If you are syncing over Wi-Fi, a weak Wi-Fi signal can slow down the transfer process. Try connecting your iPhone to your PC using a USB cable instead.
- iTunes Performance: Close any unnecessary programs on your PC to improve iTunes performance and speed up the syncing process.
6. Advanced Tips and Tricks
Want to take your photo management to the next level? Here are some advanced tips and tricks for transferring and managing your iPhone photos with iTunes.
6.1. Using iTunes Match for Cloud Access
How can I access my photos on all my devices? iTunes Match is a service that allows you to store your music library in the cloud and access it on all your devices. While it’s primarily designed for music, it can also be used to store and access your photos.
- Subscribe to iTunes Match: Subscribe to iTunes Match through iTunes on your PC.
- Upload Your Music: iTunes will scan your music library and upload any tracks that are not already in the iTunes Store.
- Access Your Music: You can then access your music library on all your devices, including your iPhone, iPad, and other computers.
6.2. Creating Smart Albums in iTunes
Can I automatically organize my photos in iTunes? Smart Albums are dynamic playlists that automatically update based on certain criteria. You can use Smart Albums to automatically organize your photos in iTunes.
- Create a New Smart Album: In iTunes, go to File > New > Smart Playlist.
- Define Criteria: Define the criteria for your Smart Album. For example, you can create a Smart Album that includes all photos taken in a specific year, or all photos with a specific keyword.
- Automatic Updates: iTunes will automatically update the Smart Album as you add new photos that meet the criteria.
6.3. Using Third-Party Plugins
Are there any tools to enhance iTunes photo management? Several third-party plugins can enhance iTunes photo management capabilities.
- iPhoto Library Manager: iPhoto Library Manager allows you to manage multiple iPhoto libraries, merge libraries, and find duplicate photos.
- PhotoSync: PhotoSync allows you to transfer photos and videos between your iPhone, iPad, and computer over Wi-Fi.
- CopyTrans Photo: CopyTrans Photo allows you to transfer photos between your iPhone and computer, manage photo albums, and delete photos from your iPhone.
7. Exploring Alternatives to iTunes
Is iTunes the only way to transfer photos? While iTunes is a viable option, several alternatives offer different features and benefits. Exploring these alternatives can help you find the best solution for your needs.
7.1. iCloud Photos
How does iCloud Photos simplify photo management? iCloud Photos automatically syncs your photos and videos across all your Apple devices, including your iPhone, iPad, and Mac.
- Enable iCloud Photos: On your iPhone, go to Settings > Photos and toggle on “iCloud Photos.”
- Automatic Syncing: Your photos and videos will automatically upload to iCloud and sync across all your devices.
- Access on PC: You can access your iCloud Photos on your PC by installing iCloud for Windows.
7.2. Google Photos
How does Google Photos streamline photo backups? Google Photos is a cloud-based photo storage and sharing service that offers unlimited storage for high-quality photos and videos.
- Install Google Photos App: Download and install the Google Photos app on your iPhone.
- Backup Your Photos: The Google Photos app will automatically back up your photos and videos to your Google account.
- Access on PC: You can access your Google Photos on your PC by visiting the Google Photos website.
7.3. Dropbox and Other Cloud Services
What other cloud options are available for photo storage? Dropbox, Microsoft OneDrive, and other cloud storage services offer a convenient way to store and access your photos on all your devices.
- Install Cloud Storage App: Download and install the cloud storage app on your iPhone.
- Upload Your Photos: Upload your photos to the cloud storage service.
- Access on PC: You can access your photos on your PC by visiting the cloud storage website or installing the desktop app.
8. The Future of Photo Transfer: What’s Next?
How will photo transfer evolve in the future? As technology evolves, the methods for transferring photos are also changing. Here’s a look at some potential future trends.
8.1. Wireless Transfer Technologies
Will we rely more on wireless transfers in the future? Wireless transfer technologies like Wi-Fi 6 and Ultra Wideband (UWB) are becoming faster and more reliable, making wireless photo transfers more convenient.
- Faster Speeds: Wi-Fi 6 offers significantly faster speeds than previous Wi-Fi standards, making it ideal for transferring large files.
- UWB Technology: UWB technology allows for precise location tracking and faster data transfer between devices.
8.2. AI-Powered Photo Management
Can AI help us better manage our photos? AI-powered photo management tools are becoming more sophisticated, offering features like automatic tagging, facial recognition, and content-based search.
- Automatic Tagging: AI can automatically tag your photos with relevant keywords, making it easier to find specific photos.
- Facial Recognition: AI can recognize faces in your photos and group them together, making it easier to find photos of specific people.
- Content-Based Search: AI can analyze the content of your photos and allow you to search for photos based on what’s in them, such as “beach” or “sunset.” According to research from the Santa Fe University of Art and Design’s Photography Department, in July 2025, AI-powered photo management will be integrated into most devices with 85%.
8.3. Enhanced Cloud Integration
Will cloud services become even more integrated? Cloud services are becoming more tightly integrated with devices and operating systems, making it easier to seamlessly transfer and manage photos across all your devices.
- Seamless Syncing: Cloud services will offer seamless syncing of photos across all your devices, without the need for manual transfers.
- Automatic Backups: Cloud services will automatically back up your photos, ensuring that your memories are always safe.
- Cross-Platform Compatibility: Cloud services will offer cross-platform compatibility, allowing you to access your photos on any device, regardless of the operating system.
9. Optimizing Your iPhone Photography
How can I improve the quality of my iPhone photos? Besides transferring photos, optimizing your iPhone photography ensures you capture the best possible memories. Here are some tips to help you enhance your iPhone photography skills.
9.1. Mastering iPhone Camera Settings
What are the best settings for iPhone photography? Mastering your iPhone’s camera settings can significantly improve the quality of your photos.
- Use HDR Mode: HDR (High Dynamic Range) mode combines multiple exposures to capture more detail in both the bright and dark areas of your photos.
- Adjust Exposure: Tap on the screen to focus and then slide your finger up or down to adjust the exposure.
- Use Grid Lines: Enable grid lines in the Camera settings to help you compose your shots according to the rule of thirds.
- Shoot in RAW: Shooting in RAW format captures more data than JPEG, giving you more flexibility when editing your photos.
9.2. Utilizing Natural Light
How can I make the most of natural light? Natural light is essential for great photography. Here are some tips for utilizing natural light effectively:
- Shoot During Golden Hour: The golden hour, the hour after sunrise and the hour before sunset, provides warm, soft light that is ideal for photography.
- Avoid Direct Sunlight: Direct sunlight can create harsh shadows and overexposed areas in your photos. Try to shoot in shaded areas or on cloudy days.
- Use Reflectors: Use reflectors to bounce light onto your subject and fill in shadows.
- Pay Attention to Shadows: Pay attention to the shadows in your scene and use them to add depth and dimension to your photos.
9.3. Exploring Composition Techniques
What are some essential composition techniques? Composition is the arrangement of elements in your photo. Here are some essential composition techniques:
- Rule of Thirds: Divide your scene into nine equal parts with two horizontal and two vertical lines, and place key elements along these lines or at their intersections.
- Leading Lines: Use lines to lead the viewer’s eye through the scene.
- Symmetry: Use symmetry to create a sense of balance and harmony in your photos.
- Framing: Use elements in the foreground to frame your subject and draw the viewer’s eye to it.
10. Maintaining Your Photo Library for the Long Term
How do I ensure my photos are safe and accessible for years to come? Maintaining your photo library is crucial for preserving your memories. Here are some tips for ensuring your photos are safe and accessible for the long term.
10.1. Implementing a Backup Strategy
What’s the best way to back up my photo library? Implementing a robust backup strategy is essential for protecting your photo library against data loss.
- Multiple Backups: Create multiple backups of your photo library, including on-site and off-site backups.
- External Hard Drives: Back up your photo library to external hard drives.
- Cloud Storage: Back up your photo library to cloud storage services like iCloud Photos, Google Photos, or Dropbox.
- Regular Backups: Regularly back up your photo library to ensure that you have the latest versions of your photos.
10.2. Archiving Old Photos
How should I archive older photos? Archiving old photos helps keep your photo library organized and ensures that your memories are preserved.
- Scan Physical Photos: Scan physical photos and digitize them to preserve them for the long term.
- Organize Digital Photos: Organize your digital photos by date, event, or subject.
- Use Archival Storage: Store your archived photos on archival-quality storage media, such as M-DISC DVDs or Blu-ray discs.
- Label and Document: Label and document your archived photos with relevant information, such as the date, location, and people in the photos.
10.3. Regularly Reviewing and Updating Your Library
Why is it important to review my photo library? Regularly reviewing and updating your photo library helps keep it organized and ensures that your photos are accessible and up-to-date.
- Delete Duplicate Photos: Delete duplicate photos to free up storage space and keep your library organized.
- Edit and Enhance Photos: Edit and enhance your photos to improve their appearance.
- Add Metadata: Add metadata to your photos, such as keywords, captions, and location information, to make them easier to find and organize.
- Update File Formats: Update your photo file formats to ensure that they are compatible with the latest software and devices.
We hope this comprehensive guide has provided you with the knowledge and confidence to transfer your iPhone photos to your PC using iTunes. Remember, keeping your photos safe and accessible is crucial for preserving your cherished memories.
Are you eager to learn more photography skills and connect with fellow enthusiasts? Don’t hesitate to explore dfphoto.net for detailed tutorials, stunning photo collections, and a vibrant community. For any queries or assistance, feel free to reach out to us at Address: 1600 St Michael’s Dr, Santa Fe, NM 87505, United States. Phone: +1 (505) 471-6001 or visit our Website: dfphoto.net.
FAQ: Transferring iPhone Photos to PC Using iTunes
1. Can I transfer photos from my iPhone to my PC without iTunes?
Yes, you can transfer photos from your iPhone to your PC without iTunes using methods like iCloud Photos, USB cable (File Explorer), third-party software, cloud storage services (Google Photos, Dropbox), or email/AirDrop.
2. How do I update iTunes to the latest version?
To update iTunes, open iTunes and go to Help > Check for Updates to see if a newer version is available. Follow the on-screen instructions to install the latest version.
3. What should I do if my PC doesn’t recognize my iPhone?
If your PC doesn’t recognize your iPhone, check the USB cable, restart your devices, update iTunes and Apple Mobile Device USB driver, ensure you trust the computer on your iPhone, and reinstall iTunes if the problem persists.
4. How can I select specific albums to sync with iTunes?
In the Photos tab of the device window in iTunes, select “Selected albums” and then choose the specific albums or folders you want to sync.
5. Why is the photo syncing process taking so long?
The syncing process may take long due to a large number of photos, large file sizes, a slow USB connection, a weak Wi-Fi signal (if syncing wirelessly), or iTunes performance issues.
6. How do I free up space on my iPhone after transferring photos to my PC?
To free up space, review and delete photos from the Photos app on your iPhone, empty the “Recently Deleted” album, and disable iCloud Photos if you’re using it.
7. Can I edit my photos after transferring them to my PC?
Yes, you can edit transferred photos using photo editing software like Adobe Photoshop, GIMP, or Luminar AI.
8. What is iTunes Match and how can it help with photo management?
iTunes Match stores your music library in the cloud, allowing access on all devices. While primarily for music, it can also help manage and access photos.
9. What are some advanced tips for managing photos in iTunes?
Advanced tips include using iTunes Match for cloud access, creating Smart Albums to automatically organize photos, and using third-party plugins to enhance iTunes photo management capabilities.
10. How can AI help with photo management in the future?
AI can provide automatic tagging, facial recognition, and content-based search, making it easier to organize and find specific photos.