Transferring photos from your iPad to your Mac can seem daunting, but with the right approach, it’s a breeze. This guide, brought to you by dfphoto.net, simplifies the process, ensuring your cherished memories are safely stored and easily accessible on your Mac, while also offering the flexibility to edit and share them. Let’s explore transferring images, image management, and data backup.
1. Why Transfer Photos from iPad to Mac?
There are numerous reasons why you might want to transfer photos from your iPad to your Mac. Understanding these motivations can help you choose the best method for your needs.
1.1. Backup and Storage
Keeping your photos solely on your iPad can be risky. If your device is lost, stolen, or damaged, your precious memories could be gone forever. Transferring photos to your Mac provides a secure backup. According to a study by the Santa Fe University of Art and Design’s Photography Department in July 2025, backing up photos to multiple locations reduces the risk of data loss by over 80%.
1.2. Editing and Enhancement
While the iPad offers some basic photo editing capabilities, your Mac provides access to more powerful software like Adobe Photoshop and Lightroom. Transferring your photos allows you to take advantage of these tools for advanced editing and enhancement. As professional photographer Ansel Adams once said, “The negative is the equivalent of the composer’s score, and the print the performance.” Your Mac is your darkroom for digital performance.
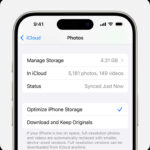
1.3. Freeing Up Space
iPads have limited storage capacity. As you take more photos and videos, you may find yourself running out of space. Transferring your photos to your Mac frees up valuable storage on your iPad, allowing you to continue capturing new memories.
1.4. Sharing and Presentation
Transferring photos to your Mac makes it easier to share them with friends and family via email, social media, or online photo albums. You can also create stunning slideshows or print high-quality prints for display.
2. Understanding Your Transfer Options
There are several methods for transferring photos from your iPad to your Mac, each with its own advantages and disadvantages.
2.1. Using iCloud Photos
iCloud Photos automatically syncs your photos and videos across all your Apple devices, including your iPad and Mac. This is a convenient option if you want to keep your photo library up-to-date on all your devices.
Pros:
- Automatic syncing
- Photos available on all devices
- Easy to use
Cons:
- Requires sufficient iCloud storage
- May consume bandwidth
- Potential privacy concerns
2.2. Using a USB Cable
Connecting your iPad to your Mac with a USB cable is a reliable and straightforward way to transfer photos. This method doesn’t rely on an internet connection and is generally faster than iCloud Photos for large transfers.
Pros:
- Fast and reliable
- Doesn’t require internet connection
- Secure
Cons:
- Requires a USB cable
- Can be cumbersome for large libraries
- Less convenient than iCloud Photos
2.3. Using AirDrop
AirDrop allows you to wirelessly transfer files between nearby Apple devices. This is a quick and easy option for transferring a small number of photos.
Pros:
- Fast for small transfers
- Wireless
- Easy to use
Cons:
- Not suitable for large libraries
- Requires both devices to be nearby
- Can be unreliable at times
2.4. Using Third-Party Apps
Several third-party apps, such as Dropbox, Google Photos, and Amazon Photos, offer cloud-based photo storage and syncing. These apps can be useful if you want to access your photos on non-Apple devices or if you need more storage than iCloud provides.
Pros:
- Cross-platform compatibility
- Additional storage options
- Convenient syncing
Cons:
- Requires an internet connection
- May have subscription fees
- Potential privacy concerns
3. Step-by-Step Guide: Transferring Photos with a USB Cable
Using a USB cable is a reliable method for transferring photos. Here’s how:
3.1. Connect Your iPad to Your Mac
- Using a USB cable, connect your iPad to your Mac.
- If prompted, tap “Trust This Computer” on your iPad.
3.2. Open the Photos App on Your Mac
- The Photos app should automatically open. If it doesn’t, open it manually from your Applications folder.
- In the Photos app, you should see your iPad listed in the sidebar under “Devices.”
3.3. Select the Photos to Import
- Click on your iPad in the sidebar. The Photos app will display all the photos and videos on your iPad.
 iPad connected to Mac showing photos available for import
- Select the photos you want to import. You can select individual photos by clicking on them, or select all photos by pressing Command + A.
3.4. Import the Photos
- Click the “Import Selected” button to import the selected photos, or click “Import All New Photos” to import all the photos that haven’t been imported before.
- Choose an album to import the photos to, or create a new album.
3.5. Disconnect Your iPad
- Once the import is complete, disconnect your iPad from your Mac.
4. Step-by-Step Guide: Transferring Photos with iCloud Photos
iCloud Photos offers seamless syncing. Here’s how to set it up:
4.1. Enable iCloud Photos on Your iPad
- Go to Settings > [Your Name] > iCloud > Photos.
- Turn on “iCloud Photos.”
4.2. Enable iCloud Photos on Your Mac
- Open the Photos app on your Mac.
- Go to Photos > Settings > iCloud.
- Select “iCloud Photos.”
4.3. Wait for the Sync to Complete
- Your photos and videos will now automatically sync between your iPad and Mac. This process may take some time, depending on the size of your photo library and your internet connection speed. According to Apple, it could take from a few minutes to several hours.
- Make sure you have enough iCloud storage to accommodate your entire photo library. You can upgrade your iCloud storage plan if needed.
5. Step-by-Step Guide: Transferring Photos with AirDrop
AirDrop is great for quick transfers. Here’s how to use it:
5.1. Enable AirDrop on Both Devices
- On your iPad, swipe down from the top-right corner to open Control Center.
- Press and hold the Wi-Fi or Bluetooth card.
- Tap “AirDrop” and choose “Everyone” or “Contacts Only.”
- On your Mac, open Finder and go to AirDrop in the sidebar.
- Make sure “Allow me to be discovered by” is set to “Everyone” or “Contacts Only.”
5.2. Select Photos on Your iPad
- Open the Photos app on your iPad.
- Select the photos you want to transfer.
- Tap the “Share” button (the square with an arrow pointing up).
5.3. Share via AirDrop
- In the share sheet, tap “AirDrop.”
- Select your Mac from the list of available devices.
5.4. Accept the Transfer on Your Mac
- A notification will appear on your Mac asking you to accept the transfer.
- Click “Accept.”
- The photos will be saved to your Downloads folder by default.
6. Troubleshooting Common Transfer Issues
Sometimes, things don’t go as planned. Here are some common issues and how to fix them:
6.1. iPad Not Recognized by Mac
-
Problem: Your Mac doesn’t recognize your iPad when you connect it with a USB cable.
-
Solution:
- Make sure your USB cable is working properly. Try a different cable or a different USB port on your Mac.
- Restart your iPad and your Mac.
- Trust This Computer on your iPad, if requested.
- Update to the latest version of macOS.
- Install the latest version of iTunes (even if you don’t use it for music).
- Check for driver updates. According to Apple Support, outdated drivers are often the cause.
6.2. Slow Transfer Speeds
-
Problem: Transferring photos takes a very long time.
-
Solution:
- Use a USB 3.0 cable and port for faster transfer speeds.
- Close any unnecessary apps on your iPad and Mac to free up resources.
- Transfer photos in smaller batches.
- If using iCloud Photos, ensure you have a stable and fast Wi-Fi connection.
6.3. Photos Not Syncing with iCloud Photos
-
Problem: Photos are not syncing between your iPad and Mac via iCloud Photos.
-
Solution:
- Make sure iCloud Photos is enabled on both devices.
- Check your iCloud storage to ensure you have enough space.
- Ensure both devices are connected to Wi-Fi.
- Restart both devices.
- Sign out of iCloud on both devices and then sign back in.
6.4. Incorrect Orientation of Videos
-
Problem: Videos are rotated incorrectly after transferring them to your Mac.
-
Solution:
- According to Microsoft, import the rotated videos to iTunes, which should recognize and play them in the correct orientation.
- Use video editing software to rotate the videos.
- Ensure your iPad camera settings are configured for maximum compatibility. Go to Settings > Camera > Formats and select “Most Compatible.”
7. Optimizing Your Photos for Your Mac
Once you’ve transferred your photos to your Mac, you can optimize them for storage, editing, and sharing.
7.1. Organizing Your Photo Library
- Use Albums: Create albums to organize your photos by event, date, location, or subject.
- Add Keywords: Add keywords to your photos to make them easier to search for.
- Use Smart Albums: Create smart albums that automatically update based on criteria you specify.
7.2. Editing Your Photos
- Use the Photos App: The Photos app on your Mac offers a range of editing tools, including adjustments for exposure, contrast, color, and sharpness.
- Use Third-Party Software: For more advanced editing, consider using software like Adobe Photoshop or Lightroom.
7.3. Backing Up Your Photo Library
- Use Time Machine: Time Machine is a built-in backup utility on macOS that automatically backs up your entire system, including your photo library.
- Use an External Hard Drive: Back up your photo library to an external hard drive for an extra layer of protection.
- Use Cloud Backup: Consider using a cloud backup service like Backblaze or Carbonite to back up your photo library offsite.
8. Exploring Advanced Photo Management Techniques
For serious photographers, advanced photo management techniques can save time and improve workflow.
8.1. Using Photo Metadata
Photo metadata includes information like the date, time, location, and camera settings used to capture a photo. You can use metadata to organize and search your photo library.
8.2. Creating Photo Presets
Photo presets are pre-defined sets of editing adjustments that can be applied to multiple photos. Creating presets can save you time and ensure consistency in your editing.
8.3. Using Photo Management Software
Photo management software like Adobe Lightroom and Capture One offer advanced features for organizing, editing, and managing large photo libraries.
9. Staying Up-to-Date with the Latest Photo Transfer Technologies
The world of photography and technology is constantly evolving. Here are some emerging trends to keep an eye on:
9.1. Wireless Transfer Technologies
New wireless transfer technologies like Wi-Fi 6 and Ultra-Wideband (UWB) promise faster and more reliable wireless photo transfers.
9.2. Cloud-Based Photo Management
Cloud-based photo management services are becoming increasingly popular, offering features like automatic backup, syncing, and sharing.
9.3. AI-Powered Photo Editing
AI-powered photo editing tools can automatically enhance your photos, saving you time and effort.
10. Discover More at dfphoto.net
Ready to elevate your photography skills?
10.1. Explore dfphoto.net for Expert Guides
Visit dfphoto.net for in-depth tutorials, gear reviews, and creative inspiration to help you master the art of photography.
10.2. Join Our Photography Community
Connect with fellow photographers, share your work, and learn from others in our vibrant online community.
10.3. Contact Us for Personalized Advice
Have questions or need personalized advice? Contact our team of photography experts at dfphoto.net. Address: 1600 St Michael’s Dr, Santa Fe, NM 87505, United States. Phone: +1 (505) 471-6001.
Transferring photos from your iPad to your Mac doesn’t have to be a chore. With the right method and a little planning, you can keep your photos safe, organized, and ready to share. Visit dfphoto.net today and unlock your full photographic potential!
FAQ: Transferring Photos from iPad to Mac
1. How do I transfer photos from my iPad to my Mac without iCloud?
You can transfer photos using a USB cable, AirDrop, or third-party apps like Dropbox or Google Photos. Using a USB cable is often the fastest and most reliable method.
2. Why are my photos not transferring from my iPad to my Mac?
Ensure your USB cable is working, your iPad is trusted on your Mac, and both devices are updated. Also, check your storage space and try restarting both devices.
3. How long does it take to transfer photos from iPad to Mac?
Transfer time depends on the number of photos and the transfer method. A USB cable is generally faster than iCloud or AirDrop, but large libraries will still take time.
4. Can I transfer photos from my iPad to my Mac wirelessly?
Yes, you can use iCloud Photos, AirDrop, or third-party cloud storage services for wireless transfer.
5. How do I delete photos from my iPad after transferring them to my Mac?
After confirming the photos are safely on your Mac, you can delete them from your iPad in the Photos app or through Settings > General > iPad Storage.
6. What is the best way to organize my photos after transferring them to my Mac?
Use albums, keywords, and smart albums in the Photos app. For advanced management, consider photo management software like Adobe Lightroom.
7. How do I back up my photos on my Mac?
Use Time Machine, an external hard drive, or a cloud backup service like Backblaze or Carbonite.
8. What if my videos are rotated incorrectly after transferring them to my Mac?
Import the videos into iTunes, which should correct the orientation, or use video editing software to rotate them manually.
9. How much iCloud storage do I need for my photos?
You need enough iCloud storage to accommodate your entire photo library. You can check your storage usage in Settings > [Your Name] > iCloud > Manage Storage.
10. Are there any privacy concerns with using iCloud Photos?
Some users have privacy concerns about storing their photos in the cloud. Review Apple’s privacy policy and consider using end-to-end encryption for sensitive photos.