Google Photos is a fantastic service for keeping your precious memories safe in the cloud. But what if you need to access those photos on your computer? Whether it’s for creating a backup, organizing your files, or editing your pictures locally, transferring your Google Photos to your computer is a straightforward process. This guide will walk you through various methods to effortlessly transfer your Google Photos to your PC or Mac, ensuring you have your photos where you need them.
Downloading All Your Google Photos at Once
For those looking to download their entire Google Photos library, Google Takeout is the most efficient solution. This method allows you to export all your photos and videos in one go. Here’s how to do it:
Step 1: Access Google Takeout
Start by navigating to the Google Takeout website. You may need to sign in to your Google account if you’re not already logged in.
Step 2: Select Google Photos for Export
You’ll be presented with a list of Google services. Click “Deselect all” to clear all selections, then scroll down and find “Google Photos”. Check the box next to Google Photos to select it for export. This ensures you only download your photos and videos.
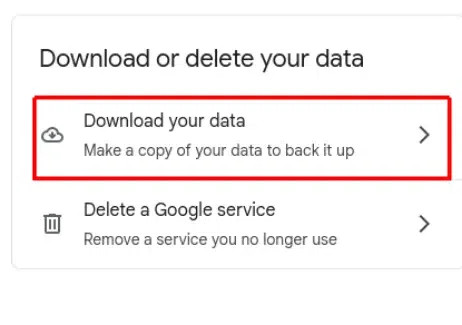
 Accessing Google Data & Personalization to transfer Google Photos to computer
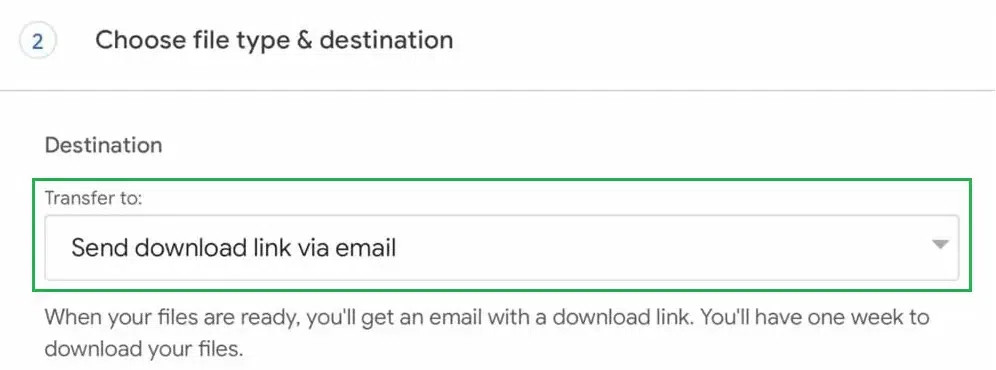
Step 3: Customize Your Export Settings
After selecting Google Photos, scroll down and click the “Next step” button at the bottom of the page. Here, you can customize your export.
Choose your delivery method. The default option is to receive a download link via email, which is generally the most convenient. You can also choose to add the export to cloud storage services like Google Drive, Dropbox, or Microsoft OneDrive.
 Navigating to Download Your Data option in Google Account for Google Photos transfer
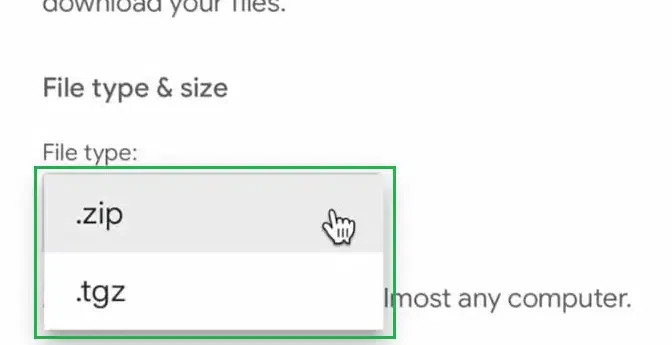
Step 4: Choose File Type and Size
Next, select the file type for your download archive. ZIP is a common and widely compatible format. You can also choose TGZ.
Then, choose the archive size. If your Google Photos library is large, it will be split into multiple files. Choosing a smaller file size (like 2GB) can be helpful for slower internet connections or if you anticipate issues with very large downloads. For most users, the default or a slightly larger size will work well.
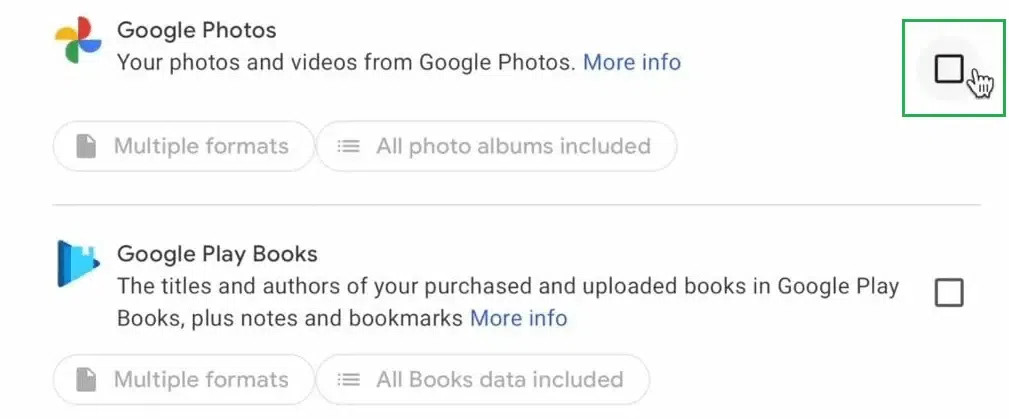 Selecting Google Photos to include in data export for computer transfer
Step 5: Initiate the Export Process
Once you’ve configured your settings, click “Create export”. Google will now begin compiling your Google Photos library for download.
 Choosing email delivery method for downloading Google Photos to computer
Step 6: Wait for Your Download Link
The export process can take anywhere from a few hours to a few days, depending on the size of your Google Photos library. You’ll receive an email at your Google account address when your export is ready. This email will contain a download link or links if your export is split into multiple files.
 Selecting ZIP file type for Google Photos download to computer
Step 7: Download Your Photos
Click the download link(s) in the email to download your Google Photos archive to your computer. You may need to unzip the downloaded ZIP files to access your photos and videos.
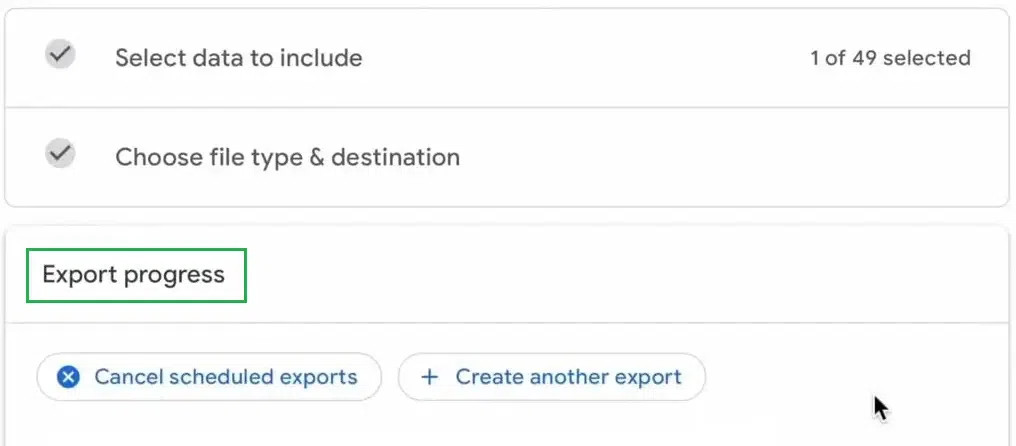 Monitoring Google Photos export progress for computer download
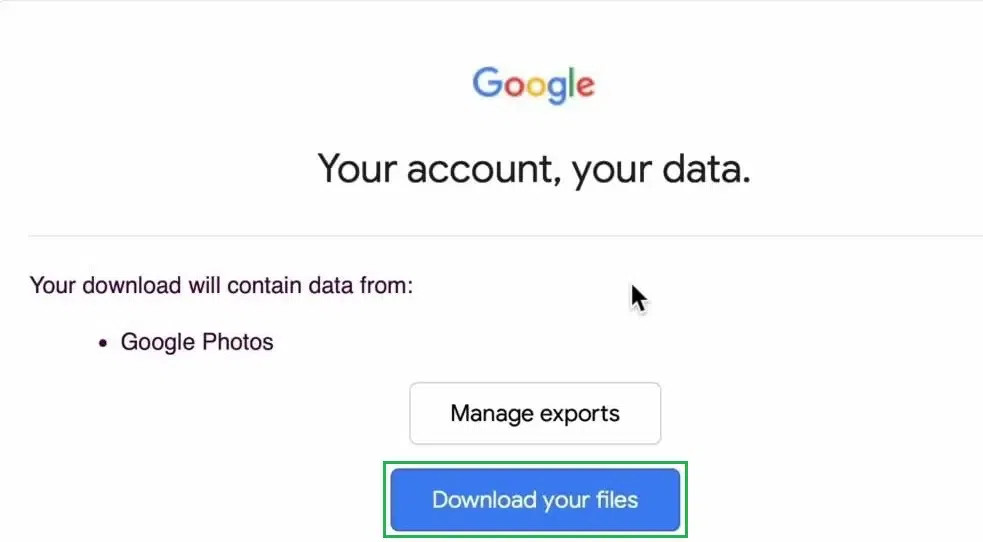 Downloading Google Photos archive from email link to computer
Downloading Specific Photos from Google Photos
If you only need to transfer a few specific photos, you don’t need to download your entire library. Google Photos allows you to download individual images directly from the web interface. Here’s how:
- Go to Google Photos and select the photo you wish to download.
- Click on the three-dot menu icon (More options) in the top right corner.
- Select “Download”. The photo will be downloaded to your computer’s default download location.
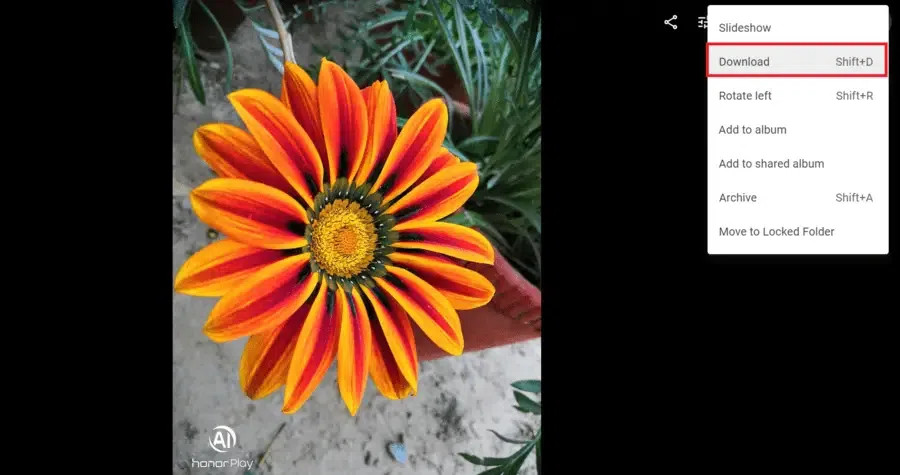 Downloading a single image from Google Photos to computer using the download icon
Shortcut: When viewing a photo, you can also press Shift + D to directly download it.
Downloading Entire Albums from Google Photos
To download a complete album from Google Photos to your computer, follow these steps:
- Open Google Photos and navigate to the album you want to download.
- Click on the three-dot menu icon (More options) in the top right corner.
- Select “Download all”. Google Photos will download the entire album as a ZIP file to your computer.
Once downloaded, you can unzip the file to access all the photos and videos in the album.
Troubleshooting Common Download Issues
While transferring Google Photos is usually seamless, you might encounter some common issues. Here’s how to troubleshoot them:
1. Slow or Interrupted Downloads
Large downloads can be slow, especially on unstable internet connections. Interruptions can also occur, requiring you to restart the download.
Fix: Ensure you have a stable and reliable internet connection. If possible, use an Ethernet connection instead of Wi-Fi for a more stable download. If downloads are frequently interrupted, consider downloading in smaller batches or at off-peak hours when internet traffic is lower.
2. Large File Sizes
Google Takeout archives can be very large, especially for users with extensive photo libraries.
Fix: When setting up your Google Takeout export, choose a smaller archive size (e.g., 2GB). This will split your download into smaller, more manageable files, reducing the risk of download interruptions and making them easier to handle.
3. Missing Photos in Download
In rare cases, you might find that some photos are missing from your downloaded archive.
Fix: Before initiating a download, double-check that all your photos are indeed backed up to Google Photos. Sometimes, photos might not be fully synced if there were issues during upload. Ensure all your photos are visible in your Google Photos library online before downloading.
Conclusion
Transferring your Google Photos to your computer is a simple process, whether you want to download your entire library, specific photos, or albums. Google Takeout is ideal for bulk downloads, while the web interface offers quick options for individual photos and albums. By following these steps, you can ensure your precious memories are safely stored on your computer, giving you peace of mind and greater control over your photo collection.
Frequently Asked Questions
How long does it take to transfer Google Photos to a computer?
The transfer time depends on several factors, including the amount of data, your internet speed, and Google’s server load. Downloading a few photos will be quick, but a large library via Google Takeout might take several hours or even days.
Can I transfer Google Photos to an external hard drive directly?
Not directly. You first need to download the photos to your computer and then transfer them to your external hard drive. Simply connect your external drive to your computer and drag and drop the downloaded photo folders to your external drive.
Is there a limit to how many photos I can download at once?
When using Google Takeout, there isn’t a strict limit, but very large libraries are split into multiple files. When downloading albums directly from Google Photos, there might be practical limits based on browser capabilities and download speeds, but for most albums, this isn’t an issue.
Will the download affect the quality of my photos?
No, downloading photos from Google Photos does not reduce their quality. You will download your photos in the original quality they were backed up, unless you originally chose to store them in “Storage Saver” quality (formerly “High quality”). If you used “Original quality” setting, your downloads will maintain that original quality.