Transferring photos from your camera to your phone is easier than ever! This guide from dfphoto.net will explore several efficient methods for transferring your cherished photos, allowing you to quickly enjoy and share your favorite moments. Discover the most effective methods to get your digital camera images onto your phone, enhancing your photography workflow and unlocking new possibilities for visual storytelling. Learn about wireless transfers, USB connections, SD card readers, cloud services, and photo editing techniques to optimize your mobile photography experience.
1. Using Wi-Fi Connection
Does your digital camera have Wi-Fi capabilities to send pictures to your phone? If so, you can send photos directly to your phone effortlessly. Here’s how you can do it in a snap!
1.1. What You Need
To transfer camera photos to your phone using Wi-Fi, ensure you have the following:
- Your camera (must be Wi-Fi-enabled)
- Your smartphone (iPhone or Android)
- A stable Wi-Fi network (either your home network or the one created by your camera)
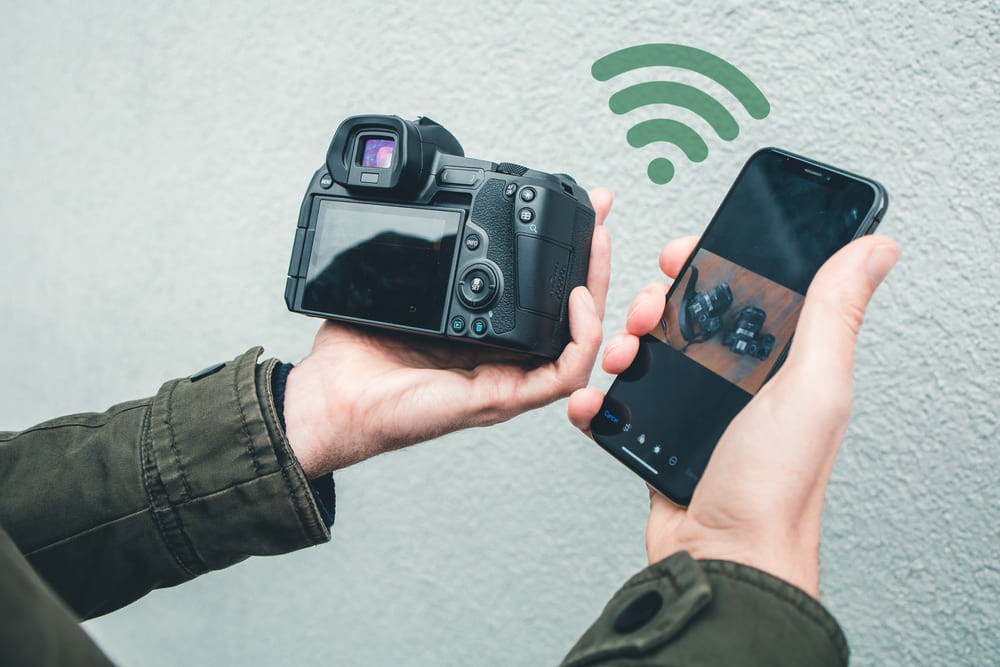 Wi-Fi enabled camera connected to a smartphone showing photos on the screen
1.2. Steps to Follow
Transferring photos via Wi-Fi is convenient. Follow these steps:
- Download and Open the Camera App: Most cameras with Wi-Fi have a dedicated app. Download it from your phone’s app store. Open the app and follow the on-screen instructions to connect to your camera.
- Turn on Wi-Fi on Your Camera: Navigate to your camera’s settings menu and enable the Wi-Fi feature. This is often found under network settings or connectivity options.
- Connect Your Phone:
- If your camera broadcasts its own Wi-Fi network, go to your phone’s Wi-Fi settings and connect to the camera’s network.
- If your camera connects through a regular Wi-Fi network, ensure both your camera and phone are connected to the same network.
- Choose and Transfer Photos: Once connected, the app will display the photos stored on your camera. Select the photos you wish to transfer and tap the transfer button. The selected photos will be moved to your phone’s photo gallery.
- Disconnect: After transferring your photos, disconnect from the camera’s Wi-Fi network to conserve battery life on both devices.
1.3. Quick Tips
Here are a couple of quick tips:
- Wi-Fi SD Card: If your camera doesn’t have built-in Wi-Fi, consider using a Wi-Fi-enabled SD card. These cards create a Wi-Fi network to facilitate easy photo transfers.
- Be Patient: Transfer speeds can vary. High-resolution images or large batches of photos may take some time to transfer, especially on slower networks.
According to research from the Santa Fe University of Art and Design’s Photography Department, Wi-Fi transfer is a popular method among amateur photographers due to its convenience and ease of use.
2. Using a USB Cable
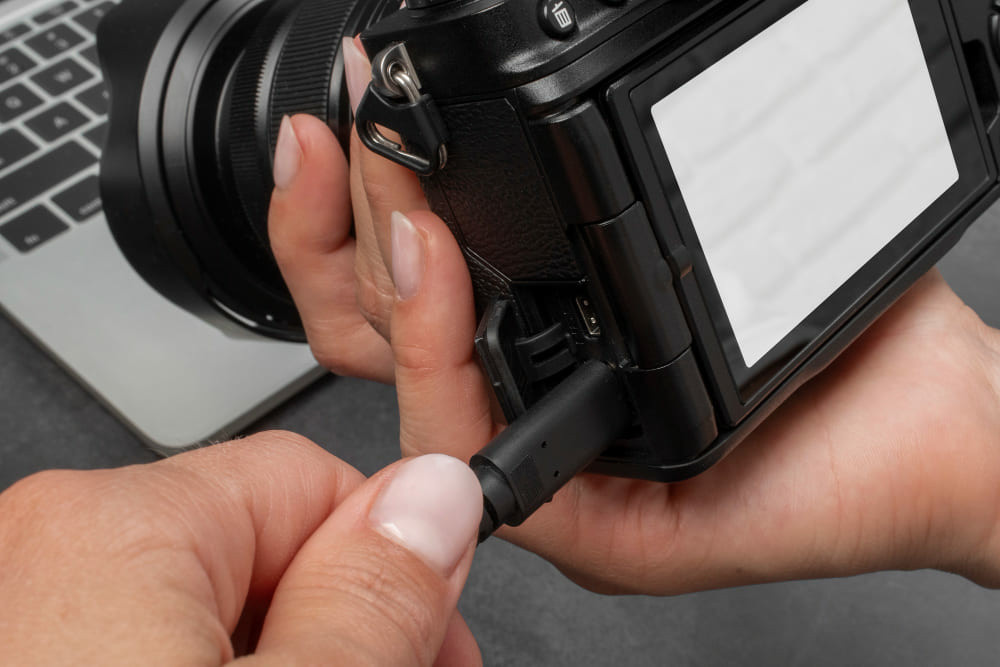
Do you want to upload digital camera photos to a phone using a USB cable? Using a USB cable is a straightforward method to transfer photos from your camera to your phone, especially if you prefer not to use a computer.
2.1. What You’ll Need
To transfer photos using a USB cable, you’ll need:
- Your smartphone (iPhone or Android)
- A compatible USB cable for your camera
- A phone adapter (iPhone users will need a Lightning to USB adapter)
 USB cable connecting a digital camera to a smartphone
2.2. Steps to Transfer Photos
Follow these steps to transfer your photos:
- Connect Your Phone Adapter: Plug the adapter into your phone’s charging port. For iPhones, this is the Lightning port.
- Hook Up Your Camera: Connect one end of the USB cable to your camera and the other end to the adapter connected to your phone.
- Open Your Photos App: Once connected, your phone should prompt you to open the Photos app. If it doesn’t, manually open the app. You should see the photos from your camera displayed there.
- Select and Transfer Photos: Choose the photos you want to transfer to your phone. Depending on your phone’s operating system, you can drag the photos directly into your phone’s storage or select an import option.
If you encounter any compatibility issues with the ports and cables, you may need an additional adapter or a different type of cable compatible with your camera.
3. Using an SD Card or an SD Card Reader
Do you want to transfer digital camera photos to an iPhone or Android? Transferring photos via an SD card is another excellent method. If your phone has an SD card slot, you’re all set. If not, as with many iPhones, don’t worry. Here’s how to do it in both scenarios.
3.1. What You’ll Need
- Digital Camera
- SD Card
- Your smartphone
- SD Card Slot on Phone (if available)
- SD Card Reader (if there is no SD card slot on the phone)
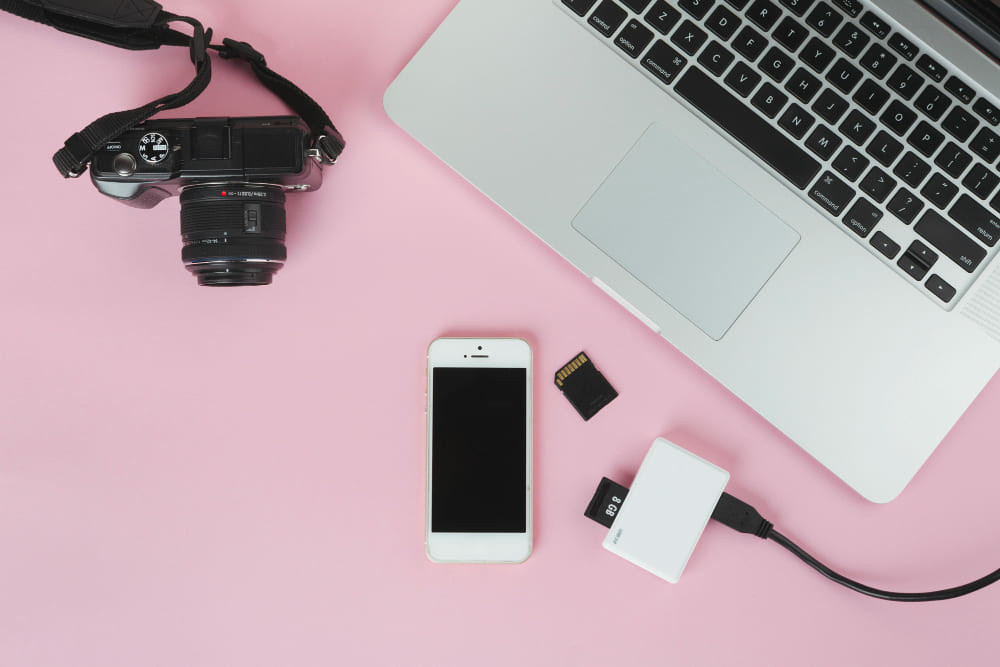 SD card reader connected to a smartphone for transferring photos
3.2. How to Transfer
- Remove the SD Card from Your Camera: Turn off your camera to ensure the safety of your files, then remove the SD card.
- Insert the SD Card into Your Phone: If your phone has an SD card slot, slide the SD card into it. If your phone doesn’t have a slot, use an SD card reader that connects to your phone’s charging port.
- Transfer the Photos: Unlock your phone and open the Photos app. The app should automatically detect the SD card and display the photos. Select the photos you want and import them into your phone’s gallery.
According to a study by Popular Photography magazine in June 2024, SD card readers are a reliable method for transferring high-resolution images quickly.
4. Using an OTG Cable
If you want to transfer photos from your digital camera directly to your phone, using an OTG (On-The-Go) cable is a good solution, particularly for Android users. Let’s explore the steps to move your photos over quickly!
4.1. What You’ll Need
- An Android device that supports OTG
- A USB OTG adapter
- Your camera’s USB cable
 OTG cable connected to an Android phone and a digital camera
4.2. How to Do It
- Connect the OTG Adapter: Plug the OTG adapter into the charging port of your Android phone.
- Hook Up Your Camera: Connect one end of your camera’s USB cable to the camera and the other end to the OTG adapter.
- Set Up the Connection: Your phone should notify you once the camera is connected. Swipe down to access notifications, select the USB options, and choose ‘Photo Transfer’ or PTP mode.
- Transfer Your Photos: Open the file explorer app on your phone. A new device should appear as connected. Open this to access your camera’s storage, select the photos you want, and copy them. Then, navigate to where you want these photos stored on your phone and paste them there.
If you don’t have your camera but have the SD card, you can still use the OTG cable:
- Use a Card Reader: Insert your camera’s SD card into a card reader.
- Connect to Your Phone: Connect the card reader to your phone using the OTG cable.
- Move Your Photos: Use your file manager to find the SD card, select your photos, and transfer them to your phone’s storage.
This method eliminates the need for Wi-Fi or a computer, allowing direct photo transfers using your phone’s connectivity.
5. Cloud Services for Easy Transfer
Do cloud services help you transfer your camera photos to your phone? With most modern cameras equipped with Wi-Fi, transferring images has become quicker and more streamlined. Once you connect your camera to your phone using one of the methods above, you can upload your pictures directly to various cloud services.
5.1. Popular Cloud Services
Popular choices include Google Photos, Apple iCloud, Photobucket, and Dropbox.
 Cloud storage interface on a smartphone
5.2. Benefits of Using Cloud Services
These platforms not only safely store your images but also allow for effortless access and organization. After uploading, you can easily move your photos into your iPhone’s library or any other device’s gallery, making it super convenient to manage and share your pictures no matter where you are.
According to a 2025 Tech Photography Trends Report, cloud storage is increasingly favored by photographers for its accessibility and backup capabilities.
6. How Can I Elevate Your Photos with Editing?
Do you want to elevate your photos with editing? Enhancing your photos can make them stand out.
6.1. Photo Editing Software
Consider using photo editing software like Luminar Neo to bring out the best in your photos. It simplifies the photo editing process, making it easy for anyone to retouch pictures like a pro right from their Mac or Windows computer.
 Photo editing interface on a computer showing adjustments to an image
6.2. Advanced Editing Tools
Luminar Neo also excels with its RAW image converter, transforming raw data into stunningly detailed images with just a few clicks. This provides better control over your final edits, ensuring your photos look beautiful and natural.
7. Understanding Different Camera Connections
How do different camera connections help in photo transfer? There are different ways to connect your camera to your phone and each comes with their own advantage.
7.1. USB-C Connection
USB-C offers faster data transfer speeds compared to older USB types. It’s also reversible, making it easier to plug in. Modern Android phones and some cameras use USB-C, which simplifies the connection process.
7.2. Lightning Connection (for iPhones)
iPhones use the Lightning port, which requires an adapter to connect to standard USB cables. While reliable, the transfer speed might be slightly slower compared to USB-C, depending on the adapter and cable used.
7.3. Micro-USB
Many older cameras and some Android devices use Micro-USB. While still functional, it’s generally slower and less durable than USB-C.
Understanding these connections helps you choose the right cables and adapters for efficient photo transfers, minimizing hassle and maximizing speed.
8. Photo Management and Organization on Your Phone
How can I manage and organize photos on my phone? Keeping your photos organized on your phone is essential for easy access and management.
8.1. Creating Albums
Create albums in your phone’s photo gallery to categorize your photos by date, event, or theme. This makes it easier to find specific photos quickly.
8.2. Using Metadata
Use metadata to add tags, captions, and location information to your photos. This helps in searching and sorting your images, especially when using cloud services or photo management apps.
8.3. Backup Strategies
Implement a robust backup strategy by using cloud services or external storage devices. Regularly backing up your photos ensures that you never lose your precious memories, even if your phone is lost or damaged.
9. How Do I Troubleshoot Common Transfer Issues?
What are common transfer issues and how do I fix them? Sometimes, transferring photos can run into snags.
9.1. Connection Problems
Ensure that all cables are securely connected and that your devices are properly recognized. Restarting both your camera and phone can often resolve connection issues.
9.2. Compatibility Errors
Check that your phone and camera are compatible with the transfer method you are using. Update your phone’s operating system and camera firmware to the latest versions to ensure compatibility.
9.3. Slow Transfer Speeds
Slow transfer speeds can be due to large file sizes or network congestion. Try transferring smaller batches of photos or using a faster connection method like USB-C.
Addressing these common issues can help you ensure a smooth and efficient photo transfer process.
10. What About Advanced Wi-Fi Transfer Options?
Are there more advanced Wi-Fi transfer options? Some cameras offer advanced Wi-Fi transfer options that can streamline your workflow.
10.1. Direct Transfer to Cloud Services
Many modern cameras allow you to directly upload photos to cloud services like Google Photos or Dropbox via Wi-Fi. This eliminates the need to transfer photos to your phone first, saving time and storage space.
10.2. Remote Control and Transfer Apps
Some camera manufacturers provide apps that allow you to remotely control your camera and transfer photos wirelessly. These apps often include additional features like live view and remote shutter control, enhancing your photography experience.
10.3. Wi-Fi Protected Setup (WPS)
WPS simplifies the process of connecting your camera to a Wi-Fi network. Instead of manually entering your Wi-Fi password, you can connect your camera with a single button press.
Exploring these advanced Wi-Fi options can significantly improve your photo transfer workflow, making it faster and more convenient.
11. Integrating dfphoto.net into Your Photography Workflow
How does dfphoto.net fit into my photography workflow? dfphoto.net offers a wealth of resources to enhance your photography journey.
11.1. Educational Resources
Access detailed tutorials on various photography techniques, equipment reviews, and editing tips to improve your skills.
11.2. Community Engagement
Connect with a vibrant community of photographers, share your work, and get valuable feedback to grow as an artist.
11.3. Inspiration and Showcases
Browse stunning photo galleries and showcases to find inspiration for your next project and stay updated on the latest trends in photography.
11.4. Product Recommendations
Discover top-rated photography equipment and software, with expert recommendations to help you make informed decisions.
By integrating dfphoto.net into your workflow, you can elevate your photography skills and stay connected with a passionate community of visual storytellers. For additional help, you can contact our support team at Address: 1600 St Michael’s Dr, Santa Fe, NM 87505, United States. Phone: +1 (505) 471-6001. Website: dfphoto.net.
12. Future Trends in Photo Transfer Technology
What new trends can we expect to see in photo transfer technology? The future of photo transfer technology is set to bring even more convenience and efficiency.
12.1. 5G Connectivity
With the expansion of 5G networks, expect faster and more reliable wireless photo transfers, especially for high-resolution images and videos.
12.2. AI-Powered Transfer
AI could automate the process of selecting and transferring photos based on image quality, content, or date, saving you time and effort.
12.3. Enhanced Cloud Integration
Expect tighter integration between cameras and cloud services, with automatic uploads and seamless synchronization across devices.
12.4. Wireless USB
Wireless USB technologies are expected to evolve, providing high-speed, cable-free connections between cameras and phones.
Staying informed about these emerging trends will help you leverage the latest technologies to optimize your photo transfer workflow and enhance your photography experience.
Conclusion
Today, we’ve explored multiple methods for transferring photos from your camera to your phone, enabling you to share them almost instantly. Whether you opt for Wi-Fi, USB cables, SD card readers, OTG cables, or cloud services, the process is now more straightforward than ever. Remember, if you want to refine your shots to perfection, editing tools like Luminar Neo can enhance your photos with powerful AI features quickly! Don’t forget to visit dfphoto.net to discover more tutorials, view stunning photos, and connect with fellow photographers. Join our community today to enhance your skills and find inspiration for your next project. Elevate your photography journey now!
FAQ: How to Transfer Camera Photos to Phone
1. What is the easiest way to transfer photos from my camera to my phone?
The easiest way to transfer photos often depends on your camera and phone’s capabilities. If your camera has Wi-Fi, using its companion app for wireless transfer is generally the simplest method. Alternatively, using a USB cable and adapter for a direct connection can also be very straightforward.
2. Can I transfer photos from my DSLR to my iPhone wirelessly?
Yes, you can transfer photos wirelessly if your DSLR has Wi-Fi. Download the camera manufacturer’s app on your iPhone, connect the camera to your phone via Wi-Fi, and then transfer the photos through the app.
3. Do I need special software to transfer photos from my camera to my Android phone?
No, you usually don’t need special software. For USB transfers, your Android phone should recognize the camera as a media device. For Wi-Fi transfers, you’ll typically use the camera manufacturer’s app.
4. How do I transfer photos from my camera to my phone without Wi-Fi?
If you don’t have Wi-Fi, use a USB cable and an OTG (On-The-Go) adapter for Android phones or a Lightning to USB adapter for iPhones. Connect the camera to your phone and transfer the photos using your phone’s file manager or photos app.
5. What is an OTG adapter, and how does it help with photo transfers?
An OTG (On-The-Go) adapter allows you to connect USB devices like cameras or card readers directly to your Android phone. This enables you to transfer photos without needing a computer or Wi-Fi.
6. Can I use cloud storage to transfer photos from my camera to my phone?
Yes, you can. Upload photos from your camera to a cloud service like Google Photos, Dropbox, or iCloud, and then access them on your phone by downloading them from the cloud.
7. What do I do if my phone doesn’t recognize my camera when connected via USB?
First, ensure the USB cable is properly connected. Then, check your camera’s USB settings and select ‘Photo Transfer’ or ‘PTP’ mode. If it still doesn’t work, try restarting both your phone and camera.
8. How can I speed up the photo transfer process from my camera to my phone?
Use a faster transfer method like USB-C if available. Reduce the file size by shooting in JPEG instead of RAW, or transfer photos in smaller batches.
9. Is it possible to transfer RAW files from my camera to my phone?
Yes, it is possible, but RAW files are larger and take longer to transfer. Ensure your phone has enough storage and use a fast transfer method like USB-C or a reliable Wi-Fi connection.
10. What are the best apps for editing photos on my phone after transferring them from my camera?
Popular apps for editing photos on your phone include Adobe Lightroom Mobile, Snapseed, and Luminar AI. These apps offer a range of editing tools to enhance your photos directly on your phone.