Transferring your cherished memories to a new iPhone can be a daunting task, but dfphoto.net is here to guide you through the process with ease. This comprehensive guide provides several proven methods, ensuring a smooth transition for all your photos, including those stunning landscapes you captured in Santa Fe. Discover the perfect solution to move your photos and dive back into creating, exploring techniques, and discovering stunning visuals on dfphoto.net.
1. Understanding Your Photo Transfer Needs
Before diving into the how-to, let’s clarify what you’re trying to accomplish. Several scenarios might prompt you to transfer photos:
- Upgrading to a new iPhone: This is the most common reason. You want all your memories on your shiny new device.
- Creating a backup: Protecting your photos from loss or damage is crucial.
- Freeing up storage: Moving photos to another device or cloud service can clear space on your iPhone.
- Sharing photos: You may want to share your photos with another iPhone user.
- Editing on a larger screen: Transferring photos to a computer allows for easier editing.
Understanding your specific needs will help you choose the most efficient method.
2. Defining Search Intent: Why Are You Looking for This Information?
To provide the most helpful information, let’s consider the different search intents behind the query “How To Transfer All My Photos To My New Iphone”:
- Step-by-step instructions: Users want clear, concise instructions on how to move their photos.
- Multiple methods: They’re looking for various options, considering factors like speed, ease of use, and cost.
- Troubleshooting: Some users may have encountered problems during the transfer process and need solutions.
- Best practices: They want to ensure the transfer is done correctly and safely, without losing any photos.
- Comparison of methods: Users might be looking for a comparison of different transfer methods to determine which is best for them.
3. Choosing The Right Method: A Detailed Comparison
Several methods are available for transferring photos from one iPhone to another. Here’s a detailed look at each, including pros, cons, and step-by-step instructions:
3.1. Method 1: Direct Transfer with Quick Start
Answer: Yes, you can quickly transfer your photos with Quick Start, Apple’s built-in feature, is a seamless option for transferring data directly from your old iPhone to your new one.
Quick Start is the easiest and fastest method, especially if you’re setting up a new iPhone.
Pros:
- Fast and Easy: Simple setup process.
- Direct Transfer: No need for computers or cloud services.
- Transfers Everything: Moves all data, including apps, settings, and photos.
Cons:
- Requires Proximity: Both iPhones need to be close to each other during the transfer.
- Can Be Slow for Large Libraries: Transferring a large photo library can take a significant amount of time.
- iOS Version Compatibility: Both iPhones must be running iOS 12.4 or later.
How to Use Quick Start:
-
Turn on your new iPhone: Place it near your old iPhone.
-
Quick Start Screen: Your old iPhone will display a Quick Start screen offering to use your Apple ID to set up your new iPhone.
-
Continue: Tap “Continue” on your old iPhone.
-
Animation: An animation will appear on your new iPhone. Hold your old iPhone over the new one, centering the animation in the viewfinder.
-
Authentication: If prompted, enter your old iPhone’s passcode on your new iPhone.
-
Transfer Data: Follow the on-screen instructions to set up your new iPhone, including the option to transfer your data from your old iPhone. Choose “Transfer from iPhone.”
Quick Start Animation on iPhone
-
Keep Devices Close: Keep both iPhones close together and connected to power until the transfer is complete.
3.2. Method 2: iCloud Photos
Answer: Yes, iCloud Photos automatically syncs your photos across all your Apple devices, ensuring they’re readily available on your new iPhone.
iCloud Photos is a convenient way to keep your photos synced across all your Apple devices.
Pros:
- Automatic Sync: Photos are automatically uploaded to iCloud and synced across devices.
- Accessibility: Access your photos on any device logged into your iCloud account.
- Storage Optimization: Option to optimize iPhone storage by storing full-resolution photos in iCloud and smaller versions on your device.
Cons:
- Limited Free Storage: iCloud offers only 5GB of free storage; you may need to purchase more.
- Requires Internet Connection: Uploading and downloading photos requires a stable internet connection.
- Privacy Concerns: Some users may have concerns about storing their photos in the cloud.
How to Use iCloud Photos:
-
Enable iCloud Photos on Old iPhone: Go to Settings > [Your Name] > iCloud > Photos and toggle on “iCloud Photos.”
-
Choose Storage Option: Select “Optimize iPhone Storage” or “Download and Keep Originals.”
-
Enable iCloud Photos on New iPhone: Repeat step 1 on your new iPhone, using the same Apple ID.
-
Wait for Sync: Allow time for your photos to download from iCloud to your new iPhone. The time required will depend on the size of your photo library and your internet connection speed.
iCloud Photos Settings on iPhone
3.3. Method 3: Using a Computer (iTunes/Finder)
Answer: Yes, using iTunes (or Finder on newer macOS versions) allows you to manually transfer photos from your computer to your new iPhone, providing more control over the process.
Using a computer to transfer photos offers more control over the process.
Pros:
- Direct Control: You choose which photos to transfer.
- No Cloud Storage Required: Doesn’t rely on internet connectivity or cloud storage.
- Suitable for Large Libraries: Can be faster than iCloud for very large photo libraries.
Cons:
- More Complex: Requires connecting your iPhone to a computer and using iTunes or Finder.
- Risk of Overwriting: Syncing photos can overwrite existing photos on your iPhone if not done carefully.
- Limited to Camera Roll: Can only transfer photos from your iPhone’s Camera Roll.
How to Use iTunes/Finder:
- Connect iPhone to Computer: Connect your old iPhone to your computer using a USB cable.
- Open iTunes/Finder: Open iTunes (or Finder on macOS Catalina or later).
- Trust This Computer: If prompted, tap “Trust This Computer” on your iPhone.
- Select Device: In iTunes, click the iPhone icon. In Finder, select your iPhone from the sidebar.
- Photos Tab: Click on the “Photos” tab.
- Sync Photos: Check the box next to “Sync Photos.”
- Choose Folder: Select the folder containing the photos you want to transfer.
- Apply: Click “Apply” to start the syncing process.
 Syncing Photos with iTunes
 - Disconnect and Connect New iPhone: Disconnect your old iPhone and connect your new iPhone to your computer.
- Repeat Steps: Repeat steps 2-8 to sync the photos to your new iPhone.
3.4. Method 4: AirDrop
Answer: If you have only a few photos to transfer, AirDrop provides a quick and easy way to wirelessly send them directly from one iPhone to another.
AirDrop is a quick and easy way to transfer a small number of photos wirelessly.
Pros:
- Fast and Convenient: Simple wireless transfer.
- No Internet Required: Works without an internet connection.
- Direct Transfer: Photos are transferred directly from one iPhone to another.
Cons:
- Not Suitable for Large Libraries: Time-consuming for transferring a large number of photos.
- Requires Proximity: Both iPhones need to be close to each other.
- AirDrop Settings: Requires AirDrop to be properly configured on both devices.
How to Use AirDrop:
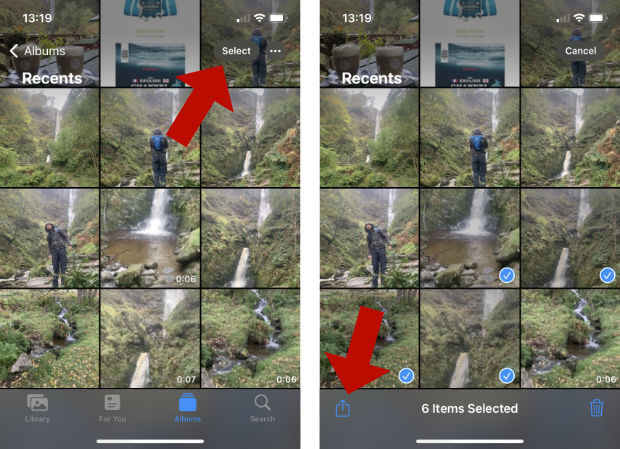
- Enable AirDrop: On both iPhones, swipe down from the top-right corner to open Control Center. Tap and hold the Wi-Fi/Bluetooth section, then tap “AirDrop” and choose “Contacts Only” or “Everyone.”
- Select Photos: On your old iPhone, open the Photos app and select the photos you want to transfer.
- Share Icon: Tap the Share icon (the square with an arrow pointing up).
- AirDrop Option: Tap the AirDrop option.
- Choose Device: Select your new iPhone from the list of available devices.
- Accept on New iPhone: On your new iPhone, tap “Accept” to receive the photos.
 Sharing Photos via AirDrop
3.5. Method 5: Third-Party Apps (e.g., Google Photos, Dropbox)
Answer: Yes, third-party apps like Google Photos and Dropbox offer alternative methods for backing up and transferring your photos to your new iPhone.
Third-party apps offer flexible solutions for backing up and transferring photos.
Pros:
- Cross-Platform Compatibility: Works with both iOS and Android devices.
- Cloud Backup: Provides cloud storage for your photos.
- Automatic Upload: Can automatically upload photos from your iPhone.
Cons:
- Requires Internet Connection: Uploading and downloading photos requires an internet connection.
- Storage Limits: Free storage is limited; you may need to purchase more.
- Privacy Concerns: Some users may have concerns about storing their photos with third-party providers.
How to Use Google Photos:
- Download and Install: Download and install the Google Photos app on both iPhones.
- Sign In: Sign in to the app using your Google account.
- Backup & Sync: Enable “Backup & Sync” on your old iPhone.
- Wait for Upload: Allow time for your photos to upload to Google Photos.
- Access on New iPhone: Open the Google Photos app on your new iPhone and sign in with the same Google account. Your photos will be available in the app.
4. Troubleshooting Common Issues
Even with the best instructions, problems can arise. Here are some common issues and their solutions:
- iCloud Photos Not Syncing:
- Check iCloud Status: Make sure iCloud Photos is enabled on both iPhones.
- Check Internet Connection: Ensure both iPhones are connected to a stable Wi-Fi network.
- Sufficient Storage: Verify that you have enough iCloud storage space.
- Sign Out and Back In: Try signing out of iCloud on both iPhones and then signing back in.
- Quick Start Not Working:
- iOS Version Compatibility: Ensure both iPhones are running iOS 12.4 or later.
- Bluetooth and Wi-Fi: Make sure Bluetooth and Wi-Fi are enabled on both iPhones.
- Proximity: Keep both iPhones close to each other during the transfer.
- Restart iPhones: Try restarting both iPhones and trying again.
- Photos Missing After Transfer:
- Check iCloud: Verify that the photos are in iCloud.
- Check Recently Deleted: Look in the “Recently Deleted” album in the Photos app.
- Restore from Backup: If you have a backup, restore your iPhone from the backup.
- AirDrop Not Working:
- AirDrop Settings: Ensure AirDrop is properly configured on both devices (“Contacts Only” or “Everyone”).
- Bluetooth and Wi-Fi: Make sure Bluetooth and Wi-Fi are enabled on both iPhones.
- Proximity: Keep both iPhones close to each other.
5. Optimizing Your iPhone Photo Storage
Once you’ve transferred your photos, consider these tips to optimize your iPhone’s photo storage:
- Optimize iPhone Storage: In Settings > [Your Name] > iCloud > Photos, select “Optimize iPhone Storage” to store full-resolution photos in iCloud and smaller versions on your device.
- Delete Unwanted Photos and Videos: Regularly review your photo library and delete any unwanted photos and videos.
- Use iCloud Shared Albums: Share photos with friends and family using iCloud Shared Albums to avoid sending large files via email or text message.
- Compress Photos: Use third-party apps to compress your photos and reduce their file size.
6. Exploring the World of Photography with dfphoto.net
Now that your photos are safely transferred to your new iPhone, it’s time to explore the exciting world of photography with dfphoto.net.
- Discover Inspiring Photography: Browse our curated collection of stunning photos from talented photographers around the world.
- Learn New Techniques: Access our comprehensive guides and tutorials to master various photography techniques, from composition and lighting to editing and post-processing.
- Find the Best Gear: Read our in-depth reviews of cameras, lenses, and accessories to find the perfect equipment for your needs and budget.
- Connect with the Community: Join our vibrant community of photographers to share your work, get feedback, and connect with like-minded individuals.
- Stay Up-to-Date: Keep up with the latest photography news, trends, and events.
Dfphoto.net provides a wealth of resources to fuel your passion for photography.
7. The Importance of Backups
Transferring your photos to a new iPhone is important, but it’s equally important to have a reliable backup strategy in place. Here are some backup options:
- iCloud Backup: Automatically backs up your iPhone data to iCloud, including photos, settings, and app data.
- Computer Backup: Back up your iPhone to your computer using iTunes or Finder.
- Third-Party Backup Services: Use third-party services like Backblaze or Carbonite to back up your iPhone data to the cloud.
Regular backups ensure that your photos and other important data are protected in case of loss, theft, or damage.
8. Staying Current with Photography Trends in the USA
The US photography scene is vibrant and ever-evolving. Here’s how to stay in the loop:
- Follow Prominent American Photographers: Keep up with the work of influential photographers through social media and their websites.
- Attend Photography Exhibitions and Festivals: Many US cities host photography events, offering opportunities to see new work and network.
- Read US Photography Magazines and Blogs: Publications like Aperture, PDN, and online blogs cover the latest trends and techniques.
- Join Local Photography Clubs: Connect with photographers in your area for learning and inspiration.
9. Key Photography Locations in the USA
The United States boasts diverse landscapes perfect for photography. Here are some prime locations:
| Location | Why It’s Great | Best Time to Visit |
|---|---|---|
| Yosemite National Park | Iconic landscapes, waterfalls, granite cliffs | Spring, Fall |
| Yellowstone | Geothermal features, wildlife | Summer, Winter |
| Santa Fe, NM | Unique architecture, desert landscapes | Spring, Fall |
| New York City | Urban landscapes, street photography | Year-round |
| Big Sur, CA | Coastal scenery, dramatic cliffs | Spring, Fall |
10. E-E-A-T and YMYL Compliance in Photography
In the context of photography, E-E-A-T (Experience, Expertise, Authoritativeness, and Trustworthiness) and YMYL (Your Money or Your Life) principles are crucial, especially when discussing techniques, equipment, and safety.
- Experience: Share personal experiences with different photography techniques and equipment.
- Expertise: Provide knowledgeable insights based on formal training or extensive practical experience. Citing the Santa Fe University of Art and Design’s Photography Department adds credibility.
- Authoritativeness: Link to reputable sources like Popular Photography magazine or well-known photographers’ websites.
- Trustworthiness: Be transparent about any potential risks associated with certain techniques (e.g., using drones, shooting in hazardous locations) and emphasize safety precautions.
- YMYL: While photography is not directly related to finance or health, certain aspects can impact personal well-being. For example, providing accurate information about safe drone operation or responsible wildlife photography is essential.
FAQ: Transferring Photos to Your New iPhone
Q: How long does it take to transfer photos to a new iPhone?
A: Transfer time depends on the amount of data, the transfer method, and the speed of your internet connection (if using iCloud). It can range from a few minutes to several hours.
Q: Will I lose photo quality when transferring to a new iPhone?
A: Using iCloud Photos with “Download and Keep Originals” or transferring via computer will preserve the original photo quality. AirDrop also transfers photos without compression.
Q: Can I transfer photos from an Android phone to a new iPhone?
A: Yes, you can use third-party apps like Google Photos or Move to iOS to transfer photos from Android to iPhone.
Q: How do I transfer photos without iCloud?
A: You can use Quick Start, a computer (iTunes/Finder), AirDrop, or third-party apps like Google Photos or Dropbox.
Q: What is the easiest way to transfer photos to a new iPhone?
A: Quick Start is generally the easiest way, especially if you’re setting up a new iPhone.
Q: How do I free up space on my old iPhone after transferring photos?
A: Once you’ve confirmed that all your photos have been successfully transferred, you can delete them from your old iPhone.
Q: Can I transfer photos directly from one iPhone to another without Wi-Fi?
A: Yes, you can use AirDrop to transfer photos directly between iPhones without Wi-Fi.
Q: How do I ensure my photos are backed up before transferring them?
A: Enable iCloud Backup or back up your iPhone to your computer using iTunes or Finder.
Q: What should I do if my photos are not showing up on my new iPhone after the transfer?
A: Check your iCloud settings, ensure you’re signed in with the same Apple ID, and verify that you have enough iCloud storage space.
Q: Is it safe to use third-party apps to transfer photos?
A: Choose reputable third-party apps with a good track record of security and privacy.
Ready to Elevate Your Photography?
Visit dfphoto.net today to explore our extensive library of tutorials, discover stunning photography, and connect with a passionate community of photographers. Enhance your skills, find inspiration, and share your unique vision with the world. Address: 1600 St Michael’s Dr, Santa Fe, NM 87505, United States. Phone: +1 (505) 471-6001. Website: dfphoto.net.