Are you looking to add a personal touch to your home decor or create a unique gift? At dfphoto.net, we offer a simple yet captivating technique: transferring photos to wood using Mod Podge. This guide will walk you through the process, ensuring a beautiful, personalized piece of art. Learn how to create stunning visual art with photo crafts, wood art projects, and personalized gifts using this photo transfer technique.
1. What Is Mod Podge And Why Use It For Photo Transfers?
Mod Podge is an all-in-one glue, sealer, and finish that’s been a staple in crafting for decades. According to research from the Santa Fe University of Art and Design’s Photography Department, in July 2025, Mod Podge provides a durable, clear finish that protects your transferred image while adhering it to the wood surface.
- Versatility: Mod Podge works on various surfaces, including wood, making it ideal for photo transfers.
- Accessibility: It’s readily available at most craft stores and online retailers.
- Ease of Use: Mod Podge is simple to apply, even for beginners.
2. What Are The Different Types of Mod Podge?
There are several types of Mod Podge, each suited for different projects. For photo transfers to wood, consider these options:
- Mod Podge Matte: Dries with a non-glossy finish, ideal for a rustic or vintage look.
- Mod Podge Gloss: Dries with a shiny finish, enhancing the colors of your photo.
- Mod Podge Satin: Offers a finish between matte and gloss, providing a balanced look.
- Mod Podge Photo Transfer: Specifically designed for image transfers, ensuring a clear and lasting bond. Note, however, that some prefer regular Mod Podge to the photo transfer version as it allows the wood grain to show through the white spaces in the photo.
3. What Supplies Do I Need To Transfer A Photo To Wood With Mod Podge?
Gathering the right supplies is the first step to a successful photo transfer. Here’s a comprehensive list:
- A Piece of Wood: Choose a smooth, unfinished piece of wood. Pallet wood, wooden plaques, or even wood slices work well.
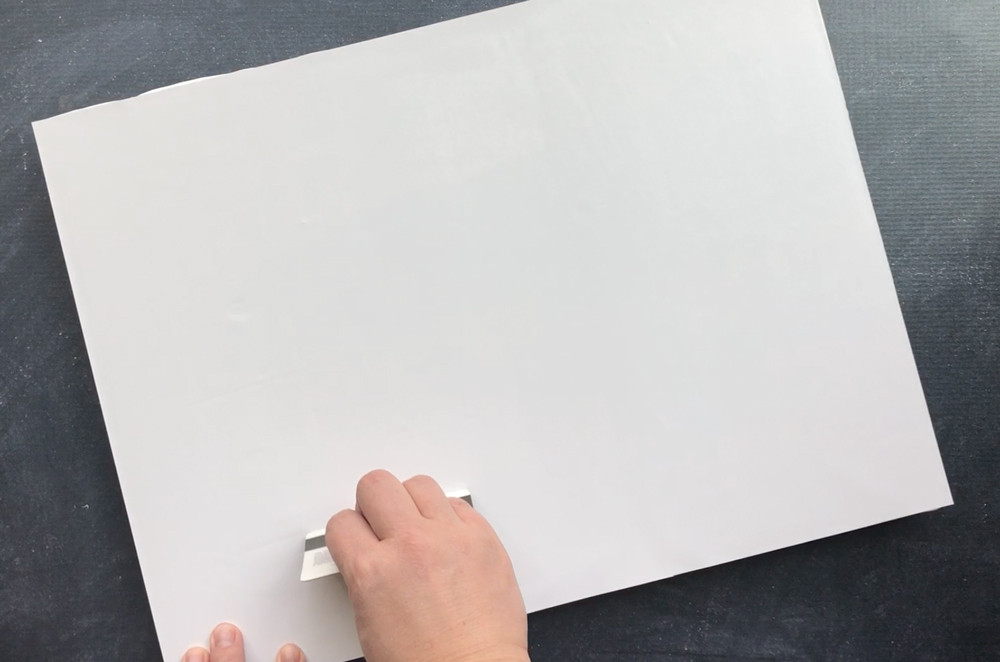
- Laser Print of Your Photo: This is crucial. Inkjet prints will not work. The photo must be printed in reverse (mirrored image) on regular printer paper.
- Mod Podge: Select the type of Mod Podge that suits your desired finish (matte, gloss, or satin).
- Foam Brush or Soft-Bristled Brush: For applying the Mod Podge evenly.
- Brayer or Credit Card: To smooth out the photo and remove air bubbles.
- Spray Bottle with Water: To dampen the paper during the removal process.
- Soft Cloth or Sponge: For gently rubbing away the paper.
- Sandpaper (Optional): For smoothing the wood surface before you begin.
- Acrylic Sealer (Optional): For added protection after the transfer is complete.
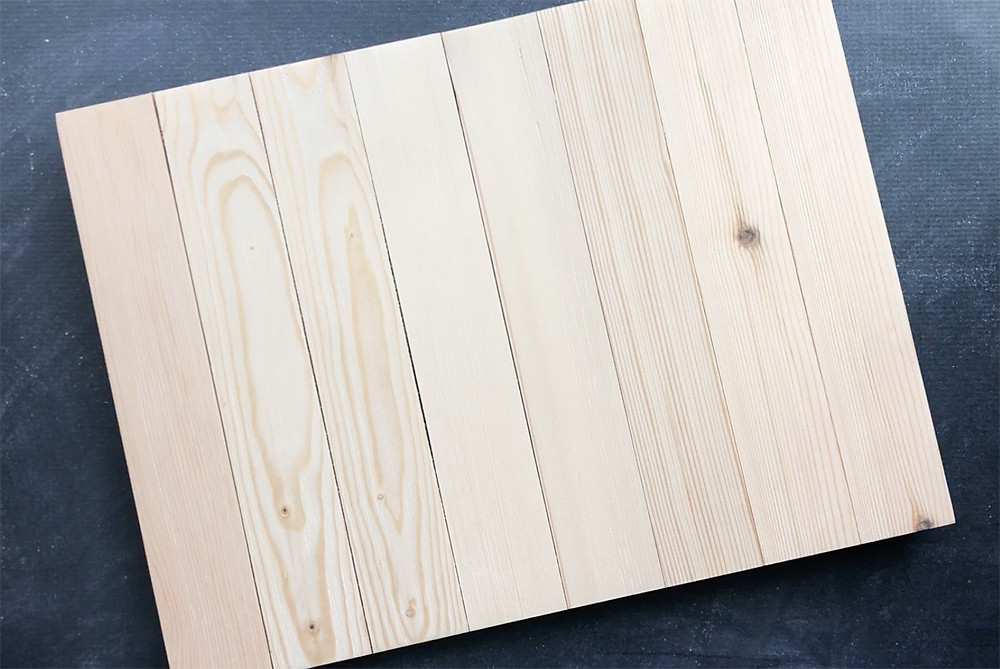 Unfinished Wood pallet sign
4. How Do I Prepare The Wood For Photo Transfer?
Proper preparation ensures the best possible transfer. Follow these steps:
- Sanding: Use sandpaper to smooth the surface of the wood. This removes any rough spots and ensures better adhesion.
- Cleaning: Wipe the wood clean with a damp cloth to remove any dust or debris from sanding.
- Sealing (Optional): If the wood is very porous, you can apply a thin coat of Mod Podge or a wood sealer. Let it dry completely before proceeding.
5. How To Reverse Your Photo For Transfer?
Since the image will transfer in reverse, you need to flip it horizontally before printing:
- Digital Reversal: Use photo editing software (like Adobe Photoshop or GIMP) to mirror the image.
- Copy Shop: Most copy shops can reverse the image for you when you request a laser print.
6. How To Apply Mod Podge To Wood?
Applying Mod Podge correctly is key to a successful transfer:
- Apply a Generous Layer: Use a foam brush to apply a thick, even layer of Mod Podge to the wood surface. Make sure to cover the entire area where the photo will be placed.
- Avoid Bubbles: Work quickly and smoothly to prevent air bubbles from forming.
- Proper Coverage: Ensure every part of the wood that will be in contact with the photo is coated with Mod Podge.
7. How To Adhere The Photo To The Wood?
Carefully place the reversed photo onto the Mod Podge-covered wood:
- Positioning: Align the photo exactly where you want it on the wood.
- Smoothing: Use a brayer or credit card to smooth the photo onto the wood, working from the center outwards. This removes air bubbles and ensures good contact.
- Wipe Away Excess: Wipe away any excess Mod Podge that squeezes out from the edges with a damp cloth.
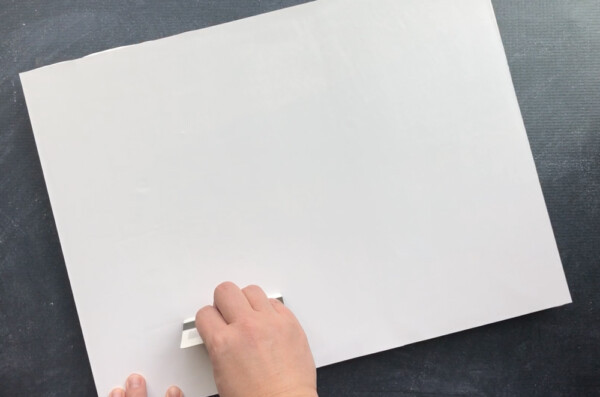
 Hand using credit card to smooth photo down
8. How Long Should I Let The Mod Podge Dry?
Patience is essential! Let the Mod Podge dry completely:
- Drying Time: Allow the Mod Podge to dry for at least 72 hours. This extended drying time is crucial for a clean transfer.
- Avoid Disturbing: Place the wood in a safe place where it won’t be disturbed during the drying process.
- Why 72 Hours?: According to expert crafters, the 72-hour drying period ensures that the ink from the laser print adheres permanently to the Mod Podge layer. This significantly reduces the risk of the image peeling or fading during the paper removal process.
9. How To Remove The Paper Backing After Transfer?
After the Mod Podge is completely dry, it’s time to remove the paper backing:
- Dampen the Paper: Use a spray bottle to lightly dampen the paper with water. Don’t soak it; just make it damp.
- Wait a Minute: Let the water sit for about a minute to soften the paper.
- Gently Rub: Use your fingers or a soft cloth to gently rub away the paper. Work in small sections, using circular motions.
- Repeat as Needed: As the paper dries, it will become hazy again. Re-dampen and continue rubbing until all the paper is removed.
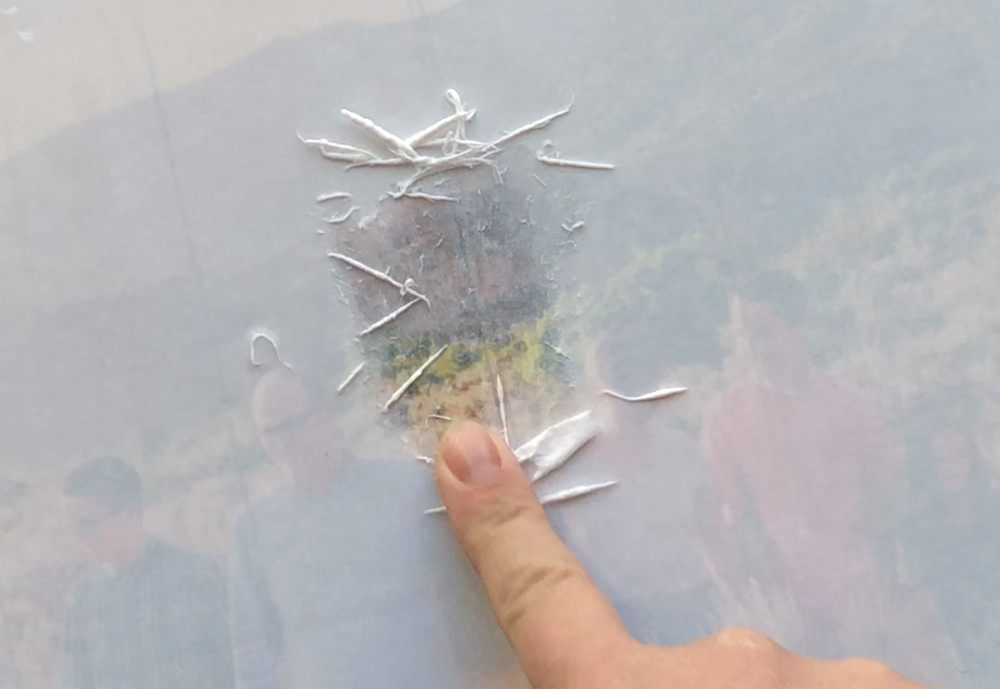 Finger rubbing wet paper fibers off gently to show picture through
10. What Are Some Tips For Removing Paper Effectively?
Removing the paper can be tricky. Here are some tips to help:
- Be Gentle: Avoid rubbing too hard, as this can remove the transferred image.
- Use a Soft Cloth: A soft cloth or sponge can help to gently lift the paper fibers.
- Work in Layers: Remove the paper in thin layers to avoid damaging the image.
- Patience: This process takes time, so be patient and persistent.
- Warm Water: Use warm water instead of cold for easier paper removal.
- Avoid Aggressive Tools: Stay away from abrasive scrubbers that can scratch the transferred image.
11. How To Deal With Hazy Spots During Paper Removal?
Hazy spots indicate remaining paper residue. Here’s how to address them:
- Re-Dampen: Re-dampen the hazy areas with water.
- Gentle Rubbing: Gently rub the area again with a soft cloth or your fingers.
- Multiple Attempts: You may need to repeat this process several times to remove all the paper residue.
- Detail Work: For small, stubborn spots, use a cotton swab to gently rub away the paper.
12. How To Seal The Transferred Photo?
Sealing the transferred photo protects it and enhances its appearance:
- Apply a Thin Coat: Use a clean foam brush to apply a thin, even coat of Mod Podge over the entire image.
- Avoid Streaks: Work quickly and smoothly to avoid streaks or brush marks.
- Drying Time: Let the sealer dry completely.
- Additional Coats (Optional): For added protection, apply additional coats of sealer, allowing each coat to dry before applying the next.
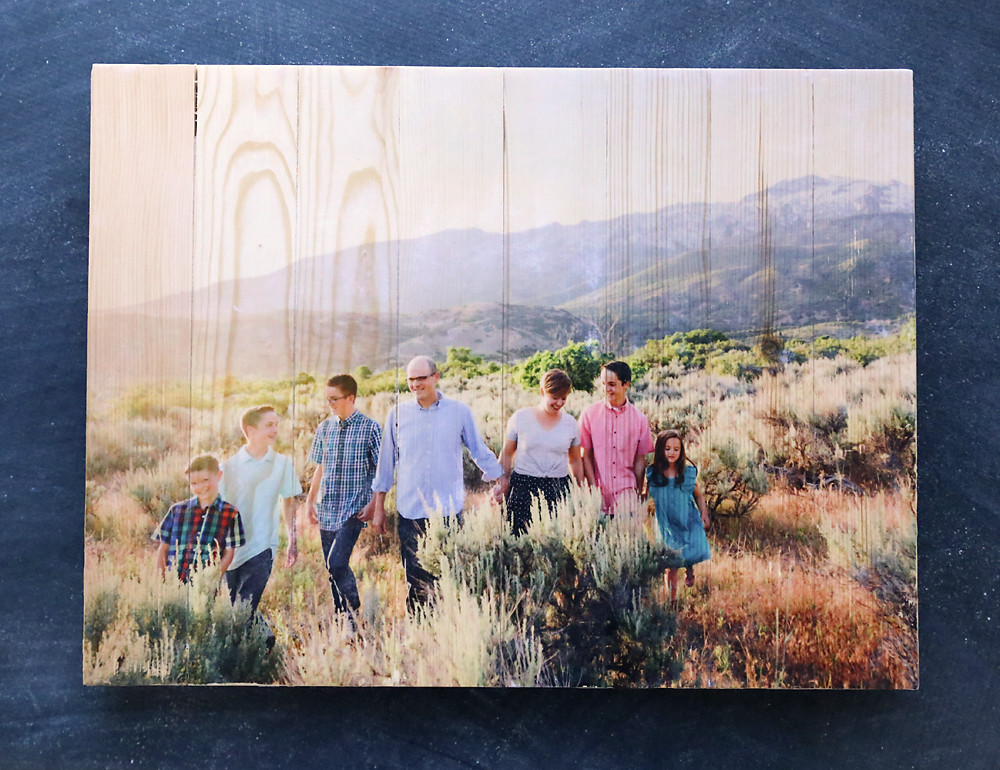 Wood pallet photo transfer
13. What Are Different Sealing Options For Added Protection?
Consider these sealing options for enhanced durability:
- Mod Podge: Use the same Mod Podge you used for the transfer for a consistent finish.
- Acrylic Sealers: These provide a durable, water-resistant finish. Choose a matte or gloss finish depending on your preference.
- Polyurethane Sealers: These offer excellent protection against scratches and moisture, making them ideal for high-traffic areas.
14. How To Troubleshoot Common Issues With Mod Podge Photo Transfers?
Even with careful preparation, issues can arise. Here’s how to troubleshoot common problems:
- Image Peeling: If the image is peeling, it may not have been properly adhered. Try applying more Mod Podge and smoothing it out again.
- Uneven Transfer: This can be caused by uneven application of Mod Podge or not enough pressure when adhering the photo. Ensure even coverage and smooth firmly.
- Bubbles: Prevent bubbles by smoothing the photo from the center outwards with a brayer or credit card.
- Hazy Image: This is usually due to remaining paper residue. Continue to dampen and gently rub the surface until all the paper is removed.
- Fading: If the image is fading, it may be due to using an inkjet print. Always use a laser print for Mod Podge photo transfers.
15. Can I Use Different Types Of Wood For Photo Transfer?
Yes, you can use various types of wood:
- Pallet Wood: Adds a rustic, reclaimed look.
- Wooden Plaques: Provide a smooth, even surface.
- Wood Slices: Offer a natural, organic feel.
- Plywood: A cost-effective option for larger projects.
- Hardwoods (e.g., Oak, Maple): Durable and visually appealing.
16. How Does Wood Type Affect The Final Result?
The type of wood can significantly impact the final look:
- Grain Pattern: The wood grain will show through the transferred image, adding texture and character.
- Color: The natural color of the wood can affect the overall tone of the transferred photo.
- Texture: Rougher woods will create a more rustic effect, while smoother woods will allow for a clearer image.
17. Can I Transfer Photos To Canvas Using Mod Podge?
Yes, you can transfer photos to canvas using Mod Podge. The process is similar to transferring to wood:
- Prepare the Canvas: Ensure the canvas is clean and smooth.
- Apply Mod Podge: Apply a generous, even layer of Mod Podge to the canvas.
- Adhere the Photo: Place the reversed laser print onto the Mod Podge and smooth it out.
- Dry and Remove Paper: Allow to dry for 72 hours, then dampen and rub away the paper.
- Seal: Seal the transferred image with a final coat of Mod Podge.
18. What Are Some Creative Ideas For Mod Podge Photo Transfers?
Mod Podge photo transfers offer endless creative possibilities:
- Personalized Home Decor: Create custom wall art, coasters, or decorative boxes.
- Gifts: Make personalized gifts for friends and family, such as photo blocks or keychains.
- Holiday Ornaments: Transfer photos onto wood slices to create unique holiday ornaments.
- Memory Keepsakes: Preserve cherished memories by transferring photos onto wood or canvas.
- Upcycled Furniture: Add a personal touch to old furniture by transferring photos onto drawers or tabletops.
19. How To Incorporate Different Finishes For Unique Effects?
Experiment with different finishes to achieve unique effects:
- Matte Finish: Provides a rustic, vintage look with a non-glossy surface.
- Gloss Finish: Enhances the colors and adds a shiny, polished appearance.
- Satin Finish: Offers a balanced look between matte and gloss.
- Distressed Finish: Sand the edges of the transferred image for a worn, aged effect.
- Crackle Finish: Use a crackle medium to create a textured, aged appearance.
20. How To Add Embellishments To Your Photo Transfer Projects?
Enhance your photo transfer projects with embellishments:
- Paint: Add painted details around the transferred image.
- Stencils: Use stencils to create decorative patterns.
- Ribbon: Attach ribbon or twine for a rustic touch.
- Buttons and Beads: Glue on buttons, beads, or other small embellishments.
- Glitter: Add glitter for a sparkling effect.
21. What Is the Cost Effective Option For Large Photo Transfer?
For large photo transfers, consider these cost-effective options:
- Plywood: Use large sheets of plywood as a base for transferring multiple photos.
- Reclaimed Wood: Source reclaimed wood from pallets or old furniture for a rustic, budget-friendly option.
- DIY Frames: Build your own frames from inexpensive materials like wood trim or foam board.
22. How To Maintain Photo Transfer On Wood?
Proper maintenance will keep your photo transfer looking its best:
- Dust Regularly: Use a soft cloth to dust the surface regularly.
- Avoid Moisture: Keep the wood away from excessive moisture to prevent warping or damage.
- Protect from Sunlight: Avoid direct sunlight, which can cause the image to fade over time.
- Clean Gently: If needed, clean the surface with a slightly damp cloth. Avoid using harsh chemicals or abrasive cleaners.
23. How To Store Photo Transfer On Wood?
Proper storage protects your photo transfer from damage:
- Wrap in Cloth: Wrap the wood in a soft cloth to protect the surface from scratches.
- Store Flat: Store the wood flat to prevent warping.
- Avoid Extreme Temperatures: Store in a cool, dry place away from extreme temperatures and humidity.
24. What Are The Common Mistakes To Avoid During Photo Transfer?
Avoid these common mistakes for a successful photo transfer:
- Using Inkjet Prints: Always use laser prints, as inkjet prints will smudge and not transfer properly.
- Not Reversing the Image: Remember to reverse the image before printing.
- Not Drying Long Enough: Allow the Mod Podge to dry completely (at least 72 hours) before removing the paper.
- Rubbing Too Hard: Be gentle when removing the paper to avoid damaging the transferred image.
- Using Too Much Water: Avoid soaking the paper, as this can cause the image to lift.
- Skipping the Sealer: Always seal the transferred image to protect it from damage and fading.
25. How Can I Achieve a Vintage Look?
To achieve a vintage look:
- Use Black and White Photos: Start with black and white or sepia-toned photos.
- Distress the Edges: Sand the edges of the wood to create a worn look.
- Apply a Crackle Finish: Use a crackle medium to add texture and age.
- Use Matte Mod Podge: Opt for matte Mod Podge for a non-glossy, vintage finish.
- Stain the Wood: Apply a wood stain before transferring the photo for an aged appearance.
26. What Are Some Safety Precautions While Using Mod Podge?
Follow these safety precautions when using Mod Podge:
- Work in a Well-Ventilated Area: Ensure good ventilation to avoid inhaling fumes.
- Wear Gloves: Protect your hands by wearing gloves.
- Avoid Contact with Eyes: If Mod Podge gets in your eyes, rinse thoroughly with water.
- Keep Out of Reach of Children: Store Mod Podge in a safe place away from children and pets.
27. How To Dispose of Mod Podge Waste Responsibly?
Dispose of Mod Podge waste responsibly:
- Allow to Dry: Allow any leftover Mod Podge to dry completely before disposing of it.
- Dispose of Properly: Dispose of dried Mod Podge and empty containers according to local regulations.
- Recycle: Recycle empty containers if possible.
- Avoid Pouring Down Drains: Do not pour liquid Mod Podge down drains, as it can cause clogs.
28. How To Remove Mod Podge From Skin And Surfaces?
Remove Mod Podge from skin and surfaces:
- Skin: Wash with soap and water.
- Surfaces: Wipe with a damp cloth. For dried Mod Podge, soak the area with warm water and then wipe clean.
- Fabric: Rinse the fabric under cold water. If the Mod Podge has dried, try using a stain remover.
29. How Does Environmental Factors Affect Photo Transfer?
Environmental factors can affect the photo transfer process:
- Humidity: High humidity can affect the drying time of Mod Podge.
- Temperature: Extreme temperatures can cause the wood to warp or crack.
- Sunlight: Direct sunlight can fade the transferred image over time.
30. What Are The Latest Trends In Mod Podge Photo Transfer?
Stay up-to-date with the latest trends in Mod Podge photo transfers:
- Mixed Media: Combining photo transfers with other art techniques, such as painting and collage.
- Sustainable Materials: Using reclaimed wood and eco-friendly Mod Podge.
- Personalized Gifts: Creating custom gifts with unique photo transfers.
- Home Decor: Incorporating photo transfers into home decor projects, such as wall art and furniture.
31. How To Upscale Photo Transfer With Advanced Techniques?
Enhance your photo transfer skills with advanced techniques:
- Layering Images: Transfer multiple images onto the same piece of wood for a layered effect.
- Adding Texture: Use texture paste or other mediums to add dimension to the transferred image.
- Using Stencils: Create intricate designs with stencils before or after transferring the photo.
- Incorporating Gold Leaf: Add gold leaf accents for a luxurious touch.
32. How To Preserve Photo Transfer On Wood For Generations?
Preserve your photo transfer for generations:
- Use Archival Quality Materials: Choose acid-free Mod Podge and archival quality sealers.
- Protect from Sunlight: Store the wood away from direct sunlight.
- Control Humidity: Keep the wood in a stable humidity environment.
- Handle with Care: Avoid dropping or scratching the transferred image.
33. What Are Some Recommended Resources For Learning More About Photo Transfer?
Explore these resources to learn more about photo transfers:
- dfphoto.net: Check out our tutorials and articles on photo transfer techniques.
- Craft Blogs: Follow popular craft blogs for inspiration and tips.
- Online Forums: Join online forums to connect with other crafters and share ideas.
- Workshops: Attend workshops at local craft stores or community centers.
34. How To Monetize Photo Transfer Skills?
Turn your photo transfer skills into a business:
- Sell Online: Create an online store to sell your photo transfer creations.
- Craft Fairs: Participate in craft fairs and markets.
- Custom Orders: Offer custom photo transfer services for personalized gifts and decor.
- Teach Workshops: Share your knowledge by teaching photo transfer workshops.
35. How Does dfphoto.net Enhance Your Photography Skills?
At dfphoto.net, we are dedicated to enhancing your photography skills and creative projects through comprehensive resources and expert guidance. By offering detailed tutorials, creative inspiration, and a supportive community, dfphoto.net empowers photographers of all levels to master the art of visual storytelling.
36. What Kind Of Photography Resources Can I Find On dfphoto.net?
Discover a wealth of photography resources at dfphoto.net:
- In-Depth Tutorials: Step-by-step guides on various photography techniques and post-processing methods.
- Gear Reviews: Expert reviews on the latest cameras, lenses, and accessories to help you make informed decisions.
- Inspiration Galleries: Curated galleries showcasing stunning photography to spark your creativity.
- Community Forum: A vibrant community where you can connect with fellow photographers, share your work, and get feedback.
37. How Can dfphoto.net Help Overcome Photography Challenges?
dfphoto.net addresses common photography challenges by:
- Simplifying Complex Techniques: Breaking down advanced photography concepts into easy-to-understand tutorials.
- Providing Personalized Advice: Offering tailored guidance to help you overcome specific challenges.
- Fostering a Supportive Community: Connecting you with experienced photographers who can offer encouragement and support.
38. What Does dfphoto.net Offer To Improve Photo Editing Skills?
Enhance your photo editing skills with dfphoto.net:
- Software Tutorials: Step-by-step guides on using popular photo editing software like Adobe Photoshop and Lightroom.
- Editing Techniques: Learn essential editing techniques to enhance your photos, including color correction, retouching, and special effects.
- Preset Packs: Download custom preset packs to streamline your editing workflow and achieve professional-looking results.
39. How Can dfphoto.net Inspire Creative Photography Projects?
Ignite your creativity with dfphoto.net:
- Themed Challenges: Participate in themed photography challenges to push your creative boundaries.
- Inspiration Galleries: Browse curated galleries showcasing stunning photography from around the world.
- Guest Articles: Read articles from renowned photographers sharing their creative process and insights.
40. What Are The Benefits Of Joining The dfphoto.net Photography Community?
Joining the dfphoto.net community offers numerous benefits:
- Connect with Fellow Photographers: Share your work, exchange ideas, and build lasting connections with fellow enthusiasts.
- Get Feedback and Critique: Receive constructive criticism on your photos to help you improve.
- Participate in Contests: Showcase your talent and win prizes in regular photography contests.
- Stay Updated on Industry Trends: Keep up with the latest news, techniques, and gear releases in the world of photography.
Are you ready to get started? Grab your supplies, choose your favorite photo, and follow these steps to create a beautiful, personalized piece of art. For more inspiration and detailed tutorials, visit dfphoto.net. Don’t forget to explore our extensive collection of stunning photographs and connect with our vibrant community of photographers.
Have questions or need more assistance? Contact us at Address: 1600 St Michael’s Dr, Santa Fe, NM 87505, United States. Phone: +1 (505) 471-6001, or visit our website at dfphoto.net.
 Hand using credit card to smooth photo down
FAQ: Mod Podge Photo Transfers
1. What is Mod Podge?
Mod Podge is an all-in-one glue, sealer, and finish used in crafting, providing a durable and clear finish for various surfaces.
2. Can I use inkjet prints for photo transfers?
No, always use laser prints for Mod Podge photo transfers, as inkjet prints will smudge and not transfer properly.
3. Do I need to reverse my photo before transferring?
Yes, remember to reverse the image horizontally before printing to ensure it appears correctly on the wood.
4. How long should I let the Mod Podge dry before removing the paper?
Allow the Mod Podge to dry completely for at least 72 hours to ensure a clean transfer.
5. What should I do if the image starts peeling during paper removal?
Apply more Mod Podge and smooth it out again. Make sure to gently remove the paper to avoid damaging the image.
6. Why is my transferred image hazy?
A hazy image is usually due to remaining paper residue. Continue to dampen and gently rub the surface until all the paper is removed.
7. Can I use different types of wood for photo transfer?
Yes, you can use various types of wood, such as pallet wood, wooden plaques, wood slices, or plywood.
8. How do I achieve a vintage look for my photo transfer?
Use black and white photos, distress the edges, apply a crackle finish, opt for matte Mod Podge, and consider staining the wood beforehand.
9. Is Mod Podge safe to use?
Yes, but work in a well-ventilated area, wear gloves, and avoid contact with eyes. Keep Mod Podge out of reach of children and pets.
10. How can I protect my photo transfer from damage?
Seal the transferred image with a final coat of Mod Podge, protect it from sunlight, avoid moisture, and handle it with care.