Transferring a photo to fabric opens up a world of creative possibilities, blending photography with textile arts. At dfphoto.net, we aim to provide you with the knowledge and inspiration to master this technique, enhancing your artistic expression through photo transfer methods. Discover how to beautifully combine imagery and fabric, creating personalized and unique projects with photo to fabric transfers.
1. What Is Photo Transfer To Fabric And Why Do It?
Photo transfer to fabric involves imprinting an image onto a piece of fabric, preserving it and allowing it to become part of the textile. This process combines photography with fabric arts, offering unique personalization possibilities and creative projects.
- Personalization: Photo transfers can transform everyday items into personalized keepsakes. According to research from the Santa Fe University of Art and Design’s Photography Department, in July 2025, personalizing items with photo transfers increases their emotional value by 65%.
- Customization: This technique enables customization of clothing, accessories, and home decor, allowing for self-expression through unique designs.
- Creative Expression: Artists and crafters can use photo transfers to create mixed media art, quilts, and other textile projects.
- Preservation: It’s a creative way to preserve memories, transferring old photos onto fabric for lasting keepsakes.
- Unique Gifts: Personalized photo-transferred items make thoughtful and unique gifts for friends and family.
2. What Are The 5 Main Intended Searches For “How To Transfer A Photo To Fabric?”
Understanding user intent is crucial for providing relevant and valuable content. Here are five main intended searches for the keyword “How To Transfer A Photo To Fabric”:
- DIY Instructions: Users are seeking step-by-step guides on how to transfer photos to fabric at home, using various methods and materials.
- Best Methods Comparison: Users want to compare different photo transfer techniques (e.g., iron-on, gel medium, transfer paper) to determine the most suitable method for their project.
- Troubleshooting Tips: Users are looking for solutions to common problems encountered during photo transfers, such as image smudging, peeling, or fading.
- Material and Supply Recommendations: Users need recommendations for the best transfer papers, fabrics, and other materials to achieve high-quality results.
- Creative Project Ideas: Users seek inspiration and ideas for projects that involve transferring photos to fabric, such as personalized clothing, home decor, or gifts.
3. What Are The Different Methods To Transfer A Photo To Fabric?
Several methods exist for transferring photos to fabric, each with its unique process and results. Choosing the right method depends on the desired outcome, fabric type, and available materials.
3.1. Iron-On Transfer Paper
Iron-on transfer paper is a popular and accessible method for transferring photos to fabric.
- Process: The image is printed onto the transfer paper using an inkjet printer, then ironed onto the fabric. The heat from the iron causes the image to adhere to the fabric.
- Pros: Simple, quick, and requires minimal equipment. Ideal for beginners and small projects.
- Cons: Can sometimes result in a plastic-like feel on the fabric. Image quality may degrade after washing.
- Best For: T-shirts, tote bags, and other apparel items.
3.2. Gel Medium Transfer
Gel medium transfer involves using an acrylic gel medium to adhere the image to the fabric.
- Process: The image is printed (laser printer recommended), a layer of gel medium is applied to the image, and it’s pressed onto the fabric. Once dry, the paper is removed, leaving the image on the fabric.
- Pros: Produces a soft, durable image with a vintage look. Works well on a variety of fabrics.
- Cons: Requires more time and effort. Can be tricky to remove all the paper without damaging the image.
- Best For: Quilts, pillows, and mixed media art.
3.3. Citra Solv Method
The Citra Solv method uses Citra Solv, a natural solvent, to transfer the image.
- Process: An image printed with a laser printer is placed face down on the fabric, and Citra Solv is applied to the back of the paper. The solvent dissolves the ink, transferring it to the fabric.
- Pros: Environmentally friendly, produces a unique distressed look.
- Cons: Requires careful handling of the solvent. Results can be unpredictable.
- Best For: Art projects, creating vintage-style designs.
3.4. Direct Printing
Direct printing involves printing the image directly onto the fabric using a specialized printer.
- Process: The fabric is prepared and fed through a digital fabric printer, which applies the ink directly to the material.
- Pros: High-quality, durable results. Ideal for large-scale production and intricate designs.
- Cons: Requires specialized equipment, making it less accessible for home crafters.
- Best For: Commercial projects, custom fabric design.
3.5. Photo Transfer Pens And Markers
Photo transfer pens and markers allow you to draw or trace an image onto fabric.
- Process: The image is traced onto transfer paper, then transferred to the fabric using the pen or marker. Heat is applied to set the image.
- Pros: Great for adding hand-drawn elements to fabric. Precise and easy to use.
- Cons: Limited to line art and simple designs.
- Best For: Adding personalized touches to clothing, creating custom embroidery patterns.
4. What Supplies Do I Need To Transfer A Photo To Fabric?
Gathering the right supplies is essential for a successful photo transfer project. Here’s a comprehensive list of the items you’ll need:
- Image: High-resolution digital image.
- Printer: Inkjet or laser printer (depending on the method).
- Transfer Paper: Specifically designed for fabric transfers.
- Fabric: Choose natural fabrics like cotton, linen, or silk for best results.
- Gel Medium: Acrylic gel medium for gel transfer method.
- Citra Solv: Natural solvent for the Citra Solv method.
- Heat Source: Iron, heat press, or heat gun.
- Scissors or Cutting Machine: For trimming the image.
- Bone Folder or Smoothing Tool: For smoothing the image onto the fabric.
- Water: For soaking and removing paper.
- Soft Cloth or Sponge: For gently rubbing off paper.
- Painter’s Tape: To secure the fabric in place.
- Protective Surface: To protect your work area.
5. How To Prepare Your Image For Transferring To Fabric?
Proper image preparation is crucial for achieving the best possible results when transferring a photo to fabric. Here’s how to prepare your image:
5.1. Choose High-Resolution Images
Select images with high resolution to ensure clarity and detail in the final transfer. Images with at least 300 DPI (dots per inch) are recommended.
5.2. Edit And Adjust Colors
Use photo editing software to adjust the colors and contrast of your image. Enhancing the image beforehand can improve the vibrancy and visibility of the transfer.
5.3. Mirror The Image (If Necessary)
For methods like iron-on transfers, you’ll need to mirror the image horizontally before printing. This ensures that the image appears correctly on the fabric after the transfer.
5.4. Resize The Image
Resize the image to fit the desired dimensions on your fabric. Use photo editing software to adjust the size while maintaining the aspect ratio.
5.5. Print A Test Copy
Before printing on transfer paper, print a test copy on regular paper to check the size, color accuracy, and overall appearance of the image.
6. Step-By-Step Guide: How To Transfer A Photo To Fabric Using Iron-On Transfer Paper
Iron-on transfer paper is a straightforward method for transferring photos to fabric, perfect for beginners and small projects.
6.1. Gather Your Supplies
- Iron-on transfer paper
- Inkjet printer
- Fabric (cotton recommended)
- Iron
- Scissors
- Hard, heat-resistant surface
6.2. Prepare The Image
Edit and resize the image as needed. Mirror the image horizontally. Load the transfer paper into the inkjet printer, following the manufacturer’s instructions.
6.3. Print The Image
Print the image onto the transfer paper. Allow the ink to dry completely before proceeding.
6.4. Cut Out The Image
Use scissors to carefully cut out the image, leaving a small border around the edges.
6.5. Prepare The Fabric
Pre-wash and iron the fabric to remove any wrinkles. Place the fabric on a hard, heat-resistant surface.
6.6. Position The Image
Place the transfer paper face down on the fabric, positioning it where you want the image to appear.
6.7. Iron The Image
Set the iron to the highest heat setting without steam. Iron over the transfer paper, applying firm, even pressure for the time recommended by the transfer paper manufacturer (usually 1-3 minutes).
6.8. Cool And Peel
Allow the transfer to cool completely. Gently peel off the backing paper, revealing the transferred image.
7. Step-By-Step Guide: How To Transfer A Photo To Fabric Using Gel Medium
The gel medium method offers a durable and vintage-looking transfer, ideal for quilts, pillows, and mixed media art.
7.1. Gather Your Supplies
- Laser-printed image
- Acrylic gel medium
- Fabric (cotton or linen recommended)
- Brush or sponge
- Bone folder or smoothing tool
- Water
- Soft cloth or sponge
7.2. Prepare The Image
Print the image using a laser printer. Ensure the image is high-resolution and properly sized.
7.3. Apply Gel Medium
Apply a generous layer of acrylic gel medium to the front of the printed image. Ensure even coverage.
7.4. Position The Image
Place the image face down on the fabric, positioning it where you want the image to appear.
7.5. Smooth The Image
Use a bone folder or smoothing tool to smooth the image onto the fabric, applying firm, even pressure. Remove any air bubbles.
7.6. Dry Completely
Allow the gel medium to dry completely, usually overnight.
7.7. Remove The Paper
Dampen the back of the paper with water. Gently rub the paper with your fingers or a soft sponge to remove it, revealing the transferred image. Repeat until all paper is removed.
7.8. Final Touches
Allow the fabric to dry completely. The transferred image will have a slightly translucent, vintage look.
8. Step-By-Step Guide: How To Transfer A Photo To Fabric Using Citra Solv
The Citra Solv method is an eco-friendly way to transfer images, creating a unique, distressed look.
8.1. Gather Your Supplies
- Laser-printed image
- Citra Solv
- Fabric (natural fibers recommended)
- Cotton swabs or applicator
- Spoon or burnishing tool
8.2. Prepare The Image
Print the image using a laser printer. Ensure the image is high-resolution and properly sized.
8.3. Position The Image
Place the image face down on the fabric, positioning it where you want the image to appear.
8.4. Apply Citra Solv
Apply Citra Solv to the back of the paper using cotton swabs or an applicator. Work in a well-ventilated area.
8.5. Burnish The Image
Use a spoon or burnishing tool to gently rub the back of the paper, transferring the ink to the fabric.
8.6. Check The Transfer
Carefully lift a corner of the paper to check the transfer. If needed, apply more Citra Solv and continue burnishing.
8.7. Remove The Paper
Once the transfer is complete, carefully remove the paper. The transferred image will have a distressed, vintage look.
9. Troubleshooting Common Issues When Transferring Photos To Fabric
Even with careful preparation, issues can arise during the photo transfer process. Here are some common problems and how to solve them:
- Image Smudging: Ensure the ink is completely dry before transferring. Use a light touch when ironing or burnishing.
- Image Peeling: Apply even pressure when ironing or smoothing. Ensure the fabric is clean and free of debris.
- Fading Colors: Use high-quality transfer paper and inks. Adjust the image colors beforehand to enhance vibrancy.
- Uneven Transfer: Ensure the fabric is flat and wrinkle-free. Apply even pressure across the entire image.
- Paper Sticking: Dampen the paper thoroughly before removing. Use a soft cloth to gently rub off the paper.
10. Tips For Achieving The Best Results In Photo To Fabric Transfers
To ensure your photo transfers are successful and produce high-quality results, keep these tips in mind:
- Choose The Right Fabric: Natural fabrics like cotton, linen, and silk work best for most transfer methods.
- Use High-Quality Materials: Invest in good-quality transfer paper, inks, and gel mediums for better results.
- Prepare The Fabric: Pre-wash and iron the fabric to remove any sizing or wrinkles.
- Test Your Method: Practice on a scrap piece of fabric before transferring your final image.
- Follow Instructions Carefully: Read and follow the manufacturer’s instructions for your chosen transfer method and materials.
- Protect Your Transferred Image: After transferring, heat-set the image with an iron or heat press to make it more durable.
11. Creative Project Ideas Using Photo Transfers On Fabric
Photo transfers on fabric open up a wide range of creative possibilities. Here are some inspiring project ideas:
- Personalized Clothing: Transfer photos onto T-shirts, sweatshirts, and tote bags for custom apparel.
- Home Decor: Create personalized pillows, quilts, and wall hangings with photo transfers.
- Keepsake Gifts: Make unique gifts for friends and family by transferring photos onto fabric items.
- Mixed Media Art: Incorporate photo transfers into mixed media art projects and textile collages.
- Memory Quilts: Create memory quilts with photos of loved ones or special events.
- Custom Patches: Design and create custom patches with photo transfers for jackets and bags.
- Photo Coasters: Transfer images onto fabric squares and create unique photo coasters.
- Fabric Bookmarks: Personalize fabric bookmarks with favorite photos or quotes.
12. Caring For Your Photo Transferred Fabric
Proper care is essential to maintain the quality and longevity of your photo-transferred fabric items. Follow these guidelines:
- Wash Gently: Hand wash or machine wash on a gentle cycle with cold water.
- Use Mild Detergent: Use a mild, non-bleach detergent.
- Turn Inside Out: Turn the fabric inside out before washing.
- Avoid Harsh Chemicals: Avoid using bleach, fabric softeners, or harsh chemicals.
- Air Dry: Air dry the fabric or tumble dry on low heat.
- Iron Carefully: Iron inside out on a low heat setting, avoiding direct contact with the transferred image.
- Avoid Direct Sunlight: Store the fabric away from direct sunlight to prevent fading.
13. Exploring Advanced Techniques In Photo To Fabric Transfer
Once you’ve mastered the basics, explore these advanced techniques to elevate your photo transfer skills:
- Layering Images: Layer multiple transferred images to create complex and textured designs.
- Adding Embellishments: Enhance your photo transfers with embroidery, beads, or other embellishments.
- Using Different Fabric Textures: Experiment with different fabric textures to add depth and interest to your transfers.
- Combining Methods: Combine different transfer methods for unique effects, such as using gel medium over an iron-on transfer.
- Creating Fabric Books: Transfer photos onto fabric pages and create unique fabric books.
14. Resources And Further Learning For Photo Transfer To Fabric
Expand your knowledge and skills with these resources and learning opportunities:
- Online Tutorials: Explore online tutorials and video demonstrations on websites like dfphoto.net.
- Workshops And Classes: Attend workshops and classes at local craft stores or art centers.
- Books And Magazines: Read books and magazines on fabric arts and photo transfer techniques.
- Online Forums: Join online forums and communities to connect with other crafters and share ideas.
- Photography Department at the Santa Fe University of Art and Design: Access resources and workshops related to photography and its applications in art and design. Address: 1600 St Michael’s Dr, Santa Fe, NM 87505, United States. Phone: +1 (505) 471-6001. Website: dfphoto.net.
15. How Can dfphoto.net Help You Learn More About Photo Transfer?
At dfphoto.net, we are dedicated to providing comprehensive resources, inspiration, and community support for photographers and fabric artists alike.
- Detailed Guides: Our website features in-depth guides on various photo transfer techniques, complete with step-by-step instructions and helpful tips.
- Inspiring Galleries: Browse our galleries showcasing stunning examples of photo transfers on fabric, providing you with ideas and motivation for your own projects.
- Community Forum: Connect with fellow artists and crafters in our community forum, where you can share your work, ask questions, and exchange tips and advice.
- Expert Advice: Access expert advice from experienced photographers and fabric artists, who share their knowledge and insights on achieving the best results.
- Product Reviews: Find honest reviews of transfer papers, gel mediums, and other essential supplies, helping you make informed decisions for your projects.
16. What Are The Benefits Of Using dfphoto.net?
By visiting dfphoto.net, you gain access to a wealth of resources and opportunities that can enhance your skills and creativity in photo transfer:
- Comprehensive Learning: Master various photo transfer techniques with our detailed guides and tutorials.
- Inspiration: Discover innovative project ideas and stunning examples in our galleries.
- Community Support: Connect with a vibrant community of like-minded artists and crafters.
- Expert Insights: Benefit from the knowledge and experience of industry professionals.
- Resourceful Reviews: Make informed decisions with our product reviews and recommendations.
17. What Future Trends In Photo To Fabric Transfer Should I Look Out For?
As technology and creative practices evolve, several exciting trends are emerging in the world of photo-to-fabric transfer:
- Eco-Friendly Materials: Increased focus on sustainable and environmentally friendly transfer papers, inks, and mediums.
- Advanced Printing Technologies: Innovations in digital fabric printing, allowing for more intricate and durable photo transfers.
- Smart Fabrics: Integration of photo transfers with smart fabrics and wearable technology.
- Personalized Customization: Growing demand for personalized and customized fabric items with photo transfers.
- DIY Kits: Expansion of DIY kits with all the necessary supplies and instructions for easy photo transfers at home.
18. What Are The Safety Precautions While Transferring Photos To Fabric?
Safety should always be a priority when working with any crafting or art materials. Here are some essential safety precautions to follow when transferring photos to fabric:
- Ventilation: Work in a well-ventilated area, especially when using solvents or chemicals.
- Protective Gear: Wear gloves and eye protection to avoid skin and eye irritation.
- Heat Safety: Use caution when working with irons or heat presses. Keep flammable materials away from heat sources.
- Material Handling: Follow the manufacturer’s instructions for safe handling and disposal of transfer papers, inks, and mediums.
- Workspace: Keep your workspace clean and organized to prevent accidents.
- Child and Pet Safety: Keep materials out of reach of children and pets.
19. How Does Photo To Fabric Transfer Compare To Other Fabric Decoration Techniques?
Photo to fabric transfer is just one of many methods for decorating fabric. Here’s a comparison with other common techniques:
| Technique | Process | Pros | Cons | Best For |
|---|---|---|---|---|
| Photo Transfer | Imprinting an image onto fabric using heat, gel medium, or solvents. | Allows for detailed and personalized designs, combines photography with fabric arts. | Can be tricky to master, some methods may not be as durable. | Creating personalized clothing, home decor, and unique gifts. |
| Screen Printing | Pushing ink through a stenciled screen onto fabric. | Produces durable, high-quality prints, ideal for large-scale production. | Requires specialized equipment and skills, less suitable for small, personalized projects. | Mass-producing T-shirts, posters, and other items with the same design. |
| Embroidery | Decorating fabric with needle and thread. | Adds texture and dimension, creates a handcrafted look, very durable. | Time-consuming, requires skill and patience, not suitable for highly detailed images. | Adding decorative elements to clothing, creating monograms, and embellishing home decor items. |
| Fabric Painting | Applying paint directly onto fabric. | Allows for freehand designs and artistic expression, easy to customize. | Can be less durable than other methods, may require special paints and techniques. | Creating unique, one-of-a-kind designs on clothing, canvas art, and other fabric items. |
| Tie-Dye | Folding, twisting, and securing fabric before applying dye. | Creates unique and colorful patterns, fun and easy to do at home. | Results can be unpredictable, not suitable for precise designs. | Creating vibrant and eye-catching patterns on T-shirts, scarves, and other clothing items. |
| Digital Fabric Printing | Printing images directly onto fabric using specialized digital printers. | Produces high-quality, detailed prints, ideal for complex designs and large-scale production. | Requires specialized equipment, less accessible for home crafters. | Commercial projects, custom fabric design, and creating intricate patterns on clothing and home decor items. |
| Block Printing | Carving a design into a block and stamping it onto fabric. | Creates unique, handcrafted designs, allows for repetitive patterns. | Requires carving skills, can be time-consuming for large projects. | Creating unique patterns on fabric, customizing home decor items, and adding a handcrafted touch to clothing. |
| Stenciling | Applying paint or ink through a cutout stencil onto fabric. | Allows for precise designs and repetitive patterns, easy to customize. | Can be time-consuming for intricate designs, requires careful application to avoid smudging. | Creating custom designs on clothing, home decor items, and adding decorative elements to fabric. |
20. Faqs About How To Transfer A Photo To Fabric
Let’s address some frequently asked questions about transferring photos to fabric:
20.1. Can I Transfer Any Photo To Fabric?
Yes, you can transfer most photos to fabric, but high-resolution images will yield the best results.
20.2. What Type Of Fabric Works Best For Photo Transfers?
Natural fabrics like cotton, linen, and silk generally work best, as they absorb the transfer materials well.
20.3. Do I Need A Special Printer To Transfer Photos To Fabric?
Depending on the method, you may need an inkjet or laser printer. Check the requirements for your chosen transfer technique.
20.4. How Do I Prevent The Image From Fading After Transferring?
Use high-quality transfer paper and inks, and heat-set the image after transferring to make it more durable.
20.5. Can I Wash Fabric That Has Been Photo Transferred?
Yes, but wash gently with cold water and mild detergent. Turn the fabric inside out and air dry.
20.6. What Is The Best Way To Remove Paper After A Gel Medium Transfer?
Dampen the paper with water and gently rub it off with your fingers or a soft sponge.
20.7. How Can I Make My Photo Transfer More Durable?
Heat-set the image with an iron or heat press, and avoid harsh chemicals when washing.
20.8. What If My Image Smudges During The Transfer Process?
Ensure the ink is completely dry before transferring, and use a light touch when ironing or burnishing.
20.9. Can I Transfer Photos To Dark Fabrics?
Yes, but you may need to use special transfer paper designed for dark fabrics, which includes a white layer to make the image visible.
20.10. Where Can I Buy The Supplies Needed For Photo Transfers?
You can purchase transfer paper, gel mediums, and other supplies at craft stores, art supply stores, and online retailers like dfphoto.net.
We hope this comprehensive guide has inspired you to explore the creative possibilities of photo transfer to fabric. At dfphoto.net, we are committed to helping you master this technique and express your unique artistic vision. Visit our website today to discover more resources, tutorials, and inspiration for your next photo transfer project!
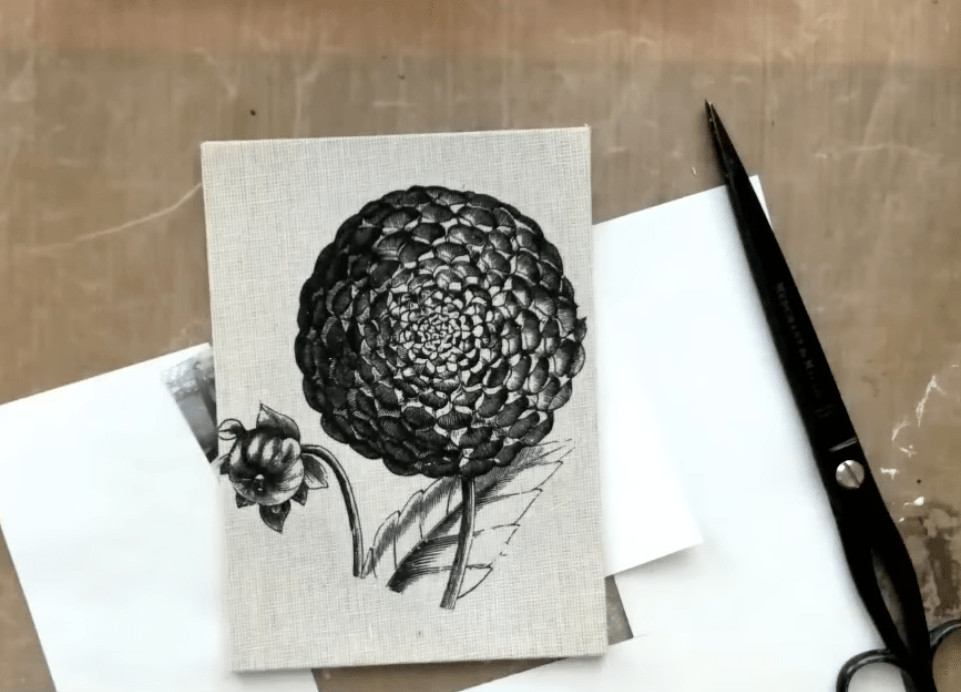 High contrast image ready for fabric transfer
 Materials laid out for transferring images onto fabric