Transferring a photo onto fabric opens up a world of creative possibilities, blending the art of photography with textile design and mixed media projects. At dfphoto.net, we are passionate about exploring innovative techniques in photography and visual arts, providing enthusiasts with the knowledge and inspiration they need to excel. This guide dives deep into the art of photo transfer to fabric, offering a detailed, SEO-optimized journey that caters specifically to the vibrant community of photographers and artisans across the USA, ensuring your artistic endeavors are both beautiful and enduring.
1. What Is Photo Transfer To Fabric and Why Should You Try It?
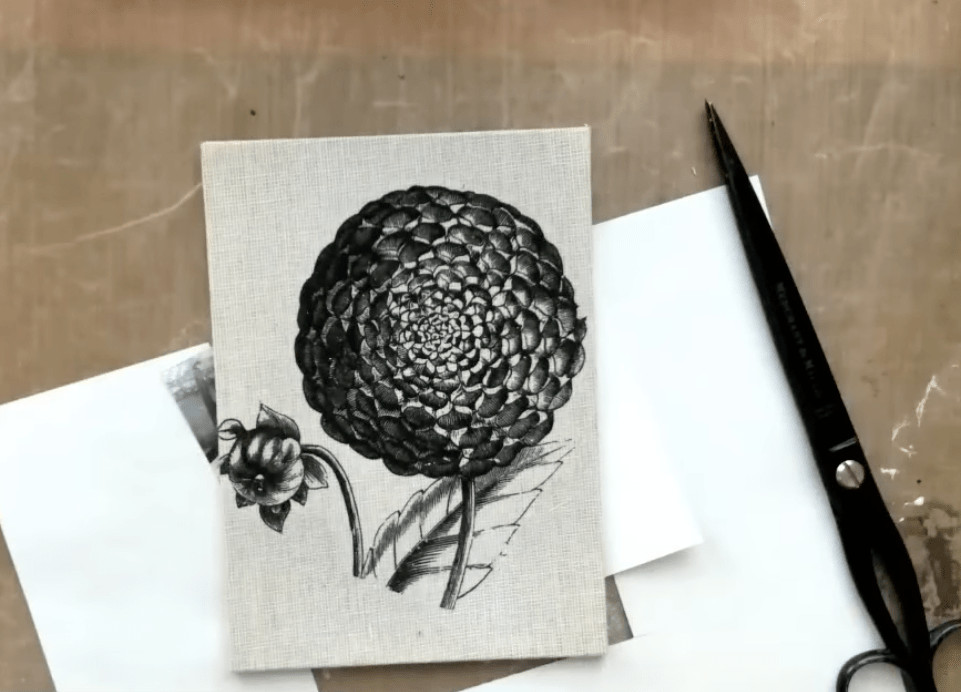
Photo transfer to fabric is a technique used to imprint an image onto a piece of fabric, creating personalized items like custom t-shirts, unique home decor, or cherished keepsakes. This fusion of photography and fabric crafts allows for the incorporation of personal images or designs into textile projects, offering a distinctive artistic expression.
- Creative Freedom: Transferring images onto fabric gives you complete control over the design, allowing you to create personalized items that reflect your unique style and vision.
- Versatility: Use a variety of fabrics such as cotton, linen, or silk to match your specific project needs and aesthetic preferences.
- Unique Gifts: Personalized fabric prints make thoughtful, one-of-a-kind gifts for friends and family, adding a personal touch to any occasion.
2. What Are the Key Intended Uses For Photo Transferring Onto Fabric?
Understanding the diverse applications of photo transfer onto fabric unlocks a myriad of creative possibilities. Whether you’re aiming to personalize your wardrobe, create unique home decor, or produce custom gifts, the versatility of this technique is unmatched. Here’s a closer look at the key intended uses that resonate with our community at dfphoto.net:
- Custom Apparel: One of the most popular uses is creating custom t-shirts, tote bags, and other apparel items with personal photos or designs. This allows individuals to express their unique style and create personalized fashion statements.
- Home Decor: Photo transfers can be used to create custom throw pillows, wall hangings, and other home decor items, adding a personal touch to interior spaces. Imagine showcasing your favorite landscapes or family portraits in a unique and artistic way.
- Quilting and Patchwork: Incorporating photo transfers into quilting and patchwork projects adds a special, sentimental element. This is particularly popular for creating memory quilts or personalized fabric art.
- DIY Gifts: Personalized photo fabric prints make heartfelt, one-of-a-kind gifts for friends and family. Whether it’s a custom baby blanket or a photo-adorned scarf, these gifts are sure to be cherished.
- Art and Craft Projects: Artists and crafters use photo transfers as a mixed media technique to add images to their fabric-based creations. This can include anything from altered books to fabric collages.
- Event Souvenirs: Create memorable event souvenirs like custom banners, tablecloths, or small fabric keepsakes featuring event photos or logos. This is a great way to commemorate special occasions.
- Promotional Items: Businesses can use photo transfers to create branded merchandise such as promotional bags or custom-designed apparel, offering a unique way to market their brand.
- Upholstery and Furniture: For more advanced projects, photo transfers can be applied to upholstery fabric to create custom furniture pieces with unique designs or patterns.
3. What Are The Benefits Of Photo Transferring Onto Fabric?
Transferring photos onto fabric offers a multitude of advantages, making it a favorite among photographers, artists, and DIY enthusiasts. From personalization to cost-effectiveness, let’s explore the benefits that make this technique so appealing, particularly within the dfphoto.net community:
- Personalization: Photo transfer allows for complete customization, enabling you to create unique items that reflect personal style, memories, or artistic vision.
- Cost-Effective: Compared to purchasing custom-printed fabrics or items, transferring photos onto fabric can be a more budget-friendly option, especially for small-scale projects.
- Creative Expression: This technique offers a creative outlet to experiment with different images, fabrics, and mixed media techniques, fostering artistic growth and innovation.
- Unique Gifts: Personalized fabric prints make thoughtful, one-of-a-kind gifts for friends and family, adding a personal touch to any occasion.
- Upcycling Opportunities: Photo transfer can be used to upcycle old fabrics or garments, giving them a new lease on life with personalized images or designs.
- Durable Results: With the right techniques and materials, transferred images can be durable and long-lasting, able to withstand washing and wear.
- Versatile Applications: From apparel and home decor to art projects and gifts, photo transfer can be applied to a wide range of fabric-based items, offering endless possibilities.
- Sentimental Value: Transferring cherished photos onto fabric creates keepsakes with sentimental value, preserving memories in a tangible and lasting way.
- Professional Results: With practice and attention to detail, photo transfers can achieve professional-looking results, making them suitable for commercial purposes.
- Easy to Learn: While mastering the technique may take time, the basic principles of photo transfer are relatively easy to learn, making it accessible to beginners and experienced crafters alike.
4. What Materials Do You Need To Transfer A Photo Onto Fabric?
To successfully transfer a photo onto fabric, gathering the right materials is essential. Here’s a comprehensive list tailored to our audience at dfphoto.net, ensuring you have everything you need for a smooth and satisfying creative process:
- Image: Choose a high-resolution digital image for best results. Ensure the image is clear and has good contrast.
- Printer: Use either an inkjet or laser printer, depending on the transfer method. Laser printers are often preferred for their durability and sharpness.
- Transfer Paper: Select appropriate transfer paper designed for either light or dark fabrics, depending on your fabric color.
- Fabric: Opt for natural fabrics like cotton, linen, or a cotton-poly blend for better adhesion and durability. Pre-wash the fabric to remove any sizing.
- Scissors or Craft Knife: Use sharp scissors or a craft knife for precise cutting of the image from the transfer paper.
- Iron or Heat Press: An iron is suitable for smaller projects, while a heat press provides more even heat distribution and is ideal for larger or frequent projects.
- Parchment Paper or Teflon Sheet: Place this between the iron/heat press and the transfer to protect both the fabric and the equipment.
- Hard, Heat-Resistant Surface: Use an ironing board or a solid, heat-resistant surface for applying the transfer.
- Optional: Software for Image Editing: Programs like Adobe Photoshop or GIMP can help you adjust the image, flip it horizontally (mirror image), and enhance its quality before printing.
- Optional: Cutting Machine: For intricate designs or precise cuts, a cutting machine like Cricut or Silhouette can be very helpful.
By assembling these materials, you’ll be well-prepared to explore the art of photo transfer onto fabric, creating personalized items that reflect your unique style and vision.
5. What Are The Different Methods Available For Transferring A Photo Onto Fabric?
Exploring the various methods for transferring a photo onto fabric opens up a world of creative possibilities. Each technique offers unique advantages and caters to different preferences, skill levels, and desired outcomes. Here’s an overview of the most popular methods, tailored for our community at dfphoto.net:
5.1. Iron-On Transfer Paper
Description: Iron-on transfer paper is a popular and accessible method for transferring images onto fabric. It involves printing the image onto special transfer paper, then using an iron or heat press to transfer the image onto the fabric.
Process:
- Print the image in reverse (mirror image) onto the transfer paper.
- Cut out the image, leaving a small border if desired.
- Place the transfer paper image-side down onto the fabric.
- Cover with parchment paper or a Teflon sheet.
- Apply heat and pressure with an iron or heat press according to the manufacturer’s instructions.
- Peel off the transfer paper backing.
Pros:
- Easy to use.
- Requires minimal equipment.
- Suitable for small projects and beginners.
Cons:
- The transfer may feel stiff on the fabric.
- Image quality may not be as vibrant as other methods.
- Durability can be limited, especially with frequent washing.
5.2. Direct Printing with Inkjet or Sublimation Printers
Description: This method involves printing directly onto fabric using specialized inkjet or sublimation printers.
Process:
- Prepare the fabric by treating it with a pre-treatment solution if necessary.
- Load the fabric into the printer.
- Print the image directly onto the fabric.
- Heat-set the image to make it permanent (usually with a heat press).
Pros:
- High-quality, vibrant images.
- Soft feel on the fabric.
- Good durability.
Cons:
- Requires specialized printers and inks.
- More expensive than other methods.
- Limited to certain types of fabrics (usually polyester for sublimation).
5.3. Image Transfer with Gel Medium
Description: This technique uses a gel medium to adhere the image to the fabric.
Process:
- Print the image (non-mirrored) on regular paper using a laser printer.
- Apply a thick layer of gel medium to the fabric.
- Place the image face down onto the gel medium.
- Smooth out any air bubbles.
- Let it dry completely (usually overnight).
- Dampen the paper with water and gently rub away the paper backing to reveal the transferred image.
Pros:
- Creates a vintage or distressed look.
- Can be used on a variety of fabrics.
- Relatively inexpensive.
Cons:
- Requires patience and careful application.
- Image may not be as sharp or vibrant as other methods.
- Can be messy.
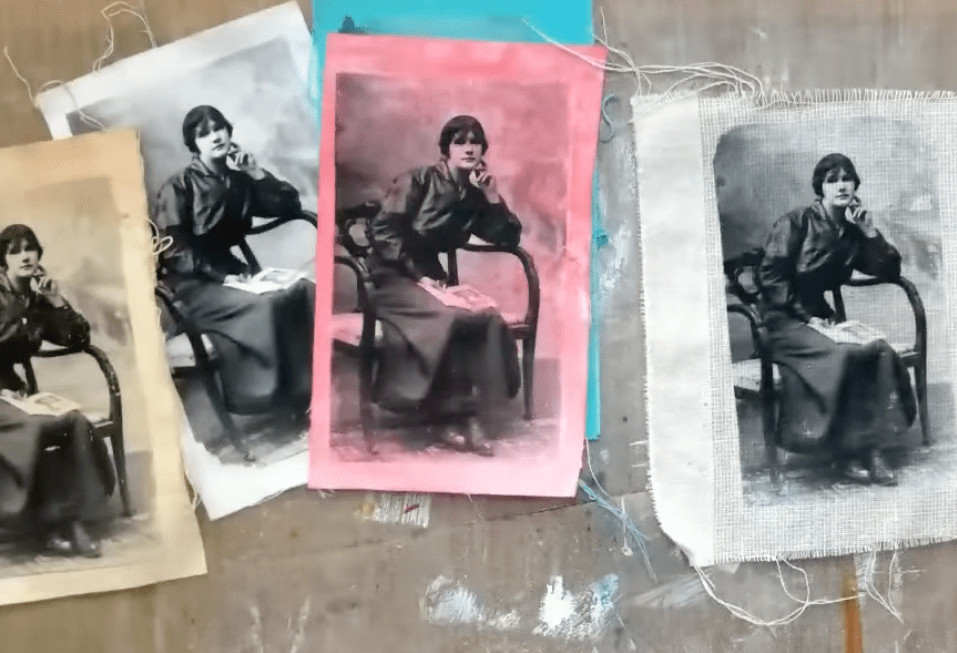
5.4. Citra Solv Method
Description: This eco-friendly method uses Citra Solv, a natural cleaner and degreaser, to transfer images onto fabric.
Process:
- Print the image (non-mirrored) on regular paper using a laser printer.
- Place the image face down onto the fabric.
- Apply Citra Solv to the back of the paper.
- Rub the back of the paper with a spoon or bone folder to transfer the image.
- Carefully peel off the paper.
Pros:
- Eco-friendly.
- Creates a vintage or distressed look.
- Inexpensive.
Cons:
- Image quality may vary.
- Requires careful application to avoid smudging.
- The scent of Citra Solv may be strong.
5.5. Acrylic Paint Method
Description: Using acrylic paint as a transfer medium is a creative way to add images to fabric.
Process:
- Print the image (non-mirrored) on regular paper using a laser printer.
- Apply a layer of acrylic paint to the fabric.
- Place the image face down onto the painted fabric.
- Press firmly and let it dry completely.
- Dampen the paper with water and gently rub away the paper backing to reveal the transferred image.
Pros:
- Adds texture to the fabric.
- Can be used with a variety of acrylic paints.
- Creates a unique, artistic look.
Cons:
- Image may not be as sharp or vibrant as other methods.
- Can be challenging to achieve a clean transfer.
- May require experimentation to find the right paint and technique.
6. How Do You Choose The Right Method?
Selecting the right method for transferring a photo onto fabric depends on various factors, including the desired outcome, budget, fabric type, and level of expertise. Here’s a guide to help our dfphoto.net community make the best choice:
- Desired Outcome: Consider the look you want to achieve. For high-quality, vibrant images with a soft feel, direct printing with inkjet or sublimation printers is ideal. If you prefer a vintage or distressed look, gel medium, Citra Solv, or acrylic paint methods may be more suitable.
- Budget: Evaluate your budget for materials and equipment. Iron-on transfer paper, gel medium, Citra Solv, and acrylic paint methods are generally more affordable, while direct printing requires a specialized printer and inks.
- Fabric Type: Certain methods work better with specific fabrics. Direct printing with sublimation printers is best for polyester fabrics, while iron-on transfers, gel medium, Citra Solv, and acrylic paint methods can be used on a variety of fabrics like cotton, linen, and blends.
- Level of Expertise: If you’re a beginner, iron-on transfer paper is the easiest method to start with. More advanced techniques like direct printing or gel medium transfers may require more practice and skill.
- Durability: Consider the durability of the transfer, especially if the item will be washed frequently. Direct printing methods generally offer better durability, while iron-on transfers may fade or crack over time.
- Project Size: For small projects, iron-on transfers, gel medium, Citra Solv, and acrylic paint methods are convenient and cost-effective. For larger projects, direct printing with a heat press may be more efficient.
- Equipment Availability: Assess the equipment you have on hand. If you have an iron or heat press, iron-on transfers are a simple option. For direct printing, you’ll need a specialized printer.
- Eco-Friendliness: If you prioritize eco-friendly options, consider the Citra Solv method, which uses a natural cleaner and degreaser.
By considering these factors, you can select the method that best suits your needs and preferences, ensuring a successful and satisfying photo transfer experience.
7. Step-by-Step Guide: How To Transfer A Photo Onto Fabric Using Iron-On Transfer Paper
Using iron-on transfer paper is a straightforward way to transfer photos onto fabric, perfect for beginners and small projects. Here’s a detailed step-by-step guide tailored for our dfphoto.net community:
7.1. Gather Your Materials
- High-resolution digital image
- Inkjet or laser printer
- Iron-on transfer paper (for light or dark fabrics)
- Scissors
- Iron
- Parchment paper or Teflon sheet
- Hard, heat-resistant surface
- Fabric (pre-washed)
7.2. Prepare Your Image
- Edit the Image: Use photo editing software to adjust the image as needed. Ensure the image is clear and has good contrast.
- Mirror the Image: Flip the image horizontally (mirror image) to ensure it appears correctly on the fabric after the transfer. Most photo editing software has an option for this.
- Print the Image: Load the transfer paper into your printer according to the manufacturer’s instructions. Print the mirrored image onto the transfer paper.
- Note: Follow the transfer paper instructions regarding the type of printer (inkjet or laser) and print settings.
7.3. Prepare Your Fabric
- Pre-wash the Fabric: Wash the fabric without fabric softener to remove any sizing or finishes that may interfere with the transfer.
- Iron the Fabric: Iron the fabric to create a smooth, wrinkle-free surface.
7.4. Cut Out the Image
- Trim the Transfer Paper: Use scissors to carefully cut out the image from the transfer paper. Leave a small border around the image if desired.
7.5. Transfer the Image
- Set Up Your Iron: Place the ironing board or heat-resistant surface on a stable surface. Set your iron to the appropriate heat setting (usually cotton or high heat), and turn off the steam setting.
- Position the Image: Place the fabric on the ironing board and position the transfer paper image-side down onto the fabric where you want the image to appear.
- Cover with Parchment Paper: Place a sheet of parchment paper or a Teflon sheet over the transfer paper to protect both the fabric and the iron.
- Iron the Image: Press the iron firmly onto the parchment paper and move it in a slow, steady motion over the entire image. Apply even pressure for the recommended time specified on the transfer paper instructions (usually 30-60 seconds).
- Note: Avoid using circular motions, as this can cause the image to smudge.
- Cool Down: Allow the transfer to cool completely before peeling off the backing paper. Follow the transfer paper instructions regarding whether to peel the backing hot or cold.
7.6. Peel Off the Backing Paper
- Peel Carefully: Gently peel off the backing paper from one corner. If the image appears to be lifting, stop and re-iron the area for a few more seconds, then allow it to cool again before peeling.
- Check the Transfer: Ensure the image has transferred completely and is adhered to the fabric.
7.7. Finalize the Transfer
- Protect the Image: Place the parchment paper or Teflon sheet over the transferred image and iron it again for a few seconds to further set the image and protect it during washing.
7.8. Care Instructions
- Wait Before Washing: Wait at least 24 hours before washing the fabric.
- Wash Inside Out: Turn the fabric inside out before washing.
- Use Cold Water: Wash in cold water on a gentle cycle.
- Avoid Bleach: Do not use bleach or harsh detergents.
- Tumble Dry Low: Tumble dry on low heat or hang to dry.
- Iron Inside Out: If ironing, iron inside out on a low setting.
By following these steps, you can successfully transfer a photo onto fabric using iron-on transfer paper, creating personalized items with professional results.
8. Tips For Achieving A High-Quality Photo Transfer
Achieving a high-quality photo transfer onto fabric requires attention to detail and careful execution. Here are some essential tips tailored for our dfphoto.net community to ensure your projects look professional and last longer:
- Use High-Resolution Images: Start with the highest resolution image possible. A clear, sharp image will result in a better transfer.
- Choose the Right Transfer Paper: Select transfer paper specifically designed for the color of your fabric (light or dark). Using the wrong paper can result in a faded or unclear image.
- Mirror the Image: Always mirror the image before printing when using iron-on transfer paper. This ensures the image appears correctly on the fabric after the transfer.
- Test Print: Do a test print on regular paper to check the image size, color accuracy, and overall appearance before printing on the transfer paper.
- Pre-Wash Fabric: Always pre-wash the fabric to remove any sizing or finishes that may interfere with the transfer. This also helps prevent shrinkage after the transfer.
- Iron Fabric Smooth: Iron the fabric to create a smooth, wrinkle-free surface before applying the transfer.
- Use Firm, Even Pressure: When ironing, apply firm, even pressure to the entire image. Avoid using circular motions, as this can cause smudging.
- Follow Transfer Paper Instructions: Always follow the manufacturer’s instructions for heat settings, ironing time, and peeling the backing paper.
- Let Cool Completely: Allow the transfer to cool completely before peeling off the backing paper. Peeling too soon can cause the image to lift or smudge.
- Protect the Image: After transferring, protect the image by covering it with parchment paper or a Teflon sheet and ironing it again for a few seconds. This helps set the image and protect it during washing.
- Use Quality Equipment: Invest in a good quality iron or heat press for more consistent results. A heat press provides even heat distribution and pressure, which can improve the quality and durability of the transfer.
- Check Printer Settings: Ensure your printer settings are optimized for the type of paper you’re using. Adjust the print quality to the highest setting for best results.
- Avoid Over-Ironing: Over-ironing can damage the transfer and cause the image to fade or crack. Follow the recommended ironing time and avoid prolonged exposure to heat.
- Wash Carefully: Wash the fabric inside out in cold water on a gentle cycle. Avoid using bleach or harsh detergents. Tumble dry on low heat or hang to dry.
- Store Properly: Store fabric items with transferred images away from direct sunlight to prevent fading.
By following these tips, you can achieve high-quality photo transfers that look professional, last longer, and showcase your creativity.
9. How To Care For Your Photo-Transferred Fabric
Proper care is essential to prolong the life of your photo-transferred fabric items. Here are some guidelines tailored for our dfphoto.net community to ensure your creations remain vibrant and durable:
- Wait Before Washing: Allow at least 24 hours after the transfer before washing the fabric. This gives the image time to fully set and adhere to the fabric.
- Turn Inside Out: Always turn the fabric inside out before washing. This protects the transferred image from direct friction and abrasion during the wash cycle.
- Use Cold Water: Wash in cold water to prevent the colors from fading or bleeding. Cold water is gentler on the fabric and the transferred image.
- Gentle Cycle: Use a gentle cycle on your washing machine to minimize wear and tear on the fabric and the transferred image.
- Mild Detergent: Use a mild, pH-neutral detergent that is free from bleach and harsh chemicals. Harsh detergents can damage the transferred image and cause it to fade or crack.
- Avoid Bleach: Do not use bleach or any products containing bleach, as they can significantly fade or damage the transferred image.
- Skip Fabric Softener: Avoid using fabric softener, as it can leave a residue on the fabric that may affect the transferred image over time.
- Tumble Dry Low: If using a dryer, tumble dry on low heat to prevent the transferred image from cracking or peeling. High heat can damage the image and shorten its lifespan.
- Hang to Dry: For best results, hang the fabric to dry. This is the gentlest method and helps prolong the life of the transferred image.
- Iron Inside Out: If ironing is necessary, iron the fabric inside out on a low setting. Place a piece of parchment paper or a Teflon sheet over the transferred image to protect it from direct heat.
- Avoid Direct Sunlight: Store fabric items with transferred images away from direct sunlight to prevent fading. Prolonged exposure to sunlight can cause the colors to fade over time.
- Handle with Care: Handle the fabric items with care to avoid excessive stretching or rubbing of the transferred image.
- Spot Clean When Possible: If the fabric item is only lightly soiled, consider spot cleaning instead of washing the entire item. This can help preserve the transferred image and extend the life of the fabric.
By following these care instructions, you can help ensure that your photo-transferred fabric items remain vibrant, durable, and cherished for years to come.
10. Troubleshooting Common Issues
Even with careful preparation, you may encounter issues when transferring photos onto fabric. Here are solutions to common problems tailored for our dfphoto.net community:
-
Image Not Transferring Completely:
- Problem: Parts of the image are not adhering to the fabric.
- Solution:
- Ensure the iron or heat press is at the correct temperature.
- Apply firm, even pressure to all areas of the image.
- Increase the ironing time slightly.
- Make sure the fabric is smooth and wrinkle-free.
-
Image Smudging or Blurring:
- Problem: The transferred image appears smudged or blurred.
- Solution:
- Avoid using circular motions when ironing.
- Ensure the fabric is stable and doesn’t move during the transfer process.
- Reduce the ironing time slightly.
- Allow the transfer to cool completely before peeling off the backing paper.
-
Image Fading After Washing:
- Problem: The transferred image fades or loses vibrancy after washing.
- Solution:
- Use a high-quality transfer paper designed for durability.
- Follow the care instructions carefully, washing inside out in cold water on a gentle cycle.
- Avoid using bleach or harsh detergents.
- Tumble dry on low heat or hang to dry.
-
Backing Paper Sticking to the Fabric:
- Problem: The backing paper is difficult to peel off and sticks to the fabric.
- Solution:
- Ensure the transfer has cooled completely before peeling.
- If the paper is still sticking, re-iron the area for a few more seconds and allow it to cool again.
- Try peeling the paper from a different corner.
- Use a pair of tweezers to gently lift the edge of the paper.
-
Image Cracking or Peeling:
- Problem: The transferred image cracks or peels after washing or with wear.
- Solution:
- Use a flexible transfer paper designed to move with the fabric.
- Avoid stretching or pulling the fabric excessively.
- Follow the care instructions carefully, avoiding high heat and harsh chemicals.
- If ironing, iron inside out on a low setting.
-
Yellowing of the Fabric:
- Problem: The fabric around the transferred image turns yellow.
- Solution:
- Reduce the ironing time and temperature.
- Use a parchment paper or Teflon sheet to protect the fabric from direct heat.
- Ensure the fabric is clean and free from any residues before transferring.
-
Uneven Transfer:
- Problem: The image transfers unevenly, with some areas appearing lighter than others.
- Solution:
- Apply firm, even pressure to all areas of the image.
- Ensure the ironing surface is flat and stable.
- Check the iron or heat press for even heat distribution.
-
Wrong Image Orientation:
- Problem: The image appears backwards on the fabric.
- Solution:
- Always mirror the image before printing when using iron-on transfer paper.
- Double-check the image orientation before printing to avoid this mistake.
By addressing these common issues with the right solutions, you can ensure a successful and satisfying photo transfer experience.
11. Inspiration: Creative Project Ideas
Transferring photos onto fabric opens up a world of creative possibilities. Here are some inspiring project ideas tailored for our dfphoto.net community to spark your imagination:
- Custom T-Shirts:
- Idea: Create personalized t-shirts with family photos, favorite quotes, or unique designs.
- Tip: Use high-quality transfer paper and follow care instructions to ensure the design lasts.
- Personalized Tote Bags:
- Idea: Design tote bags with scenic landscapes, pet portraits, or artistic patterns.
- Tip: Choose durable fabrics like canvas or cotton twill for long-lasting use.
 Canvas tote bag featuring a vibrant photo transfer of a scenic landscape, showcasing the durability and artistic possibilities
Alt text: Canvas tote bag featuring a vibrant photo transfer of a scenic landscape, showcasing the durability and artistic possibilities.
- Photo Quilts:
- Idea: Create a memory quilt with photos of special occasions, family members, or memorable events.
- Tip: Use a combination of fabric blocks and photo transfers to create a unique and sentimental quilt.
- Custom Throw Pillows:
- Idea: Design throw pillows with favorite vacation photos, inspirational quotes, or personalized monograms.
- Tip: Use soft, comfortable fabrics like cotton or linen for a cozy feel.
- Unique Wall Art:
- Idea: Create fabric wall hangings with artistic photo transfers, abstract designs, or nature-inspired patterns.
- Tip: Mount the fabric onto a wooden frame or canvas for a polished look.
- Personalized Baby Blankets:
- Idea: Design baby blankets with adorable animal photos, baby names, or birthdates.
- Tip: Use soft, hypoallergenic fabrics like cotton flannel or bamboo for baby’s delicate skin.
 Close-up of a personalized baby blanket featuring a cute animal photo transfer, highlighting the soft, hypoallergenic fabric
Alt text: Close-up of a personalized baby blanket featuring a cute animal photo transfer, highlighting the soft, hypoallergenic fabric.
- Custom Aprons:
- Idea: Design aprons with fun graphics, family recipes, or personalized names.
- Tip: Choose durable, stain-resistant fabrics like denim or canvas for practical use.
- Decorative Table Runners:
- Idea: Create table runners with elegant patterns, seasonal designs, or personalized monograms.
- Tip: Use high-quality fabrics like linen or damask for a sophisticated touch.
- Personalized Fabric Coasters:
- Idea: Design fabric coasters with unique patterns, family photos, or artistic designs.
- Tip: Use absorbent fabrics like cotton or felt for practical use.
- Custom Fabric Labels:
- Idea: Create fabric labels with logos, care instructions, or personalized messages for handmade items.
- Tip: Use durable, washable fabrics like cotton twill or satin for long-lasting labels.
These creative project ideas are just the beginning. With a little imagination and the right techniques, you can transform ordinary fabrics into personalized works of art.
12. What Are The Future Trends In Photo Transferring?
The field of photo transferring onto fabric is continuously evolving, driven by technological advancements and creative innovations. Here’s a glimpse into the future trends that our dfphoto.net community can look forward to:
- Eco-Friendly Materials:
- Trend: Increased use of sustainable and eco-friendly materials, such as organic cotton, recycled fabrics, and water-based transfer mediums.
- Impact: Reduces environmental impact and appeals to eco-conscious consumers.
- Advanced Transfer Technologies:
- Trend: Development of new transfer technologies that offer improved image quality, durability, and ease of use.
- Impact: Creates more professional and long-lasting results with less effort.
- Direct-to-Garment (DTG) Printing:
- Trend: Wider adoption of DTG printing, which allows for high-resolution, full-color images to be printed directly onto fabric with minimal setup.
- Impact: Enables on-demand customization and intricate designs with vibrant colors.
- Sublimation Printing on More Fabrics:
- Trend: Expansion of sublimation printing to a broader range of fabrics beyond polyester, offering more versatility in textile customization.
- Impact: Allows for sublimation printing on natural fabrics like cotton and linen, opening up new creative possibilities.
- Smart Fabrics and Wearable Tech:
- Trend: Integration of photo transfers with smart fabrics and wearable technology, creating interactive and personalized garments.
- Impact: Enables dynamic displays and customized designs that can change based on user preferences or environmental conditions.
- DIY and Crafting Innovations:
- Trend: Innovations in DIY and crafting tools that make photo transferring more accessible and user-friendly for hobbyists and small businesses.
- Impact: Empowers individuals to create personalized fabric items at home with professional-quality results.
- Customization and Personalization:
- Trend: Growing demand for customized and personalized products, driving the development of new techniques and services for photo transferring onto fabric.
- Impact: Creates opportunities for businesses to offer unique, made-to-order fabric items that cater to individual preferences.
- 3D Photo Transfers:
- Trend: Exploration of 3D photo transfer techniques that add depth and texture to fabric designs.
- Impact: Creates visually stunning and tactile fabric art that stands out from traditional photo transfers.
- Digital Textile Printing:
- Trend: Advancements in digital textile printing that allow for seamless integration of photo transfers with fabric manufacturing processes.
- Impact: Streamlines production and enables mass customization of fabric items with intricate designs and personalized images.
- Interactive and Augmented Reality (AR) Applications:
- Trend: Development of AR applications that allow users to visualize photo transfers on fabric before printing, ensuring optimal placement and design.
- Impact: Enhances the user experience and reduces the risk of errors in the transfer process.
These future trends highlight the exciting possibilities for photo transferring onto fabric, promising more innovative, sustainable, and personalized solutions for creative expression.
13. FAQ: Answering Your Questions About Photo Transferring Onto Fabric
Here are some frequently asked questions about photo transferring onto fabric, tailored for our dfphoto.net community:
- 13.1. What type of printer is best for photo transfers?
- The best printer for photo transfers depends on the method you choose. Laser printers are generally preferred for gel medium and Citra Solv transfers, while inkjet printers are commonly used for iron-on transfers. For direct printing, specialized inkjet or sublimation printers are required.
- 13.2. Can I use any fabric for photo transfers?
- While you can use various fabrics, natural fabrics like cotton, linen, and silk generally yield the best results. Synthetic fabrics may not absorb the transfer as well.
- 13.3. Do I need to mirror the image before transferring?
- Yes, you typically need to mirror the image before printing when using iron-on transfer paper. This ensures the image appears correctly on the fabric after the transfer. However, for methods like gel medium and Citra Solv transfers, you print the image as is.
- 13.4. How do I prevent the image from fading after washing?
- To prevent fading, use high-quality transfer paper, wash the fabric inside out in cold water on a gentle cycle, avoid using bleach or harsh detergents, and tumble dry on low heat or hang to dry.
- 13.5. What is the best way to protect the transferred image?
- Protect the transferred image by covering it with parchment paper or a Teflon sheet and ironing it again for a few seconds. This helps set the image and protect it during washing.
- 13.6. Can I use a regular iron for photo transfers?
- Yes, you can use a regular iron for photo transfers, but a heat press provides more even heat distribution and pressure, which can improve the quality and durability of the transfer.
- 13.7. How long should I wait before washing the fabric after the transfer?
- It’s best to wait at least 24 hours after the transfer before washing the fabric. This gives the image time to fully set and adhere to the fabric.
- 13.8. What should I do if the backing paper sticks to the fabric?
- If the backing paper sticks to the fabric, ensure the transfer has cooled completely before peeling. If the paper is still sticking, re-iron the area for a few more seconds and allow it to cool again.
- 13.9. How do I remove wrinkles from the fabric before transferring?
- Iron the fabric to create a smooth, wrinkle-free surface before applying the transfer. This ensures the image adheres evenly and prevents smudging.
- 13.10. Are there any eco-friendly options for photo transferring onto fabric?
- Yes, you can use eco-friendly materials like organic cotton, recycled fabrics, and water-based transfer mediums. The Citra Solv method is also an eco-friendly option as it uses a natural cleaner and degreaser.