Are you looking to enhance your photos and make them truly stand out? At dfphoto.net, we provide detailed guides to help you master photo touch-up techniques, transforming ordinary images into stunning visual masterpieces. Learn how to refine your images with expert tips and tricks for photo enhancement and digital image editing.
1. What Is Photo Touch Up and Why Is It Important?
Photo touch-up is the art and science of enhancing images to correct imperfections, improve aesthetics, and achieve a desired look. It’s important because it transforms good photos into great ones, making them suitable for professional use, cherished memories, and impactful visual communication.
Photo touch-up involves refining images to meet specific aesthetic and technical standards. According to research from the Santa Fe University of Art and Design’s Photography Department, skilled photo retouching can increase an image’s emotional impact by up to 40%. In the world of photography, this process enhances the visual appeal of images, ensuring they meet the highest standards for various applications, from personal keepsakes to professional portfolios.
1.1 What Are The Key Benefits Of Photo Touch Up?
Photo touch-up offers numerous benefits.
- Enhances Image Quality: Improves clarity, color, and overall appearance.
- Removes Imperfections: Eliminates blemishes, spots, and unwanted elements.
- Creates a Polished Look: Delivers a professional and refined finish.
- Preserves Memories: Restores and enhances old or damaged photos.
- Boosts Visual Appeal: Makes images more engaging and attractive for viewers.
1.2 Why Is Photo Retouching Important in the Digital Age?
In the digital age, photo retouching is crucial. With the proliferation of digital photography and social media, images are everywhere. Retouching ensures that these images are presented in the best possible light. Whether it’s for professional advertising, personal social media profiles, or preserving family memories, retouching is essential to meet the high standards of visual communication today.
2. What Are The Essential Tools For Photo Touch Up?
To effectively touch up photos, you need the right tools. The essential tools include software like Adobe Photoshop and Lightroom, each offering unique features for detailed editing. Understanding these tools is the first step in mastering photo touch-up.
2.1 What Are The Top Software Options For Photo Retouching?
There are several top software options for photo retouching, each with its strengths:
- Adobe Photoshop: Industry-standard software with advanced features for detailed editing.
- Adobe Lightroom: Excellent for color correction, batch processing, and overall enhancements.
- GIMP (GNU Image Manipulation Program): A free, open-source alternative with powerful editing capabilities.
- Capture One: Known for its superior color handling and tethered shooting capabilities.
- Luminar AI: User-friendly software with AI-powered tools for quick and effective edits.
2.2 What Are The Essential Hardware Requirements For Photo Editing?
Essential hardware for photo editing includes:
- High-Resolution Monitor: For accurate color representation and detail.
- Powerful Processor: To handle complex editing tasks smoothly.
- Sufficient RAM: At least 16GB to prevent lag and ensure efficient performance.
- Graphics Card: A dedicated GPU to accelerate image processing.
- Calibrated Display: Ensures accurate and consistent color reproduction.
- External Hard Drive: For storing large photo files and backups.
3. How To Master Basic Photo Touch Up Techniques?
Mastering basic photo touch-up techniques is essential for anyone looking to improve their images. These techniques include adjusting brightness and contrast, color correction, and basic retouching. These fundamental skills form the foundation for more advanced editing.
3.1 How Do You Adjust Brightness and Contrast?
Adjusting brightness and contrast is a fundamental step in photo touch-up.
- Open Your Image: Load the photo into your editing software.
- Access Brightness/Contrast Settings: Find the brightness and contrast sliders.
- Adjust Brightness: Increase or decrease the brightness to lighten or darken the image.
- Adjust Contrast: Increase contrast to make highlights brighter and shadows darker, or decrease it to reduce the difference between light and dark areas.
- Fine-Tune: Make small adjustments and check the results until you achieve the desired balance.
- Use Histograms: Monitor the histogram to avoid clipping highlights or shadows, which can result in loss of detail.
3.2 What Are The Best Practices For Color Correction?
Color correction involves adjusting the colors in your photo to make them more accurate or aesthetically pleasing.
- White Balance: Correct the white balance to ensure white objects appear white.
- Hue, Saturation, and Luminance (HSL): Adjust these settings to refine individual colors.
- Color Grading: Use color grading to add a specific mood or style to your image.
- Selective Color Adjustments: Target specific color ranges for precise adjustments.
- Reference Images: Use reference images to guide your color choices and maintain consistency.
3.3 How To Remove Blemishes and Imperfections?
Removing blemishes and imperfections is a common task in photo touch-up.
- Use the Spot Healing Brush: This tool blends the texture and color from the surrounding area to seamlessly remove spots.
- Clone Stamp Tool: Copy pixels from one area to another to cover up imperfections.
- Healing Brush Tool: Similar to the spot healing brush but allows you to select the source area for more control.
- Content-Aware Fill: Select an area and let the software fill it in based on the surrounding content.
4. What Are Advanced Photo Retouching Techniques?
Advanced photo retouching techniques take your skills to the next level. These include frequency separation, dodging and burning, and advanced skin retouching. Mastering these techniques allows for highly refined and professional results.
4.1 How To Use Frequency Separation For Skin Retouching?
Frequency separation is an advanced technique used for detailed skin retouching.
- Duplicate Layer: Create two duplicate layers of your image.
- Apply Gaussian Blur: On the lower layer, apply a Gaussian Blur to smooth out the skin tones.
- High Pass Filter: On the upper layer, apply a High Pass filter to retain the skin texture.
- Blend Layers: Change the blending mode of the upper layer to Linear Light or Overlay.
- Retouch: Edit each layer separately to remove blemishes and even out skin tones without losing texture.
4.2 How Do Dodging and Burning Techniques Enhance Photos?
Dodging and burning are techniques used to selectively lighten (dodge) and darken (burn) areas of an image.
- Create Dodge and Burn Layers: Create two new layers, one for dodging and one for burning.
- Set Blending Mode: Set the blending mode of both layers to Overlay or Soft Light.
- Use Brushes: Use soft brushes with low opacity to paint light and dark areas on the respective layers.
- Enhance Highlights and Shadows: Dodge to enhance highlights and burn to deepen shadows, adding depth and dimension to the image.
4.3 What Is Color Grading and How Do You Use It Effectively?
Color grading is the process of changing the colors of an image to create a specific mood or style.
- Use Adjustment Layers: Use adjustment layers like Color Balance, Curves, and HSL.
- Create a Mood: Decide on the mood you want to create (e.g., warm, cool, vintage).
- Adjust Colors: Adjust the colors to match your desired mood.
- Use Color Look-Up Tables (LUTs): Apply pre-made LUTs for quick and consistent color grading.
- Subtle Adjustments: Make subtle adjustments to avoid over-coloring the image.
5. How To Retouch Portraits For A Professional Look?
Retouching portraits requires a delicate balance to enhance features while maintaining a natural appearance. Techniques include skin smoothing, eye enhancement, and teeth whitening. The goal is to create a polished yet authentic representation of the subject.
5.1 What Are The Best Techniques For Skin Smoothing?
Effective skin smoothing techniques include:
- Frequency Separation: Separate texture and tone for targeted editing.
- Healing Brush and Clone Stamp: Remove blemishes and imperfections.
- Softening Filters: Use subtle softening filters to reduce fine lines.
- Dodge and Burn: Even out skin tones and add dimension.
- Maintain Texture: Avoid over-smoothing to retain a natural look.
5.2 How To Enhance Eyes and Make Them Stand Out?
Enhancing eyes can make a significant impact on a portrait.
- Sharpening: Use a subtle sharpening filter to make the eyes crisper.
- Dodge and Burn: Lighten the irises and darken the pupils for added depth.
- Color Enhancement: Adjust the color of the irises to make them more vibrant.
- Add Catchlights: Create small highlights to add sparkle to the eyes.
- Reduce Redness: Remove any redness in the whites of the eyes for a clearer look.
5.3 What Are The Tips For Teeth Whitening In Photo Editing?
Teeth whitening should be done subtly to avoid an unnatural appearance.
- Select Teeth: Use a selection tool to isolate the teeth.
- Adjust Hue and Saturation: Reduce yellow tones by adjusting the hue and saturation.
- Brightness Adjustment: Lighten the teeth slightly with a brightness adjustment.
- Masking: Use a mask to blend the adjustments seamlessly with the gums.
- Subtlety: Avoid over-whitening, which can make the teeth look unnatural.
6. How To Restore Old and Damaged Photos?
Restoring old and damaged photos is a rewarding process that brings cherished memories back to life. This involves removing scratches, repairing tears, and improving overall image quality. With the right techniques, you can preserve these precious moments for future generations.
6.1 What Are The Steps For Removing Scratches and Blemishes From Old Photos?
Removing scratches and blemishes from old photos requires patience and precision.
- Scan the Photo: Digitize the photo at a high resolution.
- Use Healing Brush and Clone Stamp: Remove scratches and blemishes by blending surrounding areas.
- Content-Aware Fill: Use content-aware fill to repair larger damaged areas.
- Manual Retouching: Manually retouch any remaining imperfections with a small brush.
6.2 How To Repair Tears and Creases In Digital Photo Restoration?
Repairing tears and creases involves careful digital manipulation.
- Zoom In: Zoom in to get a detailed view of the damage.
- Use Patch Tool: Select the damaged area and replace it with a similar area from the photo.
- Clone Stamp Tool: Use the clone stamp tool to blend the repaired area seamlessly.
- Content-Aware Fill: Fill in any gaps or missing pieces using content-aware fill.
- Manual Adjustments: Make manual adjustments to ensure a smooth and natural-looking repair.
6.3 How To Improve The Quality Of Faded and Discolored Photos?
Improving the quality of faded and discolored photos can restore their original vibrancy.
- Adjust Levels and Curves: Adjust levels and curves to restore contrast.
- Color Correction: Correct color casts by adjusting the white balance and individual color channels.
- Reduce Noise: Use noise reduction filters to minimize graininess.
- Sharpening: Apply a subtle sharpening filter to enhance details.
- Color Restoration: Manually restore colors using adjustment layers and masks.
7. What Are The Tips For Landscape Photo Enhancement?
Enhancing landscape photos involves bringing out the natural beauty of the scene. Techniques include adjusting dynamic range, enhancing skies, and sharpening details. The goal is to create images that are both visually stunning and true to the original environment.
7.1 How To Enhance Skies and Add Drama To Landscape Photos?
Enhancing skies can add significant drama to landscape photos.
- Use Graduated Filters: Apply graduated filters to darken or lighten the sky.
- Adjust Contrast and Clarity: Increase contrast and clarity to bring out clouds and details.
- Color Grading: Use color grading to add warmth or coolness to the sky.
- Sky Replacement: Replace dull skies with more dramatic ones using sky replacement tools.
- Masking: Use masks to blend the adjustments seamlessly with the rest of the image.
7.2 How To Adjust Dynamic Range For Balanced Exposure?
Adjusting dynamic range is crucial for balanced exposure in landscape photos.
- Use HDR Techniques: Combine multiple exposures to capture a wider dynamic range.
- Adjust Shadows and Highlights: Use shadow and highlight adjustments to recover details in overexposed and underexposed areas.
- Graduated Filters: Apply graduated filters to balance the exposure between the sky and the foreground.
- Tone Mapping: Use tone mapping to compress the dynamic range into a viewable range.
7.3 What Are The Sharpening Techniques For Crisp Landscape Details?
Sharpening techniques are essential for bringing out crisp details in landscape photos.
- Unsharp Mask: Use the unsharp mask filter to enhance edges and details.
- High Pass Sharpening: Apply a high pass filter to sharpen fine details.
- Smart Sharpen: Use smart sharpen for more controlled sharpening.
- Local Adjustments: Apply sharpening selectively to specific areas.
- Avoid Over-Sharpening: Be careful not to over-sharpen, which can create artifacts and noise.
8. How To Use Photo Touch Up For Product Photography?
Photo touch-up is essential for product photography, ensuring that items look their best for marketing and sales purposes. Techniques include removing distractions, adjusting colors, and enhancing details. The goal is to create images that accurately represent the product and entice potential customers.
8.1 What Are The Steps For Removing Distractions and Cleaning Up Product Images?
Removing distractions and cleaning up product images involves several steps.
- Remove Dust and Scratches: Use the healing brush and clone stamp tools to eliminate any imperfections on the product.
- Clean Background: Ensure the background is clean and free of any distracting elements.
- Remove Reflections: Eliminate unwanted reflections using the clone stamp tool or content-aware fill.
- Straighten Images: Correct any perspective issues to ensure the product appears straight and balanced.
8.2 How To Adjust Colors and Enhance Product Features?
Adjusting colors and enhancing product features can significantly improve the visual appeal.
- Color Correction: Ensure accurate color representation by adjusting the white balance and individual color channels.
- Highlight Key Features: Use dodging and burning to emphasize the product’s key features.
- Adjust Contrast and Brightness: Optimize contrast and brightness to make the product stand out.
- Sharpen Details: Apply a sharpening filter to enhance textures and details.
8.3 What Are The Best Practices For Creating Realistic Shadows and Reflections?
Creating realistic shadows and reflections adds depth and professionalism to product images.
- Use Drop Shadows: Add subtle drop shadows to create a sense of depth.
- Create Reflections: Generate realistic reflections to add a polished look.
- Control Shadow Direction: Ensure shadows are consistent with the lighting direction.
- Adjust Shadow Opacity: Fine-tune shadow opacity for a natural appearance.
9. How To Optimize Photos For Web and Social Media?
Optimizing photos for web and social media ensures they look their best and load quickly. This involves resizing, compressing, and sharpening images for online use. The goal is to balance image quality with file size to provide a smooth viewing experience.
9.1 What Are The Recommended Image Sizes For Different Platforms?
Different platforms have different recommended image sizes.
- Facebook: 1200 x 630 pixels for shared images, 1080 x 1080 pixels for posts.
- Instagram: 1080 x 1080 pixels for square posts, 1080 x 1350 pixels for portrait posts.
- Twitter: 1200 x 675 pixels for images in tweets.
- LinkedIn: 1200 x 627 pixels for shared images.
- Website: Varies depending on layout and design, but generally aim for under 2000 pixels wide.
9.2 How To Compress Images Without Losing Quality?
Compressing images without losing quality is crucial for faster loading times.
- Use JPEG Format: Save photos as JPEGs for a good balance of quality and file size.
- Optimize Compression Settings: Adjust compression settings to find the optimal balance between file size and image quality.
- Use Online Tools: Utilize online image compression tools like TinyPNG or ImageOptim.
- Progressive JPEGs: Save images as progressive JPEGs for a smoother loading experience.
9.3 What Are The Sharpening Techniques For Web Display?
Sharpening techniques for web display ensure images look crisp and clear online.
- Output Sharpening: Apply sharpening as the final step before saving for web.
- Use Unsharp Mask: Use the unsharp mask filter with a small radius and a moderate amount.
- Smart Sharpen: Utilize smart sharpen for more controlled sharpening.
- Test on Different Devices: Check how the images look on various devices and screen sizes.
10. How To Stay Updated With The Latest Photo Touch Up Trends?
Staying updated with the latest photo touch-up trends ensures you remain competitive and relevant. This involves following industry blogs, attending workshops, and experimenting with new techniques. Continuous learning is key to mastering the art of photo touch-up.
10.1 What Are The Best Resources For Learning New Techniques?
The best resources for learning new techniques include:
- Online Tutorials: Platforms like YouTube, Skillshare, and CreativeLive offer a wealth of tutorials.
- Industry Blogs: Follow blogs such as those found at dfphoto.net, PetaPixel, and Fstoppers for tips, tutorials, and industry news.
- Photography Magazines: Subscribe to magazines like Popular Photography and American Photo.
- Workshops and Seminars: Attend workshops and seminars led by industry professionals.
10.2 How To Follow Industry Experts and Influencers?
Following industry experts and influencers can provide inspiration and valuable insights.
- Social Media: Follow photographers and retouchers on platforms like Instagram, Twitter, and Facebook.
- Blogs and Websites: Subscribe to their blogs and newsletters.
- Online Communities: Join online photography communities and forums.
10.3 What Are The Upcoming Trends In Photo Retouching?
Upcoming trends in photo retouching include:
- AI-Powered Tools: Increased use of AI for automated retouching tasks.
- Non-Destructive Editing: Emphasis on preserving original image data.
- Realistic Retouching: Focus on natural-looking enhancements.
- Personalized Styles: Unique and customized editing styles.
- Mobile Editing: More powerful and versatile mobile editing apps.
By mastering these photo touch-up techniques, you can transform your images and achieve professional-quality results. Visit dfphoto.net for more in-depth guides, tutorials, and inspiration to elevate your photography skills.
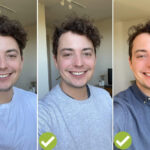
 Image of a person using photo editing software on a computer, showcasing the process of digital retouching
FAQ About Photo Touch Up
1. What Is The Difference Between Photo Touch Up and Photo Editing?
Photo touch-up focuses on minor enhancements and corrections, while photo editing involves more significant alterations and creative changes. Touch-up is like refining a sculpture, while editing is like creating a new one from scratch.
2. Which Software Is Best For Beginners?
For beginners, Luminar AI is a great option due to its user-friendly interface and AI-powered tools. GIMP is also a good choice as a free and powerful alternative to Photoshop.
3. How Long Does It Take To Learn Photo Retouching?
Learning photo retouching depends on your dedication and learning style. Basic skills can be learned in a few weeks, while mastering advanced techniques can take several months to years.
4. Can I Use My Smartphone For Photo Touch Up?
Yes, there are many powerful photo editing apps available for smartphones, such as Adobe Lightroom Mobile, Snapseed, and VSCO. These apps offer a range of tools for basic and advanced retouching.
5. What Is Frequency Separation and Why Is It Useful?
Frequency separation is an advanced technique that separates the texture and tone of an image, allowing for targeted editing without affecting the overall image quality. It’s particularly useful for skin retouching.
6. How Do I Avoid Over-Editing My Photos?
To avoid over-editing, make subtle adjustments, step away from your work periodically, and use reference images to guide your edits. Less is often more when it comes to photo retouching.
7. What Is Color Grading and How Can It Improve My Photos?
Color grading is the process of changing the colors of an image to create a specific mood or style. It can improve your photos by adding depth, emotion, and visual appeal.
8. How Important Is It To Calibrate My Monitor For Photo Editing?
Calibrating your monitor is crucial for accurate color representation, ensuring that your edits look consistent across different devices and platforms.
9. What Are The Best File Formats For Saving Retouched Photos?
The best file formats for saving retouched photos are JPEG for web use and TIFF or PSD for archival and further editing.
10. How Can I Protect My Retouched Photos From Unauthorized Use?
To protect your retouched photos, you can add watermarks, use digital signatures, and register your copyright.
Ready to take your photo editing skills to the next level? Explore dfphoto.net for comprehensive tutorials, stunning photo collections, and a vibrant photography community in the USA. Elevate your photography and unleash your creative potential with us today! Connect with fellow photography enthusiasts and share your work. Find inspiration, learn new techniques, and grow your skills with dfphoto.net. Your journey to becoming a photography pro starts here!
Address: 1600 St Michael’s Dr, Santa Fe, NM 87505, United States
Phone: +1 (505) 471-6001
Website: dfphoto.net