Have you ever wanted to capture a group photo without anyone having to stand behind the camera? Knowing How To Time Delay Photo On Iphone offers a simple solution for solo photographers and group shots alike, ensuring you’re always part of the picture. This feature allows you to set a timer, giving you time to join your friends or family and capture the perfect moment, which enhances visual storytelling. At dfphoto.net, we empower you with knowledge of photographic composition, lighting techniques, and camera settings. Learn about slow shutter speed and long exposure.
1. What is Time Delay Photography on iPhone and Why Use It?
Yes, time-delay photography on iPhone, also known as the self-timer feature, is a function that allows you to set a countdown before the camera takes a photo. This eliminates the need for someone to physically press the shutter button, enabling the photographer to be included in the shot or allowing for hands-free photography in specific scenarios.
- Inclusion in Group Photos: The most common use is to include yourself in group photos.
- Avoiding Camera Shake: When using slow shutter speeds, pressing the shutter button can cause camera shake. A timer eliminates this.
- Creative Photography: Allows for unique compositions and perspectives without needing to be behind the camera.
- Wildlife Photography: Useful for capturing animals without directly interacting with the camera.
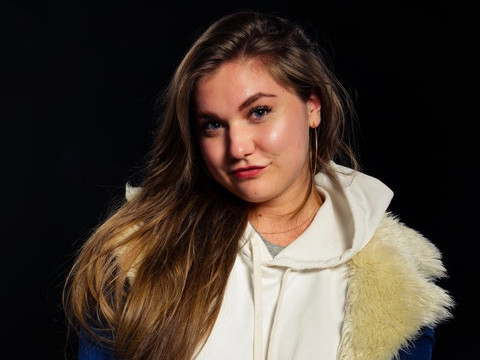 Using iPhone's self timer
2. How Do I Set the Timer on My iPhone Camera?
You can set the timer on your iPhone camera through these steps:
-
Open the Camera App: Launch the Camera app on your iPhone.
-
Position Your iPhone: Place your iPhone where you want the photo to be taken, using a tripod or stable surface for best results.
-
Access the Timer Options:
- In newer iPhone models, swipe up on the camera screen or tap the arrow at the top to reveal additional settings.
- Look for the timer icon (a clock).
-
Set the Countdown: Choose between a 3-second or 10-second timer, depending on how much time you need to get into position.
-
Start the Timer: Press the shutter button. The timer will begin counting down, giving you time to get ready for the photo.
-
Strike a Pose: Once the timer reaches zero, the iPhone will automatically take a burst of photos, increasing your chances of capturing the perfect shot.
3. Where is the Timer on My iPhone Camera App?
The timer on your iPhone camera app is typically located within the camera settings, accessible via a small arrow at the top of the screen. In some versions, you need to swipe up from the bottom to reveal these settings. Once the settings are visible, look for a clock icon, which represents the timer function. Tapping this icon will present you with options to set the timer for either 3 seconds or 10 seconds.
4. What Are the Benefits of Using the Time Delay Feature?
The benefits of using the time delay feature are numerous, from convenience to creative control:
- Inclusion in Photos: Ensures that you’re not always the one behind the camera, allowing you to be part of the memories you’re capturing.
- Sharper Images: By eliminating the need to physically touch the shutter button, you reduce the risk of camera shake, especially in low-light conditions where slower shutter speeds are necessary.
- Creative Freedom: The timer allows you to set up unique shots and compositions that would be difficult or impossible to achieve while holding the camera.
- Spontaneity: It gives you the flexibility to set up a shot and then interact naturally with your surroundings, capturing genuine moments.
- Remote Photography: For wildlife or sensitive environments, the timer enables you to capture photos from a distance, minimizing disturbance.
5. Can I Use Time Delay with Other iPhone Camera Features?
Yes, you can use time delay with other iPhone camera features, enhancing your photography capabilities.
- Burst Mode: The iPhone often takes a burst of photos when the timer is used, increasing the chances of capturing the perfect moment.
- Filters: Apply filters before setting the timer to achieve a specific look and feel in your photos.
- HDR (High Dynamic Range): Use HDR to balance the light and shadows in your scene, ensuring a well-exposed photo.
- Live Photos: Combine the timer with Live Photos to capture a few seconds of motion and sound around the photo.
- Portrait Mode: Capture stunning portraits with a blurred background using the timer in Portrait mode.
- Night Mode: In low-light conditions, use Night mode with the timer to take brighter, clearer photos.
- Zoom: Adjust the zoom level to frame your shot perfectly before starting the timer.
- Flash: Decide whether to use the flash based on the lighting conditions and the effect you want to achieve.
- Exposure Control: Manually adjust the exposure to fine-tune the brightness of your photo.
6. What Are Some Creative Ways to Use the iPhone Timer?
You can use the iPhone timer in many creative ways to take interesting and unique photos:
- Group Jump Shots: Set up the timer and have everyone jump in the air at the same time for a fun, energetic photo.
- Candid Moments: Position the camera and let the timer run to capture genuine, unposed moments.
- Self-Portraits in Scenic Locations: Take stunning self-portraits in beautiful landscapes without needing someone else to take the photo.
- Action Shots: Capture yourself or others in motion, such as skateboarding or dancing.
- Symmetrical Compositions: Create perfectly balanced shots by setting up the timer and positioning yourself in the frame.
- Reflections: Use reflective surfaces like water or mirrors to add depth and interest to your photos.
- Light Painting: In a dark environment, use a light source to create artistic patterns while the timer is running.
- Forced Perspective: Play with perspective to make objects appear larger or smaller than they actually are.
- Silhouette Photography: Capture dramatic silhouettes against a bright background.
- Macro Photography: Get close-up shots of small subjects like flowers or insects without disturbing them.
7. How Does the iPhone Timer Compare to Other Camera Timers?
The iPhone timer is designed for simplicity and convenience, integrating seamlessly into the native camera app. It offers a user-friendly experience, though it may lack some of the advanced features found in dedicated camera timers or third-party apps.
| Feature | iPhone Timer | Dedicated Camera Timers | Third-Party Apps |
|---|---|---|---|
| Ease of Use | Very easy | Moderate | Moderate to Complex |
| Timer Options | 3 or 10 seconds | Customizable | Highly Customizable |
| Integration | Seamless | Requires setup | Requires download/setup |
| Advanced Features | Limited | Extensive | Variable |
| Portability | Highly portable | Less portable | Highly portable |
| Best Use Cases | Quick, simple shots | Professional use | Specific creative needs |
8. Are There Any Limitations to the iPhone Timer?
Yes, there are some limitations to the iPhone timer:
- Limited Timer Options: The iPhone timer only offers two options: 3 seconds or 10 seconds. This may not be sufficient for all situations, as some users may need a longer or more precise countdown.
- No Custom Timer Settings: Unlike dedicated camera timers or third-party apps, the iPhone timer does not allow you to set a custom countdown time.
- Basic Functionality: The iPhone timer is a basic feature designed for simple self-portraits and group shots. It lacks advanced features like interval shooting, bulb mode, and remote triggering.
- Dependence on the Camera App: The iPhone timer is integrated into the native Camera app, which may not offer the same level of control and customization as professional photography apps.
- No Audible Countdown: The iPhone timer does not provide an audible countdown, which can make it difficult to time your movements accurately.
9. What Third-Party Apps Offer More Advanced Timer Features?
Several third-party apps offer more advanced timer features for iPhone photography:
- Camera+ 2: This app provides advanced manual controls, including custom timer settings and interval shooting.
- ProCamera: ProCamera offers a wide range of professional features, such as manual focus, exposure control, and custom timer options.
- Slow Shutter Cam: Ideal for long exposure photography, this app allows you to set custom timer durations and capture stunning motion blur effects.
- DSLR Camera Remote: This app turns your iPhone into a remote control for your DSLR camera, allowing you to trigger the shutter remotely and set custom timer intervals.
- GorillaCam: GorillaCam offers a range of useful features, including a self-timer with customizable duration and burst mode options.
- Snapseed: While primarily a photo editing app, Snapseed also includes a timer function with adjustable duration.
10. How Can I Improve My Time Delay Photography Skills?
Improving your time delay photography skills involves a combination of planning, technique, and creativity:
- Plan Your Shot: Before setting the timer, take the time to plan your composition, lighting, and pose. Consider the background, foreground, and overall aesthetic of the photo.
- Use a Tripod: A tripod is essential for time delay photography, as it ensures that your iPhone remains stable and level. This is especially important for long exposure shots or when shooting in low-light conditions.
- Master Composition Techniques: Learn and apply basic composition techniques like the rule of thirds, leading lines, and symmetry to create visually appealing photos.
- Experiment with Lighting: Pay attention to the lighting conditions and how they affect your photos. Experiment with different angles, shadows, and highlights to achieve the desired effect.
- Practice Posing: Practice different poses and expressions to find what works best for you. Consider the context of the photo and the story you want to tell.
- Use Burst Mode: Take advantage of the iPhone’s burst mode to capture a series of photos in quick succession. This increases your chances of getting the perfect shot with the right expression and pose.
- Edit Your Photos: After taking your photos, use a photo editing app like Snapseed or Adobe Lightroom Mobile to enhance the colors, tones, and details.
- Seek Inspiration: Look at the work of other photographers for inspiration. Study their techniques, compositions, and lighting styles, and try to incorporate them into your own work.
- Attend Workshops: Participating in photography workshops or online courses is a great way to learn new skills and techniques from experienced professionals.
11. How Does Lighting Affect Time Delay Photos?
Lighting significantly impacts time-delay photos, influencing mood, clarity, and overall quality.
- Natural Light: Using natural light can enhance your photos by providing soft, even illumination. Golden hour (shortly after sunrise and before sunset) is ideal for warm, flattering light.
- Artificial Light: If shooting indoors or in low-light conditions, artificial light sources like lamps or LED panels can help illuminate your subject.
- Direction of Light: The direction of light can create different effects. Front lighting provides even illumination, side lighting creates shadows and depth, and backlighting can produce silhouettes.
- Light Intensity: Adjusting the light intensity can help you achieve the desired exposure. Use the iPhone’s exposure control to fine-tune the brightness of your photos.
- Color Temperature: The color temperature of light can affect the mood of your photos. Warm light (yellowish) creates a cozy atmosphere, while cool light (bluish) feels more modern and crisp.
- Shadows: Shadows can add depth and dimension to your photos. Experiment with different lighting angles to create interesting shadow patterns.
- Reflectors: Using reflectors can bounce light onto your subject, filling in shadows and creating a more balanced exposure.
- Diffusers: Diffusers soften harsh light, reducing glare and creating a more flattering effect.
- White Balance: Set the white balance correctly to ensure accurate colors in your photos. The iPhone automatically adjusts white balance, but you can also manually adjust it in some photography apps.
12. What Composition Tips Work Best with the iPhone Timer?
Several composition tips enhance photos taken with the iPhone timer, improving visual appeal and balance:
- Rule of Thirds: Divide the frame into nine equal parts with two horizontal and two vertical lines. Place key elements along these lines or at their intersections to create a more balanced and engaging composition.
- Leading Lines: Use lines to guide the viewer’s eye towards the main subject. Leading lines can be roads, fences, rivers, or any other linear element.
- Symmetry: Create symmetrical compositions by placing the subject in the center of the frame and balancing the elements on either side.
- Framing: Use elements in the foreground to frame the main subject, adding depth and context to the photo.
- Foreground Interest: Include interesting elements in the foreground to add depth and create a sense of scale.
- Negative Space: Use negative space (empty areas around the subject) to create a sense of calm and focus.
- Point of View: Experiment with different points of view to find the most interesting angle. Try shooting from a low angle to make the subject appear larger or from a high angle to provide a broader perspective.
- Depth of Field: Use depth of field to control which parts of the photo are in focus. A shallow depth of field can isolate the subject, while a deep depth of field keeps everything sharp.
- Simplicity: Keep the composition simple and uncluttered to avoid distracting the viewer.
- Balance: Balance the elements in the frame to create a sense of harmony.
13. How Can I Use the iPhone Timer for Group Photos?
Use the iPhone timer to ensure everyone is included in group photos:
- Choose a Location: Select a location with good lighting and an interesting background.
- Set Up the iPhone: Place the iPhone on a stable surface or tripod. Frame the shot to include everyone in the group.
- Set the Timer: Choose either the 3-second or 10-second timer, depending on how much time you need to get into position.
- Join the Group: Quickly join the group and strike a pose.
- Take Multiple Shots: Use burst mode to take multiple shots in quick succession. This increases the chances of capturing the perfect moment with everyone looking their best.
- Review and Select: Review the photos and select the best one.
- Consider Posing: Discuss poses ahead of time for a smoother process.
- Check Lighting: Ensure everyone is well-lit and visible.
14. What Accessories Can Enhance My Time Delay Photography?
Several accessories can enhance your time delay photography, providing stability, control, and creative options:
- Tripod: A tripod is essential for keeping your iPhone stable and level, especially for long exposure shots or when shooting in low-light conditions.
- Remote Shutter: A remote shutter allows you to trigger the shutter without touching the iPhone, reducing the risk of camera shake.
- Lens Kit: Lens kits offer a range of lenses, such as wide-angle, telephoto, and macro lenses, that can expand your creative options.
- Lighting Accessories: Lighting accessories like reflectors, diffusers, and LED panels can help you control the light and create different effects.
- Smartphone Stabilizer: A smartphone stabilizer (gimbal) keeps your iPhone steady while you’re moving, allowing you to capture smooth, cinematic video.
- External Microphone: An external microphone improves the audio quality of your videos, especially when recording in noisy environments.
- Phone Case with Tripod Mount: A phone case with a built-in tripod mount makes it easy to attach your iPhone to a tripod.
- Portable Power Bank: A portable power bank ensures that your iPhone stays charged during long photo shoots.
15. Can I Use Time Delay for Long Exposure Photography on iPhone?
Yes, you can use time delay for long exposure photography on iPhone, but it requires a combination of techniques and tools:
- Use a Tripod: A tripod is essential for keeping your iPhone stable during long exposures.
- Choose a Low-Light Environment: Long exposure photography works best in low-light conditions.
- Use a Third-Party App: The native iPhone camera app doesn’t offer manual shutter speed control. Use a third-party app like Slow Shutter Cam or ProCamera to set a long shutter speed.
- Set the Timer: Use the app’s timer function to trigger the shutter and avoid camera shake.
- Experiment with Shutter Speeds: Experiment with different shutter speeds to find the best setting for your scene.
- Use an ND Filter: An ND (neutral density) filter reduces the amount of light entering the lens, allowing you to use longer shutter speeds in brighter conditions.
- Consider RAW Format: Shooting in RAW format preserves more image data, giving you greater flexibility when editing your photos.
- Edit Your Photos: Use a photo editing app like Snapseed or Adobe Lightroom Mobile to enhance the colors, tones, and details of your long exposure photos.
- Focus Manually: Set focus before starting the time delay.
16. How to Use Time Delay for Landscape Photography on iPhone?
Using time delay for landscape photography on iPhone allows you to capture stunning scenes with precision and creative control.
- Choose a Scenic Location: Select a location with interesting landscapes, such as mountains, forests, or coastlines.
- Set Up the iPhone: Place the iPhone on a tripod to keep it stable and level. Frame the shot to capture the desired composition.
- Use a Wide-Angle Lens: A wide-angle lens can help you capture more of the scene.
- Set the Timer: Use the iPhone’s built-in timer to avoid camera shake.
- Consider HDR: Use HDR (High Dynamic Range) mode to balance the light and shadows in your landscape photos.
- Focus Manually: Tap on the screen to focus on the main subject.
- Use a Polarizing Filter: A polarizing filter reduces glare and reflections, making the colors more vibrant and the sky more blue.
- Shoot During Golden Hour: The golden hour (shortly after sunrise and before sunset) provides warm, flattering light that can enhance your landscape photos.
- Capture Panoramic Views: Use the iPhone’s panoramic mode to capture wide, sweeping landscapes.
- Edit Your Photos: Enhance colors and tones.
17. Can Time Delay Photography Be Used for Portrait Photography?
Yes, time delay photography can be effectively used for portrait photography on iPhone:
- Choose a Suitable Location: Select a location with good lighting and a flattering background.
- Set Up the iPhone: Place the iPhone on a tripod and frame the shot to capture the desired composition.
- Use Portrait Mode: Use Portrait mode to create a shallow depth of field and blur the background.
- Set the Timer: Use the iPhone’s built-in timer to give yourself time to pose and prepare for the shot.
- Consider Lighting: Pay attention to the lighting conditions. Soft, diffused light is generally more flattering for portraits.
- Focus on the Eyes: Focus on the eyes to ensure that the subject’s face is sharp and clear.
- Experiment with Poses: Try different poses and expressions to find what works best for you.
- Use Natural Light: Natural light is generally more flattering than artificial light for portraits.
- Consider the Background: Choose a background that complements the subject and doesn’t distract from the photo.
- Edit Your Photos: Enhance colors and tones.
18. How Can I Take Better Self-Portraits with Time Delay?
Improve your self-portraits with time delay on your iPhone:
- Plan Your Shot: Before setting the timer, take the time to plan your composition, lighting, and pose. Consider the background, foreground, and overall aesthetic of the photo.
- Use a Tripod: A tripod is essential for keeping your iPhone stable and level.
- Master Composition Techniques: Apply basic composition techniques like the rule of thirds, leading lines, and symmetry to create visually appealing photos.
- Experiment with Lighting: Pay attention to the lighting conditions and how they affect your photos.
- Practice Posing: Practice different poses and expressions to find what works best for you.
- Use Burst Mode: Take advantage of the iPhone’s burst mode to capture a series of photos in quick succession.
- Edit Your Photos: After taking your photos, use a photo editing app like Snapseed or Adobe Lightroom Mobile to enhance the colors, tones, and details.
- Find Your Angle: Experiment with different angles to find the most flattering perspective.
- Consider the Background: Choose a background that complements you and doesn’t distract from the photo.
- Relax and Be Yourself: The best self-portraits are those that capture your personality and spirit.
19. Can I Use Time Delay in Video Recording on iPhone?
No, the built-in timer function on the iPhone is specifically designed for still photography and does not work with video recording. However, you can use third-party apps or workarounds to achieve a similar effect for videos.
20. How to Troubleshoot Common Issues with the iPhone Timer?
Troubleshooting common issues with the iPhone timer can ensure smooth and successful photography sessions:
- Timer Not Appearing: If the timer icon is not visible in the Camera app, try swiping up on the screen or tapping the arrow at the top to reveal additional settings.
- Timer Not Working: If the timer is not working, make sure that it is properly activated. Tap the timer icon to select either the 3-second or 10-second option.
- Camera Shaking: If the camera is shaking during the countdown, use a tripod or place the iPhone on a stable surface.
- Blurry Photos: If the photos are blurry, make sure that the lens is clean and that the subject is in focus.
- Poor Lighting: If the lighting is poor, try adjusting the exposure or using a reflector or artificial light source.
- Timer Resets: Check battery level and ensure phone isn’t overheating.
- App Conflicts: Close other apps that might interfere with the camera.
21. How to Maintain My iPhone Camera for Best Results?
Maintaining your iPhone camera ensures optimal performance and high-quality photos:
- Clean the Lens: Regularly clean the lens with a soft, lint-free cloth to remove smudges, dust, and fingerprints.
- Protect the Lens: Use a screen protector or lens cover to prevent scratches and damage.
- Store the iPhone Properly: Store the iPhone in a safe place away from extreme temperatures, humidity, and dust.
- Update the Software: Keep the iPhone’s software up to date to ensure that you have the latest features and bug fixes.
- Manage Storage: Regularly clear out unnecessary photos and videos to free up storage space.
- Use a Protective Case: Use a protective case to protect the iPhone from drops, bumps, and scratches.
- Avoid Extreme Temperatures: Avoid exposing the iPhone to extreme temperatures, as this can damage the battery and other components.
- Back Up Your Photos: Regularly back up your photos to a computer or cloud service to prevent data loss.
- Calibrate the Camera: Some apps offer a camera calibration feature that can improve the accuracy of the colors and tones in your photos.
- Avoid Harsh Chemicals: Avoid using harsh chemicals or abrasive cleaners to clean the iPhone, as this can damage the screen and other components.
22. What are the Ethical Considerations in Time Delay Photography?
Ethical considerations are crucial in time delay photography, especially when capturing images in public or private spaces:
- Privacy: Respect the privacy of individuals and avoid taking photos of people without their consent.
- Property Rights: Respect property rights and avoid trespassing on private property to take photos.
- Cultural Sensitivity: Be aware of cultural norms and sensitivities when taking photos in different locations.
- Environmental Impact: Minimize your impact on the environment and avoid disturbing wildlife or damaging natural habitats.
- Honesty: Be honest about your intentions when taking photos and avoid misrepresenting the context or purpose of your images.
- Copyright: Respect copyright laws and obtain permission before using copyrighted material in your photos.
- Transparency: Be transparent about the use of time delay photography and avoid using it in a deceptive or manipulative way.
- Social Responsibility: Consider the social impact of your photos and avoid creating images that promote hate, discrimination, or violence.
- Accuracy: Strive for accuracy in your photos and avoid manipulating or distorting reality in a way that could mislead viewers.
- Consent: Obtain consent from individuals before publishing or sharing photos that include their likeness.
23. How Can I Share My Time Delay Photos?
Share your time delay photos effectively to showcase your creativity:
- Social Media: Share your photos on social media platforms like Instagram, Facebook, and Twitter.
- Online Portfolios: Create an online portfolio to showcase your best time delay photos.
- Photo Sharing Sites: Upload your photos to photo sharing sites like Flickr and 500px.
- Photography Communities: Join photography communities and forums to share your photos and get feedback from other photographers.
- Photo Contests: Enter your photos in photo contests to gain exposure and recognition.
- Prints: Print your photos and display them in your home or office.
- Photo Books: Create a photo book to showcase a collection of your best time delay photos.
- Exhibitions: Participate in local or regional art exhibitions to display your photos to a wider audience.
- Blogs: Create a blog to share your photos and stories with the world.
- Personal Website: Create a personal website to showcase your photography skills and attract potential clients.
24. What are the Emerging Trends in iPhone Photography?
Emerging trends in iPhone photography reflect technological advancements and evolving creative practices:
- Computational Photography: Computational photography techniques like HDR, Night mode, and Portrait mode are becoming increasingly sophisticated.
- AI-Powered Editing: AI-powered editing tools are making it easier to enhance and manipulate photos.
- Mobile Storytelling: Photographers are using their iPhones to create compelling visual stories for social media and other platforms.
- Drone Photography: Drones are being used to capture aerial perspectives and unique landscapes.
- Underwater Photography: Waterproof iPhone cases and accessories are making it possible to capture stunning underwater photos and videos.
- Augmented Reality: Augmented reality (AR) apps are being used to overlay digital content onto real-world photos and videos.
- Live Streaming: Live streaming apps are allowing photographers to share their work in real-time with audiences around the world.
- Collaborative Photography: Collaborative photography projects are bringing together photographers from different backgrounds and locations.
- Sustainable Photography: Photographers are becoming more aware of the environmental impact of their work and are adopting sustainable practices.
- Ethical Photography: Ethical considerations are becoming increasingly important in iPhone photography, with photographers focusing on responsible and respectful image-making.
FAQ About Time Delay Photo on iPhone
1. How do I access the timer on my iPhone camera?
Swipe up on the camera screen or tap the arrow at the top to reveal additional settings. Look for the timer icon (a clock) and tap it to set the countdown.
2. What timer options are available on the iPhone camera?
The iPhone timer offers two options: 3 seconds or 10 seconds.
3. Can I set a custom timer duration on my iPhone?
No, the built-in timer function on the iPhone only offers the 3-second and 10-second options. For custom timer durations, you will need to use a third-party app.
4. How can I avoid camera shake when using the iPhone timer?
Use a tripod or place the iPhone on a stable surface to minimize camera shake. You can also use a remote shutter to trigger the shutter without touching the iPhone.
5. Can I use the iPhone timer for video recording?
No, the built-in timer function on the iPhone is specifically designed for still photography and does not work with video recording.
6. How can I improve the lighting in my time delay photos?
Use natural light whenever possible. If shooting indoors or in low-light conditions, use artificial light sources like lamps or LED panels.
7. What composition tips work best with the iPhone timer?
Apply composition techniques like the rule of thirds, leading lines, and symmetry to create visually appealing photos.
8. How can I take better self-portraits with time delay?
Plan your shot, use a tripod, master composition techniques, experiment with lighting, practice posing, and relax and be yourself.
9. What accessories can enhance my time delay photography?
Accessories like tripods, remote shutters, lens kits, and lighting accessories can enhance your time delay photography.
10. Can I use time delay for long exposure photography on iPhone?
Yes, but it requires a combination of techniques and tools, including a tripod, a third-party app with manual shutter speed control, and an ND filter.
Time delay photography on your iPhone opens up a world of creative possibilities, from capturing the perfect group shot to mastering long exposure techniques. By understanding the features, limitations, and best practices outlined in this guide, you can take your iPhone photography skills to the next level. Visit dfphoto.net for more tips, tutorials, and inspiration to fuel your photographic journey. Join our community, explore stunning images, and elevate your photography today! Address: 1600 St Michael’s Dr, Santa Fe, NM 87505, United States. Phone: +1 (505) 471-6001.