Taking retro photos involves capturing images with a vintage aesthetic, reminiscent of film photography from past decades. This guide, brought to you by dfphoto.net, dives deep into the techniques and tools you need to master this art form, incorporating both shooting and editing tips for creating authentic retro-style images. Learn about composition, lighting, and post-processing techniques to emulate classic film looks, vintage color palettes, and the nostalgic feel of old photographs.
1. Attend Vintage Events
Do vintage events offer great opportunities for capturing old-time scenes?
Yes, vintage events provide fantastic settings for capturing authentic retro scenes. These events, such as steam train reenactments, vintage vehicle shows, and historical reenactments, offer a wealth of visual opportunities to create stunning retro-style photographs. Vintage events immerse you in a bygone era, complete with period-appropriate costumes, vehicles, and props. By attending these events, you gain access to meticulously recreated environments that enhance the authenticity of your retro photos. Capturing these scenes requires understanding the era’s aesthetics, including fashion, architecture, and everyday objects.
.webp)
Steam train providing a backdrop for authentic retro photography.
Consider exploring events listed on websites like revivalvintage.co.uk if you’re in the UK, or search for local vintage fairs and classic car meets in your area. These gatherings often feature meticulously staged scenes, providing a perfect backdrop for your retro-inspired photography.
2. Utilize Monochrome Picture Style
Is using a monochrome picture style beneficial for creating classic photos?
Yes, using a monochrome picture style is highly beneficial for creating classic photos. Shooting in your camera’s monochrome mode allows you to instantly visualize the scene in black and white, helping you focus on composition, contrast, and tonal range. This immediate feedback enables you to capture images that truly evoke a classic feel.
.webp)
Vintage car photographed in monochrome, emphasizing its classic lines and historical significance.
According to “Popular Photography” magazine, shooting in monochrome can improve your understanding of light and shadow, crucial elements in retro photography. This technique allows you to focus on the interplay of light and shadow, enhancing the depth and mood of your images. If you shoot in raw mode, the black and white effect is not permanent, giving you the flexibility to revert to color later if desired.
3. Explore Vintage Profiles
How do vintage profiles enhance the retro look in photos?
Vintage profiles significantly enhance the retro look in photos by applying pre-designed color adjustments that mimic the tones and hues of vintage film stocks. These profiles, available in Adobe Lightroom and Camera Raw, allow you to quickly skew the colors in your images, adding a nostalgic and classic aesthetic with just a few clicks.
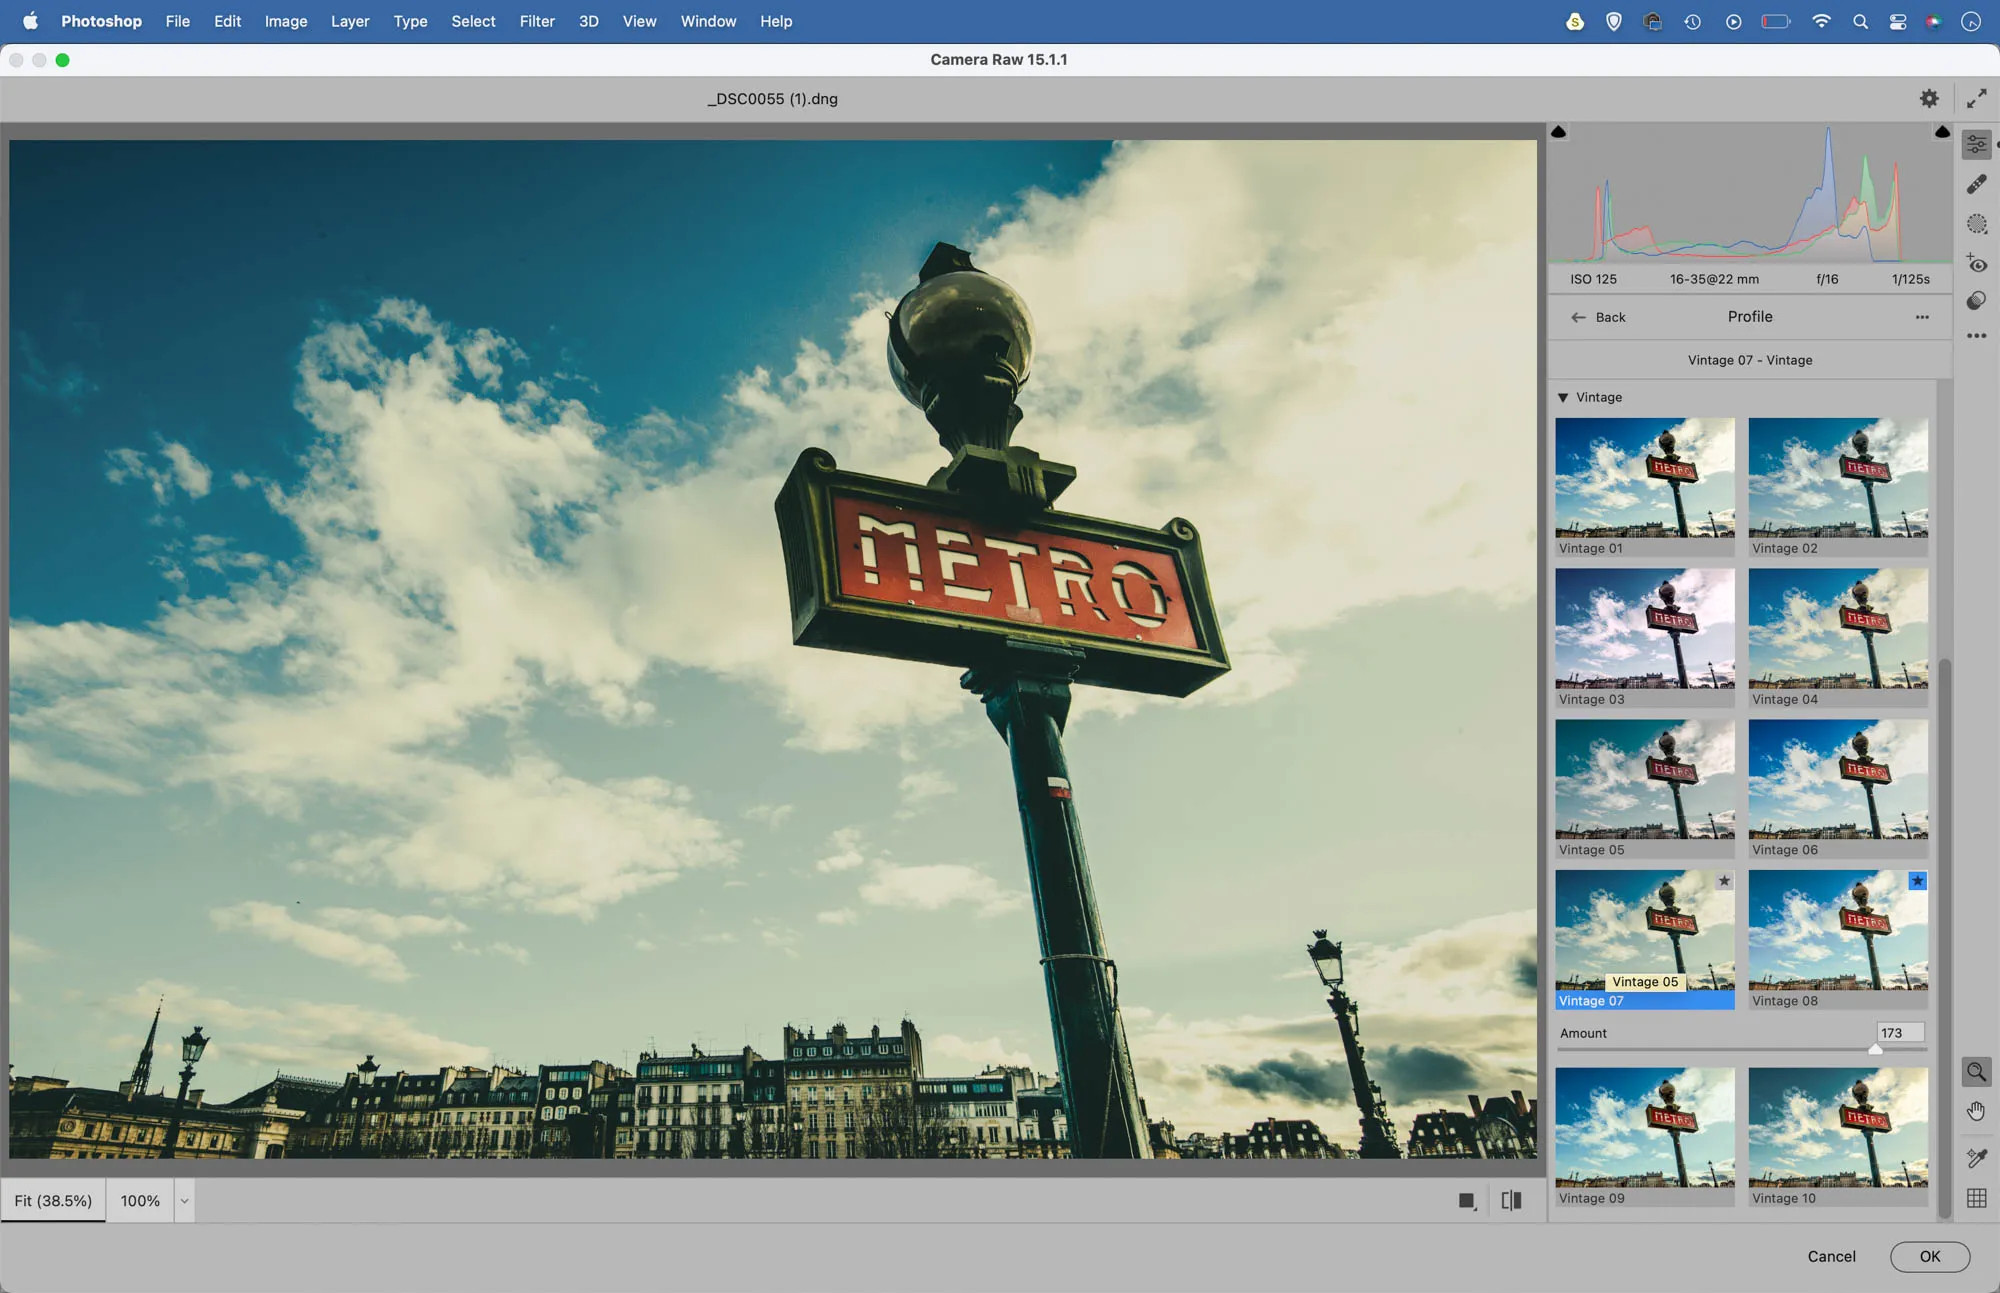 Adobe Lightroom interface showing Vintage Profiles, offering one-click retro toning.
Adobe Lightroom showcasing vintage profiles for instant retro color grading.
To use vintage profiles, open your image in Camera Raw or Lightroom, or go to Filter > Camera Raw Filter in Photoshop. Click on the grid icon at the top of the Basic Panel on the right to open the Profile Browser. Here, you will find a variety of Vintage Profiles. Hover over each profile to preview the effect, and adjust the Amount slider to control the intensity of the color change.
4. Shoot Through an Old Film Camera
Can shooting through an old film camera create unique retro effects?
Yes, shooting through an old film camera can create unique retro effects by capturing the imperfections and characteristics of vintage lenses and focusing screens. By aiming your digital camera through the viewfinder of an old film camera, you can capture images with a distinctive retro quality, embracing the unique optical properties of older lenses.
.webp)
Seascape captured through a TLR camera, showcasing the charm of vintage optics.
This technique is particularly effective with medium format cameras that have a focusing screen. The resulting images often exhibit a unique softness, vignetting, and color rendition that is difficult to replicate with modern equipment. According to the Santa Fe University of Art and Design’s Photography Department, in July 2025, using vintage equipment can introduce unpredictable elements that enhance the artistic value of your photographs.
5. Add Film Grain
Why is adding film grain important for retro photos?
Adding film grain is crucial for retro photos because it replicates the texture and aesthetic of vintage film stocks. Grain was a prominent characteristic of older films, especially when pushed during development to increase ISO. Replicating this effect digitally adds authenticity and a nostalgic feel to your images.
.webp)
Fish and chip shop with added film grain, creating a vintage texture.
You can achieve this effect by using a high ISO setting on your digital camera, such as 3200 or higher. Alternatively, you can add grain during post-processing using software like Lightroom or Camera Raw. In these programs, the Effect panel allows you to increase the grain slider and fine-tune the size and roughness for a realistic film grain effect.
6. Transfer Colors from Old Photos
How does transferring colors from old photos enhance a modern image’s retro feel?
Transferring colors from old photos enhances a modern image’s retro feel by replicating the unique color palette and tonal characteristics of vintage prints. This technique involves using an old photograph as a reference to adjust the colors of a modern image, creating a cohesive and authentic retro aesthetic.
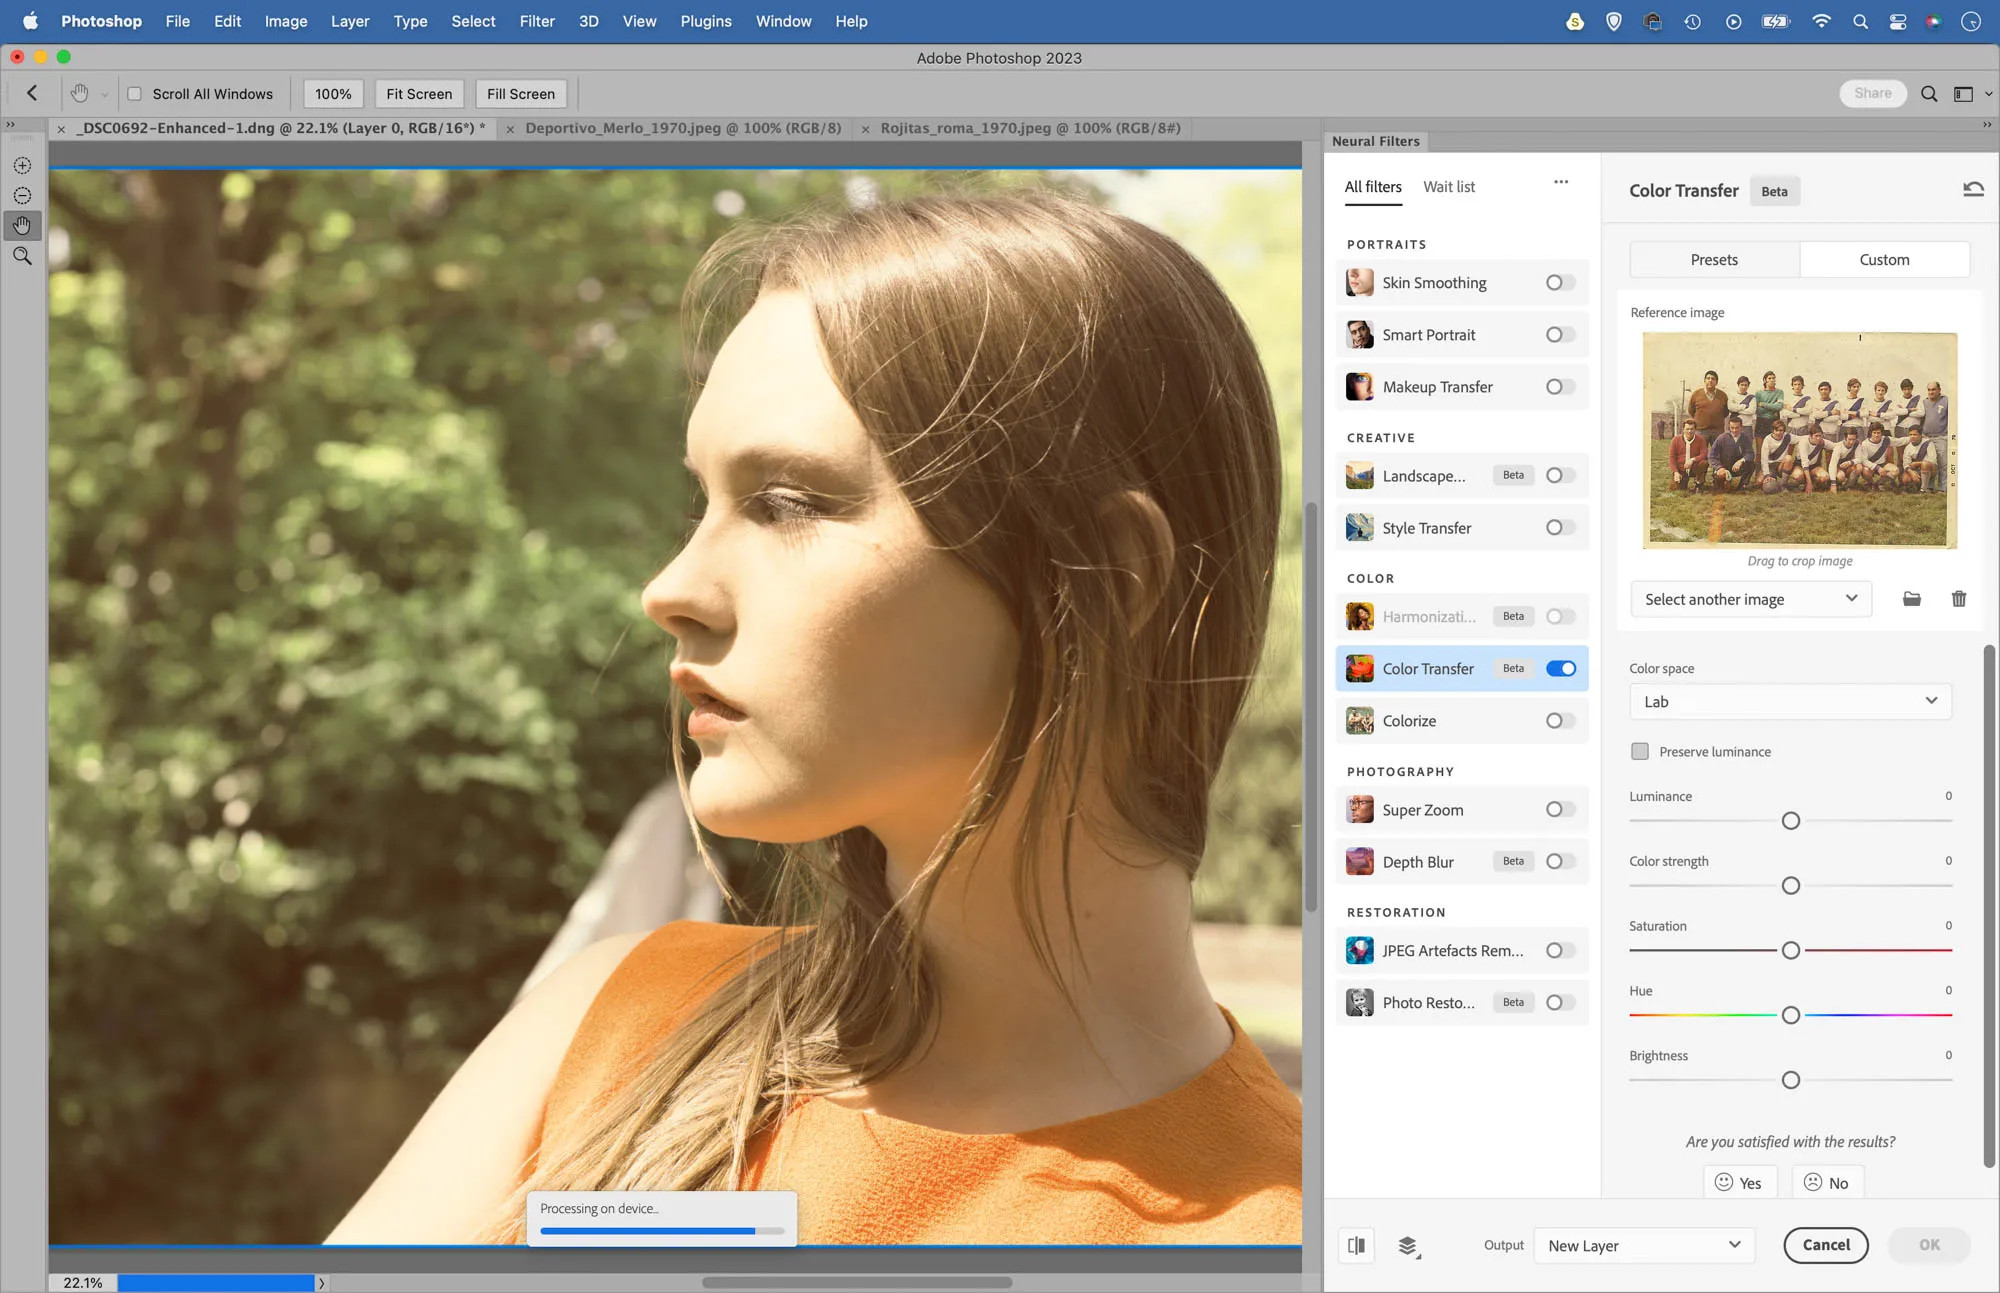 Example of color transfer from an old photo to a modern image.
Color transfer applied to a modern photo, giving it a retro color shift.
Photoshop’s AI-powered Color Transfer Neural Filter simplifies this process. Start by opening both the modern image and the vintage reference photo in Photoshop. Navigate to Filter > Neural Filters, turn on Color Transfer, and upload the vintage image in the Custom tab. The filter will apply the colors from the vintage photo to your modern one. Adjust the layer opacity to fine-tune the effect.
7. Blend Textures
Why is blending textures with photos effective for creating a vintage look?
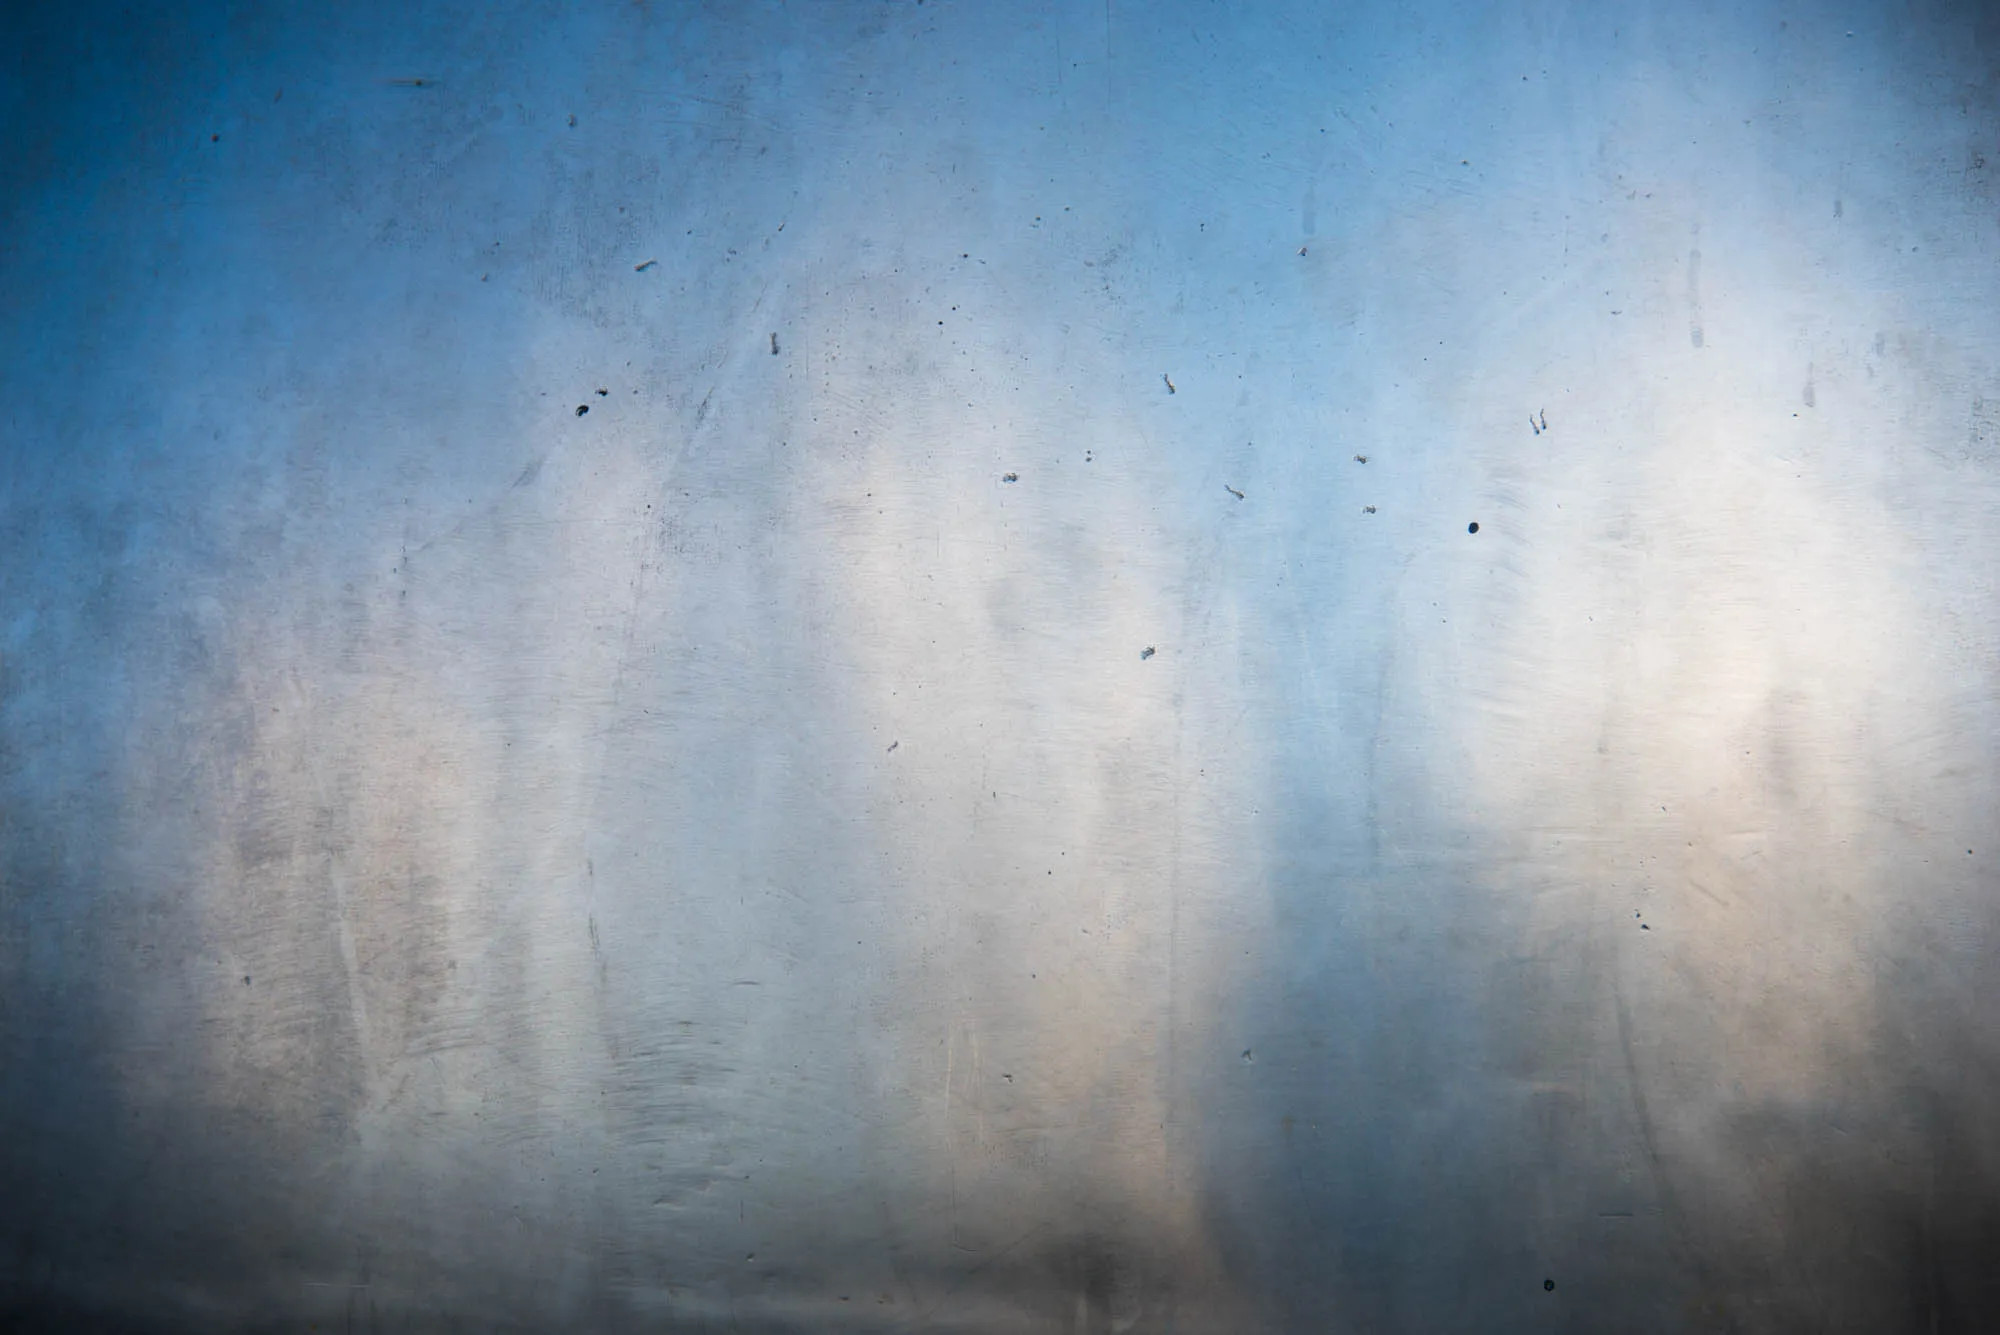
Blending textures with photos is highly effective for creating a vintage look because it simulates the physical imperfections and wear associated with old prints. By overlaying textures such as scratches, dust, and paper grain, you can add depth and character to your images, making them appear aged and weathered.
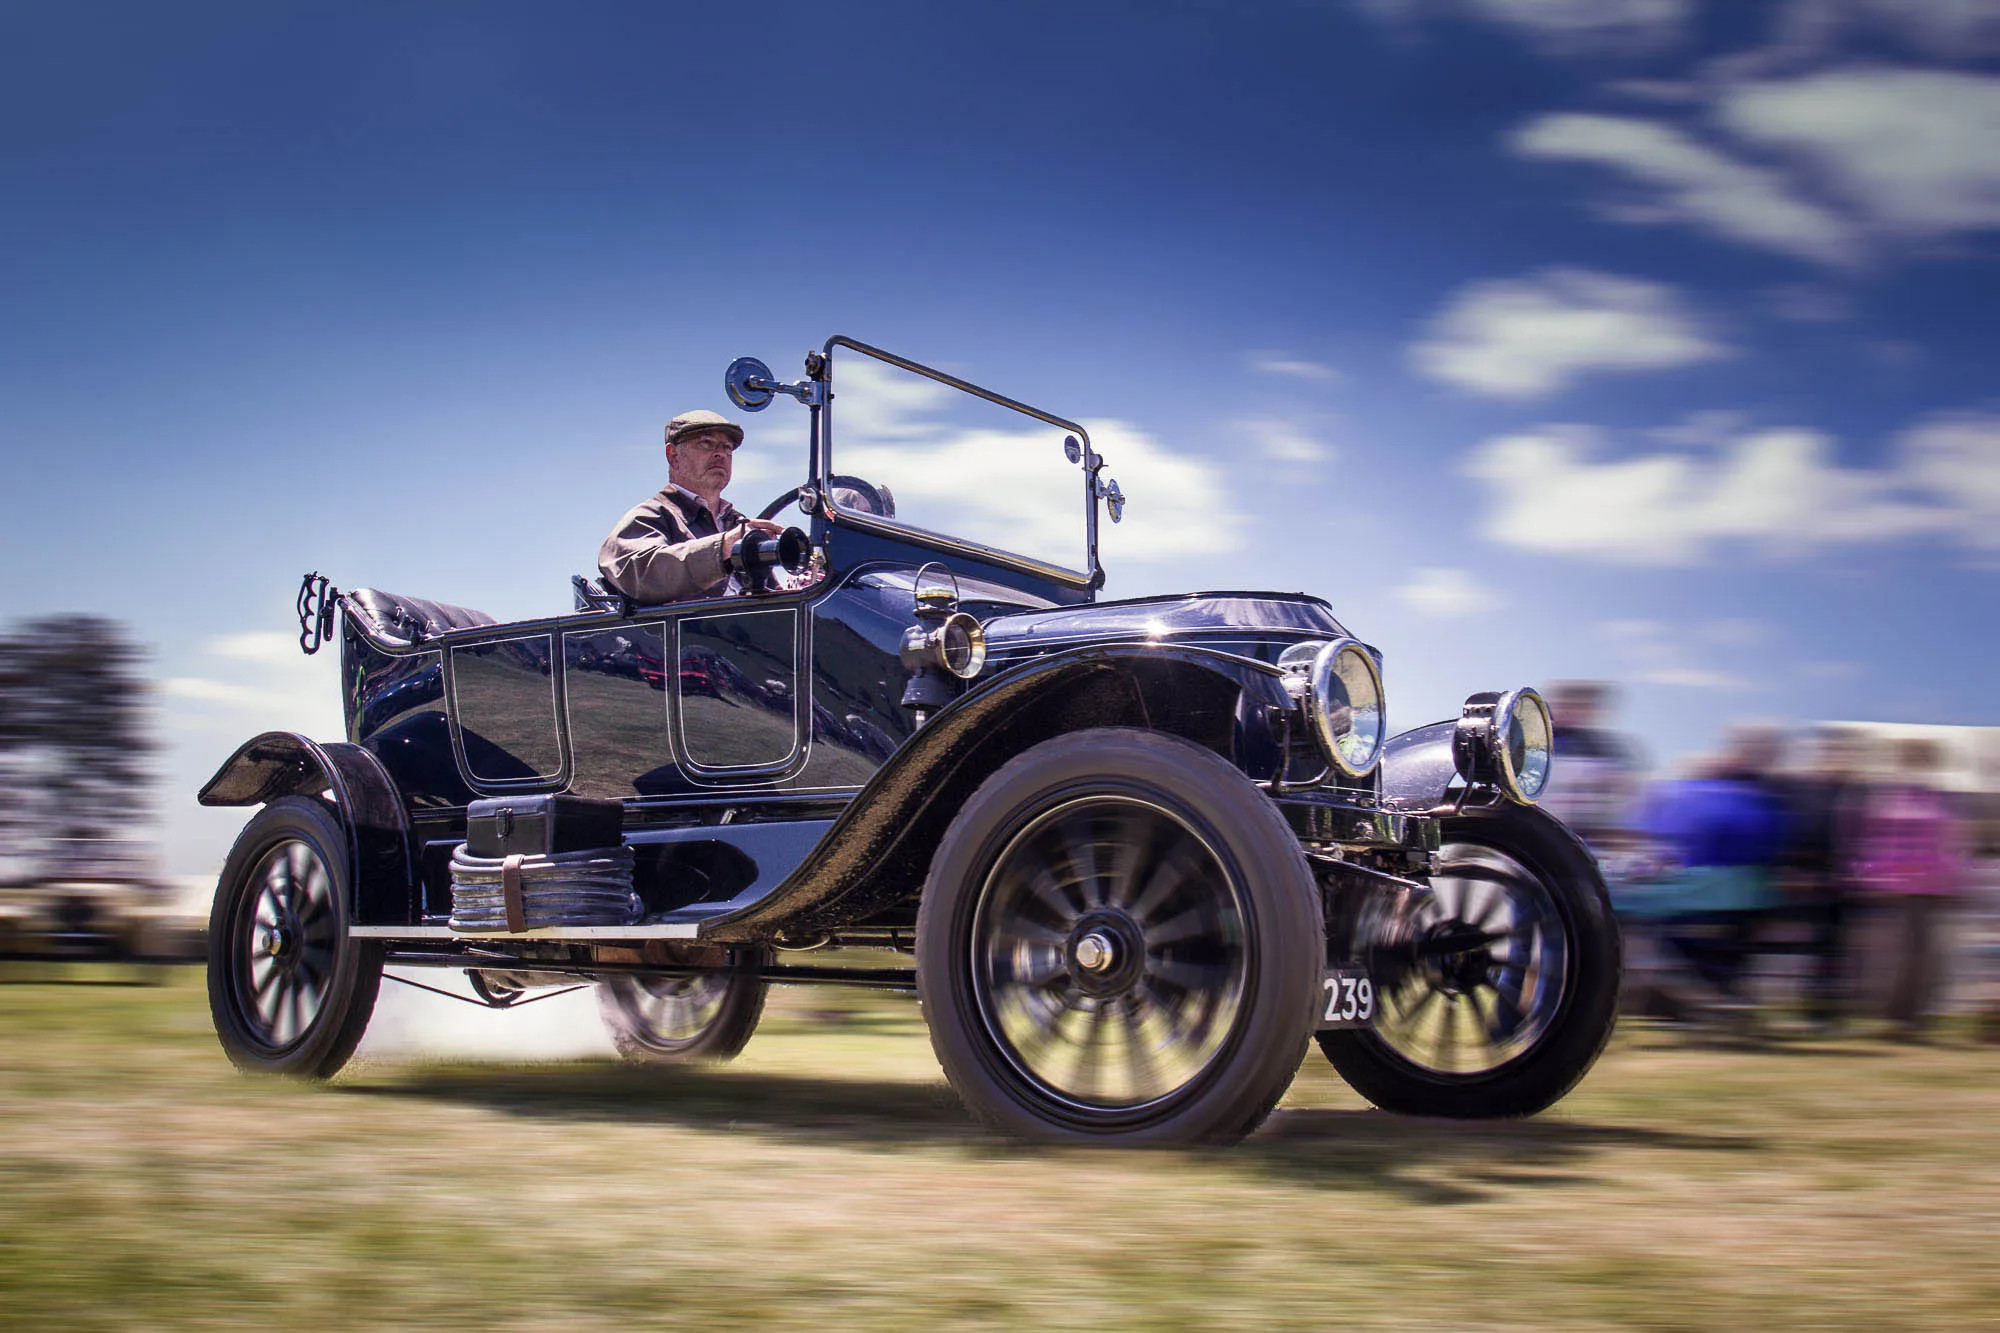 Photo before texture blending.
Original photo before texture overlay.
 Another photo before texture blending.
Another original photo before texture application.
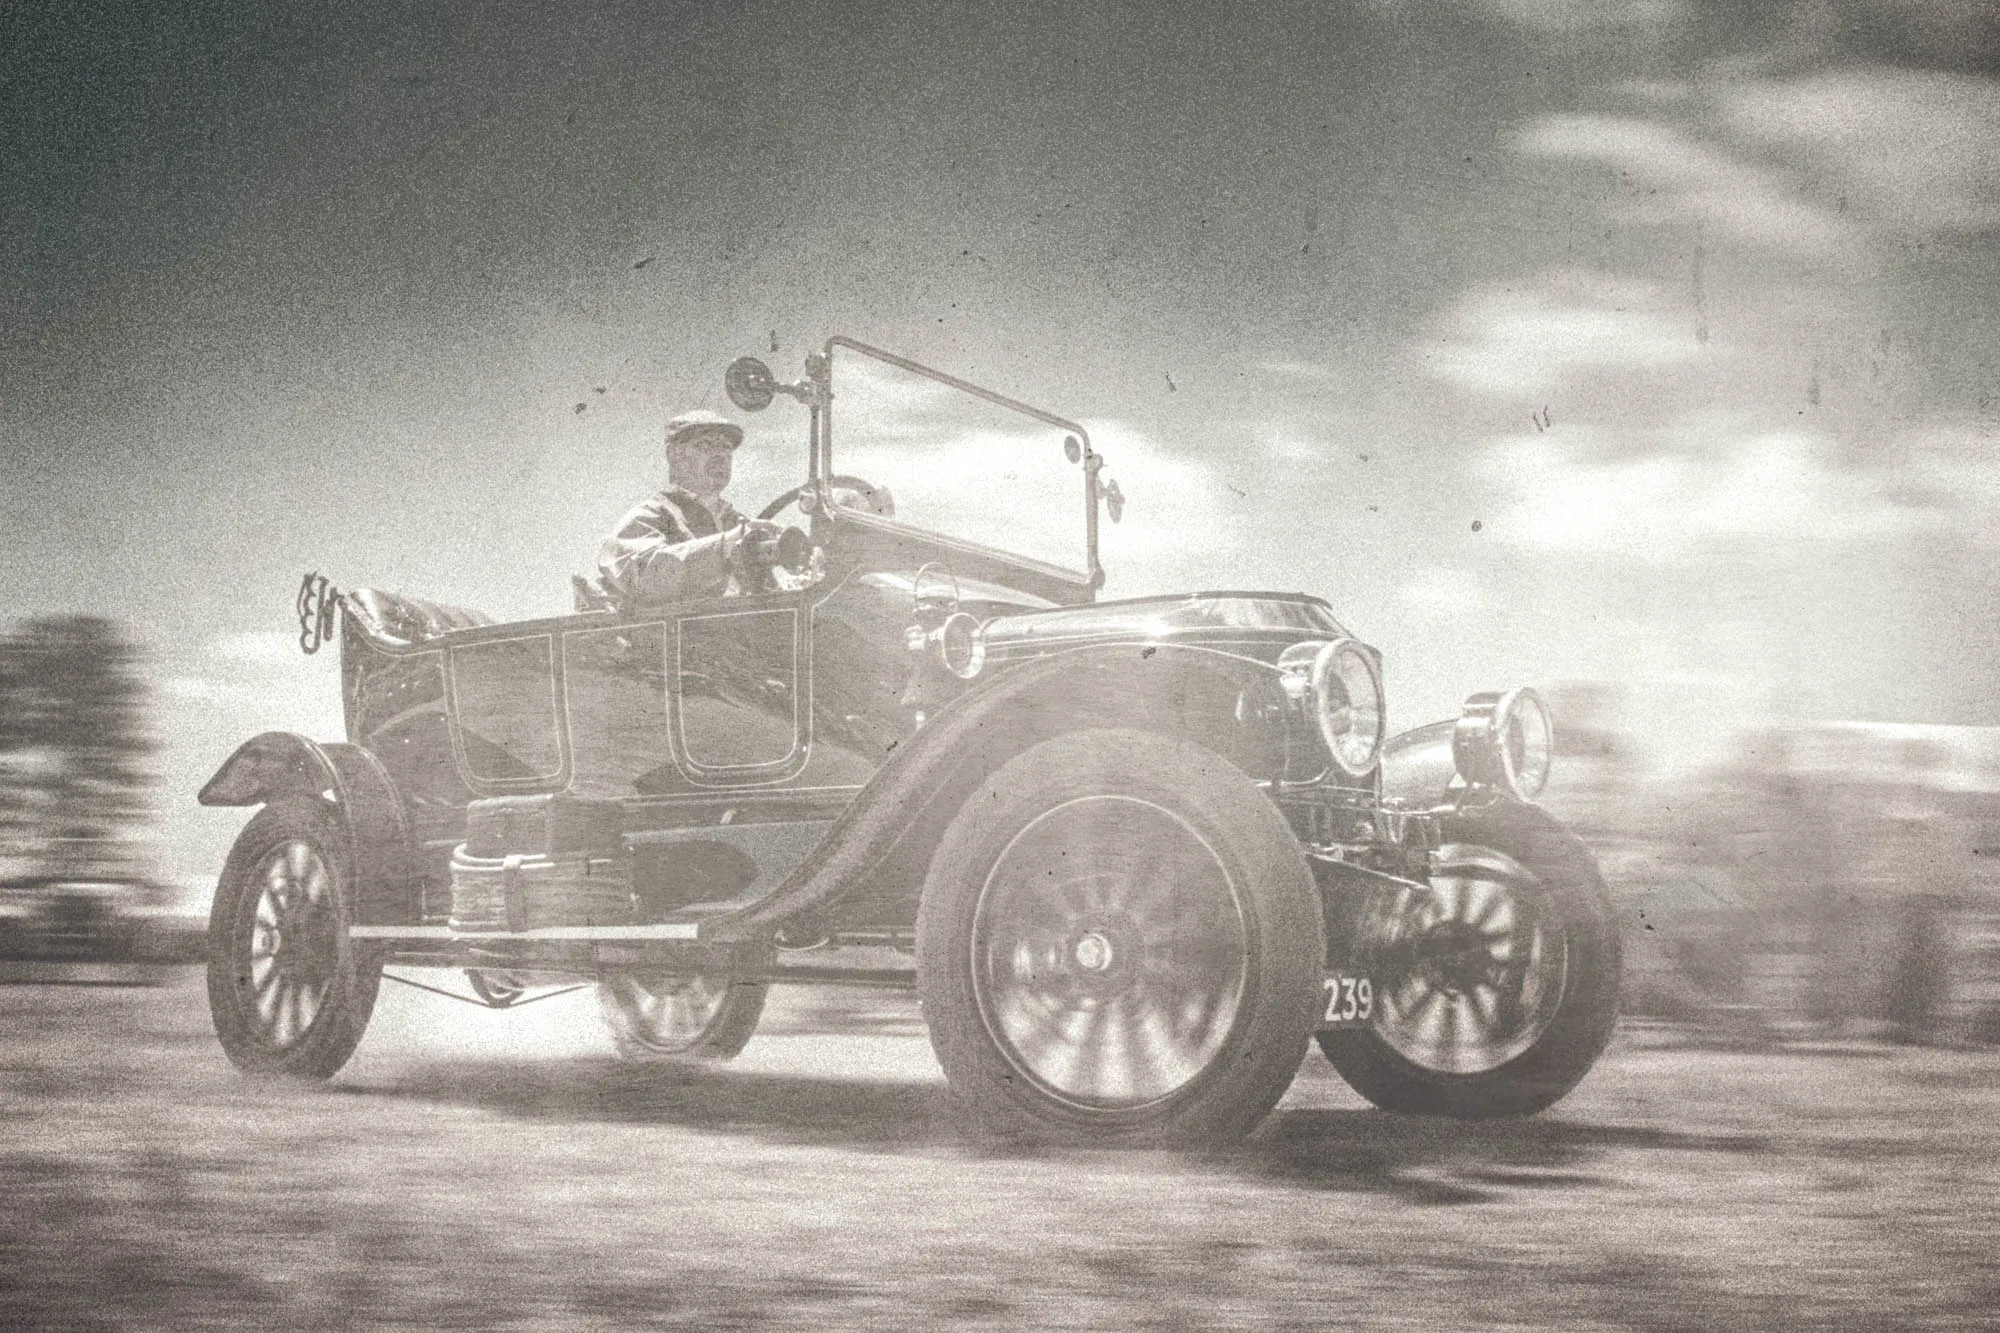 Photo after texture blending, creating a vintage aesthetic.
Final image with texture applied, enhancing the vintage effect.
Begin by creating a library of aged textures. Photograph surfaces like old roasting tins, crumpled paper, and scratched walls. Open your image in Photoshop or Affinity Photo, copy the texture onto a new layer, and experiment with blend modes such as Screen, Multiply, Overlay, and Soft Light to achieve the desired effect.
8. Embrace Lens Imperfections
How do lens imperfections contribute to the retro aesthetic?
Lens imperfections, such as soft corners and vignetting, are integral to the retro aesthetic because they were common characteristics of older, less refined lenses. Replicating these imperfections in post-processing can add authenticity and a nostalgic feel to your images.
.webp)
Streetcar scene with vignetting and soft corners, emulating imperfections of old lenses.
To add vignetting, use Camera Raw or the Camera Raw filter in Photoshop. Go to the Effects panel and adjust the Vignetting controls. For corner softness, use the Iris Blur filter (Filter > Blur Gallery > Iris Blur) to selectively blur the corners of the frame. Consider adding grain to the blurred areas to maintain the film grain look.
9. Use Analog Efex Pro
What benefits does Analog Efex Pro offer for creating retro photos?
Analog Efex Pro, part of the Nik Collection, offers numerous benefits for creating retro photos. It provides a wide array of presets and effects that allow you to add an aged look to any photo in seconds. With realistic light leaks, film borders, and other vintage effects, this plugin is a powerful tool for achieving authentic retro aesthetics.
 Analog Efex Pro interface with various retro presets and effects.
Interface of Analog Efex Pro, offering retro presets and effects for vintage styling.
Once installed, Analog Efex Pro can be launched from within the filter menu in Photoshop. Its user-friendly interface and extensive range of options make it easy to experiment and fine-tune your retro effects.
10. Matte the Shadows
Why is matting the shadows a useful technique for retro photo editing?
Matting the shadows is a useful technique for retro photo editing because it replicates the faded contrast and washed-out blacks often seen in old prints. By lightening the darkest pixels, you can create a softer, more nostalgic look that evokes the passage of time.
.webp)
Converse shoes photo with faded blacks, giving it a vintage print appearance.
To matte the shadows, open your image in Photoshop or Affinity Photo and add a Levels adjustment layer (or hit Cmd/Ctrl+L). In the Output Levels section, drag the black point slider inwards to lighten the darkest pixels. You can also bring the white point slider inwards slightly to reduce the brightest pixels, further enhancing the faded look.
Understanding the Core of Retro Photography
Creating retro photos is more than just applying a filter; it’s about understanding the essence of vintage photography. It involves capturing the aesthetics, imperfections, and unique qualities of past eras.
Embracing Imperfections:
One of the key elements of retro photography is embracing imperfections. Old film cameras and lenses often produced images with soft focus, vignetting, and other quirks that added character to the photos. Instead of striving for clinical perfection, try to incorporate these imperfections into your modern retro photos.
Color Grading Techniques:
Color grading is crucial for achieving a retro look. Experiment with different color palettes and toning techniques to mimic the colors of vintage film stocks. Common techniques include:
- Sepia Toning: Adding a warm, brownish tint to the image.
- Cross-Processing: Simulating the effect of developing film in the wrong chemicals, resulting in unusual color shifts.
- Faded Colors: Reducing the saturation and contrast to create a washed-out, vintage feel.
Composition and Styling:
The composition and styling of your photos can also contribute to the retro aesthetic. Consider using vintage props, clothing, and locations to create authentic-looking scenes. Pay attention to details like hairstyles, makeup, and accessories, as these can significantly impact the overall look and feel of your photos.
Diving Deeper: Advanced Retro Photography Techniques
For those looking to take their retro photography skills to the next level, here are some advanced techniques to explore:
Using Vintage Lenses:
One of the best ways to achieve an authentic retro look is by using vintage lenses on modern cameras. These lenses often have unique optical characteristics that are difficult to replicate with modern equipment.
- Adapting Vintage Lenses: Many vintage lenses can be adapted to fit modern camera bodies using lens adapters.
- Lens Characteristics: Look for lenses with soft focus, vignetting, and other imperfections that contribute to the retro aesthetic.
Creating Light Leaks:
Light leaks were a common occurrence in old film cameras, caused by light entering the camera body and affecting the film. While they were often seen as a flaw, light leaks can add a unique and interesting element to retro photos.
- Simulating Light Leaks: You can simulate light leaks in post-processing using software like Photoshop or Lightroom.
- Creative Use of Light Leaks: Experiment with different colors and patterns to create unique and eye-catching light leak effects.
Double Exposure Techniques:
Double exposure involves combining two or more images into a single frame. This technique was popular in the early days of photography and can be used to create surreal and dreamlike effects.
- In-Camera Double Exposure: Some modern cameras have a built-in double exposure mode.
- Post-Processing Double Exposure: You can also create double exposures in post-processing by layering two or more images and blending them together.
Maximizing Your Retro Photography with dfphoto.net
dfphoto.net is your ultimate resource for mastering retro photography. Here’s how you can leverage our platform to enhance your skills and create stunning vintage-inspired images:
Extensive Tutorials and Guides:
dfphoto.net offers a wealth of tutorials and guides covering every aspect of retro photography, from basic techniques to advanced editing tips.
Curated Image Collections:
Explore our curated collections of retro-style photographs for inspiration and ideas. These collections showcase the best examples of vintage photography, helping you understand the key elements of the retro aesthetic.
Community Engagement:
Connect with fellow retro photography enthusiasts in our online community. Share your work, get feedback, and learn from others who are passionate about vintage photography.
Equipment Reviews and Recommendations:
Stay informed about the latest equipment and accessories for retro photography with our in-depth reviews and recommendations. Whether you’re looking for vintage lenses, film cameras, or editing software, dfphoto.net has you covered.
5 Search Intentions for “How to Take Retro Photos”
Understanding user search intent is crucial for creating content that resonates with your audience. Here are five key search intentions for the keyword “How To Take Retro Photos”:
- Instructional Guides: Users seeking step-by-step instructions on creating retro photos.
- Techniques and Tips: Users looking for specific techniques and tips for achieving a vintage aesthetic.
- Inspiration and Ideas: Users seeking inspiration and ideas for retro-themed photo shoots.
- Equipment Recommendations: Users looking for recommendations on cameras, lenses, and accessories for retro photography.
- Editing Tutorials: Users seeking tutorials on editing photos to give them a retro look.
FAQ: Mastering Retro Photography
1. What is retro photography?
Retro photography is capturing or editing images to evoke a vintage or nostalgic feel, reminiscent of film photography from past decades.
2. What equipment do I need for retro photography?
While modern digital cameras can be used, vintage lenses or film cameras can enhance the authenticity. Essential editing software includes Adobe Lightroom and Photoshop.
3. How do I add film grain to my photos?
You can add film grain in post-processing using software like Lightroom or Camera Raw, adjusting the grain slider in the Effects panel.
4. What are some common retro color grading techniques?
Common techniques include sepia toning, cross-processing simulation, and reducing saturation and contrast for a faded look.
5. How can I create light leaks in my photos?
Light leaks can be simulated in post-processing using software like Photoshop, adding colored overlays to mimic the effect of light entering the camera body.
6. What blend modes are best for blending textures?
The best blend modes for blending textures include Screen, Multiply, Overlay, and Soft Light.
7. How do I achieve soft corners in my photos?
Soft corners can be achieved using the Iris Blur filter in Photoshop, selectively blurring the corners of the frame.
8. What are vintage profiles in Lightroom?
Vintage profiles are pre-designed color adjustments that mimic the tones and hues of vintage film stocks, available in Adobe Lightroom and Camera Raw.
9. How do I matte the shadows in my photos?
Matte the shadows by adding a Levels adjustment layer in Photoshop or Affinity Photo and dragging the black point slider inwards to lighten the darkest pixels.
10. Where can I find inspiration for retro photography?
Explore online photography communities, vintage photo archives, and platforms like dfphoto.net for curated collections of retro-style photographs.
By following these guidelines and utilizing the resources available on dfphoto.net, you can master the art of retro photography and create stunning vintage-inspired images that capture the charm and nostalgia of bygone eras.
For further assistance and inspiration, visit us at dfphoto.net or contact us at Address: 1600 St Michael’s Dr, Santa Fe, NM 87505, United States. Phone: +1 (505) 471-6001. Explore our tutorials, view our curated collections, and connect with our vibrant photography community.