 Elevated Real Estate Photography Techniques
Are you aiming to elevate your real estate photography and capture images that truly sell properties? Whether you’re a real estate agent looking to showcase your listings, a homeowner venturing into DIY property promotion, or an aspiring photographer specializing in real estate, you’ve landed in the perfect spot.
This guide provides actionable strategies to enhance your real estate photography without demanding a hefty investment in top-tier photography gear. You don’t need to be a seasoned professional to significantly improve your property photos. These insights are designed to be practical and impactful for anyone seeking to present properties in their best light.
Consider this article your go-to resource if you:
- Want to create compelling visuals for your own home for sale or rent.
- Are a realtor tasked with photographing client properties to attract buyers or renters.
- Are a beginner photographer eager to refine your skills and break into the real estate photography market.
If any of these scenarios resonate with you, delve into the following expert tips to transform your real estate photography.
Understanding Real Estate Photography
Real estate photography, a specialized area within commercial photography, centers around capturing properties—be they residential homes, commercial buildings, industrial spaces, or even land plots. Each category encompasses a spectrum of property types, from single-family homes and apartments to office complexes and vacant land ripe for development.
The primary goal of real estate photography is commercial: to visually communicate the unique features and appeal of a property to attract potential buyers, renters, or investors. It’s about creating an enticing visual narrative that sparks interest and drives action.
It’s crucial to understand that real estate photography is not about capturing a single standout image. Instead, it’s a comprehensive approach involving a series of carefully composed photographs. Typically, this includes not only interior shots highlighting key rooms and features but also exterior images that showcase the building’s facade, surrounding landscape, and neighborhood context. The precise number and focus of these images will vary depending on the property’s specifics and the marketing strategy.
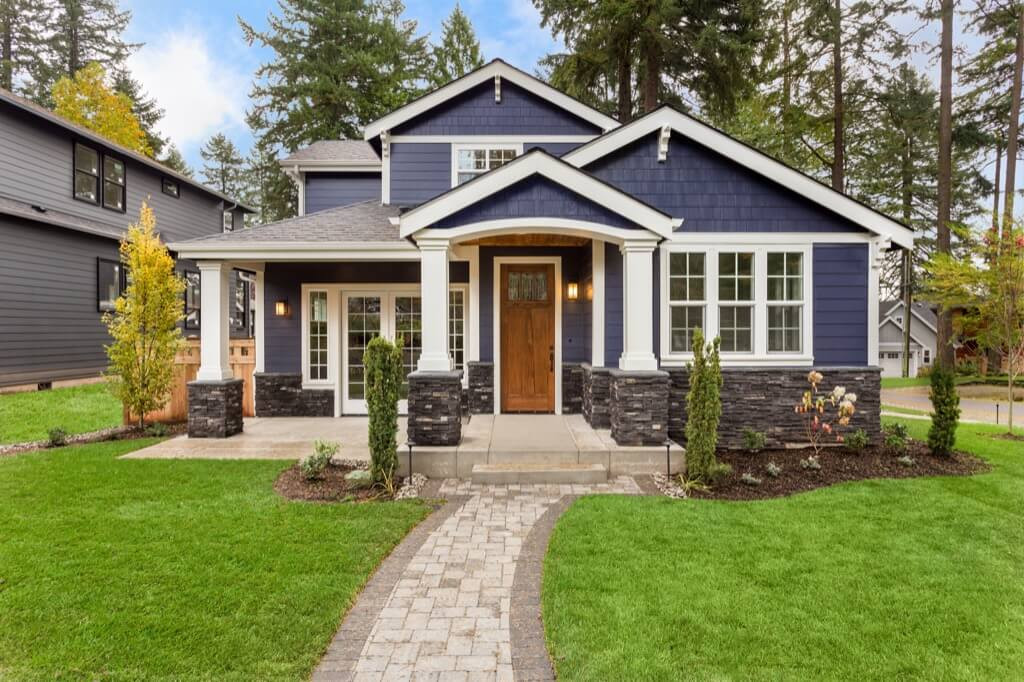 Showcasing Property Features in Real Estate Photography
Differentiating Real Estate Photography from Architecture and Interior Photography
While real estate photography shares visual elements with architecture and interior photography, their core purposes and applications diverge significantly. This distinction, though seemingly subtle, shapes the entire photographic process, from initial concept to final image delivery.
As previously mentioned, real estate photography is primarily focused on marketing and sales. The aim is to present a property in its most appealing light to attract potential buyers or renters. Conversely, architecture and interior photography serve different masters. These images often find their place in an architect’s or interior designer’s professional portfolio, in the pages of design and lifestyle publications (editorial photography), and sometimes even as pieces of fine art.
This difference in intended use dictates considerable variations in the approach to shooting and editing. Architecture and interior photography often involve a more artistic and detailed approach, with greater emphasis on aesthetic interpretation and less on strictly objective representation. The time invested in capturing and refining these images, along with the level of detail pursued, reflects this artistic and portfolio-driven focus, leading to higher fees compared to the more commercially oriented real estate photography.
Furthermore, ethical considerations play a role. Real estate photographers generally aim for objective representation, accurately portraying a property’s features without undue artistic interpretation. In contrast, an architecture photographer might intentionally employ artistic license, offering a unique perspective or stylistic viewpoint that aligns with their creative vision or the architect’s design concept. This difference in approach and intent is a key factor in the pricing disparity between these photography types.
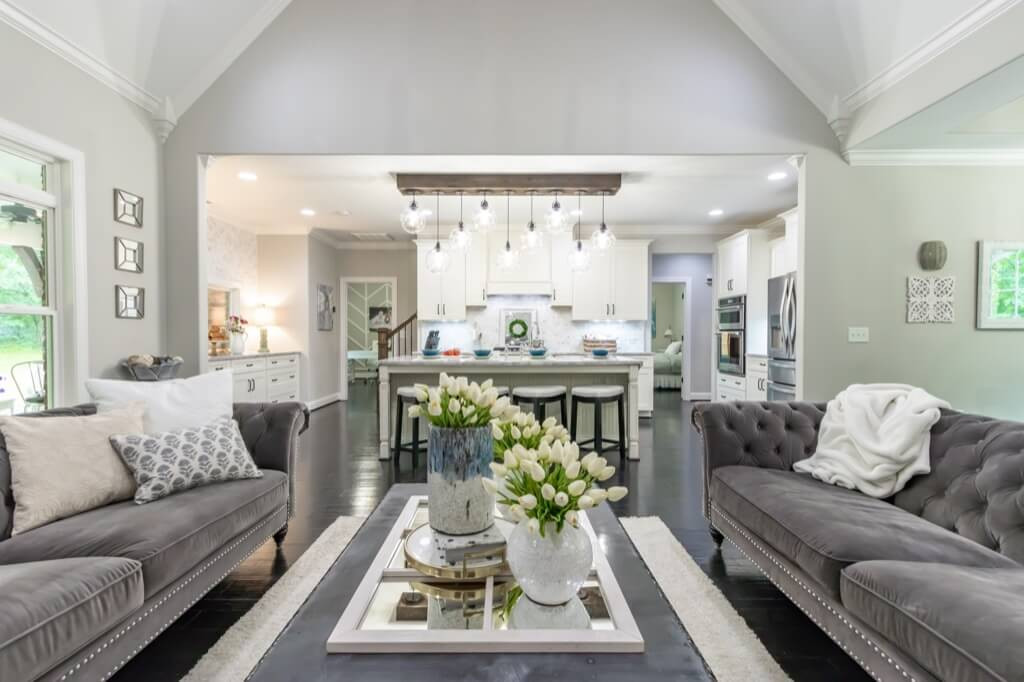
 Highlighting Property Appeal in Real Estate Photography
Essential Real Estate Photography Tips for Success
Whether you’re just starting out or looking to refine your techniques, these actionable tips will significantly improve your real estate photography and help you capture images that truly stand out.
1. Develop a Detailed Shot List
Efficiency is paramount in real estate photography, where budgets are often tight and turnaround times are quick. A well-structured shot list is your secret weapon for staying organized, optimizing your photography packages, and ensuring efficient photoshoots.
Tailor your shot lists to each property type. Consider whether you’re photographing a sprawling house or a compact apartment, and adjust the list based on the number of rooms and unique features.
Example Shot List for a Residential Property:
- Exterior front elevation shot
- Rear exterior shot (essential if the property boasts a garden, pool, or notable backyard feature)
- Individual shots for each bedroom
- Comprehensive living room shot
- Dedicated shots for each bathroom
- Kitchen showcasing
- Dining room capture
This is a foundational list that you can customize for each property. Remember to adjust your pricing if clients request more images than included in your standard package. Clear communication about scope and pricing ensures client satisfaction and fair compensation for your work.
 Organized Real Estate Photography with Shot Lists
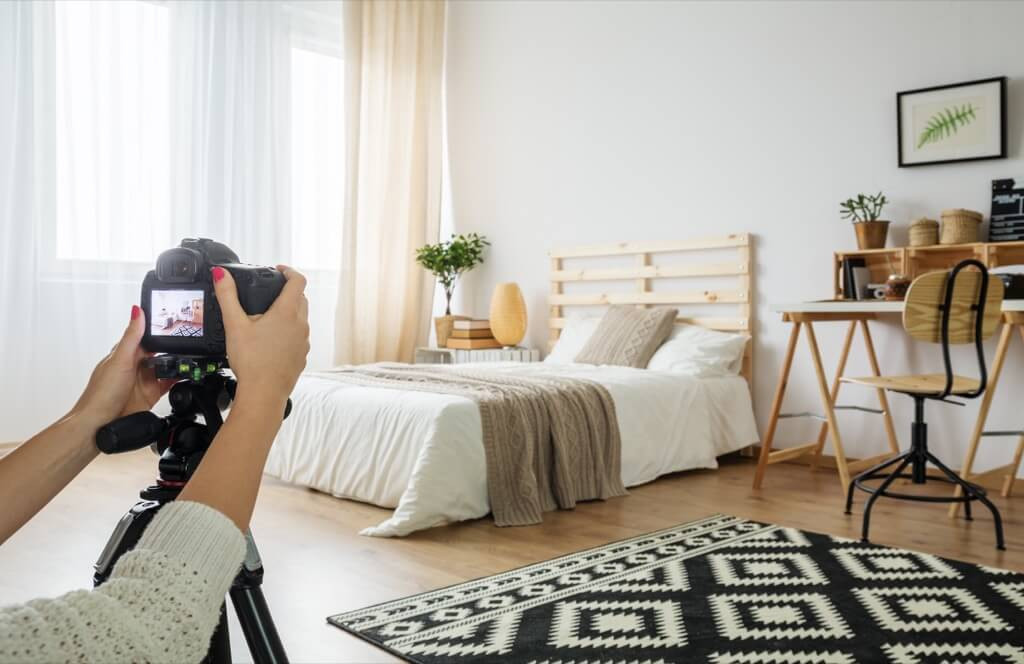
2. Property Preparation is Key
No matter your photographic expertise, a cluttered or unclean property will detract from the final images. Before the photoshoot, clearly communicate with your client about the property’s presentation. Emphasize that your photography services focus on capturing the property as it is presented and do not include cleaning or tidying.
While you could offer pre-shoot cleaning or staging services, these should be considered add-ons with separate fees to compensate for the additional time and effort. Generally, real estate photographers are there to document a property, not manage its upkeep, similar to how portrait photographers are not expected to provide makeup artistry. Minor adjustments like repositioning furniture or decluttering a surface are acceptable to enhance a shot, but extensive cleaning or organizing goes beyond the typical scope.
 Prepared Interiors for Real Estate Photography
3. Collaborate with a Home Stager
Home staging involves strategically decorating and arranging a property to maximize its appeal to potential buyers. This service, often implemented before real estate photos are taken, can significantly enhance the visual impact of your images.
Offering home staging as part of your service package can attract clients seeking a premium presentation for their properties. Ensure that staging services are clearly priced and billed separately from your photography fees.
Many real estate agents have established relationships with trusted home stagers, so you may not always have the flexibility to choose the stager. However, collaborating with a stager you know and trust can streamline the process and ensure a cohesive visual outcome.
For personal portfolio projects or when creating stock real estate photos, investing in a home stager can elevate the quality and marketability of your images. Even if you don’t offer staging, learning staging principles can inform your own approach to property photography and help you advise clients on simple staging improvements.
Professional Home Staging for Real Estate Photos
4. Optimize Your Shooting Time
Scheduling flexibility in real estate photography can be limited due to coordination needs with homeowners and real estate agents. However, when possible, aim to shoot during the “golden hours”—early morning or late afternoon. These times provide soft, diffused light and warm tones, ideal for enhancing the visual appeal of almost any property. Ensure the sun’s orientation illuminates the front of the house for exterior shots during these times.
Cloudy days can also provide even, soft lighting, which is beneficial for photographing interiors and exteriors. However, overcast skies can result in dull, uninteresting backgrounds in exterior shots. This can be easily addressed in post-processing by adding a more vibrant sky overlay, a common technique in real estate photography editing.
If you must shoot in the evening or under challenging lighting conditions, consider adjusting your rates to account for the need for additional lighting equipment, such as flashes, and potentially an assistant. Evening and low-light shoots often require more setup time and post-processing to achieve optimal results.
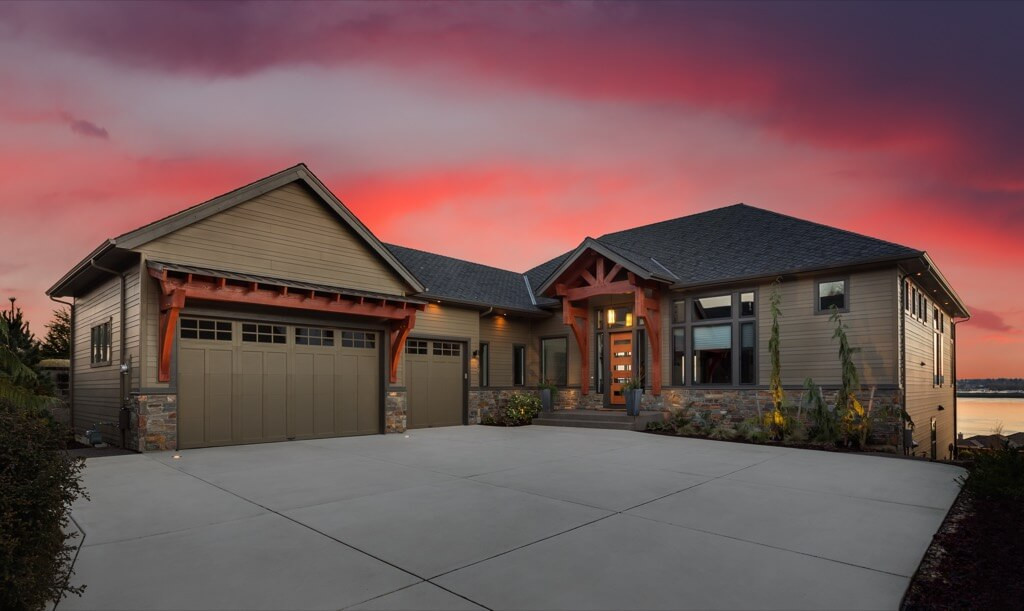 Golden Hour Lighting in Real Estate Photography
5. The Indispensable Tripod
A tripod is not just an accessory; it’s a fundamental tool for real estate photography. It provides stability, allowing for precise framing and minimizing perspective distortion.
In low-light situations, a tripod becomes even more critical. Ambient light indoors is often insufficient for fast shutter speeds, and without a tripod, you risk blurry images. A tripod allows for longer exposures at lower ISO settings, maintaining image clarity and sharpness.
Furthermore, tripods are essential for advanced techniques like HDR (High Dynamic Range) and photo compositing, both frequently used in real estate photography. These techniques require capturing multiple images with identical framing, achievable only with a stable tripod setup.
 Tripod Stability for Sharp Real Estate Photos
6. Lens Selection for Real Estate
A wide-angle lens is crucial for real estate photography. It enables you to capture a broad field of view, essential for showcasing rooms in their entirety and placing properties within their surrounding context.
A focal length range of 16-35mm on a full-frame camera is generally ideal, offering a viewing angle from approximately 107 to 64 degrees. Using a full-frame camera is recommended to maximize the wide field of view; crop-sensor cameras will require focal length conversion.
Be cautious with extremely wide focal lengths in real estate photography, as they can introduce unwanted distortion, making rooms appear unnaturally stretched or skewed. Choose your wide-angle lens carefully to balance field of view with minimal distortion.
 Wide-Angle Lens for Real Estate Photography
7. Leverage Ambient Light Effectively
Lighting large spaces efficiently requires expertise, time, and specialized equipment, which may not always align with real estate photography budgets and timelines. Maximizing available ambient light is often the most practical approach.
Tips for Working with Ambient Light:
- Position yourself with windows to your side or at a 45-degree angle. Avoid shooting directly towards or away from windows to manage contrast.
- Adjust blinds or curtains to soften harsh sunlight and reduce excessive contrast between indoor and outdoor light levels.
- Minimize artificial lighting to avoid mixed color temperatures. Turn off interior lights when sufficient natural light is available.
- For exterior shots, ensure the property’s front facade is well-illuminated by natural light.
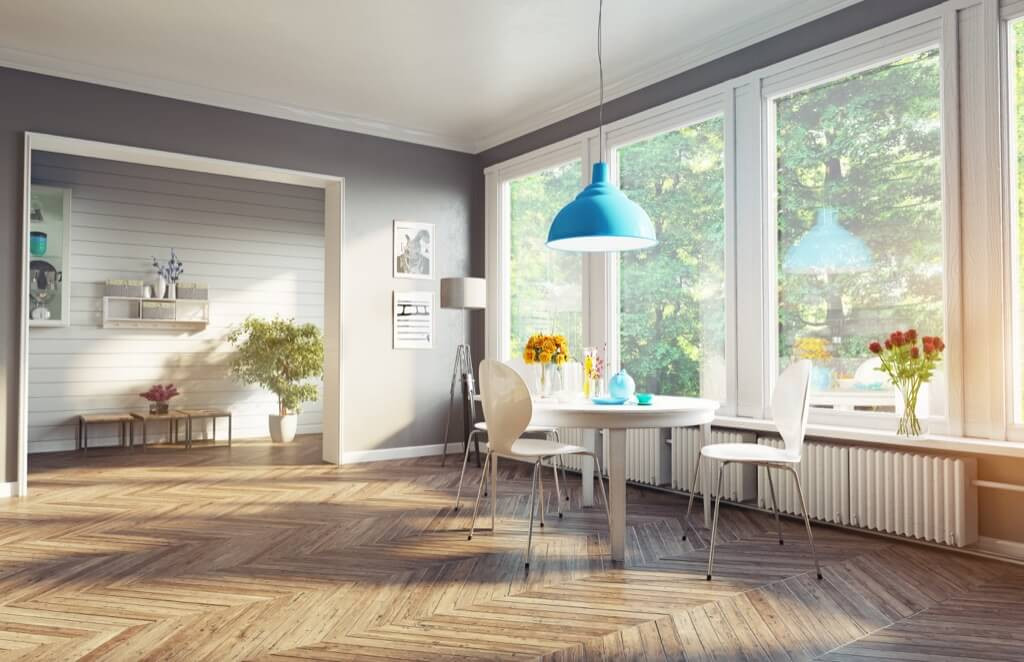 Ambient Light Techniques in Real Estate Interior Photography
8. Manage Color Temperatures Carefully
White balance is a significant challenge in real estate photography due to the mix of natural light from windows and artificial light from interior fixtures. Different light sources emit light at varying color temperatures, measured in Kelvin.
For instance, daylight around noon is approximately 5500K (Kelvin), appearing as white light. Incandescent lamps are much warmer, around 2700-3000K, producing a yellowish light. Mixing these light sources can lead to color casts and imbalances that are time-consuming to correct in post-processing.
While mixed lighting can sometimes be used creatively for effect, in real estate photography, a neutral and balanced color palette is generally preferred. Aim to use a single dominant light source whenever possible. If natural light is abundant, turn off interior lights to rely solely on window light. Alternatively, use artificial lighting and flash to overpower and standardize the ambient light, ensuring consistent color temperatures throughout your images.
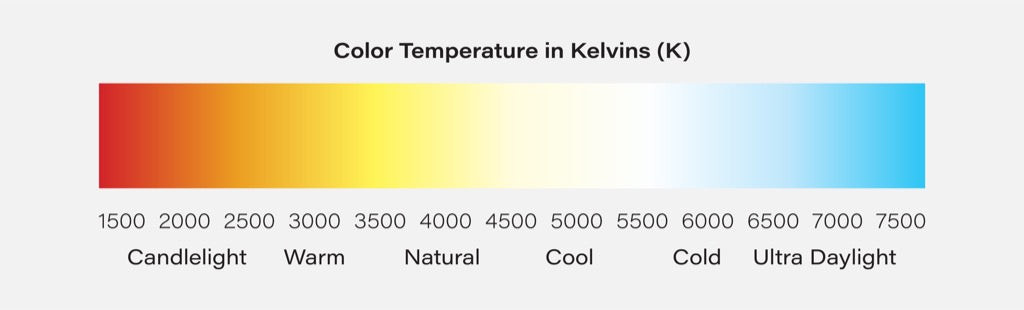 Understanding Color Temperature in Real Estate Photography Lighting
9. Choose the Optimal Perspective
Perspective is crucial in real estate photography. Your camera position significantly impacts how a space is perceived. Aim to showcase property features objectively while also capturing viewer interest within a limited set of images.
Space constraints can dictate your shooting position, especially in smaller rooms. Shooting from a doorway may be necessary to capture the entire space. Wide-angle lenses are helpful in these situations. Whenever feasible, try to include three walls in your interior shots to give a better sense of the room’s dimensions and layout.
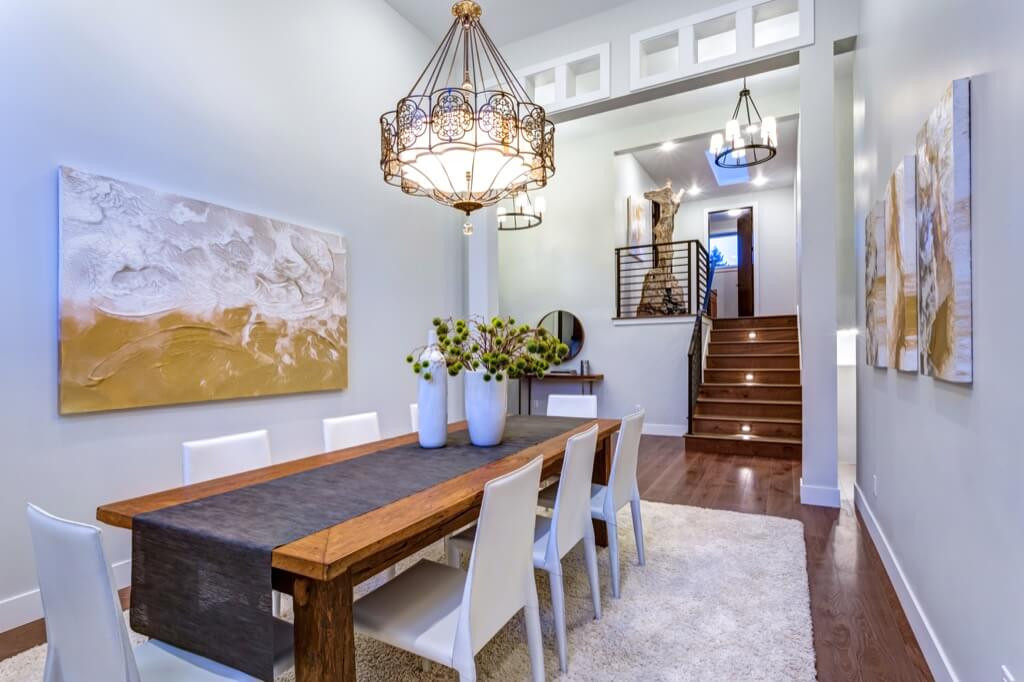 Strategic Perspective in Real Estate Interior Photography
10. Ideal Shooting Height for Real Estate
Minimizing perspective distortion is paramount in real estate photography. Leveling your camera is essential to ensure vertical lines, like walls and door frames, appear straight and true. Use a bubble level, ideally a double bubble level, to precisely align your camera. A tilt-shift tripod head can further refine adjustments for perfect leveling.
While leveling is technical and straightforward, determining the optimal shooting height is more subjective and may vary room by room. Chest height is a common starting point to minimize distortion. However, this height can sometimes result in too much ceiling area and not enough foreground detail, or even awkwardly crop furniture.
Lowering your shooting height can often solve these issues. Many experienced real estate photographers recommend shooting at doorknob height as a guideline. Experiment with different heights to find the best perspective for each room, balancing composition with minimal distortion.
 Optimizing Shooting Height in Residential Photography
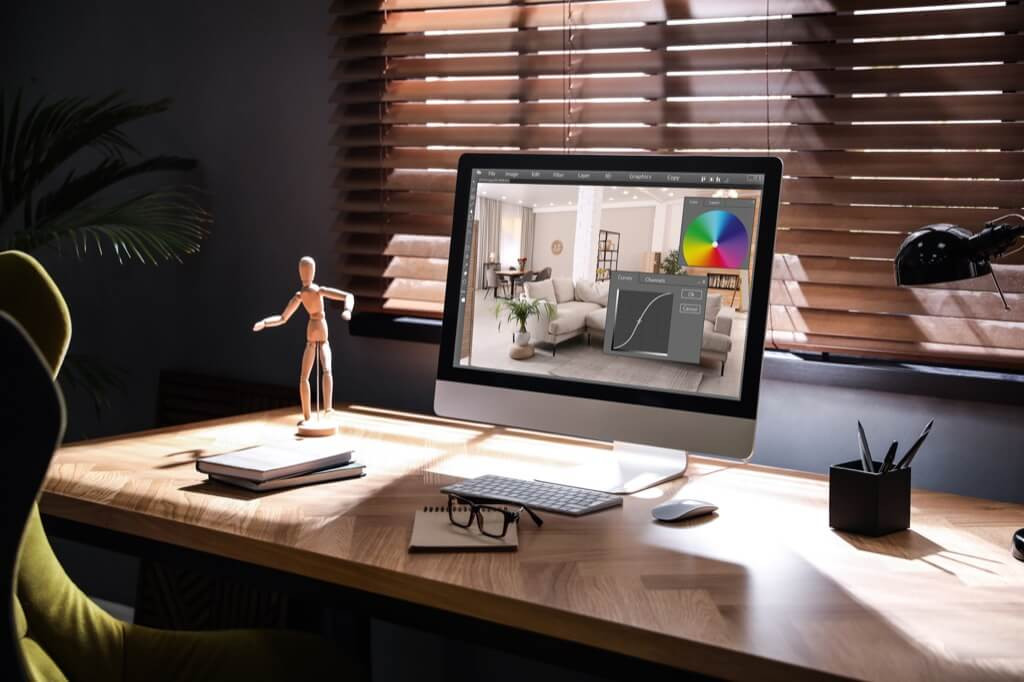
11. Post-Production Perspective Correction
If in-camera perspective correction is not fully achievable, post-production tools are essential. Converging lines, a hallmark of amateur real estate photos, must be corrected.
Most photo editing software offers lens and perspective correction tools. For desktop editing, Lightroom, Photoshop, GIMP, and other programs provide robust features.
Lightroom and Adobe Camera Raw are popular choices for real estate photo editing. In Lightroom, the “Lens Corrections” panel under the “Develop” module allows you to automatically correct lens distortion by selecting “Enable Profile Corrections.” For perspective correction, the “Transform” panel offers “Upright” options and manual sliders for fine-tuning vertical and horizontal perspective.
Mobile editing apps like SKRWT, Lightroom Mobile, and Snapseed also offer perspective correction tools, making it possible to refine images directly on mobile devices. Mastering perspective correction in post-production significantly elevates the professionalism of your real estate photography.
 Post-Processing Perspective Correction for Real Estate Photos
12. High Dynamic Range (HDR) Photography
HDR photography is a standard technique in real estate imaging. It involves merging multiple exposures of the same scene to capture a wider dynamic range—details in both bright highlights and deep shadows. This is particularly useful in real estate to balance bright window views with darker interiors.
To create an HDR image, use a tripod to keep the framing identical across exposures. Capture at least three images: one underexposed (for highlights), one properly exposed (for mid-tones), and one overexposed (for shadows). More exposures can further enhance the dynamic range.
Combine these images in post-processing using HDR software. Programs like Luminar NEO and Photoshop offer dedicated HDR merging tools. In Photoshop, navigate to File > Automate > Merge to HDR Pro, select your exposure series, and the software will merge them. Adjust settings within the HDR interface to refine the final image.
Use HDR judiciously. Overdone HDR can create unnatural-looking results. Aim for a balanced, realistic look that enhances detail without appearing artificial or overly processed.
 HDR Techniques in Real Estate Photography
13. Photo Compositing for Advanced Lighting Control
Photo compositing is a more advanced and time-intensive lighting technique in real estate photography, reserved for challenging lighting situations and projects that justify the extra effort.
Compositing involves taking multiple photos of the same scene, each with selectively lit areas, and then merging these images in post-production to create a uniformly and attractively lit final image.
Using a tripod to maintain consistent framing, take a series of photos while moving a flash to illuminate different parts of the room. For example, in one shot, position the flash to light the left side of the room; in another, the right side, and so on. The number of shots depends on room size and lighting complexity.
In Photoshop, load these images as layers in a single document. Use layer masks to reveal only the well-lit portions from each layer, effectively “painting with light.” Combine these masked layers to produce a final image with balanced and controlled lighting throughout the entire space. Compositing provides ultimate control over lighting but requires significant post-processing expertise and time.
 Advanced Photo Compositing Techniques for Real Estate
Conclusion
Whether you’re a seasoned real estate photography professional, a real estate agent enhancing your listings, or a homeowner marketing your property, these comprehensive tips will empower you to take impactful real estate photos. Mastering these techniques will elevate your property visuals, attracting more attention and driving successful sales or rentals.
If you have further questions or additional tips to share, please contribute in the comments below. Your insights and experiences are valuable to our community!