Taking rain photos involves mastering specific techniques, choosing the right equipment, and understanding creative compositions. This guide on dfphoto.net will provide you with the knowledge and inspiration you need to capture stunning rain photography, whether you’re aiming for dramatic urban scenes or serene nature shots. Explore advanced methods, artistic vision, and post-processing techniques for mesmerizing rain images.
1. What Gear Do I Need To Take Rain Photos?
The right gear is essential for safe, comfortable, and successful rain photography. Essential gear includes a camera with good low-light performance, rain protection for your equipment and yourself, and a sturdy tripod. Investing in quality gear ensures you can capture beautiful, aesthetic rain pictures.
- Camera: A professional DSLR or mirrorless camera excels in low-light conditions. Smartphone cameras often lack the dynamic range needed for detailed rain photography.
- Rain Protection: Waterproof camera cases, lens hoods, and custom rain covers are crucial. Protect yourself with a raincoat or umbrella.
- Tripod: Essential for long exposures, especially in low light, to prevent blurry images.
2. What Are The Best Camera Settings For Rain Photography?
Achieving the best rain photography involves specific camera settings that enhance raindrops and create the desired effect. Key settings include medium to high ISO, fast shutter speed, large aperture, utilizing a light source, manual flash mode, and manual focus. These settings can be adjusted based on your preferred style and the type of photography you are pursuing.
- Medium to High ISO: Combat poor lighting by increasing ISO to maintain a fast shutter speed.
- Fast Shutter Speed: Freeze the motion of raindrops for realistic detail. Adjust for different effects, such as capturing splashing water or flowing waterfalls.
- Large Aperture: Use a large aperture to allow more light into the camera and maintain a fast shutter speed. Experiment to balance raindrop speed and depth of field. Starting with f/8 is a good baseline.
- Light Source: Using a light source behind the rain can create a captivating atmosphere in your photos. Natural light sources such as bright windows, billboards, or traffic lights can give the rain a beautiful glow and add depth to your compositions. When shooting at night, use any available light source or carry your own reflector to illuminate the raindrops effectively.
- Manual Flash Mode: Instead of automatic flash, adjust flash intensity manually for better lighting control.
- Manual Focus: Sharp focus on raindrops or puddles ensures the main subject remains clear.
3. How Can I Create Artistic Compositions For Rain Photography?
Artistic compositions are crucial for conveying the desired mood and message in rain photography. Consider reflections, water drops, and creative angles to enhance your images. According to research from the Santa Fe University of Art and Design’s Photography Department, in July 2023, thoughtful composition significantly enhances the emotional impact of rain photography.
3.1. Reflections
Capturing reflections in puddles can add depth and symmetry to your photos. Look for interesting reflections of buildings, lights, or people to create visually stunning images.
3.2. Water Drops
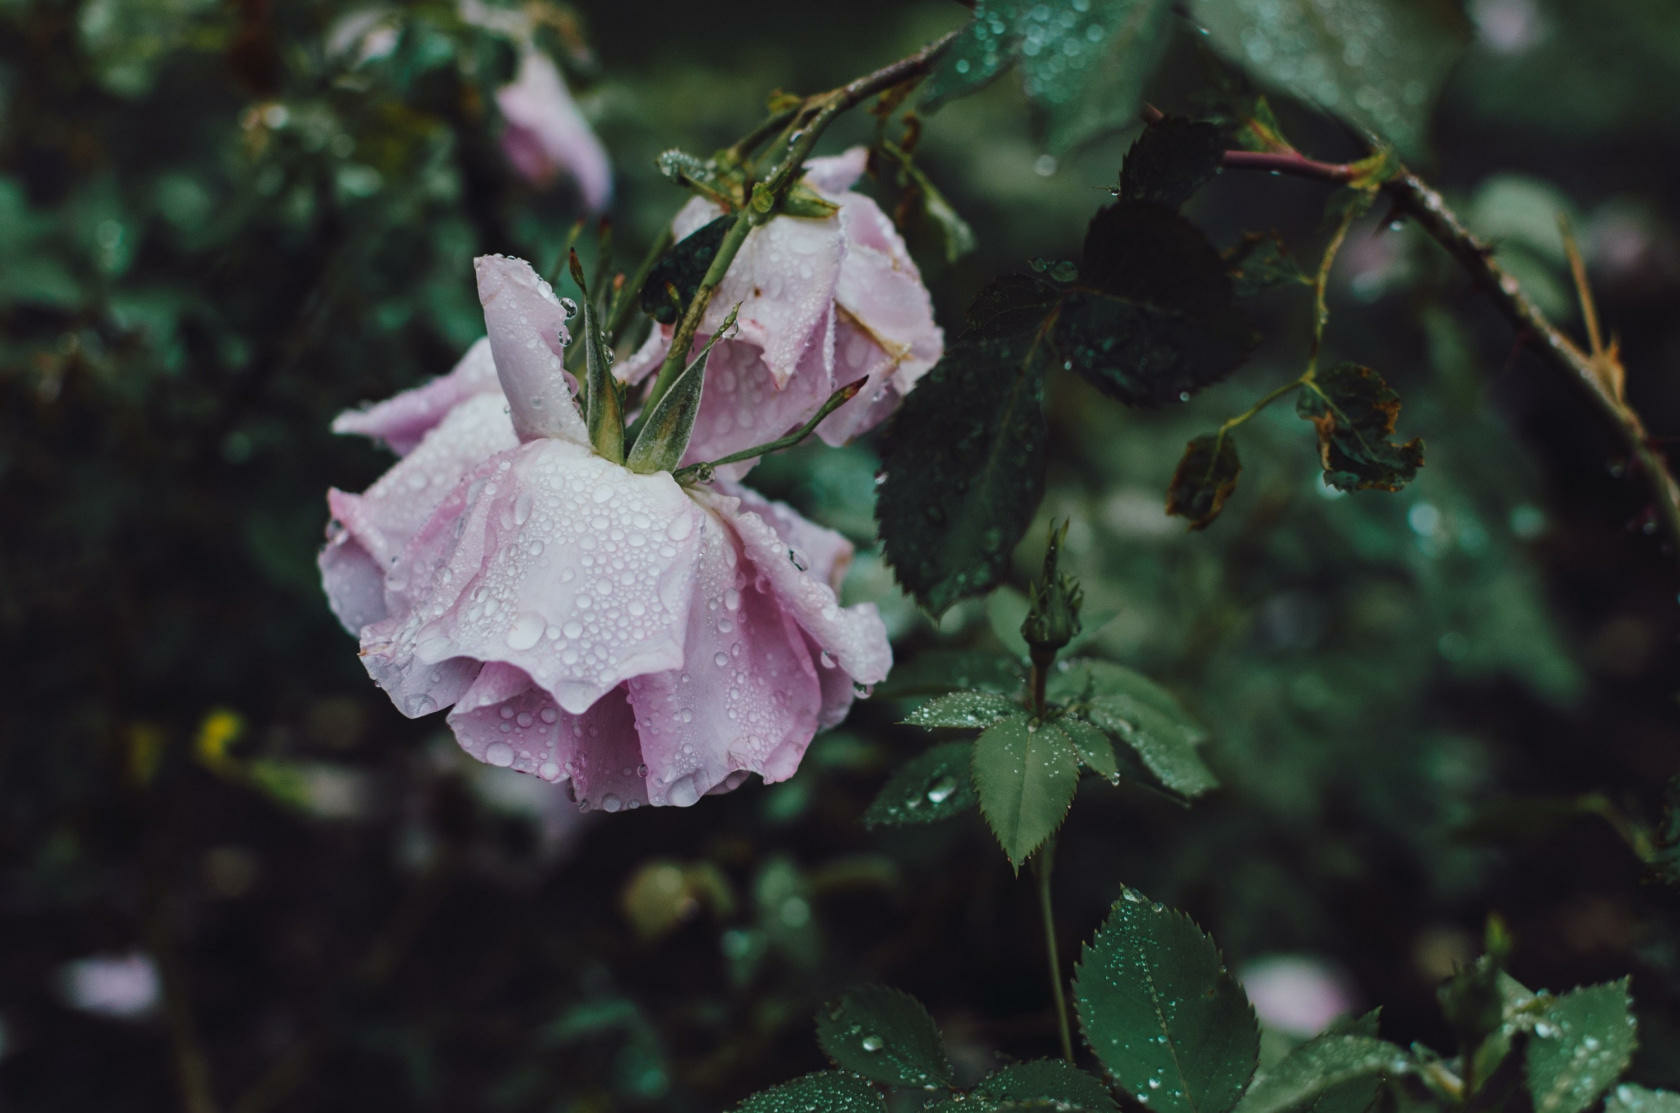
Focusing on individual water drops on leaves, flowers, or other surfaces can create intricate and captivating close-up shots.
3.3. Creative Angles
Experimenting with different angles and perspectives can transform ordinary rain scenes into extraordinary photographs. Shoot from low angles, high angles, or unusual viewpoints to add interest.
4. How Do I Capture Different Rain Moods In Photos?
Rain photography offers diverse moods and atmospheres. To create evocative images, consider tonal contrast, muted colors, low-key photography, black and white, and macro photography. Mastering these techniques will allow you to transport viewers to different emotional landscapes.
4.1. Tonal Contrast
Enhance the desired mood by using a consistent range of colors. Tonal contrast employs gradients and neutral colors to evoke emotions like sadness or happiness.
4.2. Muted Colors
Incorporate muted and unsaturated colors to create a soft, ethereal atmosphere. These colors emphasize love, mindfulness, and serenity, evoking calmness and tranquility.
4.3. Low-Key Photography
Using dark midtones and shadows, low-key photography adds drama and mystery. Adjust exposure settings in manual mode to balance bright areas with captivating dark tones.
4.4. Black And White Photography
Transforming rain images into black and white adds a timeless, classic aesthetic. Removing colors emphasizes shapes, geometry, and contrast, allowing viewers to focus on essential elements and emotions.
4.5. Macro Photography
Macro photography provides a close-up perspective, revealing intricate details in rain-related subjects. Capture the beauty of water droplets on leaves, flowers, or other elements that transform in the rain.
5. What Are Some Creative Ideas For Shooting In The Rain?
To fuel your creativity and overcome creative blocks, explore various rain photography ideas. These include capturing rainbows, utilizing umbrellas, shooting through windows, focusing on raindrops in puddles, and capturing stormy weather.
5.1. Catch The Rainbow
Look for rainbows after rain showers. Use a polarizing filter to enhance the rainbow’s colors and vibrancy, adding enchantment to your images.
5.2. Pay Attention To The Umbrella
Use umbrellas as props, adding shape, texture, and color. Explore different angles to incorporate umbrellas creatively, telling unique stories.
5.3. Watch The Rain Through A Window
Capture rainy-day photographs from indoors, observing cityscapes or landscapes through windows. Focus on raindrops on the windowpane to create abstract and intriguing compositions.
5.4. Focus On Raindrops In Puddles
Capture raindrops falling into puddles for a dramatic effect. Use a tripod and adjust shutter speed to capture mesmerizing ripples and reflections.
5.5. Capture The Mood Of Stormy Weather
Embrace stormy weather to capture intense and moody rain photography. Find a safe location, set up your camera on a tripod, and adjust aperture and exposure settings to capture lightning strikes.
6. How To Take Rain Photos Of People?
Taking portraits in the rain can be challenging but rewarding. Key considerations include protecting your subject, using appropriate lighting, and choosing the right background.
6.1. Protect Your Subject
Ensure your subject is protected from the rain with an umbrella or waterproof clothing. This helps them stay comfortable and allows for a more relaxed and natural pose.
6.2. Use Appropriate Lighting
Rainy days often mean low light, so use reflectors or external flashes to brighten your subject’s face. Soft, diffused light can create a flattering effect.
6.3. Choose The Right Background
Select a background that complements the rainy mood, such as a colorful wall, a reflective puddle, or a blurred cityscape.
7. How Do I Take Rain Photos At Night?
Nighttime rain photography presents unique challenges and opportunities. Use long exposures, capture light trails, and utilize artificial light sources to create stunning images.
7.1. Use Long Exposures
Capture the motion of rain streaks and create a sense of movement with long exposures. A tripod is essential for sharp images.
7.2. Capture Light Trails
Photograph car lights and other light sources reflecting off wet surfaces to create dynamic light trails.
7.3. Utilize Artificial Light Sources
Use streetlights, neon signs, and other artificial light sources to illuminate the rain and create interesting visual effects.
8. What Post-Processing Techniques Can Enhance Rain Photos?
Post-processing can significantly enhance the mood and aesthetics of your rain photography. Consider adjusting exposure, contrast, and white balance, as well as using selective color and tone adjustments. Photo editing software can elevate your rain photography to new heights.
8.1. Exposure Adjustment
Adjust exposure to brighten or darken the image, depending on the desired mood.
8.2. Contrast Adjustment
Increase contrast to add drama and definition to your rain photos.
8.3. White Balance Adjustment
Correct white balance to ensure accurate colors and a natural look.
8.4. Selective Color
Use selective color to highlight specific elements in your image and create a more impactful composition.
8.5. Tone Adjustments
Adjust highlights, shadows, and midtones to fine-tune the overall look and feel of your rain photography.
9. What Are Some Common Mistakes To Avoid In Rain Photography?
Avoiding common mistakes can improve the quality of your rain photography. These include neglecting camera protection, using incorrect camera settings, and overlooking composition.
9.1. Neglecting Camera Protection
Protect your camera from water damage with waterproof cases and lens hoods.
9.2. Using Incorrect Camera Settings
Adjust ISO, shutter speed, and aperture according to the lighting conditions and desired effect.
9.3. Overlooking Composition
Pay attention to composition to create visually appealing and engaging rain photos.
10. Where Can I Find Inspiration For Rain Photography?
Finding inspiration is key to pushing your creative boundaries. Explore online galleries, follow photographers on social media, and visit local exhibitions to discover new ideas and techniques.
10.1. Online Galleries
Browse online photography galleries for stunning examples of rain photography.
10.2. Social Media
Follow photographers on platforms like Instagram and Facebook for daily inspiration.
10.3. Local Exhibitions
Visit local photography exhibitions to see rain photography prints and connect with other photographers.
11. How Does Weather Affect Rain Photography?
Weather conditions greatly influence the outcome of rain photography. Understanding how different weather elements such as light intensity, cloud cover, and rain density affect your shots helps in adapting your techniques and settings.
11.1. Light Intensity
On overcast days, light is often soft and diffused, reducing harsh shadows and creating even illumination. On brighter rainy days, the interplay of light and water droplets can produce dazzling effects, but also requires careful management of exposure to avoid overblown highlights.
11.2. Cloud Cover
The density of cloud cover significantly impacts the ambient light. Heavy cloud cover can darken the scene, necessitating higher ISO settings or wider apertures. Conversely, scattered clouds can create dynamic lighting conditions, offering intermittent bursts of sunlight that add depth and drama to your images.
11.3. Rain Density
The intensity of rainfall—from light drizzle to heavy downpours—affects the visual texture of your images. Light rain can create subtle, ethereal effects, while heavy rain introduces bold, dramatic elements. Adjust your shutter speed to capture either the delicate streaks of light rain or the powerful splashes of heavy rain.
12. What Kind Of Storytelling Can Be Achieved Through Rain Photography?
Rain photography is not just about capturing images; it’s about conveying emotions, narratives, and experiences. The storytelling potential of rain photography lies in its ability to evoke feelings of melancholy, joy, mystery, and introspection.
12.1. Emotions And Moods
Rain often symbolizes a range of emotions, from sadness and loneliness to peace and cleansing. Use composition, color, and subject matter to highlight these feelings.
12.2. Symbolism
Rain can symbolize renewal, change, and reflection. Incorporate elements that reinforce these themes to deepen the narrative.
12.3. Context
The setting in which you photograph the rain – whether a bustling city street or a quiet natural landscape – can add layers of meaning to your story. Consider how the environment influences the narrative.
 Beautiful rain photo moods – macro rain photography
13. How To Manage Reflections And Glare In Rain Photography?
Reflections and glare can be both a blessing and a curse in rain photography. Managing them effectively involves understanding how light interacts with wet surfaces and using tools and techniques to control these effects.
13.1. Polarizing Filters
A polarizing filter reduces glare and reflections from wet surfaces, allowing you to capture clearer and more vibrant images. This is particularly useful for photographing reflections in puddles or raindrops on windows.
13.2. Angles And Perspective
Adjusting your shooting angle can help minimize unwanted reflections. Experiment with different viewpoints to find the angle that offers the best balance between reflection and clarity.
13.3. Composition
Use reflections to enhance your composition by adding depth, symmetry, and interest to your images. Position your subject strategically to take advantage of reflective surfaces.
14. How To Work With Models In Rain Photography?
Working with models in rain photography requires careful planning and consideration for their comfort and safety. Effective communication, appropriate attire, and creative posing are key to capturing compelling portraits.
14.1. Communication
Clearly communicate your vision and expectations to the model. Ensure they understand the concept and are comfortable working in the rain.
14.2. Attire
Choose attire that complements the rainy setting while providing adequate protection. Consider using waterproof jackets, umbrellas, and hats.
14.3. Posing
Direct the model with creative poses that enhance the mood and narrative of the photograph. Encourage natural expressions and movements that convey the essence of the rain.
15. What Are The Ethical Considerations In Rain Photography?
As with all forms of photography, ethical considerations are crucial in rain photography. Respecting privacy, obtaining consent, and avoiding exploitation are paramount.
15.1. Privacy
Be mindful of people’s privacy when photographing them in public spaces. Avoid capturing images that could be considered intrusive or disrespectful.
15.2. Consent
Obtain consent from individuals before photographing them, especially if you plan to use the images for commercial purposes.
15.3. Exploitation
Avoid exploiting vulnerable individuals or creating images that perpetuate harmful stereotypes.
16. How Does Urban Vs Natural Environments Influence Rain Photography?
Urban and natural environments offer distinct opportunities and challenges for rain photography. The choice of environment can greatly impact the mood, composition, and narrative of your images.
16.1. Urban Environments
Urban settings provide a wealth of reflective surfaces, artificial lights, and architectural details. Capture the vibrant energy of city streets, the reflections in puddles, and the dynamic interplay of light and shadow.
16.2. Natural Environments
Natural landscapes offer serene beauty, organic textures, and a sense of tranquility. Photograph raindrops on leaves, misty forests, and dramatic skies to capture the essence of the natural world in the rain.
 Beautiful rain photo moods – tonal contrast
17. Can You Explain The Rule Of Thirds In Rain Photography?
The Rule of Thirds is a compositional guideline that suggests dividing your image into nine equal parts using two horizontal and two vertical lines. Placing key elements along these lines or at their intersections can create a more balanced and visually appealing composition.
17.1. Application
Apply the Rule of Thirds to rain photography by positioning your subject – whether a person, a building, or a natural element – along one of the lines or at an intersection. This can help draw the viewer’s eye and create a sense of balance.
17.2. Variations
Experiment with variations of the Rule of Thirds to find the composition that best suits your vision. You can also use the rule to create a sense of tension or imbalance, depending on the desired effect.
18. What Are The Best Lenses For Rain Photography?
Choosing the right lens can significantly impact the quality and versatility of your rain photography. Wide-angle lenses, telephoto lenses, and prime lenses each offer unique advantages.
18.1. Wide-Angle Lenses
Wide-angle lenses capture expansive scenes, making them ideal for urban landscapes and dramatic weather conditions. They also offer a greater depth of field, ensuring that more of the image is in focus.
18.2. Telephoto Lenses
Telephoto lenses allow you to zoom in on distant subjects, capturing details that would otherwise be missed. They are useful for isolating elements in a busy scene or capturing wildlife in natural settings.
18.3. Prime Lenses
Prime lenses offer exceptional image quality and wide apertures, making them well-suited for low-light conditions. They can also create a shallow depth of field, allowing you to isolate your subject and create a blurred background.
19. How To Use Leading Lines In Rain Photography?
Leading lines are compositional elements that draw the viewer’s eye into the image, creating a sense of depth and direction. Using leading lines effectively can enhance the visual impact of your rain photography.
19.1. Identification
Identify natural or artificial lines in your scene – such as roads, rivers, or fences – that can be used to guide the viewer’s eye.
19.2. Placement
Position these lines strategically within your composition, ensuring that they lead towards your subject or a key point of interest.
19.3. Variation
Experiment with different types of leading lines – such as straight, curved, or diagonal lines – to create varying effects.
20. How To Use Shutter Speed To Convey Motion In Rain Photography?
Shutter speed plays a crucial role in conveying motion in rain photography. By adjusting your shutter speed, you can capture either the frozen droplets or the blurred streaks of rain.
20.1. Fast Shutter Speed
Use a fast shutter speed (e.g., 1/500 second or faster) to freeze the motion of raindrops, capturing them as individual droplets.
20.2. Slow Shutter Speed
Use a slow shutter speed (e.g., 1/30 second or slower) to blur the motion of rain, creating streaks that convey a sense of movement and energy.
20.3. Experimentation
Experiment with different shutter speeds to find the effect that best suits your vision and the conditions of the scene.
21. How Can You Capture Reflections In Puddles During Rain Photography?
Capturing reflections in puddles adds depth and interest to rain photography. The key is to find the right angle, stabilize your camera, and use appropriate settings to enhance the reflective qualities of the water.
21.1. Finding The Right Angle
Get low to the ground to capture the reflections from a more direct perspective. The closer you are to the puddle, the more complete and detailed the reflection will appear.
21.2. Stabilizing Your Camera
Use a tripod to keep your camera steady, especially in low-light conditions where longer exposures may be necessary. This ensures the reflections are sharp and clear.
21.3. Adjusting Camera Settings
Set your aperture to a higher f-stop (e.g., f/8 to f/16) to increase the depth of field, ensuring both the reflection and the surrounding environment are in focus. Use manual focus to fine-tune the sharpness on the reflective surface.
 Beautiful rain photo moods – low-key rain photography
22. How To Compose For Storytelling In Rain Photography?
Composition is key to telling a story through rain photography. Elements like subject placement, leading lines, and perspective work together to convey emotion and context.
22.1. Subject Placement
Strategically place your subject to draw attention and convey meaning. A lone figure walking in the rain can evoke feelings of solitude, while a couple sharing an umbrella can tell a story of companionship.
22.2. Leading Lines
Use natural or artificial lines (roads, rivers, buildings) to guide the viewer’s eye toward the main subject, creating a sense of depth and drawing them into the scene.
22.3. Perspective
Experiment with different perspectives to add drama or intimacy. Shooting from a low angle can emphasize the power of a storm, while a high angle can show the vastness of a rain-soaked landscape.
23. What Are The Benefits Of Shooting In Manual Mode During Rain?
Shooting in manual mode gives you complete control over your camera’s settings, which is essential for the unpredictable conditions of rain photography.
23.1. Control Over Exposure
Adjust aperture, shutter speed, and ISO independently to achieve the perfect exposure, regardless of the lighting conditions. This is especially useful when dealing with dark, overcast skies.
23.2. Creative Effects
Use slow shutter speeds to blur the motion of rain or wide apertures to create a shallow depth of field, isolating your subject against a rainy backdrop.
23.3. Consistent Results
Manual mode ensures consistent results, as the camera will not automatically change settings based on fluctuating light levels.
24. How To Minimize Noise When Shooting In High ISO During Rain?
Shooting in rain often requires high ISO settings due to low light conditions, which can lead to unwanted noise in your images.
24.1. Understanding ISO
ISO measures the sensitivity of your camera’s sensor to light. Higher ISO settings allow you to capture images in darker conditions, but they also increase the amount of noise.
24.2. Noise Reduction Techniques
Use noise reduction software in post-processing to reduce the amount of noise in your images. Adobe Lightroom and other editing programs offer noise reduction tools that can help clean up your photos without sacrificing too much detail.
24.3. Shooting Raw
Shooting in RAW format captures more data than JPEG, giving you more flexibility to reduce noise and recover detail in post-processing.
25. What Role Do Colors Play In Rain Photography?
Colors play a significant role in setting the mood and conveying emotions in rain photography.
25.1. Muted Colors
Muted and desaturated colors can evoke a sense of melancholy or tranquility, reflecting the somber mood often associated with rain.
25.2. Vibrant Colors
Vibrant colors can create a striking contrast against the grayness of the rain, adding energy and visual interest to your photos.
25.3. Color Harmony
Use color harmony principles to create visually pleasing compositions, balancing complementary colors or using a monochromatic palette to enhance the mood.
26. How To Protect Your Lens During Rain Photography?
Protecting your lens is crucial to prevent water damage and ensure clear, high-quality images during rain photography.
26.1. Lens Hood
A lens hood helps to shield the front element of your lens from rain, preventing water droplets from blurring your images.
26.2. Waterproof Cover
Use a waterproof lens cover or rain sleeve to provide additional protection for your lens and camera body.
26.3. Microfiber Cloth
Carry a microfiber cloth to gently wipe away any water droplets that may land on your lens, ensuring they don’t dry and leave spots.
27. How To Prepare Your Camera For Rain Photography?
Preparing your camera before heading out into the rain can help prevent damage and ensure you capture the best possible images.
27.1. Weather Sealing
Check if your camera and lens have weather sealing. Weather sealing helps to protect the internal components from moisture.
27.2. Battery Life
Ensure your batteries are fully charged, as cold and wet conditions can drain power more quickly.
27.3. Memory Cards
Bring extra memory cards to avoid running out of space, especially if you are shooting in RAW format.
28. What Are Some Safety Tips For Rain Photography?
Safety should always be a priority when shooting in the rain.
28.1. Avoid Electrical Hazards
Stay away from power lines and electrical equipment to avoid the risk of electric shock.
28.2. Wear Appropriate Clothing
Wear waterproof clothing and shoes to stay dry and comfortable.
28.3. Be Aware Of Surroundings
Be aware of your surroundings and watch out for slippery surfaces, especially in urban areas.
29. What Type Of License Do I Need To Showcase Rain Photos?
When showcasing or selling your rain photos, understanding and obtaining the appropriate licenses is crucial for protecting your rights and respecting the rights of others.
29.1. Copyright
By default, you own the copyright to your photos as soon as you create them. This gives you the exclusive right to control how your work is used, distributed, and displayed.
29.2. Model Release
If your photos feature recognizable people, you typically need a model release form granting you permission to use their likeness in your work. This is especially important for commercial use.
29.3. Creative Commons Licenses
Creative Commons licenses offer a flexible way to allow others to use your work while still retaining some rights. These licenses range from allowing any use with attribution to permitting only non-commercial use.
30. How Can I Find Unique Locations For Rain Photography?
Finding unique locations for rain photography can set your work apart and create compelling images.
30.1. Explore Local Areas
Start by exploring areas near you that offer interesting backdrops or features. This could be anything from old buildings to natural landscapes.
30.2. Scout Locations During Dry Weather
Visit potential locations during dry weather to identify interesting compositions and plan your shots.
30.3. Online Communities
Engage with online photography communities to discover hidden gems and unique locations.
 Beautiful rain photo moods – black and white rain photography
Rain photography offers a unique opportunity to capture the beauty and mood of rainy weather. By mastering the techniques, understanding the equipment, and exploring creative compositions, you can create mesmerizing images that captivate viewers. Remember to experiment, be patient, and let your creativity soar.
Ready to take your rain photography to the next level? Visit dfphoto.net for more detailed guides, stunning photo collections, and a vibrant community of photographers eager to share their experiences. Explore our resources, discover new techniques, and connect with fellow enthusiasts. Address: 1600 St Michael’s Dr, Santa Fe, NM 87505, United States. Phone: +1 (505) 471-6001. Website: dfphoto.net. Dive into the world of dfphoto.net and transform your rainy days into photographic masterpieces.
FAQ Section
- What is the best time of day to take rain photos? The best time of day depends on the desired mood. Overcast days offer soft, even lighting, while early morning or late afternoon can provide dramatic light and shadows.
- How do I prevent my lens from fogging up in the rain? Use a lens warmer or anti-fog spray to prevent fogging. Also, allow your camera to acclimate to the ambient temperature gradually.
- What are the best subjects to photograph in the rain? Great subjects include urban landscapes, natural scenes, portraits, and macro shots of raindrops.
- How do I capture lightning during a rainstorm? Use a tripod, set your aperture to f/8 or f/11, and use a long exposure time (e.g., 5-10 seconds).
- How can I add artificial rain to my photos in post-processing? Use software like Adobe Photoshop to add rain effects.
- What are the best settings for photographing reflections in puddles? Use a low angle, manual focus, and a high f-stop for maximum depth of field.
- How do I protect my camera from heavy rain? Use a waterproof camera case, lens hood, and rain cover.
- What type of clothing should I wear for rain photography? Wear waterproof clothing, including a jacket, pants, and boots.
- How can I create a shallow depth of field in rainy conditions? Use a wide aperture (e.g., f/1.8 or f/2.8) to create a shallow depth of field and isolate your subject.
- What is the best way to clean my camera equipment after shooting in the rain? Use a soft, dry cloth to wipe down your camera and lens. Allow your equipment to air dry completely before storing it.