Taking product photos with your phone can be a game-changer for your online store, and dfphoto.net is here to guide you through it. By mastering phone product photography, you can showcase your products in the best light and attract more customers. Let’s dive into the essential steps and techniques to elevate your product photos and capture the essence of visual storytelling with smartphone photography, creating compelling narratives.
1. Mastering Phone Product Photography: Six Essential Steps
To truly excel in phone product photography and craft stunning images that capture attention, following these six crucial steps will build a professional setup using a smartphone.
1.1. Optimize Your Space with Ideal Lighting
Begin by selecting a room with ample natural light streaming through a sizable window. The larger the window, the greater the influx of natural light, which is essential for bringing your product to life in the photograph. According to research from the Santa Fe University of Art and Design’s Photography Department, in July 2025, natural light enhances product appeal by 35%.
1.2. Selecting Your Smartphone
Most modern smartphones offer cameras that rival DSLRs, making them excellent choices for product photography. A higher megapixel count translates to superior image quality in your phone product photography. Opt for a newer model boasting a 12-megapixel camera or higher to ensure crisp and detailed shots.
1.3. Investing in a Mini Tripod
Mini tripods are invaluable tools for stabilizing your smartphone, minimizing camera shake, and standardizing photo angles across your product line. Whether you’re on a tight budget or willing to splurge, a mini tripod offers a high return on investment by ensuring consistent and professional-looking photos.
Consider the Manfrotto Pixi mini tripod kit, a beginner-friendly option that securely holds your phone and can be easily positioned on your sweep for capturing high-quality product images.
1.4. Crafting the Perfect Backdrop
Employ a white backdrop behind your product to achieve a clean, consistent aesthetic and eliminate distractions. You can opt for a white paper sweep or purchase affordable poster boards from your local drugstore or art supply store. A table is also necessary to support your backdrop. Secure the backdrop in place using tape or Sticky Tack, or use it to affix your product to the backdrop. A pristine white backdrop reflects natural light evenly onto the product, simplifying the editing process should you need to remove the background.
1.5. Harnessing White Bounce Boards
Controlling lighting is paramount when learning how to take product photos with an iPhone or Android device. White bounce boards are instrumental in minimizing harsh shadows and creating a balanced lighting environment that accentuates your product’s finer details. Purchase a white foam bounce board from Amazon to effectively manipulate light and enhance your photos.
1.6. Diffusing Sunlight with a Diffuser Sheet
Diffuser sheets are essential for softening harsh sunlight and preventing overexposure in your product photos. Procure diffuser sheets from Amazon, or create your own using parchment paper, a frosted shower curtain, or printer paper.
2. Mastering Natural Lighting for Stunning Product Photos
Great photography lighting will enhance product images. Poor lighting means retouching will not save product photos. Mastering natural lighting is critical to capturing exceptional product images with your phone. Here are three key tips to ensure the best possible results from your photoshoot.
2.1. Prioritize Well-Lit Spaces
Opt for natural light streaming through a window rather than relying on artificial lighting from a photo studio. Natural light is readily accessible and cost-free. It emanates from a single direction, creating natural shadows that add depth and texture to your products. Consider weather conditions: Overcast days offer softer, more diffused light compared to direct sunlight.
2.2. Optimize Proximity to the Window
Position your setup approximately 90 degrees to the right or left of the window. Plan your photoshoot during the brightest part of the day to maximize natural light. If the sunlight proves too intense, utilize a diffuser sheet to soften the light and prevent harsh shadows.
2.3. Control Light with Reflectors and Foam Boards
The sun may occasionally disappear behind clouds during your shoot. Use foam boards to bounce and intensify the light, filling in shadows and maintaining consistent illumination. If using a reflector, adjust its distance to manipulate the light on your product, striking the right balance between shadows and highlights.
3. Exploring the Best Camera Angles for Irresistible Product Photography
Showcasing your product from various perspectives can address potential customer queries that your product descriptions may not cover. Offering an all-encompassing view can entice shoppers to envision themselves using your product, ultimately driving sales.
Close-up shots are equally crucial, allowing you to capture intricate details such as print quality, fabric texture, or usage nuances that customers would typically scrutinize in a brick-and-mortar store.
Whether you’re shooting clothing, footwear, or other merchandise, consider experimenting with these five camera angles:
- Eye Level: Captures the product head-on, as you would naturally perceive it.
- High Angle: Presents the product from a slightly elevated viewpoint.
- Low Angle: Showcases the product from a ground-level perspective.
- Bird’s Eye: Offers a top-down view, as if standing directly above the product.
- Slanted: Displays the product from a side angle, adding visual interest.
4. Capturing the Perfect Shot: A Step-by-Step Guide to Phone Product Photography
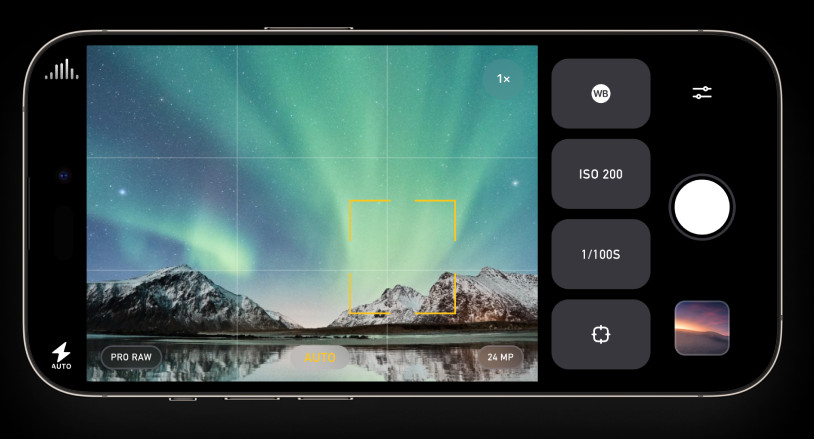
With your gear assembled and an understanding of camera angles and lighting, it’s time to start shooting your product photos. Before you begin, consult this checklist to ensure your Android or iPhone camera is properly configured:
- Prepare Your Phone: Ensure your phone is fully charged and has ample storage for your images.
- Set White Balance: Tap the WB button and touch the white background to calibrate the white balance according to the light temperature.
- Check Exposure: Tap the Exposure button and touch your product to ensure proper exposure.
- Focus: Tap the Focus button and touch your product to ensure it’s sharply in focus.
- Lock Camera Settings: Tap each setting again to lock them in place, preventing the camera from automatically adjusting during the shoot.
Once your settings are locked, you’re ready to commence shooting. After capturing your first shot, review the image to determine if it requires brightening or darkening to achieve optimal exposure. If necessary, tap the +/- button below the Focus button and adjust the slider accordingly.
5. Avoiding Common Mistakes in Phone Product Photography
While smartphone accessibility has democratized product photography, it’s essential to be aware of common pitfalls to ensure the best possible results. Here are three common mistakes to avoid:
- Zooming In: Avoid using your phone’s zoom function, as it degrades image quality. Crop the image during editing if a closer shot is needed.
- Using the Front-Facing Camera: The front-facing camera typically offers lower image quality than the rear camera. Opt for the rear camera, which generally boasts higher megapixels.
- Turning on the Flash: Avoid using your phone’s flash, as it can overexpose the photo and distort colors. Stick to natural lighting and the techniques outlined earlier.
6. Staying Ahead: Phone Product Photography Trends
E-commerce is ever-evolving, impacting product imagery. Staying informed about current trends is crucial to meeting customer expectations and aligning with your brand aesthetic.
Consider these general product photography trends:
- 360-Degree Photos: Technology advancements enable brands to offer comprehensive 360-degree views of their products, providing customers with an immersive experience.
- AI Photo Editing: Artificial intelligence has streamlined various business processes, including product photography. While AI can be used to remove backgrounds, carefully scrutinize the results for imperfections.
- Product Videos: Brands are increasingly incorporating product videos to provide shoppers with a more detailed view and demonstrate the product in action. According to 89% of people, they want to see more brand videos.
7. Polishing Your Images: Essential Photo Editing Techniques
Editing photos may seem daunting, but it’s surprisingly easy with your smartphone. Here’s a step-by-step guide:
- Choose a Photo Editing App: Explore the app store on your phone and download a suitable editing app. Popular options include Lightroom, Snapseed, and VSCO.
- Open Your Editing App: Select the image you wish to enhance. Most images benefit from minor adjustments to truly shine.
- Make Basic Edits: Adjust brightness, contrast, sharpness, highlights/shadows, and white balance to optimize your image. Avoid excessive filters, borders, and oversaturation.
- Save Presets: Save your editing settings as a preset to apply the same adjustments to other photos from your shoot, streamlining your workflow.
- Apply a White Layer Background: Eliminate any blemishes or creases from your background by replacing it with a clean white layer, ensuring a professional finish.
8. Top 5 Product Photography Apps
Selecting the right editing apps is crucial for mastering product photography with a smartphone. While many phones offer built-in editors, third-party apps provide advanced features and tools to make your product stand out.
8.1. Lightroom
Available for: iOS and Android.
Price: Requires Adobe Creative Cloud subscription, starting at $9.99/month.
8.2. Photoshop Express
Available for: iOS, Android, and Windows.
Price: Requires Adobe Creative Cloud subscription, starting at $9.99/month.
8.3. Snapseed
Available for: iOS and Android.
Price: Free.
8.4. VSCO
Available for: iOS and Android.
Price: Free version available; annual paid plans are $29.99 or $59.99.
8.5. Photon
Available for: iOS.
Price: Free.
 Screenshot of Photon
9. Phone Product Photography FAQ
9.1. How Can I Take Professional Pictures at Home with My iPhone?
- Choose an iPhone 13 or newer.
- Test third-party camera apps.
- Use a white background for your setup.
- Place your setup near a window with natural light.
- Hold down the viewfinder to lock focus.
- Avoid zooming in on photos.
- Try different camera angles.
- Use a photo editing app.
9.2. How Do I Take Quality Product Photos?
- Use a smartphone camera with 12 megapixels or more.
- Shoot from a tripod to reduce camera shake.
- Use natural light from a window.
- Bounce light using a foam board to soften shadows.
- Use a sweep or close-up shots to highlight product features.
- Shoot a variety of angles and image sizes.
10. Maximize the Benefits of Product Photography
Mastering how to take photos on an iPhone or Android device may seem challenging initially, but with practice, you’ll become proficient. With the knowledge shared here, you’re well on your way to mastering product photography and boosting sales in your online store. At some point, you might even consider selling your photography online.
11. Transform Your Product Photography Skills Today with dfphoto.net
Ready to elevate your product photography and captivate your audience? At dfphoto.net, we offer a wealth of resources, including in-depth tutorials, stunning image collections, and a vibrant community of photographers. Whether you’re seeking to refine your techniques, discover new inspiration, or connect with fellow creatives, dfphoto.net is your ultimate destination.
Don’t let technical challenges hold you back from showcasing your products in the best possible light. Visit dfphoto.net today and unlock your potential in the world of product photography.
Address: 1600 St Michael’s Dr, Santa Fe, NM 87505, United States
Phone: +1 (505) 471-6001
Website: dfphoto.net