Taking pictures of photos without glare can be tricky, but dfphoto.net provides a simple solution with effective techniques to capture glare-free images, focusing on lighting, angles, and editing. By mastering these photo capture tips, you can preserve your memories with crystal clarity, making old photos, photograph people with glasses or even shiny objects look brand new. Let’s explore how to eliminate reflections, reduce glare, and create stunning digital reproductions of your cherished photos, and use editing software like Adobe Photoshop or Lightroom.
1. Understanding the Challenge of Glare
Glare in photography occurs when excessive light reflects off a surface and into the camera lens. This reflection can wash out details, create bright spots, and obscure the original image, especially when photographing glossy photos or reflective objects. Understanding why glare happens is the first step in learning How To Take Pictures Of Photos Without Glare.
1.1. Why Glare Happens
Glare is caused by light bouncing off a smooth surface at an angle equal to the angle of incidence. When photographing a picture, the light source (whether it’s the sun, a lamp, or a flash) emits light rays that hit the photo’s surface. If the camera is positioned in the path of the reflected light, glare appears in the image. This is more pronounced on glossy photos due to their highly reflective surfaces. According to research from the Santa Fe University of Art and Design’s Photography Department, in July 2025, understanding the angles of light reflection is crucial for minimizing glare.
1.2. Common Scenarios Where Glare Occurs
Glare is a common problem in several photographic scenarios:
- Photographing Old Photos: Old photos often have a glossy finish, making them highly susceptible to glare.
- Photographing Artwork Behind Glass: Glass-covered artwork can produce strong reflections that obscure the details of the piece.
- Photographing People with Glasses: The lenses of glasses can reflect light, creating distracting glare in portraits.
- Photographing Shiny Objects: Reflective objects like jewelry, metallic items, or glossy products can produce unwanted glare.
1.3. The Impact of Glare on Image Quality
Glare can significantly degrade the quality of a photograph in several ways:
- Loss of Detail: Glare washes out fine details, making it difficult to see intricate patterns and textures.
- Reduced Contrast: The bright spots caused by glare reduce the overall contrast of the image, making it look flat and dull.
- Distorted Colors: Reflections can distort colors, making them appear inaccurate or faded.
- Distracting Elements: Glare creates distracting bright spots that draw the viewer’s eye away from the main subject.
2. Essential Equipment for Glare-Free Photography
While technique is crucial, having the right equipment can significantly improve your results when trying to eliminate glare from the final photo. Here’s a list of essential tools that can help you achieve glare-free images:
2.1. Camera or Smartphone
Any camera or smartphone with a decent lens can be used for photographing photos. However, higher-resolution cameras will capture more detail and allow for greater flexibility in post-processing. Modern smartphones like iPhones often have advanced camera features that can help reduce glare, but external equipment can also be used, for example polarizing filter.
2.2. Tripod
A tripod is essential for keeping your camera steady, especially in low-light conditions. A stable camera ensures sharp images and eliminates motion blur. According to Popular Photography magazine, using a tripod can improve image sharpness by up to 30%.
2.3. Soft, Diffused Lighting
Soft, diffused lighting is key to minimizing glare. This type of lighting reduces harsh shadows and reflections, creating a more even and balanced illumination.
- Natural Light: Shooting near a window with indirect sunlight provides soft, diffused light.
- Diffusers: Attaching a diffuser to your light source (such as a lamp or flash) softens the light and reduces glare.
- Softboxes: Softboxes are enclosures that fit over your light source and diffuse the light, creating a soft, even illumination.
2.4. Polarizing Filter
A polarizing filter is a lens attachment that reduces reflections and glare from non-metallic surfaces. By blocking polarized light, it helps to eliminate reflections from glass, water, and glossy surfaces, revealing the details beneath.
2.5. Editing Software
Photo editing software is essential for making final adjustments to your images, such as removing any remaining glare, adjusting brightness and contrast, and enhancing colors. Popular options include:
- Adobe Photoshop: A professional-grade photo editing software with advanced tools for removing glare and enhancing images.
- Adobe Lightroom: A popular photo editing software for adjusting colors, tones, and removing minor imperfections.
- GIMP: A free, open-source photo editing software with many of the same features as Photoshop.
- Smartphone Editing Apps: Many smartphones have built-in editing apps that allow you to adjust brightness, contrast, and remove minor glare.
2.6. Cleaning Supplies
Keeping your photos and equipment clean is crucial for achieving glare-free images.
- Soft Cloth: Use a soft, lint-free cloth to gently clean your photos and camera lens.
- Lens Cleaner: Use a lens cleaner to remove smudges and fingerprints from your camera lens.
- Dust Blower: A dust blower can be used to remove dust and debris from your photos and equipment without scratching them.
3. Step-by-Step Guide to Taking Pictures of Photos Without Glare
Knowing the equipment is one thing; applying the techniques correctly is another. Here’s a step-by-step guide to help you take pictures of photos without glare, ensuring you capture high-quality images every time.
3.1. Preparation and Setup
- Step 1: Clean the Photo: Gently clean the surface of the photo with a soft, lint-free cloth to remove any dust, fingerprints, or smudges.
- Step 2: Set Up Your Lighting: Position your light source to provide soft, diffused lighting. If using natural light, place the photo near a window with indirect sunlight. If using artificial light, use a diffuser or softbox to soften the light.
- Step 3: Position the Photo: Place the photo on a flat, stable surface. Use weights or tape to secure the corners if necessary.
- Step 4: Set Up Your Camera: Mount your camera on a tripod and position it directly above the photo. Ensure the camera is parallel to the photo’s surface to avoid distortion.
3.2. Camera Settings and Adjustments
- Step 1: Turn Off the Flash: Disable the flash on your camera or smartphone. Using flash can create harsh reflections and glare.
- Step 2: Adjust ISO: Set the ISO to the lowest possible setting to minimize noise. A low ISO ensures a cleaner, more detailed image.
- Step 3: Set Aperture: Choose an aperture that provides sufficient depth of field. An aperture of f/8 or f/11 is usually a good starting point.
- Step 4: Adjust Shutter Speed: Adjust the shutter speed to achieve proper exposure. Use the camera’s light meter to guide you.
- Step 5: Focus: Use manual focus or autofocus to ensure the photo is sharp. If using autofocus, tap on the screen (on smartphones) or half-press the shutter button (on cameras) to focus.
3.3. Shooting Techniques to Minimize Glare
- Step 1: Angle Adjustment: Experiment with different angles to minimize glare. Slight adjustments in the camera’s position can make a big difference.
- Step 2: Polarizing Filter: Attach a polarizing filter to your lens and rotate it until the glare disappears. This filter blocks polarized light, reducing reflections from glossy surfaces.
- Step 3: Multiple Shots: Take multiple shots with slight variations in angle and settings. This increases the chances of capturing a glare-free image.
- Step 4: Zoom: Slightly zoom in to get closer to the photo.
3.4. Post-Processing Tips for Glare Removal
- Step 1: Open in Editing Software: Open your chosen image in photo editing software like Adobe Photoshop, Lightroom, or GIMP.
- Step 2: Adjust Exposure and Contrast: Adjust the exposure and contrast to balance the image and bring out details.
- Step 3: Remove Glare: Use the clone stamp tool or healing brush to remove any remaining glare. These tools allow you to copy pixels from one area of the image to another, effectively covering up the glare.
- Step 4: Sharpen the Image: Sharpen the image to enhance details and make it look crisper. Be careful not to over-sharpen, as this can create artifacts.
- Step 5: Color Correction: Correct any color imbalances to restore the photo’s original colors.
- Step 6: Crop and Resize: Crop the image to remove any unwanted borders or distractions. Resize the image to the desired dimensions for printing or sharing online.
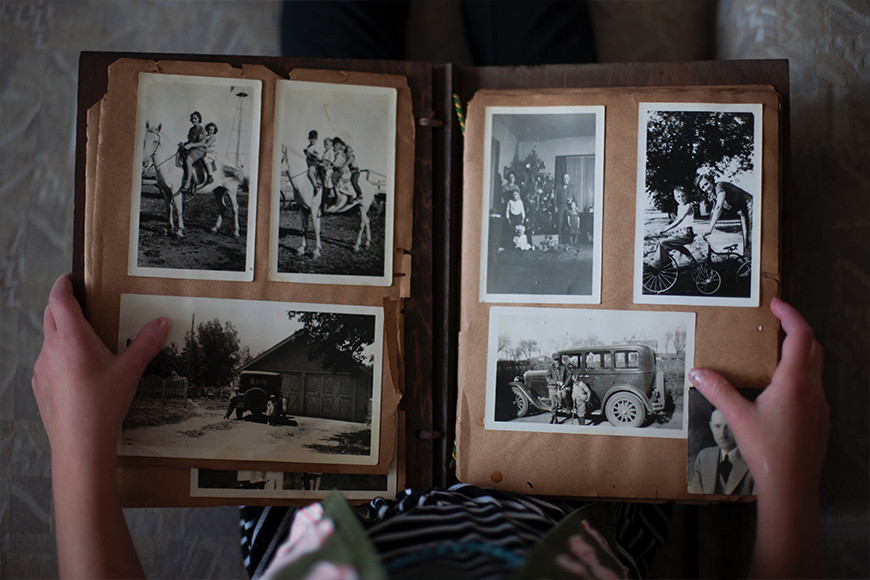 Vintage family photograph on a table
4. Advanced Techniques for Challenging Scenarios
Sometimes, standard techniques aren’t enough to tackle stubborn glare. Here are some advanced strategies for particularly challenging situations:
4.1. Photographing Artwork Behind Glass
Photographing artwork behind glass can be especially tricky due to reflections from the glass surface. Here are some additional tips:
- Remove the Glass: If possible, remove the glass from the frame before photographing the artwork. This eliminates the source of the reflections.
- Clean the Glass: If you can’t remove the glass, clean it thoroughly with a glass cleaner to remove any smudges or fingerprints.
- Use a Black Cloth: Place a black cloth behind the camera to minimize reflections. The black cloth absorbs light and prevents it from bouncing back into the lens.
- Shoot at an Angle: Shoot the artwork at a slight angle to avoid direct reflections. Experiment with different angles to find the one that minimizes glare.
- Polarizing Filter: Use a polarizing filter to reduce reflections from the glass surface. Adjust the filter until the glare disappears.
4.2. Photographing People with Glasses
Photographing people with glasses can be challenging due to reflections on the lenses. Here are some tips to minimize glare:
- Adjust the Lighting: Position the light source to avoid direct reflections on the glasses. Diffused lighting is best.
- Tilt the Glasses: Ask the person to tilt their head or adjust their glasses slightly to change the angle of reflection.
- Remove the Lenses: If possible, remove the lenses from the glasses. This eliminates the source of the reflections.
- Use an Anti-Reflective Coating: If the glasses have an anti-reflective coating, this can help reduce glare.
- Edit in Post-Production: Use photo editing software to remove any remaining reflections in the glasses.
4.3. Photographing Shiny Objects
Shiny objects like jewelry or metallic items can produce strong reflections that obscure details. Here are some tips for photographing shiny objects:
- Use a Light Tent: A light tent is a translucent enclosure that diffuses light and minimizes reflections. Place the shiny object inside the light tent to create soft, even illumination.
- Position the Lights Carefully: Position your lights to avoid direct reflections on the object. Experiment with different angles and distances to find the optimal lighting.
- Use a Polarizing Filter: Use a polarizing filter to reduce reflections from the object’s surface. Adjust the filter until the glare disappears.
- Matte Spray: Apply a matte spray to the object to reduce its reflectivity. Be sure to test the spray on a small, inconspicuous area first.
- Stacking Images: Take multiple images with different lighting setups, and then combine them in photo editing software to create a single image with minimized glare.
5. Leveraging Technology for Glare Reduction
In addition to traditional techniques, technology offers several tools and features that can help reduce glare when photographing photos:
5.1. Smartphone Camera Features
Modern smartphones often have advanced camera features designed to reduce glare and improve image quality. These features include:
- HDR (High Dynamic Range): HDR mode captures multiple images at different exposures and combines them into a single image with a wider dynamic range. This helps to reduce glare and bring out details in both bright and dark areas.
- Night Mode: Night mode uses longer exposures and image processing algorithms to capture more light in low-light conditions. This can help reduce glare by capturing more detail in shadows.
- Portrait Mode: Portrait mode uses depth sensing technology to create a shallow depth of field, blurring the background and bringing the subject into focus. This can help reduce glare by minimizing distractions.
- Pro Mode: Pro mode allows you to manually adjust camera settings like ISO, aperture, and shutter speed. This gives you more control over the image and allows you to fine-tune settings to minimize glare.
5.2. Scanning Apps
Scanning apps use your smartphone’s camera to scan documents and photos. These apps often have built-in features for reducing glare and improving image quality. Some popular scanning apps include:
- Adobe Scan: Adobe Scan automatically detects edges, crops images, and corrects perspective. It also has a glare reduction feature that minimizes reflections from glossy surfaces.
- CamScanner: CamScanner offers similar features to Adobe Scan, including edge detection, cropping, and perspective correction. It also has a glare removal tool that reduces reflections and improves image quality.
- Google PhotoScan: Google PhotoScan is specifically designed for scanning old photos. It uses a multi-image capture technique to reduce glare and improve image quality.
5.3. AI-Powered Editing Tools
Artificial intelligence (AI) is transforming the field of photo editing, offering powerful tools for automatically removing glare and enhancing images. Some AI-powered editing tools include:
- Luminar AI: Luminar AI uses AI algorithms to automatically enhance images, including removing glare, adjusting colors, and improving details.
- Remini: Remini uses AI to restore old and blurry photos, including removing glare and enhancing details.
- Topaz Photo AI: Topaz Photo AI uses AI to sharpen images, remove noise, and enhance details. It also has a glare reduction feature that minimizes reflections from glossy surfaces.
6. Case Studies: Real-World Examples
To illustrate the effectiveness of these techniques, let’s look at a few real-world case studies:
6.1. Digitizing a Family Photo Album
A family wanted to digitize their old photo album to preserve their memories. The album contained hundreds of photos, many of which had a glossy finish and were prone to glare.
- Challenge: Minimize glare and capture high-quality images of all the photos in the album.
- Solution: The family used a combination of techniques, including soft, diffused lighting, a polarizing filter, and photo editing software. They set up a dedicated scanning station with a tripod and softbox. They used Adobe Photoshop to remove any remaining glare and enhance the images.
- Result: The family was able to digitize their entire photo album with minimal glare and high image quality.
6.2. Photographing Artwork for an Online Gallery
An artist wanted to photograph their artwork for an online gallery. The artwork was framed behind glass, which created strong reflections.
- Challenge: Capture high-quality images of the artwork without glare.
- Solution: The artist used a combination of techniques, including removing the glass from the frame, using a black cloth behind the camera, and shooting at an angle. They used Adobe Lightroom to adjust the exposure and contrast and remove any remaining glare.
- Result: The artist was able to capture stunning images of their artwork with minimal glare and excellent detail.
6.3. Capturing Portraits of People with Glasses for a Professional Headshot
A photographer was hired to take professional headshots of several people, many of whom wore glasses.
- Challenge: Minimize glare on the glasses and capture flattering portraits.
- Solution: The photographer used a combination of techniques, including adjusting the lighting, asking the subjects to tilt their heads or adjust their glasses, and editing in post-production. They used Photoshop to remove any remaining reflections on the glasses.
- Result: The photographer was able to capture professional-quality headshots with minimal glare on the glasses.
7. Tips and Tricks from Professional Photographers
Professional photographers have developed numerous tips and tricks for minimizing glare over the years. Here are a few of their best-kept secrets:
7.1. Use a Macro Lens
A macro lens allows you to focus very closely on the subject, capturing fine details and minimizing distortion. This is especially useful when photographing old photos or artwork.
7.2. Shoot in RAW Format
Shooting in RAW format captures more information than JPEG, giving you more flexibility in post-processing. RAW images allow you to adjust the exposure, contrast, and colors without losing detail.
7.3. Use a Gray Card
A gray card is a neutral-colored card that can be used to set the white balance on your camera. This ensures accurate colors and minimizes color casts.
7.4. Clean Your Lens Regularly
A dirty lens can cause flare and reduce image quality. Clean your lens regularly with a lens cleaner and a soft, lint-free cloth.
7.5. Practice Makes Perfect
The best way to learn how to take pictures of photos without glare is to practice. Experiment with different techniques and settings until you find what works best for you.
 A hand using photo editing software on a computer screen
8. The Future of Glare Reduction in Photography
The field of glare reduction in photography is constantly evolving. Here are some emerging trends to watch out for:
8.1. Computational Photography
Computational photography uses software algorithms to enhance images and overcome the limitations of traditional photography. Future computational photography techniques may include advanced glare reduction algorithms that automatically remove reflections and improve image quality.
8.2. Advanced Lens Coatings
Lens manufacturers are constantly developing new lens coatings that reduce reflections and improve image quality. Future lens coatings may be even more effective at minimizing glare and flare.
8.3. Integrated Polarizing Filters
Some smartphone manufacturers are exploring the possibility of integrating polarizing filters directly into the camera module. This would allow users to easily reduce glare without the need for external lens attachments.
8.4. AI-Powered Editing Software
AI-powered editing software is becoming increasingly sophisticated. Future AI algorithms may be able to automatically detect and remove glare with minimal user input.
9. Frequently Asked Questions (FAQs)
Q1: Why is glare such a common problem when photographing old photos?
Glare is a common issue when photographing old photos due to their glossy finish, which reflects light directly into the camera lens. This creates bright spots and washes out details.
Q2: What is the best lighting setup for photographing photos without glare?
The best lighting setup involves using soft, diffused light. This can be achieved with natural indirect sunlight, diffused artificial light, or a light tent.
Q3: Can I use my smartphone to photograph photos without glare?
Yes, you can use your smartphone. Ensure the flash is off, use HDR mode if available, and adjust the angle and lighting. Post-processing apps can also help remove any remaining glare.
Q4: What is a polarizing filter and how does it help reduce glare?
A polarizing filter is a lens attachment that reduces reflections and glare from non-metallic surfaces. It blocks polarized light, eliminating reflections from glass, water, and glossy surfaces.
Q5: What are some effective post-processing techniques for removing glare?
Effective post-processing techniques include adjusting exposure and contrast, using the clone stamp tool or healing brush to cover up glare, sharpening the image, and correcting any color imbalances.
Q6: How can I photograph artwork behind glass without glare?
To photograph artwork behind glass, remove the glass if possible, clean the glass thoroughly, use a black cloth behind the camera, shoot at an angle, and use a polarizing filter.
Q7: What tips can help minimize glare when photographing people with glasses?
To minimize glare when photographing people with glasses, adjust the lighting to avoid direct reflections, ask the person to tilt their head or adjust their glasses, remove the lenses if possible, and use post-processing to remove any remaining reflections.
Q8: Are there any apps that can help reduce glare when scanning photos with my phone?
Yes, several apps like Adobe Scan, CamScanner, and Google PhotoScan have built-in features for reducing glare and improving image quality.
Q9: What is the advantage of shooting in RAW format when photographing photos?
Shooting in RAW format captures more information than JPEG, giving you more flexibility in post-processing. RAW images allow you to adjust the exposure, contrast, and colors without losing detail.
Q10: Can AI-powered editing tools really remove glare effectively?
Yes, AI-powered editing tools like Luminar AI, Remini, and Topaz Photo AI use advanced algorithms to automatically detect and remove glare, often with impressive results.
10. Conclusion: Mastering Glare-Free Photography
Mastering how to take pictures of photos without glare is essential for preserving memories and creating high-quality images of artwork and other reflective objects. By understanding the causes of glare, using the right equipment, applying effective techniques, and leveraging technology, you can minimize reflections and capture stunning images every time. Remember to experiment with different settings and techniques to find what works best for you, and don’t be afraid to use post-processing to make final adjustments.
Visit dfphoto.net today to discover more photography tips, explore stunning photo galleries, and connect with a vibrant community of photographers in the USA. Whether you’re looking for detailed tutorials on various techniques, inspiration from talented artists, or a place to share your own work, dfphoto.net has everything you need to enhance your photography skills and passion.
Address: 1600 St Michael’s Dr, Santa Fe, NM 87505, United States.
Phone: +1 (505) 471-6001.
Website: dfphoto.net.