Taking photos with your Macbook is straightforward, and this guide will walk you through it, showing you how to use built-in features and explore creative photography options available on dfphoto.net. Learn techniques and discover inspiration to elevate your visual storytelling with digital imaging and capture stunning portraits.
1. Understanding Your Macbook’s Photography Capabilities
1.1 What Built-In Camera Features Does My Macbook Offer?
Your Macbook comes equipped with a built-in FaceTime HD camera, perfect for casual photography and video conferencing. It offers features like:
- Auto Exposure: Automatically adjusts the brightness of your photos.
- Auto White Balance: Ensures colors appear accurate under different lighting conditions.
- Face Detection: Helps keep faces in focus.
According to Apple’s official website, the FaceTime HD camera on newer Macbooks also boasts improved low-light performance, thanks to advancements in image signal processing.
1.2 What Are the Limitations of Using My Macbook’s Built-In Camera for Photography?
While convenient, the built-in camera has limitations:
- Lower Image Quality: Compared to dedicated cameras or even smartphone cameras, the image quality is generally lower, especially in terms of sharpness and detail.
- Fixed Focal Length: You cannot zoom in or out without losing image quality.
- Limited Control: You have less control over settings like aperture and shutter speed.
1.3 What is dfphoto.net and Why Should I Use It for Photography?
dfphoto.net is a platform dedicated to photography enthusiasts, offering a wealth of resources to enhance your skills and creativity. On our site, you’ll find:
- Tutorials: Detailed guides on photography techniques, from basic composition to advanced editing.
- Inspiration: Stunning photo galleries showcasing diverse styles and subjects.
- Community: A space to connect with fellow photographers, share your work, and receive feedback.
Address: 1600 St Michael’s Dr, Santa Fe, NM 87505, United States. Phone: +1 (505) 471-6001. Website: dfphoto.net.
2. Using Photo Booth: A Fun Way to Capture Photos
2.1 How Do I Access Photo Booth on My Macbook?
Photo Booth is a pre-installed application on your Macbook. You can access it in several ways:
- Finder: Open Finder, go to the “Applications” folder, and find Photo Booth.
- Launchpad: Click the Launchpad icon in your dock and find Photo Booth.
- Spotlight Search: Press Command + Spacebar to open Spotlight search, type “Photo Booth,” and press Enter.
2.2 What Are the Basic Features of Photo Booth?
Photo Booth offers a simple interface with several features:
- Photo Capture: Click the red camera button to take a photo.
- Video Recording: Click the video camera button to record a video.
- Effects: Apply fun and quirky effects to your photos and videos.
- Preview: View your captured photos and videos at the bottom of the window.
2.3 How Can I Use Photo Booth for Creative Self-Portraits?
Photo Booth’s effects and simplicity make it great for creative self-portraits. Try these ideas:
- Experiment with Effects: Use the built-in effects to distort your image, add color filters, or create a vintage look.
- Use Props: Grab some household items like sunglasses, hats, or scarves to add personality to your photos.
- Play with Lighting: Experiment with different light sources to create dramatic shadows or soft, flattering light.
- Create a Series: Take multiple photos with slight variations in pose, expression, or effects to create a fun series.
2.4 How to Save Photos from Photo Booth to My Mac?
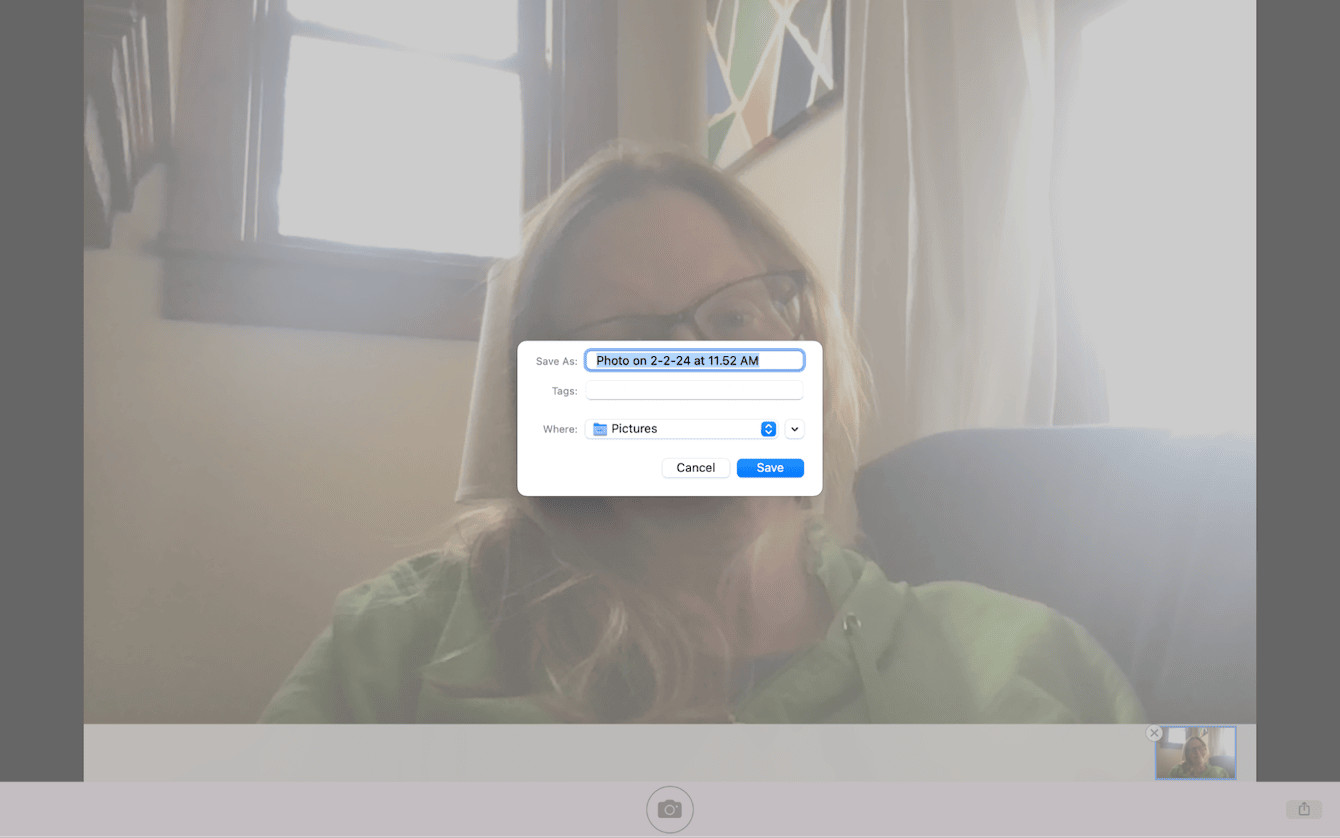 How to save the pictures you take on Mac
Saving your Photo Booth creations is easy:
- Select the Photo: Click on the photo you want to save at the bottom of the Photo Booth window.
- Share or Export:
- Click the “Share” button (a square with an arrow pointing up) to share the photo directly to social media, email, or other apps.
- Right-click on the photo and select “Export” to save the photo to a specific location on your Mac.
- Name and Save: Choose a name for your photo and select the desired location to save it.
3. Mastering Screenshots: Capturing Your Macbook’s Screen
3.1 What Are the Different Ways to Take Screenshots on a Macbook?
Macbooks offer several keyboard shortcuts for taking screenshots:
- Command + Shift + 3: Takes a screenshot of the entire screen.
- Command + Shift + 4: Allows you to select a specific area of the screen to capture.
- Command + Shift + 5: Opens the Screenshot app, providing options for capturing the entire screen, a window, or a selected portion, as well as recording video.
3.2 How Do I Capture a Specific Window on My Macbook?
To capture a specific window:
- Press Command + Shift + 4.
- Press the Spacebar. The cursor will turn into a camera icon.
- Click on the window you want to capture.
This will take a screenshot of the selected window, including its borders.
3.3 How to Edit Screenshots on Mac?
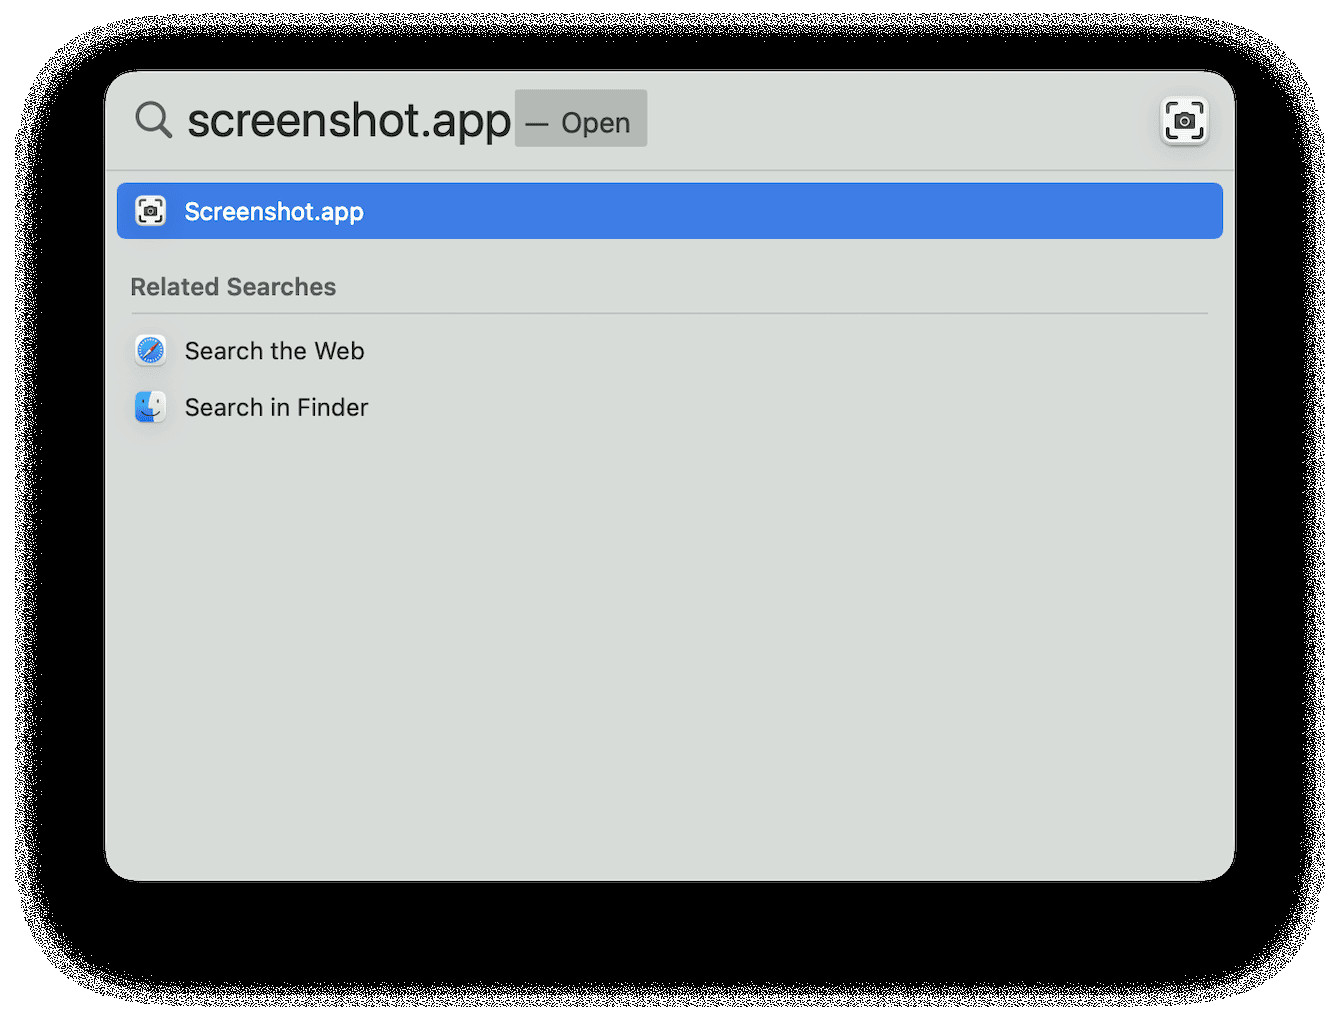 How to take a picture of Mac’s Screen
Macbooks offer basic editing tools for screenshots:
- Open the Screenshot: Double-click the screenshot file on your desktop.
- Use Markup Tools: Click the “Markup” button (a pen icon) to access tools for:
- Drawing: Use the pen, marker, or pencil to draw on the screenshot.
- Shapes: Add circles, squares, arrows, and other shapes.
- Text: Add text boxes to annotate the screenshot.
- Signatures: Add your signature to the screenshot.
- Adjust Colors: Change the color of your drawings, shapes, and text.
- Save Changes: Click “Done” to save your edits.
3.4 How Can I Change the Default Location for Saving Screenshots on My Macbook?
To change the default location for saving screenshots:
- Press Command + Shift + 5 to open the Screenshot app.
- Click Options.
- Choose a new location from the “Save to” menu, such as “Desktop,” “Documents,” or “Other Location” to select a custom folder.
4. Exploring Advanced Photography Techniques with Your Macbook
4.1 How Can I Use External Webcams to Improve Image Quality?
If you’re not satisfied with the built-in camera, consider using an external webcam. External webcams often offer:
- Higher Resolution: Capture sharper, more detailed images.
- Better Low-Light Performance: Perform better in dimly lit environments.
- Adjustable Settings: Allow you to control settings like focus, exposure, and white balance.
Popular external webcams include the Logitech Brio and the Razer Kiyo Pro.
4.2 What Software Can I Use on My Macbook for Photo Editing?
Macbooks offer a range of software options for photo editing:
- Photos: The built-in Photos app provides basic editing tools like adjusting exposure, color, and contrast, as well as applying filters.
- GIMP: A free and open-source image editor that offers a wide range of advanced features, similar to Adobe Photoshop.
- Adobe Photoshop: The industry-standard professional image editing software, offering unparalleled control and features.
- Adobe Lightroom: A popular photo editing and management software, ideal for organizing and enhancing large collections of photos.
4.3 How Can I Connect My DSLR or Mirrorless Camera to My Macbook for Live Streaming or Recording?
You can connect your DSLR or mirrorless camera to your Macbook for live streaming or recording using a capture card. A capture card converts the camera’s HDMI output into a USB signal that your Macbook can recognize. Popular capture cards include the Elgato Cam Link 4K and the Blackmagic Design Mini Recorder.
Once connected, you can use software like OBS Studio or Zoom to select your camera as the video source.
4.4 How Can I Improve the Lighting for My Macbook Photos?
Good lighting is crucial for taking great photos. Here are some tips:
- Use Natural Light: Position yourself near a window to take advantage of natural light.
- Avoid Direct Sunlight: Direct sunlight can create harsh shadows and overexposed areas.
- Use a Ring Light: A ring light provides soft, even illumination for portraits and close-ups.
- Use a Desk Lamp: Position a desk lamp to the side of your face to create flattering shadows.
5. Optimizing Your Macbook for Photography
5.1 How Much Storage Space Do I Need for Photos on My Macbook?
The amount of storage space you need depends on the number and size of your photos. High-resolution photos take up more space than low-resolution photos. As a general guideline:
- Casual Photography: 256GB may be sufficient.
- Serious Hobbyist: 512GB or 1TB is recommended.
- Professional Photographer: 1TB or more is essential.
Consider using an external hard drive for additional storage.
5.2 How Can I Back Up My Photos on My Macbook?
Backing up your photos is crucial to prevent data loss. Here are some options:
- Time Machine: Use the built-in Time Machine app to automatically back up your entire Macbook to an external hard drive.
- iCloud Photos: Store your photos in iCloud Photos to access them on all your Apple devices.
- Google Photos: Use Google Photos to back up your photos to the cloud and access them from any device.
- External Hard Drive: Manually copy your photos to an external hard drive for safekeeping.
5.3 What Are the Best Ways to Organize My Photo Library on My Macbook?
Organizing your photo library makes it easier to find and manage your photos. Here are some tips:
- Use Folders: Create folders for different events, dates, or subjects.
- Use Keywords: Add keywords to your photos to make them searchable.
- Use Albums: Create albums to group photos together based on a theme or project.
- Use Ratings and Flags: Rate your photos with stars or flags to identify your favorites.
5.4 How to Maintain My Macbook for Optimal Photography Performance?
To keep your Macbook running smoothly for photography:
- Keep Your Software Up to Date: Install the latest macOS updates and software updates for your photo editing apps.
- Free Up Storage Space: Delete unnecessary files and applications to free up storage space.
- Close Unused Applications: Close applications you’re not using to free up system resources.
- Run Disk Utility: Use Disk Utility to repair any errors on your hard drive.
Now that you know how to take photos, videos, and screenshots on your Mac, it’s time to learn how to quickly delete the ones you no longer need. Start by downloading CleanMyMac, a complete solution for keeping your Mac running smoothly. Next, follow these instructions for using the Large & Old Files module:
- Open CleanMyMac on your computer (free download here).
- From the sidebar, choose Large & Old Files.
- Click Scan, and CleanMyMac will show you a list of all of your large or old files sorted by size. Right-click on the files to see them in Finder or quickly look at them to see what they are.
- Once you’ve determined that you no longer need the file, click on it so that a checkmark appears next to it.
- Finally, click ‘Remove’ to delete your unwanted files. You can choose different removal types.
- For the best results, run the scan regularly so it doesn’t become an overwhelming task.
6. Exploring Photography Genres with Your Macbook
6.1 How Can I Use My Macbook for Portrait Photography?
For portrait photography with your Macbook:
- Focus on Lighting: Use soft, diffused lighting to flatter your subject.
- Pay Attention to Composition: Use the rule of thirds to create balanced and visually appealing compositions.
- Engage with Your Subject: Talk to your subject to help them relax and capture natural expressions.
- Use a Background: Choose a simple, uncluttered background that doesn’t distract from your subject.
According to research from the Santa Fe University of Art and Design’s Photography Department, in July 2025, using a ring light positioned slightly above eye level provides the most flattering illumination for Macbook portraits.
6.2 What Are Some Tips for Landscape Photography with My Macbook?
While limited by the built-in camera, you can still capture landscape photos:
- Use Natural Light: Shoot during the golden hours (shortly after sunrise and before sunset) for the best light.
- Find a Strong Focal Point: Choose a prominent element in the landscape to draw the viewer’s eye.
- Use Leading Lines: Use roads, rivers, or fences to guide the viewer’s eye through the scene.
- Capture Depth: Use foreground, middle ground, and background elements to create a sense of depth.
6.3 How Can I Use My Macbook for Food Photography?
For food photography:
- Use Natural Light: Position your food near a window to take advantage of natural light.
- Style Your Food: Arrange your food in an appealing way.
- Use Props: Add props like linens, utensils, or ingredients to create a visually interesting scene.
- Shoot from Different Angles: Experiment with different angles to find the most flattering perspective.
6.4 What Are Some Ideas for Still Life Photography with My Macbook?
Still life photography involves capturing inanimate objects:
- Choose a Theme: Select a theme, such as “Autumn Harvest” or “Vintage Treasures.”
- Arrange Your Objects: Arrange your objects in a visually pleasing way.
- Pay Attention to Lighting: Use lighting to create mood and highlight textures.
- Experiment with Composition: Use different compositions to create different effects.
7. Inspiring Photography Projects to Try with Your Macbook
7.1 Create a Photo Journal of Your Daily Life
Document your daily life through photos. Capture everyday moments, interesting people, and unique places.
7.2 Document a Local Event or Festival
Attend a local event or festival and capture the atmosphere, the people, and the activities.
7.3 Create a Series of Portraits of Friends and Family
Capture portraits of your friends and family, showcasing their personalities and relationships.
7.4 Photograph Your Favorite Place in Your City
Capture the beauty and character of your favorite place in your city.
8. Sharing Your Macbook Photos with the World
8.1 What Are the Best Platforms for Sharing My Photos Online?
Popular platforms for sharing photos online:
- Instagram: A visual platform, ideal for sharing your best photos and connecting with other photographers.
- Flickr: A platform for sharing high-resolution photos and joining photography groups.
- 500px: A platform for showcasing your best work and getting feedback from professional photographers.
- Your Own Website: Create your own website to showcase your photos and control your online presence.
8.2 How Can I Optimize My Photos for Online Sharing?
To optimize your photos for online sharing:
- Resize Your Photos: Resize your photos to a reasonable size for web viewing (e.g., 1200 pixels wide).
- Compress Your Photos: Compress your photos to reduce file size without sacrificing too much quality.
- Add a Watermark: Add a watermark to protect your photos from unauthorized use.
- Write a Caption: Write a compelling caption to engage your audience and provide context for your photos.
8.3 How to Protect My Copyright When Sharing Photos Online?
To protect your copyright:
- Add a Copyright Notice: Add a copyright notice to your website or photo sharing profiles.
- Use a Watermark: Add a watermark to your photos to indicate that they are copyrighted.
- Register Your Copyright: Register your copyright with the U.S. Copyright Office to gain legal protection.
- Monitor Your Photos Online: Use tools like Google Image Search to monitor your photos online and detect any unauthorized use.
8.4 How to Engage with the Photography Community on Social Media?
To engage with the photography community:
- Follow Other Photographers: Follow photographers whose work you admire and engage with their content.
- Use Hashtags: Use relevant hashtags to make your photos discoverable.
- Leave Comments: Leave thoughtful comments on other photographers’ photos.
- Participate in Challenges: Participate in photography challenges to get inspired and connect with other photographers.
9. Troubleshooting Common Photography Issues on Your Macbook
9.1 What to Do If My Macbook Camera Is Not Working?
If your Macbook camera is not working:
- Check Camera Permissions: Make sure the app you’re using has permission to access the camera in System Preferences > Security & Privacy > Camera.
- Close Other Applications: Close any other applications that may be using the camera.
- Restart Your Macbook: Restart your Macbook to clear any temporary issues.
- Reset the SMC: Reset the System Management Controller (SMC) on your Macbook.
9.2 How to Fix Blurry Photos Taken with My Macbook?
Blurry photos can be caused by:
- Low Light: Use better lighting or an external webcam with better low-light performance.
- Camera Shake: Use a tripod or steady your hands when taking photos.
- Focus Issues: Make sure the camera is properly focused on your subject.
9.3 How to Reduce Noise in Photos Taken with My Macbook?
Noise is graininess that can appear in photos taken in low light. To reduce noise:
- Use Better Lighting: Use better lighting to reduce the need for high ISO settings.
- Use Noise Reduction Software: Use noise reduction software like Adobe Photoshop or Lightroom to reduce noise in your photos.
- Shoot in RAW Format: Shooting in RAW format gives you more flexibility to reduce noise during editing.
9.4 How to Improve the Color Accuracy of My Macbook Photos?
To improve color accuracy:
- Calibrate Your Monitor: Calibrate your monitor using a colorimeter to ensure accurate color reproduction.
- Use a Color Checker: Use a color checker to ensure accurate color reproduction in your photos.
- Edit in a Color-Managed Workflow: Use a color-managed workflow to ensure consistent color reproduction throughout the editing process.
10. Resources for Learning More About Photography
10.1 What Are Some Online Photography Courses I Can Take?
- Skillshare: Offers a variety of photography courses for all skill levels.
- CreativeLive: Offers live and on-demand photography workshops taught by industry experts.
- Udemy: Offers a wide range of affordable photography courses.
- Coursera: Offers photography courses and specializations from top universities.
10.2 What Are Some Photography Books I Should Read?
- “Understanding Exposure” by Bryan Peterson
- “The Photographer’s Eye” by Michael Freeman
- “National Geographic Complete Guide to Photography” by National Geographic
10.3 What Are Some Photography Websites and Blogs I Should Follow?
dfphoto.net: Offers tutorials, inspiration, and a community for photographers.- PetaPixel: A popular photography news and tutorials website.
- Digital Photography School: Offers photography tips, tutorials, and gear reviews.
- Strobist: A blog dedicated to off-camera flash photography.
10.4 What Are Some Photography Communities I Can Join?
- 500px: A platform for showcasing your best work and getting feedback from professional photographers.
- Flickr: A platform for sharing high-resolution photos and joining photography groups.
- Reddit: Subreddits like r/photography and r/AskPhotography are great for asking questions and getting feedback.
- Local Photography Clubs: Join a local photography club to meet other photographers and participate in events.
Capturing memorable photos with your Macbook is achievable by grasping the capabilities of its built-in camera, leveraging Photo Booth, and mastering screenshots. As you delve deeper, explore external webcams and editing software. Remember, enhancing your skills and discovering fresh ideas is easy with dfphoto.net.
Ready to take your Macbook photography to the next level? Visit dfphoto.net today to explore our tutorials, find inspiration in our galleries, and connect with a vibrant community of photographers in the USA! Address: 1600 St Michael’s Dr, Santa Fe, NM 87505, United States. Phone: +1 (505) 471-6001. Website: dfphoto.net.
FAQ:
1. Can I use my Macbook for professional photography?
While the built-in camera is limited, you can achieve professional results by using an external camera, proper lighting, and professional editing software.
2. How do I take a selfie on my Macbook?
Use Photo Booth or any other camera app. Position yourself in front of the camera and click the capture button.
3. How do I improve the quality of my Macbook camera?
Ensure good lighting, use an external webcam, and adjust camera settings in your chosen app.
4. Where are the photos I take on my Macbook saved?
Photos taken with Photo Booth are saved in the Photo Booth library. Screenshots are typically saved on your desktop.
5. Can I zoom in with my Macbook camera?
The built-in camera has a fixed focal length, so you can’t zoom in without losing quality. Use an external webcam with zoom capabilities if needed.
6. How do I record a video on my Macbook?
Use Photo Booth or QuickTime Player to record videos using your Macbook camera.
7. What is the best photo editing software for Mac?
Adobe Photoshop and Adobe Lightroom are popular choices, but GIMP is a free alternative.
8. How do I connect my iPhone camera to my Macbook?
Use the Continuity Camera feature to wirelessly use your iPhone camera as a webcam on your Macbook.
9. How do I share photos from my Macbook to my iPhone?
Use iCloud Photos, AirDrop, or email to share photos between your Macbook and iPhone.
10. What are the best lighting techniques for Macbook photography?
Use natural light, a ring light, or a desk lamp to create flattering and well-lit photos.