Fog photography unlocks a world of ethereal beauty; are you ready to capture it? At dfphoto.net, we provide expert tips and techniques to master photographing in foggy conditions. This guide delves into maximizing atmospheric depth, utilizing shapes, and maintaining equipment integrity to create stunning visual stories. Explore the art of fog photography with us and elevate your photographic skills today with visual storytelling, composition techniques, and post-processing methods.
1. Understanding the Allure of Fog Photography
Fog transforms ordinary scenes into extraordinary, atmospheric images. It’s more than just weather; it’s a powerful artistic tool. It’s the ability to take an ordinary scene and turn it into something that feels almost otherworldly. The right conditions can add depth, mystery, and a touch of the surreal to your photos. Fog can simplify a busy landscape by softening details and reducing contrast. This can help to focus the viewer’s attention on the essential elements of the composition. Fog also offers creative opportunities, such as capturing silhouettes or dramatic light rays. Whether you’re an amateur or a professional, understanding how to harness fog will significantly enhance your photographic repertoire.
1.1. What Makes Fog So Photogenic?
Fog possesses a unique ability to diffuse light, creating a soft, dreamlike quality that’s highly sought after by photographers. It selectively obscures details, simplifying compositions and drawing attention to key subjects. Fog can create a sense of depth and distance in a photograph, even in otherwise flat or uninteresting landscapes. According to research from the Santa Fe University of Art and Design’s Photography Department, in July 2025, the atmospheric perspective created by fog can dramatically enhance the three-dimensionality of an image. Fog evokes emotions, adding a sense of mystery, tranquility, or even drama, depending on the scene and how you capture it.
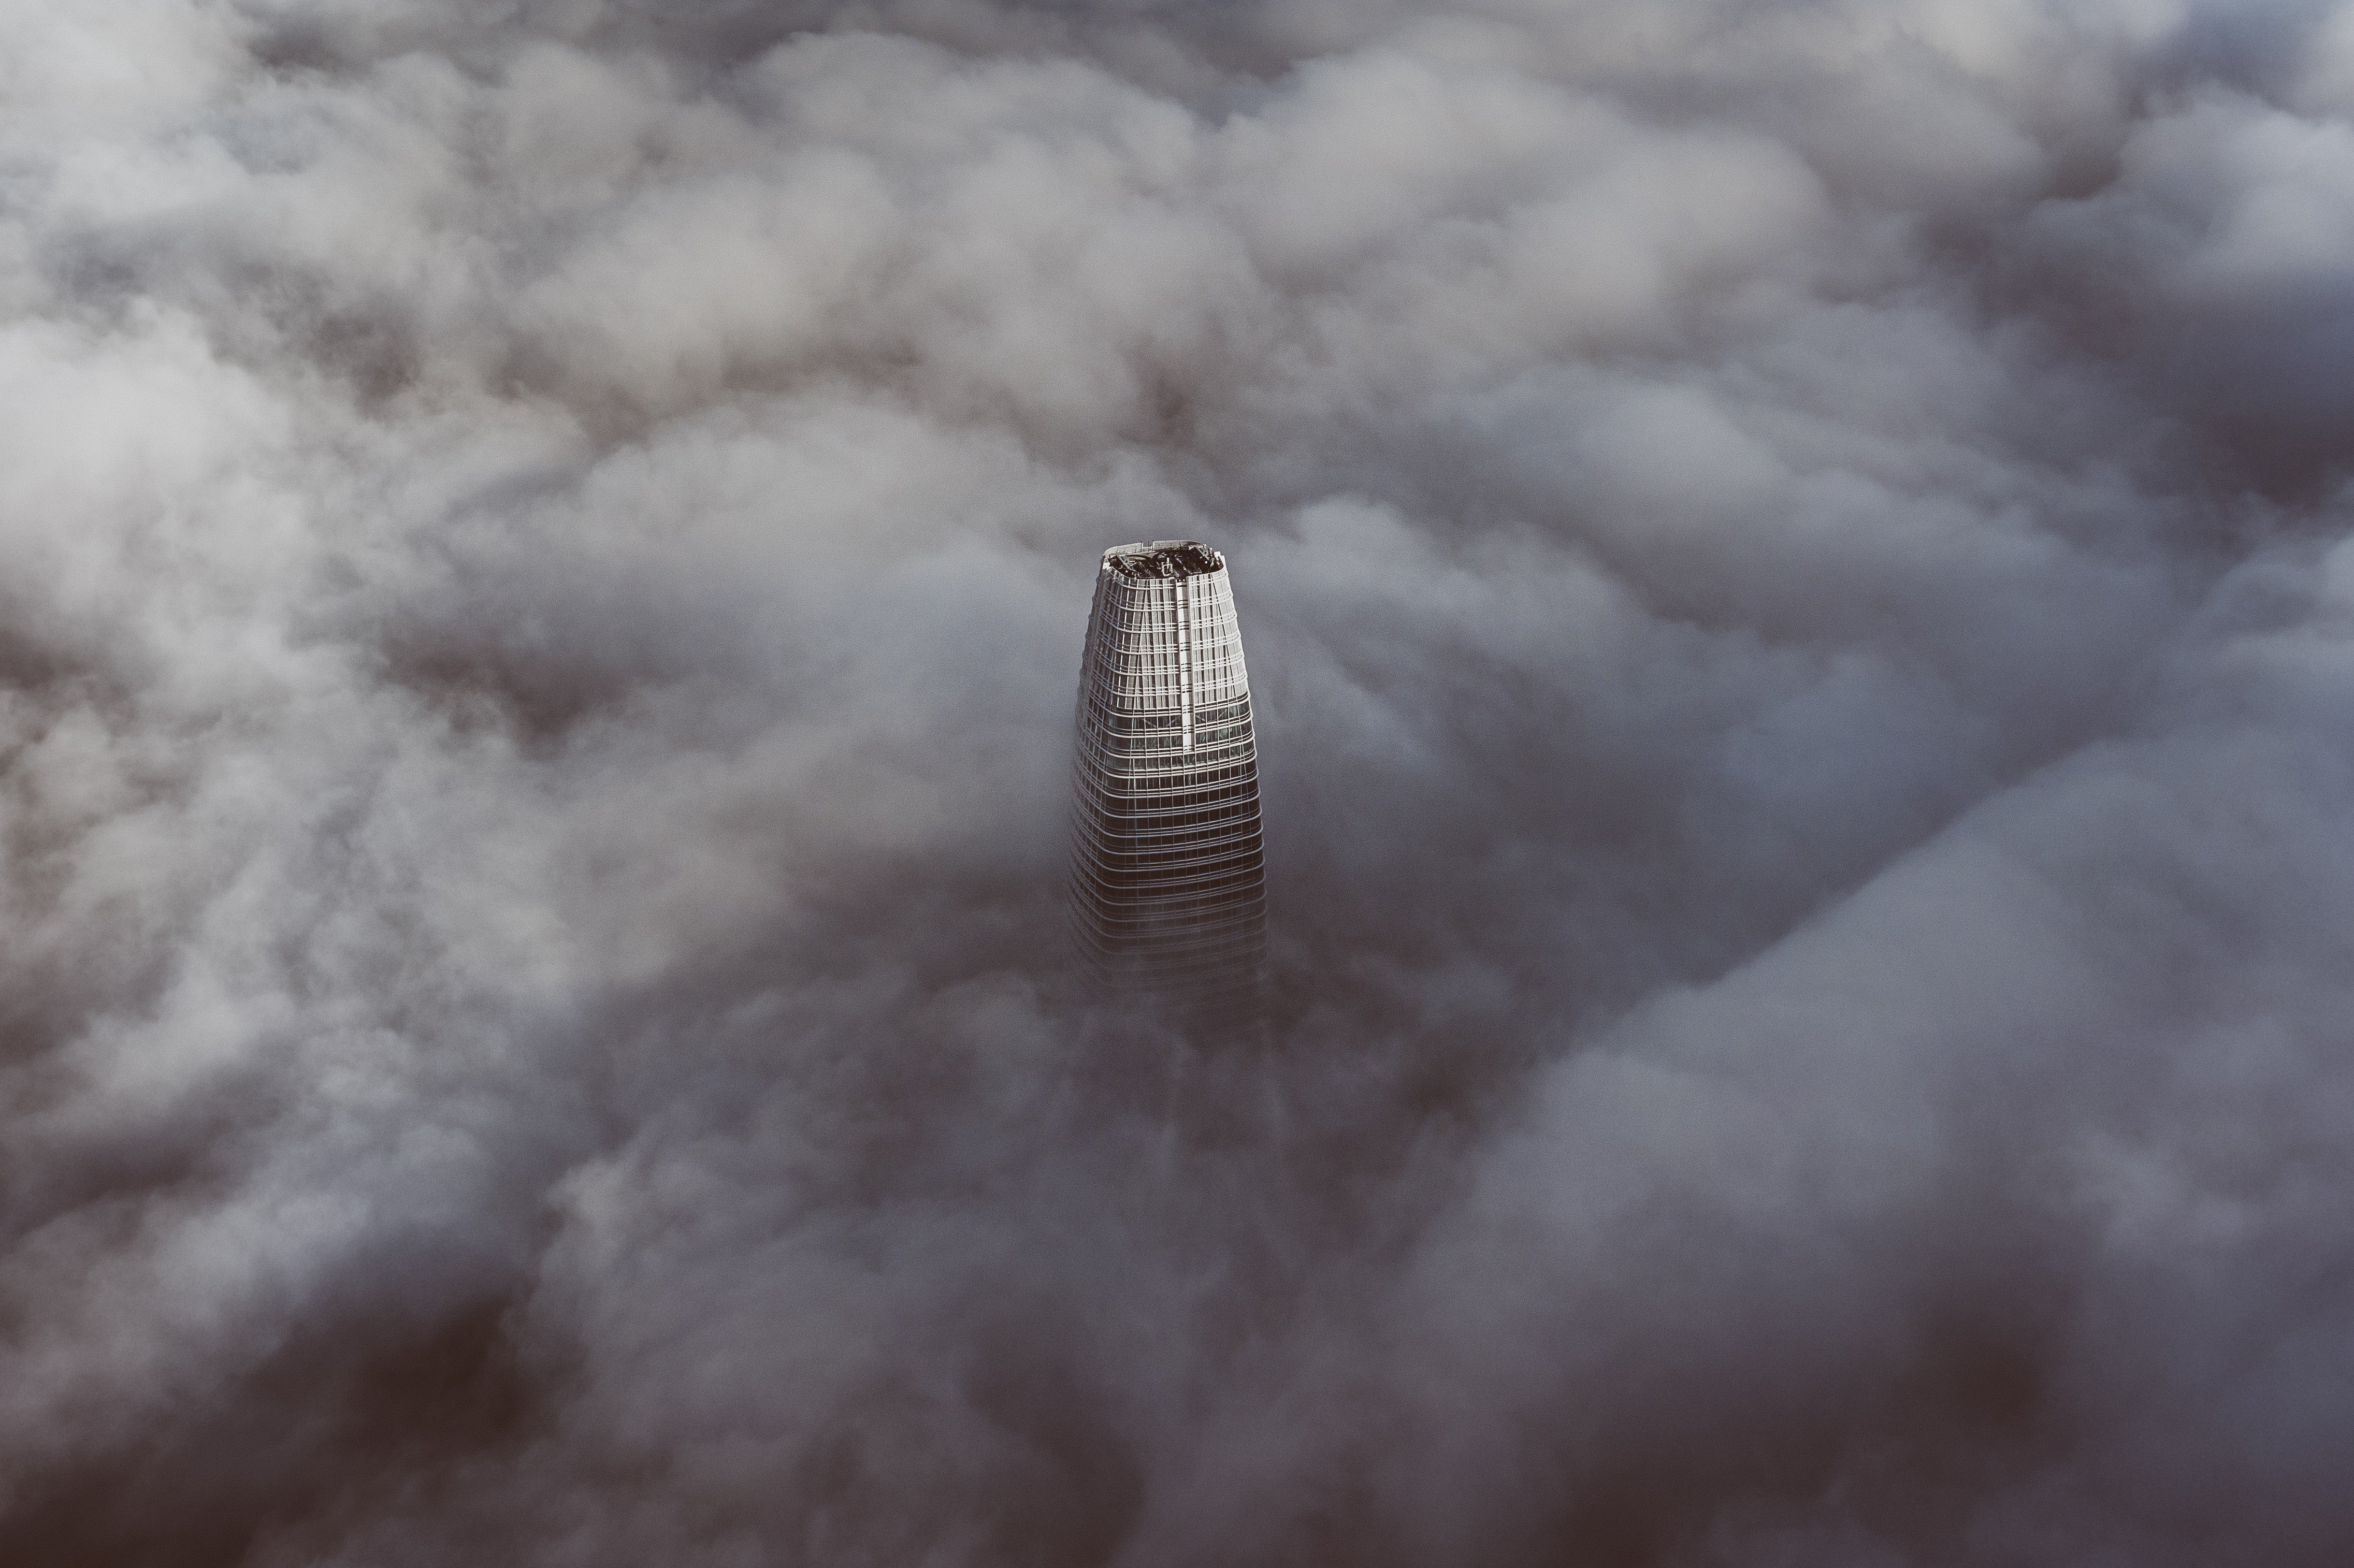 Dreamy photograph in dense fog
1.2. What Are the Different Types of Fog and How Do They Affect Photography?
Understanding the types of fog helps predict and photograph them effectively. Each type offers unique photographic opportunities:
| Fog Type | Description | Photographic Opportunities |
|---|---|---|
| Radiation Fog | Forms on clear nights when the ground cools, chilling the air above it. | Best for capturing serene landscapes with ground-level mist, often found in valleys and fields. |
| Advection Fog | Warm, moist air moves over a cooler surface. | Creates dense, widespread fog ideal for dramatic coastal scenes and covering large areas. |
| Upslope Fog | Moist air is forced upwards along a slope, cooling as it rises. | Offers unique perspectives on mountains and hills, with fog swirling around peaks. |
| Steam Fog | Cold air passes over warm water, causing evaporation and condensation. | Excellent for capturing dynamic scenes near lakes, rivers, or hot springs, with rising plumes of fog. |
| Frontal Fog | Forms along weather fronts where warm, moist air meets cooler air. | Can lead to unpredictable and dramatic conditions, ideal for capturing powerful, atmospheric images. |
1.3. How Does Time of Day Affect Fog Photography?
The time of day dramatically influences the mood and quality of fog photography:
- Early Morning: This is often the best time, with the rising sun creating dramatic light rays and golden hues through the fog.
- Midday: Fog can be less dense, creating a softer, more diffused light that’s excellent for portraits and detailed landscapes.
- Late Afternoon/Evening: As the temperature drops, fog can become denser, creating moody and atmospheric scenes, especially around twilight.
- Night: Artificial lights interacting with fog can produce stunning, surreal effects, ideal for urban and architectural photography.
2. Essential Gear for Fog Photography
Having the right equipment ensures you’re prepared to handle the challenges and capture the opportunities that fog presents.
2.1. What Are the Best Cameras for Fog Photography?
While any camera can capture fog, some perform better than others:
- DSLRs and Mirrorless Cameras: These offer the most flexibility with manual controls, interchangeable lenses, and high image quality, especially in low light.
- Full-Frame Cameras: These excel in low light and offer a wider dynamic range, capturing more detail in foggy scenes.
- Cameras with Good Weather Sealing: Protect your equipment from moisture, especially in damp conditions.
2.2. Which Lenses Are Ideal for Fog Photography?
Lens choice significantly impacts the look and feel of your fog photos:
- Wide-Angle Lenses (14-35mm): Capture expansive landscapes and emphasize the scale of the fog.
- Standard Lenses (35-70mm): Versatile for a variety of subjects, offering a natural perspective.
- Telephoto Lenses (70-200mm+): Isolate subjects and compress the fog, creating a layered effect.
2.3. Why Is a Tripod Essential for Fog Photography?
A tripod is crucial for sharp images in foggy conditions:
- Stability: Fog often reduces light, requiring longer exposures that can lead to camera shake without a tripod.
- Sharpness: Ensures your images are crisp, especially when using manual focus.
- Composition: Allows you to carefully compose your shot without worrying about holding the camera steady.
 Fog photography requires a tripod
2.4. What Other Accessories Can Enhance Fog Photography?
- Lens Cloth: Essential for wiping away moisture and condensation from your lens.
- Lens Hood: Reduces flare and protects your lens from rain and fog droplets.
- Remote Shutter Release: Minimizes camera shake during long exposures.
- Neutral Density (ND) Filters: Allow for longer exposures in bright conditions, creating silky smooth fog effects.
- Rain Cover: Protects your camera body from moisture.
3. Mastering Camera Settings for Fog Photography
Understanding and adjusting your camera settings is key to capturing the best possible images in fog.
3.1. How Should You Set Your Aperture in Foggy Conditions?
Aperture controls the depth of field and the amount of light entering the camera:
- Wider Apertures (f/1.8 – f/4): Create a shallow depth of field, isolating your subject and blurring the background fog for a dreamy effect.
- Mid-Range Apertures (f/5.6 – f/8): Offer a balance between sharpness and depth of field, suitable for most landscape scenes.
- Narrower Apertures (f/11 – f/16): Maximize depth of field, ensuring sharpness from foreground to background, ideal for complex scenes.
3.2. What Shutter Speed Works Best for Fog Photography?
Shutter speed affects the motion blur and overall brightness of your image:
- Fast Shutter Speeds (1/250s – 1/1000s): Freeze the motion of the fog, capturing its texture and movement in detail.
- Moderate Shutter Speeds (1/60s – 1/250s): Suitable for static subjects, balancing sharpness and light.
- Slow Shutter Speeds (1s – 30s+): Create a silky smooth, ethereal effect by blurring the fog’s movement, requiring a tripod.
 Shutter speed affects the texture of the fog
3.3. How Do You Adjust ISO for Optimal Fog Photography?
ISO determines your camera’s sensitivity to light:
- Low ISO (100-400): Provides the best image quality with minimal noise, ideal for well-lit foggy scenes or when using a tripod.
- Mid ISO (400-1600): Useful when more light is needed, balancing brightness and noise.
- High ISO (1600+): Only use when necessary in very low light, as it introduces more noise into the image.
3.4. What Metering Mode Is Most Effective in Fog?
Metering mode tells your camera how to measure the light in a scene:
- Evaluative/Matrix Metering: The camera analyzes the entire scene, which can be fooled by the bright fog, often leading to underexposure.
- Center-Weighted Metering: Focuses on the center of the frame, which can be more accurate if your subject is centrally located.
- Spot Metering: Measures light only at the focus point, giving you the most control but requiring careful placement.
3.5. Why Is Manual Focus Important in Fog Photography?
Fog can confuse autofocus systems, making manual focus essential for sharp images.
- Accuracy: Allows you to precisely focus on your subject, overriding the camera’s tendency to focus on the fog itself.
- Control: Gives you complete control over the focal point, ensuring sharpness where you want it.
- Live View: Use Live View with magnification to fine-tune your focus for critical sharpness.
 Achieving sharp images in fog requires manual focus
4. Composition Techniques for Striking Fog Photos
Composition is key to creating visually compelling fog photographs that capture the atmosphere and tell a story.
4.1. How Can You Use Leading Lines to Enhance Fog Photography?
Leading lines draw the viewer’s eye into the scene, creating depth and guiding them through the fog:
- Roads and Paths: Use winding roads or paths to lead the viewer into the misty distance.
- Rivers and Streams: Capture the flow of water as it disappears into the fog, creating a sense of movement.
- Fences and Walls: Utilize fences or walls that vanish into the fog to create a sense of mystery.
4.2. Why Is Negative Space Effective in Fog Photography?
Negative space, or empty space, emphasizes the subject and enhances the feeling of isolation and tranquility:
- Minimalist Landscapes: Use large areas of fog to isolate a single tree or building, creating a stark and impactful image.
- Silhouettes: Position your subject against a backdrop of fog to create a dramatic silhouette, emphasizing shape and form.
4.3. How Does Layering Work in Fog Photography?
Layering creates depth and dimension in your images by placing elements at different distances:
- Foreground Elements: Include rocks, trees, or other objects in the foreground to provide context and scale.
- Midground Subjects: Position your main subject in the midground, allowing the fog to separate it from the foreground and background.
- Background Details: Let the fog gradually obscure background details, creating a sense of mystery and distance.
4.4. What Role Do Silhouettes Play in Fog Photography?
Silhouettes are powerful tools for creating dramatic and evocative images:
- Strong Shapes: Look for subjects with interesting shapes, such as trees, buildings, or people.
- Backlighting: Position yourself so that the light is behind your subject, creating a dark silhouette against the bright fog.
- Minimalism: Silhouettes simplify the scene, focusing attention on form and shape.
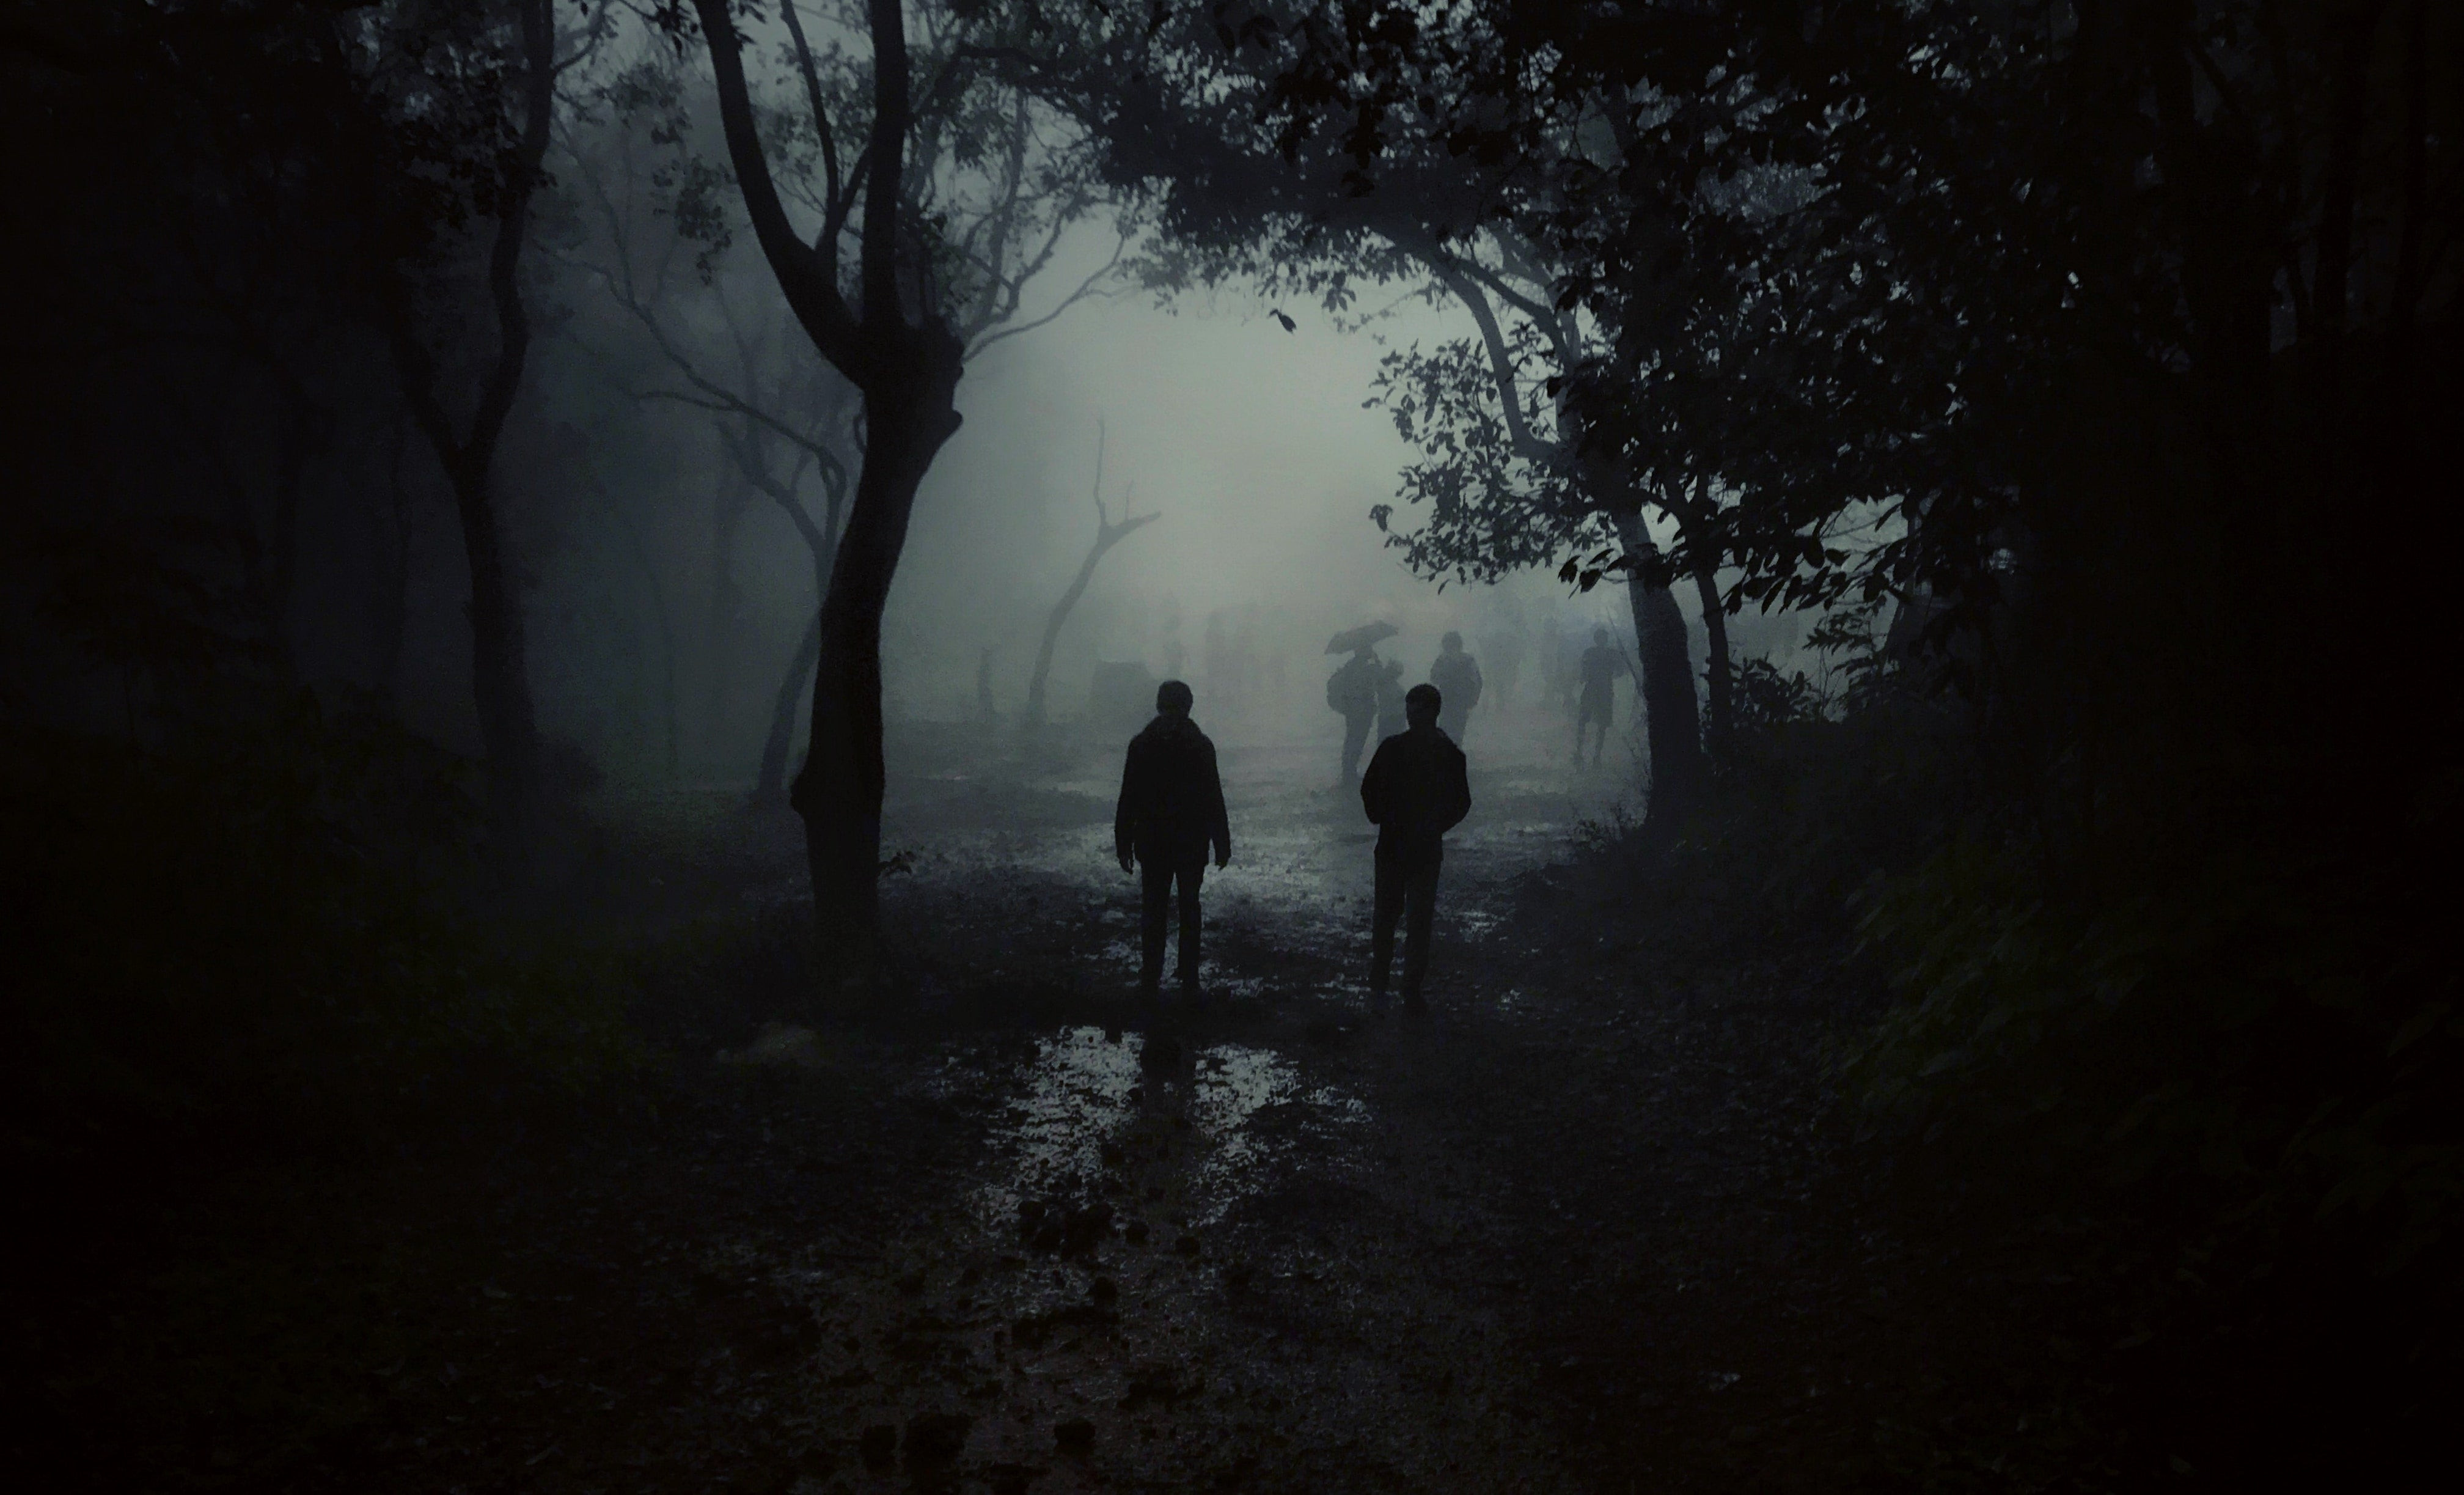 Shapes and silhouettes make for haunting photographs
4.5. How Can You Demonstrate Depth in Fog Photography?
Fog reduces contrast, making it challenging to convey depth. Here’s how to overcome this:
- Get Closer: Reduce the distance between you and your subject to increase contrast and detail.
- Layering: Use fog to separate elements in the foreground, midground, and background.
- Perspective: Utilize perspective to create a sense of distance, such as converging lines or diminishing size.
5. Finding Compelling Subjects in Fog
The right subject can transform a simple fog photo into a captivating work of art.
5.1. What Types of Landscapes Work Best in Fog?
Certain landscapes lend themselves particularly well to fog photography:
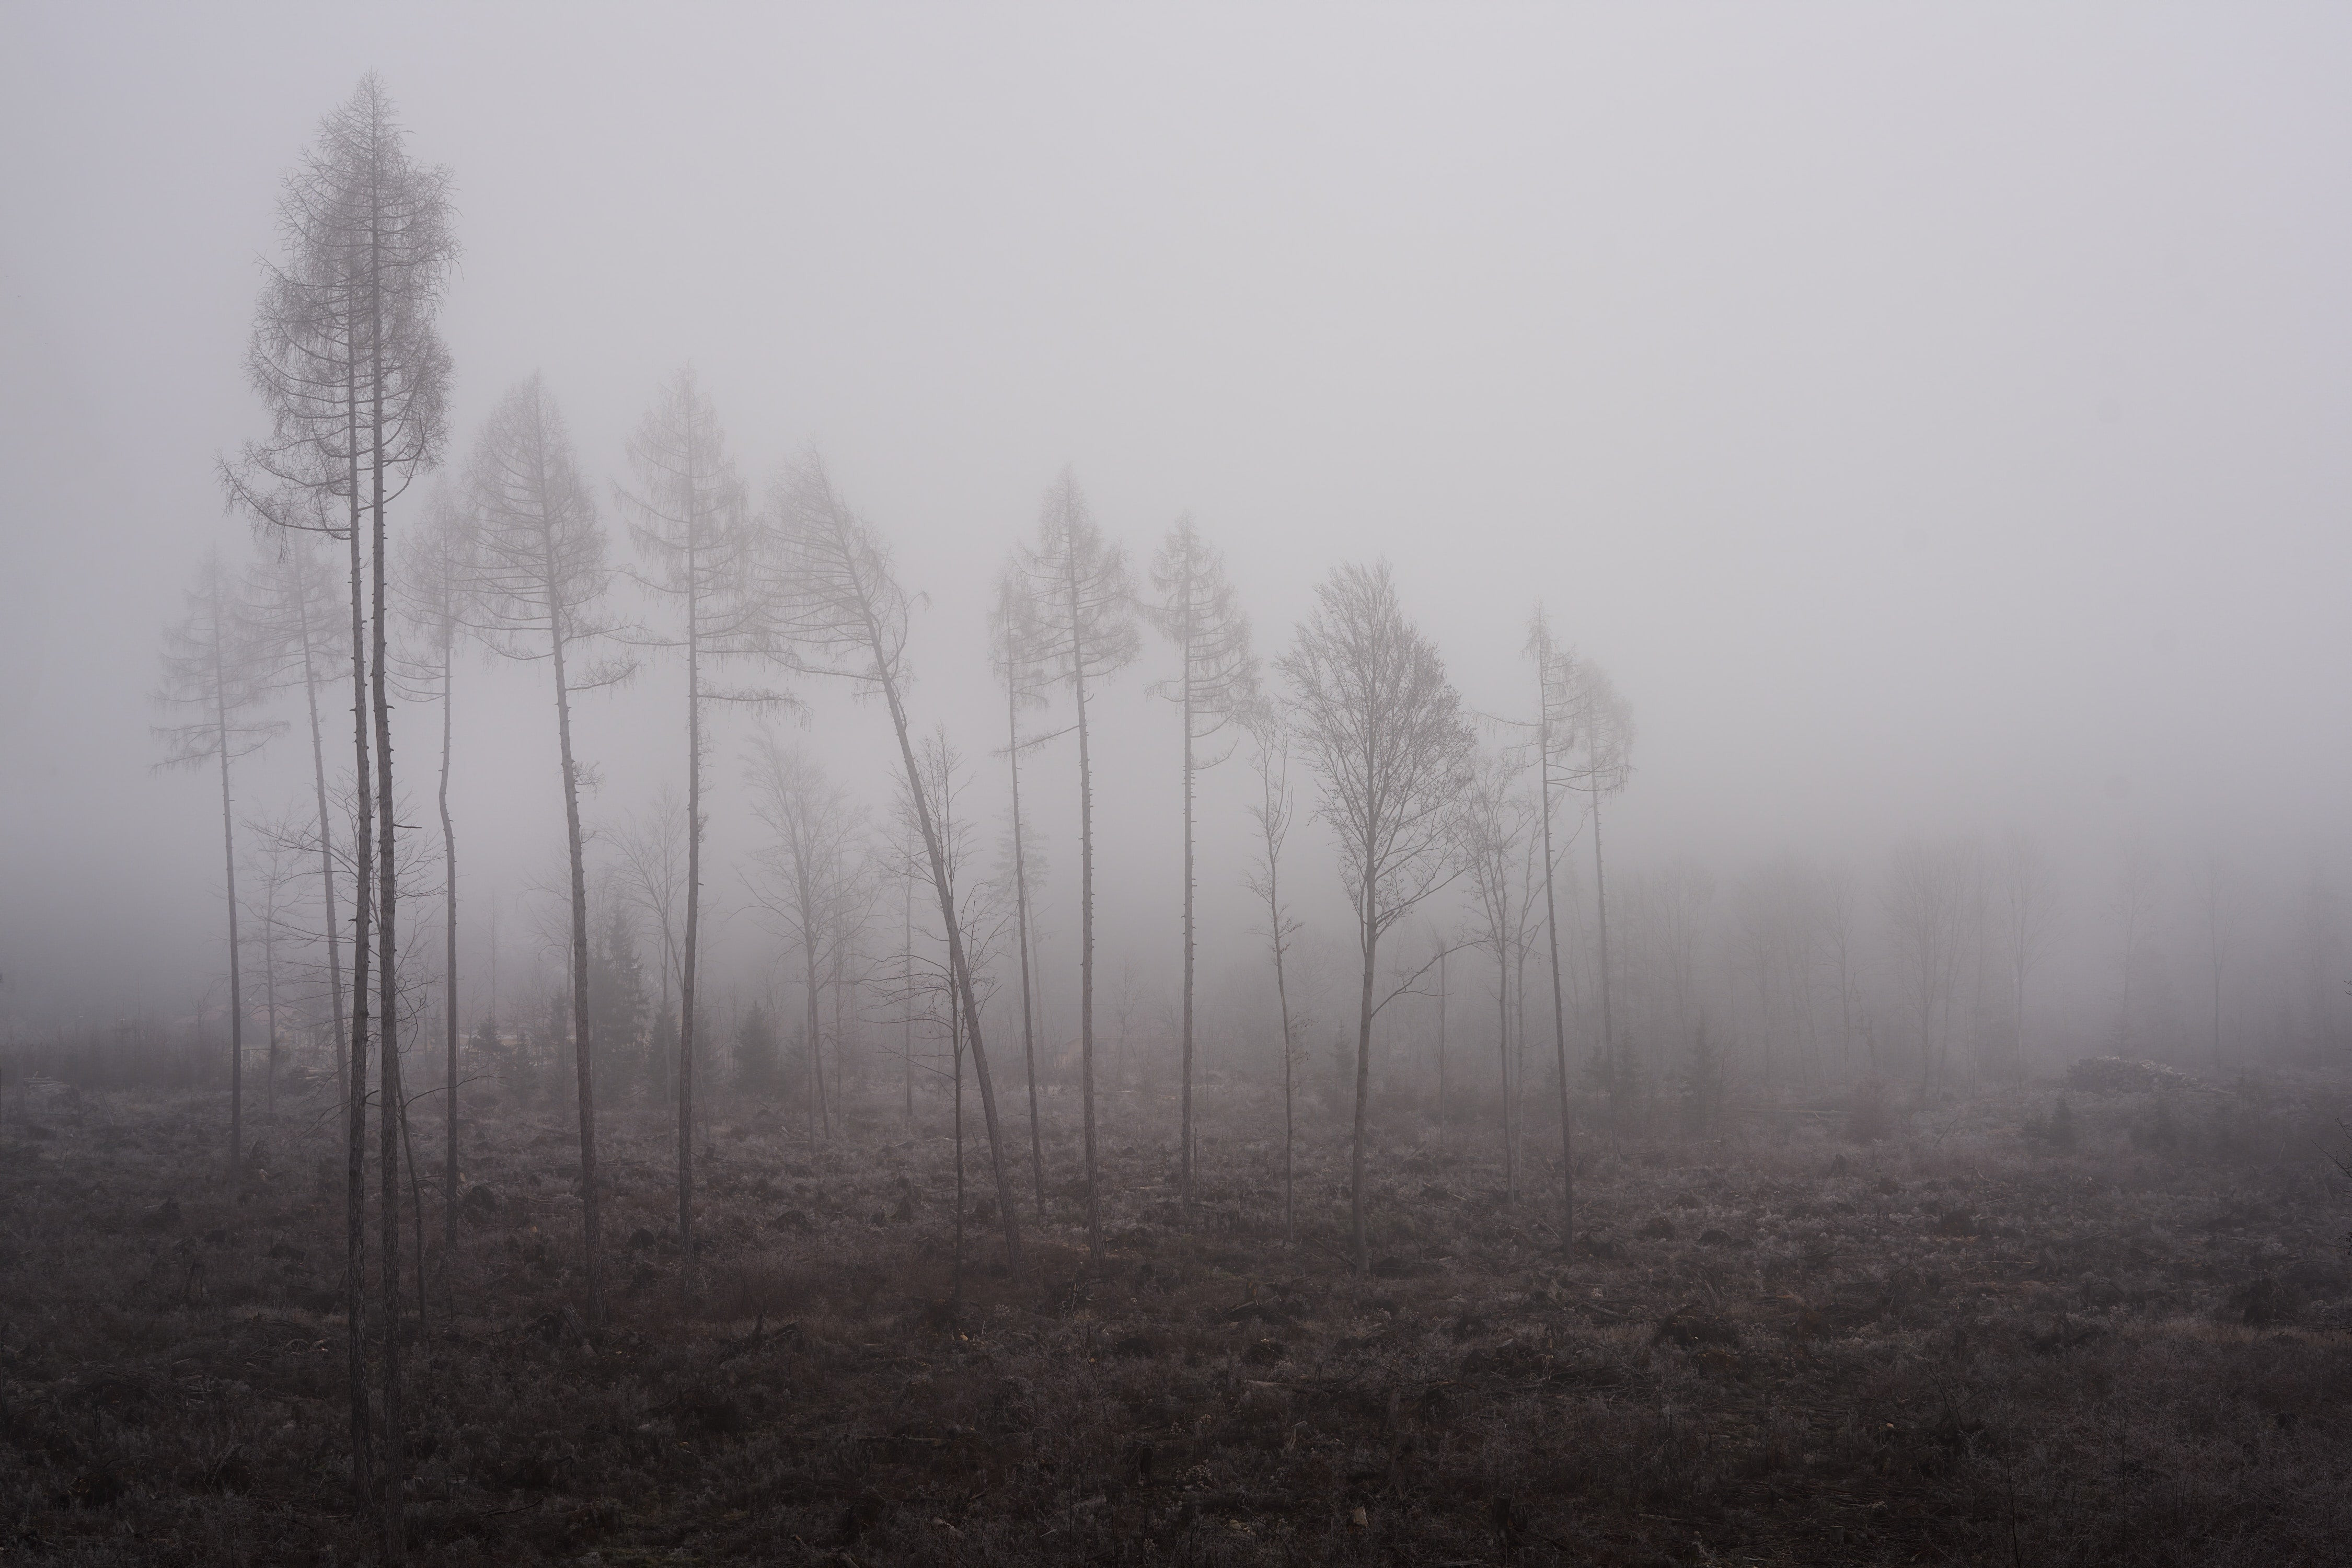
- Forests: Fog creates a magical atmosphere in forests, softening the light and emphasizing the trees.
- Mountains: Fog swirling around mountain peaks adds drama and mystery.
- Coastal Areas: Fog rolling in from the sea creates moody and atmospheric seascapes.
- Valleys: Fog filling valleys creates serene and peaceful scenes.
- Urban Areas: Fog softens the harsh lines of cityscapes, creating a surreal and ethereal effect.
5.2. How Can You Capture Wildlife in Fog?
Photographing wildlife in fog requires patience and the right techniques:
- Anticipation: Be prepared to wait for the fog to clear slightly, revealing your subject.
- Telephoto Lens: Use a telephoto lens to isolate the animal from the foggy background.
- Fast Shutter Speed: Freeze the animal’s movement with a fast shutter speed.
- Focus Carefully: Focus on the animal’s eye for maximum sharpness.
5.3. What Architectural Subjects Stand Out in Fog?
Certain architectural elements become particularly striking in fog:
- Historic Buildings: Fog adds a sense of timelessness and mystery to old buildings.
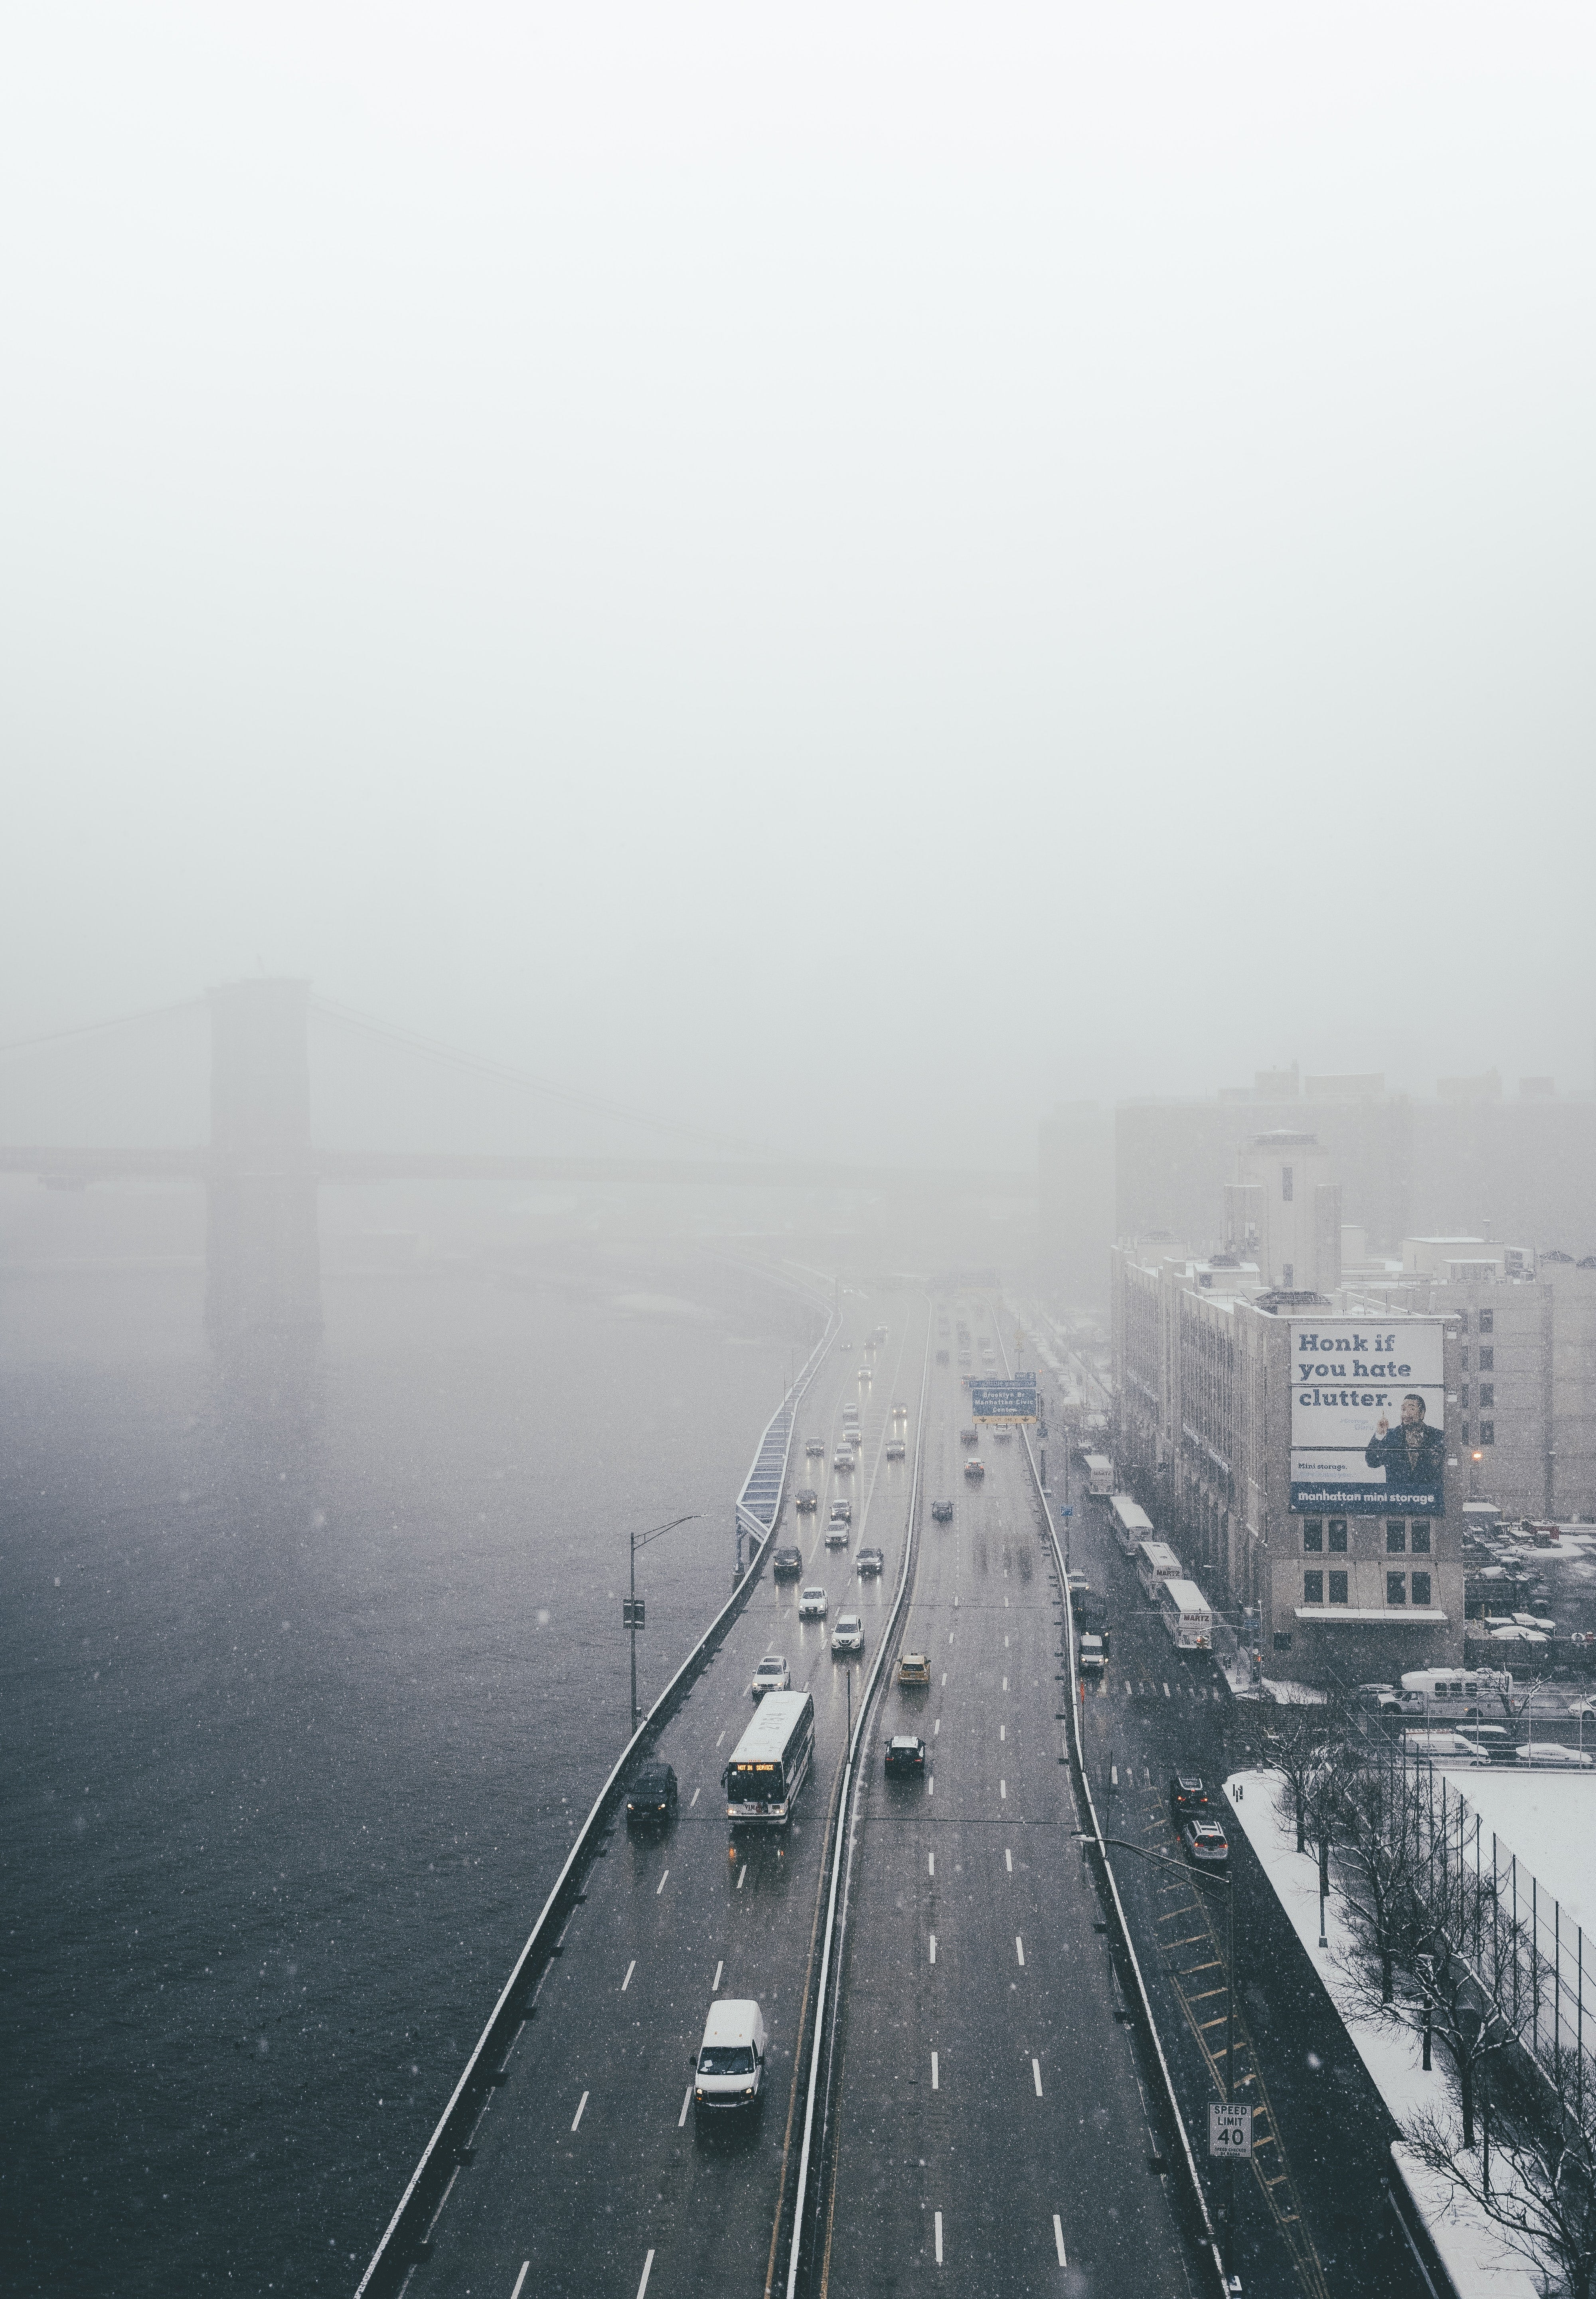
- Bridges: Fog obscuring parts of a bridge creates a dramatic and surreal effect.
- Lighthouses: Fog enhances the sense of isolation and danger associated with lighthouses.
- Skyscrapers: Fog enveloping skyscrapers creates a sense of height and grandeur.
5.4. How Can You Incorporate People into Fog Photography?
Adding people to your fog photos can create a sense of scale, mystery, or drama:
- Silhouettes: Capture people as silhouettes against the bright fog for a minimalist and evocative image.
- Isolated Figures: Position people in the distance to emphasize their isolation and vulnerability.
- Action Shots: Capture people walking or running through the fog to create a sense of movement and energy.
5.5. Why Are Reflections Effective in Fog Photography?
Reflections add symmetry and visual interest to fog photos:
- Still Water: Look for calm lakes, ponds, or puddles to reflect the surrounding landscape.
- Symmetry: Position your camera to create a symmetrical composition, with the reflection mirroring the scene above.
- Fog as a Diffuser: The fog softens the light, creating a dreamy and ethereal reflection.
6. Post-Processing Techniques for Fog Photography
Post-processing is essential for enhancing the mood and detail in your fog photos.
6.1. How Should You Adjust Exposure and Contrast in Post-Processing?
- Exposure: Adjust the overall brightness of the image, being careful not to overexpose the highlights.
- Contrast: Increase contrast slightly to add definition and separation between elements.
6.2. Why Is White Balance Important in Fog Photography?
White balance corrects color casts, ensuring accurate and pleasing colors:
- Cool Tones: Fog often has a cool, blueish cast, so adjust the white balance to neutralize the colors.
- Warm Tones: If the fog is lit by the rising or setting sun, preserve the warm tones for a more dramatic effect.
6.3. How Can You Enhance Details and Sharpness in Fog Photos?
- Clarity: Increase clarity to add definition to the fog and reveal hidden details.
- Sharpening: Apply sharpening selectively to the subject, avoiding the fog itself to prevent unwanted artifacts.
6.4. What Color Adjustments Are Effective for Fog Photography?
- Saturation: Reduce saturation slightly to enhance the muted, ethereal feel of the fog.
- Hue: Adjust the hue of specific colors to create a more harmonious and pleasing palette.
6.5. How Can You Remove Noise from Fog Photos?
- Noise Reduction: Use noise reduction tools in your editing software to minimize noise, especially in high ISO images.
- Selective Noise Reduction: Apply noise reduction selectively to areas of the fog, avoiding the subject to preserve detail.
7. Overcoming Challenges in Fog Photography
Fog photography presents unique challenges, but with the right knowledge and techniques, you can overcome them.
7.1. How Do You Deal with Low Light in Foggy Conditions?
- Tripod: Use a tripod to allow for longer exposures without camera shake.
- Wide Aperture: Use a wide aperture to let in as much light as possible.
- Increase ISO: Increase ISO as a last resort, being mindful of noise.
- Shoot in RAW: Capture images in RAW format to preserve more detail and allow for greater flexibility in post-processing.
7.2. How Can You Prevent Lens Condensation in Fog?
- Lens Cloth: Keep a lens cloth handy to wipe away condensation.
- Lens Hood: Use a lens hood to protect the lens from moisture.
- Acclimatize Your Gear: Allow your gear to gradually adjust to the temperature and humidity to prevent condensation from forming.
 Take care to avoid condensation when shooting in foggy conditions
7.3. How Do You Avoid Overexposure in Fog Photography?
- Manual Mode: Shoot in manual mode to have complete control over your exposure settings.
- Histogram: Use the histogram to check for overexposure, adjusting your settings accordingly.
- Exposure Compensation: Use negative exposure compensation to darken the image.
7.4. How Can You Maintain Sharp Focus in Fog?
- Manual Focus: Use manual focus for precise control over the focal point.
- Live View: Use Live View with magnification to fine-tune your focus.
- Focus Peaking: Enable focus peaking in your camera to highlight areas of sharp focus.
7.5. How Do You Handle Moving Fog?
- Patience: Be patient and wait for the fog to move into the desired position.
- Continuous Shooting: Use continuous shooting mode to capture a series of images as the fog moves.
- Anticipation: Anticipate the fog’s movement and adjust your composition accordingly.
8. Safety Tips for Fog Photography
Safety is paramount when shooting in foggy conditions.
8.1. What Precautions Should You Take When Shooting Near Roads?
- Visibility: Wear bright clothing and be aware of your surroundings.
- Traffic: Be mindful of traffic and avoid standing in the road.
- Reflective Gear: Use reflective gear to increase your visibility.
8.2. How Can You Stay Safe When Hiking in Fog?
- Navigation: Use a GPS device or map and compass to navigate.
- Communication: Carry a cell phone or satellite device for communication.
- Weather: Check the weather forecast before you go and be prepared for changing conditions.
- Tell Someone: Let someone know your plans and expected return time.
8.3. What Are the Risks of Shooting Near Water in Fog?
- Slippery Surfaces: Be aware of slippery surfaces near water.
- Hypothermia: Dress warmly and be aware of the risk of hypothermia.
- Tides and Currents: Be mindful of tides and currents.
8.4. How Can You Protect Your Gear from the Elements?
- Weather Sealing: Use a camera and lens with weather sealing.
- Rain Cover: Use a rain cover to protect your gear from moisture.
- Dry Bag: Store your gear in a dry bag when not in use.
8.5. What Emergency Supplies Should You Carry?
- First-Aid Kit: Carry a first-aid kit for minor injuries.
- Water and Food: Bring plenty of water and food.
- Flashlight: Carry a flashlight or headlamp.
- Warm Clothing: Bring warm clothing, even if the weather seems mild.
9. Finding Inspiration for Fog Photography
Inspiration is key to developing your own unique style in fog photography.
9.1. What Are Some Famous Fog Photographers?
- Ansel Adams: Known for his dramatic black and white landscapes, often featuring fog.
- Michael Kenna: Captures minimalist black and white landscapes with a strong emphasis on atmosphere.
- Fan Ho: Famous for his street photography in Hong Kong, often using fog to create a sense of mystery.
9.2. Which Online Resources Offer Inspiration for Fog Photography?
- dfphoto.net: Offers a wealth of articles, tutorials, and inspiration for fog photography.
- 500px: A platform for showcasing and discovering inspiring photography.
- Flickr: A community-based platform for sharing and discussing photography.
- Instagram: A visual platform for discovering and following photographers.
9.3. How Can You Find Local Fog Photography Spots?
- Local Photography Groups: Join local photography groups to discover hidden gems.
- Online Forums: Search online forums for recommendations on fog photography spots in your area.
- Social Media: Use social media to search for geotagged photos taken in your area.
- Explore: Get out and explore your local area, paying attention to areas that are prone to fog.
9.4. What Are Some Classic Fog Photography Locations in the USA?
- San Francisco, California: The Golden Gate Bridge and the city’s hills are often shrouded in fog.
- Point Reyes National Seashore, California: Offers dramatic coastal landscapes with frequent fog.
- Great Smoky Mountains National Park, North Carolina and Tennessee: Known for its misty mountains and valleys.
- Acadia National Park, Maine: Features rugged coastline and forests with frequent fog.
- Seattle, Washington: The city’s skyline and waterfront are often shrouded in fog.
9.5. How Can You Develop Your Own Unique Style in Fog Photography?
- Experiment: Experiment with different techniques, subjects, and compositions.
- Study the Masters: Study the work of famous fog photographers to learn from their techniques and perspectives.
- Find Your Passion: Focus on subjects and locations that you are passionate about.
- Be Patient: Fog photography requires patience and persistence.
- Practice: The more you practice, the better you will become.
10. Maintaining Your Equipment After Fog Photography
Proper maintenance ensures your gear stays in top condition.
10.1. How Should You Clean Your Camera After Shooting in Fog?
- Wipe Down: Wipe down your camera body with a soft, dry cloth to remove moisture.
- Clean the Sensor: Clean the sensor if necessary, following the manufacturer’s instructions.
- Dry Thoroughly: Allow your camera to air dry completely before storing it.
10.2. How Do You Clean Your Lenses After Fog Photography?
- Remove Dust: Use a blower to remove dust and debris from the lens surface.
- Clean with Lens Cleaner: Use a lens cleaner and a microfiber cloth to gently clean the lens surface.
- Dry Thoroughly: Allow the lens to air dry completely before storing it.
10.3. How Should You Store Your Gear After Shooting in Fog?
- Dry Environment: Store your gear in a dry, cool environment.
- Silica Gel: Use silica gel packets to absorb moisture.
- Camera Bag: Store your gear in a camera bag to protect it from dust and impact.
10.4. How Can You Prevent Mold and Fungus Growth on Your Equipment?
- Proper Cleaning: Clean your gear thoroughly after each use.
- Dry Storage: Store your gear in a dry environment.
- UV Light: Expose your gear to UV light periodically to kill mold and fungus spores.
10.5. What Are Some Common Equipment Problems Associated with Fog Photography?
- Condensation: Condensation can form on the lens and inside the camera body.
- Corrosion: Moisture can corrode electronic components and metal parts.
- Mold and Fungus: Mold and fungus can grow on lenses and sensors.
By following these tips, you can minimize these risks and keep your gear in good working condition.
Ready to elevate your fog photography? Visit dfphoto.net today for more in-depth tutorials, stunning image galleries, and a vibrant community of photographers eager to share their knowledge. Don’t just capture fog; master it.
Address: 1600 St Michael’s Dr, Santa Fe, NM 87505, United States.
Phone: +1 (505) 471-6001.
Website: dfphoto.net.
FAQ: Mastering Fog Photography
1. What is the best time of day to take photos in fog?
The best time to photograph fog is usually early morning or late evening when the temperature is cooler. The contrast between the cool air and warmer ground can create denser and more visually interesting fog.
2. What camera settings should I use for fog photography?
Use manual mode to control your ISO, aperture, and shutter speed. A lower ISO (100-400) is ideal for minimizing noise, while aperture and shutter speed will depend on the desired depth of field and the amount of motion you want to capture.
3. How do I focus in foggy conditions?
Manual focus is often more reliable in fog. Use live view and zoom in on your subject to achieve precise focus, as autofocus can be misled by the fog.
 Setting focus on point of most contrast
4. How can I prevent my lens from fogging up?
Keep a lens cloth handy to wipe away condensation. A lens hood can also help. Allow your camera gear to gradually adjust to the ambient temperature to minimize condensation.
5. What are the best subjects to photograph in fog?
Subjects with strong shapes and silhouettes, such as trees, buildings, and bridges, stand out well in fog. Landscapes, wildlife, and architectural elements can also be compelling.
6. How do I create depth in fog photography?
Use layering by including elements in the foreground, midground, and background. Leading lines can also guide the viewer’s eye through the fog.
7. How should I edit my fog photos?
Adjust exposure and contrast to enhance details and separation. Pay attention to white balance to correct color casts, and use sharpening selectively to avoid artifacts in the fog.
8. What safety precautions should I take when photographing in fog?
Be aware of your surroundings, wear bright clothing near roads, and use a GPS device when hiking. Protect your gear from the elements and carry emergency supplies.
9. What are some famous fog photography locations in the USA?
Some popular locations include San Francisco, Point Reyes National Seashore, Great Smoky Mountains National Park, Acadia National Park, and Seattle.
10. How can I develop my unique style in fog photography?
Experiment with different techniques, study the work of famous fog photographers, focus on subjects you are passionate about, and practice consistently.