Taking HDR photos can dramatically enhance your images, capturing a wider range of light and detail; dfphoto.net can show you how. This technique, blending multiple exposures, lets you create stunning, realistic, and surreal images, surpassing what a single shot can achieve. Master the art of High Dynamic Range photography and explore its creative potential through tone mapping and exposure bracketing.
1. What Is HDR Photography and Why Should You Learn It?
HDR, or High Dynamic Range, photography is a technique that combines multiple images of the same scene, each shot at different exposure levels, to create a single image with an exceptionally wide dynamic range; dfphoto.net offers a comprehensive guide on mastering this technique. This means the final image contains a greater level of detail in both the shadows and highlights than could be captured in a single exposure, closely mimicking what the human eye perceives. HDR photography is particularly useful in high-contrast situations, such as landscapes with bright skies and dark foregrounds, where a single exposure would result in either blown-out highlights or crushed shadows.
1.1. What Are the Benefits of HDR Photography?
There are several key advantages to using HDR photography.
- Extended Dynamic Range: HDR captures details in both bright and dark areas, which is impossible with a single shot.
- Enhanced Detail: By combining multiple exposures, HDR images reveal more texture and detail throughout the scene.
- Artistic Expression: HDR allows for creative manipulation of tones and colors, leading to unique and visually striking images.
- Overcoming Camera Limitations: HDR helps overcome the limitations of camera sensors, which cannot capture the full dynamic range that the human eye can see.
- Versatility: HDR can be used in various genres, including landscape, architectural, and even portrait photography, to add depth and visual interest.
1.2. How Does HDR Differ From Single-Exposure Photography?
Traditional single-exposure photography is limited by the dynamic range of the camera sensor. In high-contrast scenes, this often results in a compromise, where either the bright areas are overexposed (losing detail in the highlights) or the dark areas are underexposed (losing detail in the shadows). HDR overcomes this limitation by capturing a series of images at different exposures and merging them together, ensuring that both the highlights and shadows are properly exposed and detailed. This process creates a final image that more closely resembles what the human eye sees, with a greater sense of depth and realism.
2. What Equipment Do You Need to Take HDR Photos?
To start taking HDR photos, you’ll need some essential equipment. A digital camera, a tripod, and software are the basics, but additional tools can improve your results; dfphoto.net provides in-depth reviews and recommendations on the best gear for HDR photography.
2.1. Digital Camera
A digital camera, preferably a DSLR or mirrorless camera, is essential for capturing high-quality images. While smartphones can also be used for HDR, dedicated cameras offer more control and better image quality, especially in low-light conditions. Cameras with good dynamic range and RAW shooting capabilities are ideal for HDR photography.
2.2. Tripod
A sturdy tripod is crucial for HDR photography, especially when shooting multiple exposures. The tripod ensures that the camera remains perfectly still between shots, which is essential for proper alignment during the HDR merging process. Even a slight movement can result in blurry or misaligned images.
2.3. HDR Software
HDR software is used to merge the multiple exposures into a single HDR image. There are several popular software options available, each with its own strengths and features.
- Adobe Photoshop: Photoshop has built-in HDR capabilities, allowing you to merge and tone map HDR images directly within the software.
- Adobe Lightroom: While Lightroom doesn’t have dedicated HDR merging capabilities like Photoshop, it can be used to adjust individual exposures and create virtual copies for HDR processing in other software.
- Photomatix Pro: Photomatix Pro is a dedicated HDR software known for its advanced tone mapping algorithms and control over HDR processing.
- Aurora HDR: Aurora HDR is another popular HDR software that offers a range of presets and advanced editing tools for creating stunning HDR images.
2.4. Optional Accessories
While not essential, these accessories can further enhance your HDR photography.
- Remote Shutter Release: A remote shutter release minimizes camera shake when taking multiple exposures, especially when using a tripod.
- Neutral Density (ND) Filter: An ND filter reduces the amount of light entering the camera, allowing for longer exposures in bright conditions. This can be useful for capturing motion blur in HDR landscapes.
- Memory Cards: High-capacity memory cards are essential for storing the multiple images required for HDR photography.
3. What Are the Ideal Camera Settings for HDR Photography?
Setting your camera correctly is essential for capturing the best possible images for HDR processing. Shooting in RAW, using Aperture Priority mode, and understanding bracketing are key to success; dfphoto.net offers detailed tutorials on mastering these settings.
3.1. Shoot in RAW Format
Shooting in RAW format is highly recommended for HDR photography. RAW files contain more image data than JPEGs, allowing for greater flexibility during post-processing. This extra data is crucial for recovering details in the highlights and shadows and for minimizing artifacts during HDR merging.
3.2. Aperture Priority Mode
Using Aperture Priority mode (Av or A on most cameras) allows you to set the aperture while the camera automatically adjusts the shutter speed to achieve proper exposure. This is important for maintaining a consistent depth of field across all exposures. Choose an aperture that provides the desired depth of field for your scene, typically between f/8 and f/16 for landscapes.
3.3. Manual Mode
Using Manual Mode (M on most cameras) gives you full control over both aperture and shutter speed. This is important for maintaining a consistent depth of field across all exposures. It also gives you full control over your creative vision.
3.4. Understanding Metering Modes
Setting your camera metering to Matrix (Nikon) or Evaluative (Canon) lets the camera pick the best exposure for the whole scene. This will be your middle exposure.
3.5. ISO Sensitivity
Keep the ISO as low as possible (typically ISO 100 or 200) to minimize noise in your images. Noise can be amplified during HDR processing, so starting with clean images is essential.
3.6. White Balance
Set the white balance to a fixed value (such as Daylight or Cloudy) to maintain consistent colors across all exposures. Avoid using Auto White Balance, as it can vary between shots and cause color inconsistencies in the final HDR image.
3.7. Image Stabilization
Turn off image stabilization (IS or VR) when using a tripod. Image stabilization systems can sometimes introduce unwanted movement when the camera is mounted on a stable surface.
4. How to Use Bracketing for HDR Photography?
Bracketing involves taking multiple shots of the same scene at different exposures. This ensures you capture the full dynamic range; dfphoto.net provides practical tips on using bracketing effectively to achieve the best HDR results.
4.1. What is Exposure Bracketing?
Exposure bracketing is the process of taking a series of photos of the same scene with different exposure settings. Typically, this involves capturing three or more images: one at the “normal” exposure, one or more underexposed images, and one or more overexposed images. The underexposed images capture detail in the highlights, while the overexposed images capture detail in the shadows.
4.2. Setting Up Bracketing on Your Camera
Most digital cameras have a built-in bracketing function that automates the process of taking multiple exposures. Refer to your camera’s manual for instructions on how to set up bracketing. Typically, you will need to specify the number of exposures and the exposure difference (EV) between each shot.
4.3. How Many Exposures Should You Take?
The number of exposures you should take depends on the dynamic range of the scene. For most situations, three exposures (one normal, one underexposed, and one overexposed) are sufficient. However, in high-contrast scenes, you may need to take five or more exposures to capture the full dynamic range.
4.4. What Exposure Difference (EV) Should You Use?
The exposure difference (EV) between each shot determines the amount of exposure variation. A smaller EV (e.g., 0.7 or 1 stop) provides finer control over the exposure range, while a larger EV (e.g., 2 stops) captures a wider range of light. Start with an EV of 1 stop and adjust as needed based on the scene’s dynamic range.
4.5. Using Bracketing with a Tripod
When using bracketing, it is essential to use a tripod to keep the camera perfectly still between shots. This ensures that the images are properly aligned during HDR merging. Use a remote shutter release or the camera’s self-timer to minimize camera shake when taking the exposures.
4.6 Best Practices
Shoot frames quickly in bursts, especially if you have clouds in the frame.
Watch out for other moving objects. Although Photomatix Pro has a built-in function to reduce ghosting artifacts, it is still best if movements are minimal – motion is difficult to fix in software.
5. How to Create HDR Photos From a Single Image?
Even with just one image, you can create an HDR effect. This technique works best with RAW files, allowing you to extract more detail from highlights and shadows; dfphoto.net explains how to maximize the potential of single-image HDR.
5.1. When to Use Single-Image HDR
Single-image HDR is useful when you don’t have the opportunity to take multiple exposures, such as when shooting handheld or when the scene is changing rapidly. It can also be used to add a subtle HDR effect to images with a moderate dynamic range.
5.2. Processing a Single Image for HDR
To create an HDR effect from a single image, you will need to use image editing software such as Adobe Photoshop or Lightroom. The process involves making multiple adjustments to the image to simulate the effect of multiple exposures.
- Adjust Exposure: Create multiple virtual copies of the image and adjust the exposure of each copy to simulate underexposed and overexposed shots.
- Highlight and Shadow Adjustments: Use the highlight and shadow sliders to recover detail in the bright and dark areas of the image.
- Contrast and Clarity: Adjust the contrast and clarity to enhance the overall detail and texture of the image.
- Tone Mapping: Use tone mapping tools to create a balanced and visually appealing HDR effect.
5.3. Limitations of Single-Image HDR
While single-image HDR can be a useful technique, it has limitations compared to using multiple exposures. The dynamic range is limited by the amount of data captured in the original image, and the resulting HDR effect may not be as dramatic or detailed as with multiple exposures.
6. Step-by-Step Guide to HDR Photography Using Multiple Images
Using multiple images is the ideal way to create HDR photos. This method captures the full dynamic range of a scene; dfphoto.net provides a detailed walkthrough of the entire process.
6.1. Capturing the Images
- Set Up Your Camera: Mount your camera on a tripod and set it to Aperture Priority mode (Av or A). Choose an aperture between f/8 and f/16 for optimal depth of field.
- Enable Bracketing: Enable the bracketing function on your camera and set the exposure difference (EV) to 1 or 2 stops, depending on the scene’s dynamic range.
- Take the Exposures: Use a remote shutter release or the camera’s self-timer to take the series of bracketed exposures.
6.2. Merging the Images in HDR Software
- Open HDR Software: Launch your preferred HDR software, such as Adobe Photoshop, Photomatix Pro, or Aurora HDR.
- Load the Images: Load the series of bracketed exposures into the HDR software.
- Adjust Settings: Adjust the settings in the HDR software to optimize the merging process. This may include options for aligning images, reducing ghosting artifacts, and adjusting the overall tone and color of the HDR image.
- Merge the Images: Merge the images to create an HDR image.
6.3. Tone Mapping
- Open Tone Mapping Window: Open the tone mapping window in your HDR software.
- Adjust Settings: Adjust the settings to achieve the desired look for your HDR image. Experiment with different tone mapping algorithms and settings to find the best result for your image.
- Save the HDR Image: Save the HDR image in a high-quality format, such as TIFF or PSD.
6.4. Post-Processing
- Open in Image Editor: Open the HDR image in an image editor such as Adobe Photoshop or Lightroom.
- Make Adjustments: Make any final adjustments to the image, such as adjusting the contrast, color, and sharpness.
- Remove Noise: Use noise reduction software to remove any unwanted noise from the image.
- Save the Final Image: Save the final image in your desired format, such as JPEG or TIFF.
7. What Are Common HDR Mistakes to Avoid?
While HDR can produce stunning results, it’s easy to fall into common traps. Over-processing, ghosting, and unnatural colors are frequent issues; dfphoto.net highlights these mistakes and offers solutions to avoid them.
7.1. Over-Processing
One of the most common mistakes in HDR photography is over-processing the images. This can result in unnatural-looking images with excessive contrast, saturation, and sharpness.
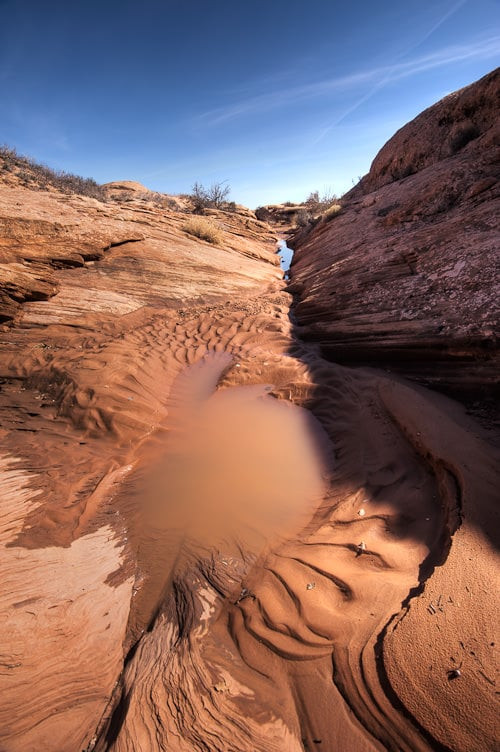
7.2. Ghosting
Ghosting occurs when moving objects in the scene (such as people, cars, or trees) appear as blurry or transparent artifacts in the final HDR image. This is caused by the movement of the objects between the different exposures.
7.3. Noise
HDR processing can amplify noise in the images, especially in the shadows. This can result in a grainy or speckled appearance in the final HDR image.
7.4. Unnatural Colors
HDR processing can sometimes result in unnatural or unrealistic colors in the images. This can be caused by excessive saturation or incorrect color balancing.
7.5. Alignment Issues
If the images are not properly aligned during HDR merging, it can result in blurry or distorted images. This is especially common when shooting handheld or when using a tripod on unstable ground.
8. What Are Some Advanced HDR Techniques?
Once you’ve mastered the basics of HDR, you can explore advanced techniques like exposure fusion, HDR panoramas, and black and white HDR; dfphoto.net provides tutorials on these advanced methods to push your creative boundaries.
8.1 Exposure Fusion
Exposure Fusion, also known as exposure blending, is an alternative to traditional HDR processing. Instead of merging the images into an HDR image and then tone mapping it, exposure fusion selectively blends the best parts of each exposure to create a final image with a wide dynamic range.
8.2 HDR Panoramas
HDR panoramas combine the techniques of HDR and panoramic photography to create stunning, wide-angle images with a wide dynamic range. This involves taking multiple bracketed exposures for each section of the panorama and then merging them together to create an HDR panorama.
8.3 Black and White HDR
Black and white HDR is a technique that combines the tonal range of HDR with the classic aesthetic of black and white photography. This can result in dramatic and visually striking images with a timeless quality.
9. What Are Some Creative HDR Photography Ideas?
HDR photography opens up many creative possibilities. Experiment with different subjects, compositions, and processing styles to create unique and compelling images; dfphoto.net showcases inspiring HDR photos to spark your imagination.
9.1. Landscapes
Landscapes are a natural fit for HDR photography. Use HDR to capture the full dynamic range of a scene, from the bright sky to the dark foreground.
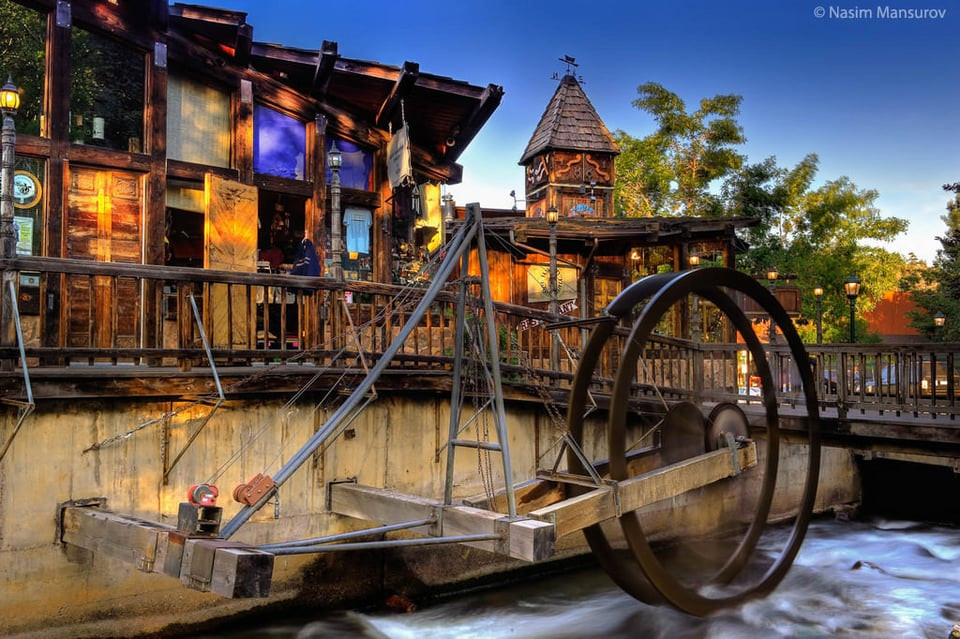
9.2. Architecture
HDR can be used to capture the intricate details and textures of architectural subjects, both indoors and outdoors.
9.3. Cityscapes
HDR can be used to create dramatic and visually striking cityscapes, capturing the bright lights and dark shadows of the urban environment.
9.4. Interiors
HDR is useful for capturing the full dynamic range of interior scenes, from the bright windows to the dark corners of the room.
9.5. Portraits
While not as common as other genres, HDR can be used in portrait photography to add depth and visual interest to the images. Use HDR subtly to avoid unnatural-looking skin tones.
10. HDR Photography: FAQ
10.1. Is HDR photography still relevant in today’s world of advanced cameras?
Yes, HDR photography is still relevant despite advancements in camera technology. While modern cameras have improved dynamic range, they still can’t match the range captured through HDR techniques, especially in high-contrast scenes.
10.2. Can I use my smartphone to take HDR photos?
Yes, most smartphones have built-in HDR modes that automatically capture and merge multiple exposures. While the quality may not be as high as with a dedicated camera, smartphones can still produce impressive HDR results.
10.3. Is HDR photography difficult to learn?
HDR photography has a learning curve, but it’s not overly difficult. Understanding exposure, bracketing, and post-processing are key, and with practice, anyone can master the technique.
10.4. What is tone mapping in HDR photography?
Tone mapping is the process of compressing the high dynamic range of an HDR image into a lower dynamic range that can be displayed on a screen or print. This involves adjusting the tones and colors of the image to create a balanced and visually appealing result.
10.5. How do I avoid ghosting in HDR photos?
To avoid ghosting, use a tripod to keep the camera still and try to shoot in calm conditions with minimal movement in the scene. HDR software also has ghost reduction features that can help remove ghosting artifacts.
10.6. What are the best HDR software options available?
Some of the best HDR software options include Adobe Photoshop, Adobe Lightroom, Photomatix Pro, and Aurora HDR. Each has its own strengths and features, so choose the one that best fits your needs and workflow.
10.7. Can HDR be used for black and white photography?
Yes, HDR can be used to create stunning black and white images with a wide range of tones and details.
10.8. How do I make my HDR photos look more realistic?
To make your HDR photos look more realistic, avoid over-processing the images and focus on capturing a natural-looking dynamic range. Use subtle tone mapping and avoid excessive contrast, saturation, and sharpness.
10.9. What is the ideal number of exposures for HDR photography?
The ideal number of exposures depends on the dynamic range of the scene. For most situations, three to five exposures are sufficient, but high-contrast scenes may require more.
10.10. How important is a tripod for HDR photography?
A tripod is essential for HDR photography, especially when shooting multiple exposures. It ensures that the camera remains perfectly still between shots, which is crucial for proper alignment during the HDR merging process.
Elevate your photography skills and discover the world of HDR imaging at dfphoto.net. Explore our detailed guides, breathtaking image collections, and connect with a vibrant community of photographers. Whether you’re looking to master HDR techniques, find inspiration, or stay updated with the latest trends and equipment, dfphoto.net is your ultimate resource. Don’t miss out—start your journey toward stunning HDR photography today!
Address: 1600 St Michael’s Dr, Santa Fe, NM 87505, United States. Phone: +1 (505) 471-6001. Website: dfphoto.net.
 Combined in Software
 HDR Image
Pool
Water Wheel