So, you’re venturing into the world of online selling and understand that captivating product visuals are crucial. Your product might be fantastic, but in today’s visually-driven online marketplace, especially on platforms like Instagram, making it stand out requires more than just a quick snapshot. Don’t worry, you don’t need to be a professional photographer with expensive gear to create compelling product photos.
This guide will walk you through the essential steps to take impressive product photos using just your smartphone, natural light, and a few simple tools. We’ll show you how to capture images that not only showcase your products but also drive sales.
Click here to explore more product photography tips on dfphoto.net
Mastering Product Photography with Your Phone: 6 Key Steps
Most e-commerce entrepreneurs grasp the basics of smartphone product photography: a plain white background, natural daylight, and the highest camera settings. While this is a solid starting point, a few extra steps and readily available accessories can significantly elevate your photos. These enhancements will help you truly highlight your product’s value and allow potential customers to envision it in their own lives.
If you’re ready to transform your smartphone into a powerful product photography tool and create stunning visuals, let’s build your perfect setup.
1. Optimize Your Space with Natural Light
Begin by selecting a room in your home or workspace that receives ample natural light through a window. Larger windows are preferable as they provide a broader, softer light source, ideal for bringing your products to life in photos.
Alt text: Home product photography studio setup near window with white backdrop and natural light.
As illustrated in the setup from Pixc, you can easily create a professional-quality product photography area at home. Positioning your product closer to the window will result in softer lighting with gentler shadows. Conversely, moving further from the window will produce sharper, more defined shadows. Experiment with distance to achieve your desired lighting effect.
2. Select the Right Smartphone
Modern smartphones boast impressive camera capabilities, often rivaling DSLRs for product photography. The higher the megapixel count of your phone’s camera, the greater the detail and quality of your product photos.
While any smartphone with a decent camera can work, ideally, you should aim for a newer model equipped with a camera of 12 megapixels or higher. This will ensure your images are sharp, clear, and suitable for online display.
3. Invest in a Mini Tripod
Mini tripods are invaluable tools for product photography, available across a range of prices to suit any budget. Regardless of whether you choose an inexpensive or more premium model, a mini tripod is a worthwhile investment that delivers significant benefits. It minimizes camera shake, which is crucial for sharp images, and helps maintain consistent photo angles and styling across your product line.
For a user-friendly and effective mini tripod, consider the Manfrotto Pixi mini tripod kit. It’s particularly great for beginners, securely holds your phone, and can be positioned on your backdrop sweep for easily capturing high-quality product shots from various angles.
Alt text: Manfrotto Pixi mini tripod for stable smartphone product photography on white backdrop.
4. Create a Seamless White Backdrop
A white backdrop is essential for product photography, providing a clean, consistent background that eliminates distractions and keeps the focus squarely on your product. You can create a simple setup using a roll of white paper sweep or purchase affordable white poster board from art supply stores or pharmacies. You’ll also need a table or flat surface to set up your backdrop.
Use tape or reusable adhesive like Sticky Tack to secure your backdrop in place or to gently position your product on the backdrop if needed.
Always opt for a pure white backdrop. White effectively reflects natural light back onto your product, ensuring even illumination throughout the photo. It also simplifies the editing process should you need to remove the background for certain shots. Cream or off-white backdrops can complicate lighting and editing. Ideally, your backdrop should extend not only behind but also underneath your product, creating a seamless, infinite white background.
Alt text: Product photography setup with smartphone and seamless white backdrop for clean images.
5. Utilize White Bounce Boards
Mastering lighting control is key to learning how to take professional-looking product photos with a smartphone, whether it’s an iPhone or an Android device. Bounce boards play a crucial role in minimizing harsh shadows and establishing a more balanced lighting environment. They effectively reflect light back into shadow areas, revealing finer details and textures in your product. You can easily find affordable white foam bounce boards online from retailers like Amazon.
6. Employ a Diffuser Sheet for Harsh Sunlight
Diffuser sheets are used to soften intense, direct sunlight, which can often be too harsh for product photography. You can purchase professional diffuser sheets online or create a DIY version using readily available household materials such as parchment paper, a frosted shower curtain liner, or even plain printer paper. Position the diffuser between the light source (window or sun) and your product to diffuse the light and reduce harsh shadows.
Harnessing Natural Light for Stunning Product Photos
Effective photography lighting is the cornerstone of compelling product imagery. Get it right, and your photos will be captivating; get it wrong, and even extensive photo editing might not salvage your shots.
Here are three essential tips for maximizing natural light in your product photography:
- Shoot in a Brightly Lit Room: Natural light from a window is generally superior to artificial studio lighting for product photography, especially when starting out. Firstly, a window is readily accessible and free. Secondly, natural window light comes from a single direction, which creates natural, soft shadows that add depth and texture to your products. Consider weather conditions: Is it sunny or overcast? Depending on the look you want to achieve, slightly overcast days can sometimes be preferable to direct, harsh sunlight. As you’ll see in the example below, the type of natural light drastically impacts shadows and highlights in your photos.
Alt text: Comparison of product photos showing difference between shooting in direct sunlight vs overcast natural light.
- Position Your Setup Near the Window: Aim to position your product setup approximately 90 degrees to the right or left of the window. Plan your photoshoot to coincide with the brightest part of the day to maximize available light. If the sunlight becomes too intense, use a diffuser sheet to soften it.
Alt text: Natural light product photography setup with product positioned near window for soft lighting.
Experiment with product placement and the time of day to discover the optimal lighting setup for your space. Crucially, avoid hard light at all costs. Hard light can oversaturate colors and accentuate even minor imperfections on your product—flaws that are often invisible to the naked eye.
- Control Light with Foam Boards and Reflectors: Natural light can be unpredictable. Sometimes, the sun might disappear behind clouds mid-shoot. If this occurs, don’t worry. Utilize your white foam boards to bounce and intensify the available light, effectively filling in shadows and maintaining consistent illumination.
If you’re using a reflector, you can further manipulate the light on your product by adjusting the reflector’s distance and angle. Moving it closer or further away, and tilting it, will alter how much natural light is reflected back onto your product, allowing you to fine-tune the balance between highlights and shadows. Remember to test different reflector angles to find the perfect light balance.
Explore Further: An In-Depth Look at Jewelry Photography Techniques
Optimal Camera Angles for Product Photography
When capturing product photos for your e-commerce website, certain camera angles are more effective than others. Presenting diverse perspectives of your product helps answer potential customer questions that your product descriptions might not fully address.
Aim to provide as many different viewpoints as possible to showcase your product’s key features and design elements. A comprehensive, all-around view is engaging and helps shoppers visualize themselves interacting with or using your product, which can significantly boost sales.
Including close-up shots is equally vital. Close-ups allow you to highlight specific details that underscore your product’s quality— intricate patterns, fabric textures, unique design elements, or usage-related details. These are the types of features shoppers would typically examine closely in a physical retail store.
Whether you’re engaged in clothing photography, footwear photography, or photographing any other type of product, these five camera angles are essential to explore during your photoshoot:
- Eye-Level Shot: This angle presents the product as you would naturally see it when looking straight ahead.
- High-Angle Shot: This view shows the product from a slightly elevated perspective, as if you are looking down at it from above.
- Low-Angle Shot: Conversely, this angle presents the product as if you are looking up at it from a low position, often from floor level.
- Bird’s-Eye View: This angle captures the product directly from above, looking straight down, providing a top-down perspective.
- Slanted Angle Shot: This view shows the product from one side, typically at a diagonal, offering a dynamic and less conventional perspective.
Alt text: Five camera angles for product photography: eye level, high angle, low angle, birds eye, slanted.
Showcasing various angles is crucial so customers gain a complete understanding of the product. If you’re new to smartphone product photography, it’s advisable to keep your smartphone and tripod stationary throughout the shoot and instead rotate your product to achieve different angles. Rotating the product, rather than the camera, ensures consistent framing across all your shots, promotes uniformity, and reduces post-shoot image editing time.
Step-by-Step Guide to Smartphone Product Photography
Now that you have your equipment set up, understand lighting principles, and are familiar with essential camera angles, it’s time to start taking photos.
Before you begin shooting, use this checklist to prepare your Android or iPhone camera and ensure you’re ready to capture the best possible images.
- Prepare Your Phone: Ensure your phone is fully charged and has sufficient storage space for all your photos.
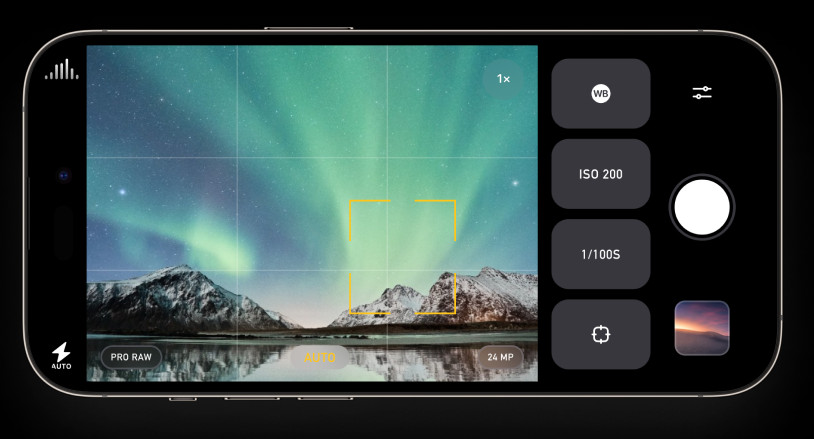
- Set Your White Balance: To adjust the white balance according to the light temperature in your setup, locate the WB (White Balance) button in your camera app (often found in ‘Pro’ or ‘Manual’ mode). Tap it, then tap on your white backdrop. This will calibrate the camera to accurately represent colors under your lighting conditions.
- Check Your Exposure: Tap the circular Exposure button (often represented by a +/- icon in ‘Pro’ or ‘Manual’ mode). Then, touch your product on the screen. This tells the camera to prioritize exposing the product correctly, ensuring it’s neither too dark nor too bright.
- Ensure Sharp Focus: Tap the circular Focus button (often symbolized by a target icon in ‘Pro’ or ‘Manual’ mode), and then touch your product. This action sets the focus point on your product, guaranteeing it will be sharp and clear in the final image.
- Lock Your Camera Settings: After adjusting white balance, exposure, and focus, tap each of these buttons again to lock in your settings. Locking prevents the camera from automatically readjusting these settings while you’re shooting a series of photos, ensuring consistency across your images.
Once your settings are locked, you’re all set to begin shooting!
After your first shot, review the image on your phone screen. Evaluate whether it appears correctly exposed. If you think the exposure needs adjustment—either brighter or darker—look for the +/- button (usually near the Focus button). Tap it, and a slider will appear, allowing you to fine-tune the exposure. Slide it up to brighten the image or down to darken it until you achieve the desired exposure.
Common Mistakes to Avoid in Smartphone Product Photography
The widespread availability of smartphones has made product photography more accessible than ever. However, this accessibility also means common mistakes are prevalent. Being aware of these pitfalls can help you avoid them and improve your product photos.
Remember to steer clear of these three frequent errors in smartphone product photography:
- Using Digital Zoom: Your phone’s digital zoom function is generally not recommended for product shots. Digital zoom degrades image quality significantly by simply cropping and enlarging the existing pixels. If you need a closer shot, it’s always better to physically move your setup closer to the product or crop the image later during editing.
- Using the Front-Facing Camera: The front-facing “selfie camera” on most smartphones typically has lower specifications compared to the rear camera. While this can vary depending on your phone model, generally, the rear-facing camera boasts a higher megapixel count and superior lens quality, resulting in higher image quality. Always use the rear camera for product photography.
- Turning On the Flash: Your phone’s built-in flash is rarely flattering for product photography. It tends to produce harsh, direct light that overexposes the photo, washes out colors, and creates unflattering shadows. It’s almost always better to rely on natural lighting and implement the techniques discussed earlier in this guide, such as using bounce boards and diffusers, rather than using the phone’s flash.
Current Trends in Phone Product Photography
E-commerce is dynamic, and trends in product imagery evolve alongside it. Staying informed about current trends is beneficial to understand customer expectations and align your product visuals with contemporary aesthetics and preferences.
Here are three prominent product photography trends to consider as you shoot with your smartphone:
- 360-Degree Photos: Technological advancements now enable brands to offer comprehensive 360-degree views of their products on their websites and product listings. While they appear video-like, 360-degree views are actually composed of a series of still images stitched together. This immersive format provides customers with a complete product perspective, enhancing their online shopping experience.
- AI-Powered Photo Editing: Artificial intelligence is increasingly streamlining various business operations, including product photography. AI tools can efficiently remove backgrounds from your smartphone product shots and perform other editing tasks. However, it’s still crucial to carefully review the output quality, as AI editing can sometimes introduce imperfections or unnatural artifacts. Use AI as an aid but always maintain a critical eye on the final results.
- Product Videos: Product videos are not a nascent trend but continue to gain momentum. More and more brands are integrating product videos into their online presence. In fact, 89% of consumers express a desire for more brand videos. Similar to 360-degree images, videos offer shoppers a more complete product view and allow them to see the product in action, demonstrating its features and benefits in a dynamic way.
Essential Steps to Editing Your Product Photos
The thought of photo editing might seem daunting, but with smartphones and user-friendly apps, it’s surprisingly accessible.
- Choose a Product Photography App: Visit your phone’s app store and download a photo editing app designed for product photography. Popular choices among smartphone photographers include mobile apps like Lightroom and Snapseed. Others prefer more robust photo editing software on their computers for more advanced editing.
- Open Your Editing App: Launch your chosen app and select the product photo you want to prepare for your online store. Most images benefit from at least some minor adjustments to truly enhance their visual appeal and professionalism.
- Make Basic Edits: Focus on fundamental adjustments first. These typically include: Brightness (adjusting overall image lightness), Contrast (enhancing tonal separation), Sharpness (improving image clarity), Highlights and Shadows (fine-tuning bright and dark areas), and White Balance (ensuring accurate colors). Resist the temptation to overuse filters, borders, tints, and oversaturation. Your primary goal is to make your product look its absolute best and stand out while maintaining a realistic representation. Aim for the edited photo to closely resemble the product as it appears in real life.
- Save Presets: Once you’ve perfected the edits on your first photo, save these settings as a preset. Presets allow you to apply the same adjustments quickly and consistently to other photos from the same photoshoot, significantly saving time. However, after applying a preset to a new image, always review it to see if any additional individual tweaks are needed to optimize it.
- Apply a White Layer Background (If Necessary): If your background isn’t perfectly white or contains minor blemishes or creases, you can refine it by replacing it with a pure white layer in your editing app. Since you shot on a white backdrop, isolating the product and adding a white layer behind it is usually a straightforward process in most photo editing apps.
Once your product image is clean, crisp, and visually appealing, it’s ready to be uploaded to your online store.
Top 5 Apps for Product Photography Editing
Selecting the right editing apps is a critical component of mastering smartphone product photography. While many smartphones come with basic built-in editing tools, dedicated third-party apps offer a wider array of features and greater control to make your product photos truly shine.
Here are five of the highest-rated product photo editing apps:
1. Lightroom
Available for: iOS and Android.
Price: Requires Adobe Creative Cloud subscription, starting at $9.99/month.
Alt text: Adobe Lightroom mobile app interface for product photo editing.
Lightroom, while requiring an Adobe Creative Cloud subscription, is often cited as the premier app for product photography. It provides user-friendly tools like sliders and customizable presets, enabling you to achieve precisely the look you envision for your photos. Lightroom’s cross-device functionality is also a major advantage. You can begin editing on your mobile device, continue on the web interface, or switch to the desktop application, and all edits automatically synchronize across platforms.
For full access to Lightroom and its extensive capabilities, consider the Adobe Creative Cloud Photography plan. This subscription includes Lightroom for desktop, mobile, and web, along with the latest version of Photoshop, all for a monthly fee.
2. Photoshop Express
Available for: iOS, Android, and Windows.
Price: Requires Adobe Creative Cloud subscription, starting at $9.99/month.
Alt text: Adobe Photoshop Express mobile app interface showing editing tools.
Photoshop Express brings the power of Adobe Photoshop to your smartphone. With Photoshop Express, you gain access to many of Photoshop’s renowned photo editing features directly on your mobile device. You can import product photos from your phone’s gallery or capture new ones directly within the app. Then, easily adjust attributes like hue, brightness, exposure, and contrast to create professional-quality photos for your online store.
3. Snapseed
Available for: iOS and Android.
Price: Free.
Alt text: Google Snapseed free mobile photo editing app interface.
Snapseed, a free photo editing app developed by Google, brings professional-grade editing capabilities to your smartphone without any cost. Snapseed rivals expensive desktop software in terms of features and control, offering a wide range of tools for detailed image manipulation. For beginners, Snapseed offers unique features like “Stacks,” which allows you to revisit earlier edits and make non-destructive adjustments, as well as save and apply custom editing settings across multiple photos.
4. VSCO
Available for: iOS and Android.
Price: Free version available; annual paid plans are $29.99 or $59.99.
Alt text: VSCO mobile app interface with filters and editing options.
VSCO offers both free and paid versions of its popular photo editing app. VSCO includes a comprehensive suite of basic editing tools, such as exposure, contrast, and color balance, enabling you to create stunning product photos on the go. VSCO is not only an excellent product photo app but also serves as a powerful Instagram tool due to its extensive library of filters and customization options for achieving unique photographic styles.
5. Photon
Available for: iOS.
Price: Free
 Photon app screenshot
Alt text: Photon iOS app interface for advanced camera and photo editing controls.
Photon, exclusively for iOS devices, is a robust option suitable for both experienced and novice smartphone photographers. Photon functions not only as an editor but also as a camera app for your product shoots. It provides manual controls for exposure and focus, along with a built-in stabilizer, mimicking the feel of shooting with a high-quality DSLR lens.
For users who prefer desktop editing, Photon allows you to capture product photos in RAW format. RAW images retain more image data compared to standard JPEGs, resulting in higher-quality product images with greater flexibility in post-processing.
Maximizing Your Product Photography Efforts
Learning how to take professional-looking product photos with an iPhone or Android smartphone might initially seem challenging, but with practice and the right guidance, you’ll quickly develop proficiency. With the information provided in this guide, you are well-equipped to master product photography and create compelling visuals that will contribute to increased sales in your online store. As your skills progress, you might even consider selling your photography online.
Further Reading
Essential Product Photography Equipment for Beginners
The Ultimate Guide to DIY Product Photography Lighting
Phone Product Photography FAQs
How can I take professional product photos at home with my iPhone?
- Opt for an iPhone 13 or newer model for superior camera capabilities.
- Explore third-party camera apps for manual controls and advanced features.
- Set up a clean white background for a professional look.
- Position your setup near a window to utilize natural light effectively.
- Tap and hold on your product in the viewfinder to lock focus for sharp images.
- Avoid using digital zoom, instead, move closer physically or crop later.
- Experiment with various camera angles to showcase your product fully.
- Utilize a photo editing app to refine and enhance your images.
What are the key steps to taking high-quality product photos?
- Use a smartphone camera with a resolution of 12 megapixels or more.
- Shoot using a tripod to minimize camera shake and ensure sharpness.
- Maximize natural light from a window for soft, even illumination.
- Employ a bounce board to reflect light and soften shadows.
- Utilize sweep backgrounds and close-up shots to emphasize product features.
- Capture a variety of angles and optimize image sizes for web display.