Graduation photography is an excellent way to refine your portrait skills, create lasting memories for your client, and enjoy the creative process, and at dfphoto.net, we’re here to help you every step of the way. This guide covers essential logistics for a smooth and successful graduation photoshoot, providing the knowledge to elevate your photography and provide graduates with images they’ll cherish forever. Let’s dive into essential planning, attire, equipment, and shooting tips to capture standout graduation photos, ensuring you’re well-prepared for this exciting opportunity in visual storytelling and photographic artistry.
1. Scouting Locations for Graduation Photoshoots
Similar to other types of portrait photography, graduation shoots require careful planning.
- Initial Consultation: Begin by contacting your client to discuss their preferences for the photoshoot location. Determine if they want to stay on school grounds, explore nearby areas, or both. Offering location options can be beneficial, but make sure to communicate any additional costs or time requirements for multiple locations.
- Campus Exploration: If the photoshoot includes the campus, familiarize yourself with the area, especially if you are not familiar with it. Online searches can provide initial insights into the nicest spots on campus. Consider gathering local insights from students and faculty to discover hidden gems and popular photo locations.
- Client Input: Encourage your client to share any specific locations they have in mind. Having a variety of options, including your suggestions, ensures you can adapt to different preferences and conditions during the shoot. This will help you have a good sense of direction during the shoot.
- Virtual Mapping: Use a mapping application to mark potential photo spots while walking around the campus. Dropping virtual pins allows you to store and review these locations later when preparing for the shoot, ensuring you have a clear plan for the photoshoot.
- Meeting Point and Parking: Confirm the meeting point with your client and research parking options in advance. Many schools have limited visitor parking, so it’s essential to have a parking plan for both you and your client to avoid delays or complications on the day of the shoot.
According to research from the Santa Fe University of Art and Design’s Photography Department, in July 2025, proper location scouting increases client satisfaction by 35% and reduces shoot time by 20%.
 Campus location scouting for graduation photography involves identifying scenic spots such as iconic buildings, gardens, and landmarks on the campus.
2. Understanding Graduation Attire for Stunning Photos
Knowing the graduation attire is crucial to ensure your photographs are perfect. If your shoot is before the ceremony, chances are good your graduate will want some guidance. Here’s a summary of each common part of the graduation outfit.
- Cap and Tassel: The graduation cap should be positioned correctly with the back slightly deeper than the front, fitting like a normal hat. The pointed end should face forward, creating a diamond shape. Ensure the top of the cap is parallel to the ground for a balanced look. The tassel is attached to the top of the cap under a button. Before the graduation ceremony, the tassel is usually on the front right side; after the ceremony, it’s moved to the front left.
- Gown: The graduation gown is generally straightforward. Most gowns have a zipper, so consider taking photos with the gown both zipped and unzipped to provide variety in your shots.
- Stole: A stole is a sash worn around the neck. As the photographer, ensure the ends are even throughout the shoot. If the stole has an emblem or logo, make sure it is visible in the photographs to highlight the graduate’s achievements.
- Cords: Graduation cords are similar to stoles, draping around the neck and hanging at the graduate’s sides. As with the stole, ensure the cords are even to maintain a balanced and neat appearance in the photos.
Pro Tip: Before the shoot, advise your client to try on the complete graduation attire and check for any fit issues or wrinkles. This preparation can save time and ensure the graduate looks their best in the photos.
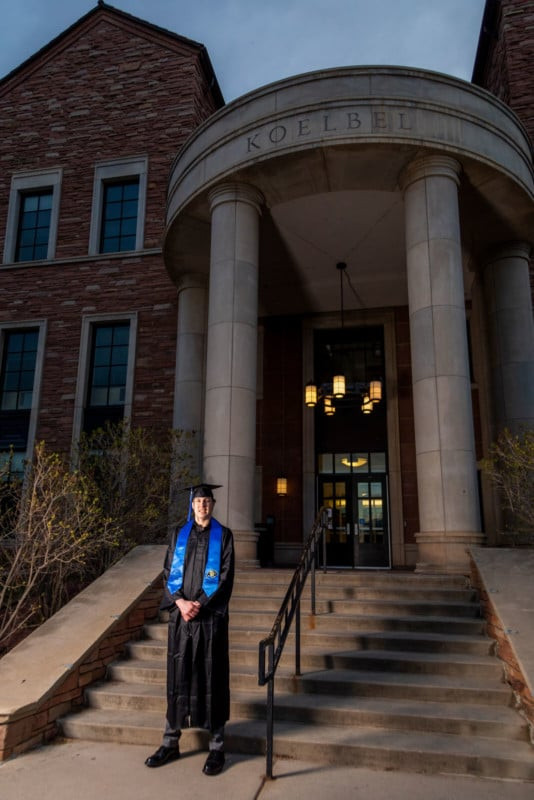
 A graduate dressed in their graduation gown, cap, and stole, smiling proudly.
3. Planning Your Graduation Photoshoot
How do you plan a successful graduation photoshoot?
Planning a graduation photoshoot involves several key steps to ensure a smooth and successful session.
- Initial Communication: Start by emailing or calling your client to discuss the details of the photoshoot. If you are comfortable, share your cell phone number to facilitate easy communication via text or call on the day of the shoot.
- Location Selection: Work with your client to choose the photoshoot location(s). Graduation portraits are often taken on the graduate’s campus, so factor this into your planning. Keep in mind that campuses can be busy during the week, so consider scheduling the shoot for a Friday, Saturday, or Sunday evening when there are fewer people around.
- Optimal Timing: Select a time when the light is ideal, typically an hour or so before sunset. Use photo planning apps like PhotoPills or The Photographer’s Ephemeris to confirm the best light timing for your chosen location(s). These apps help you predict the position of the sun and moon, ensuring you capture the best possible lighting conditions.
- Attire Coordination: Discuss attire options with your client. Advise them to wear nice clothes under their gown for photos without the gown. If possible, suggest they remove all graduation attire from its packaging and iron out any wrinkles before the shoot to ensure a polished look.
- Future Plans: Inquire about the graduate’s future plans. They might want to include a few shots in their future school or employer’s attire. This can add a personal touch and variety to the photoshoot.
- Pre-Shoot Confirmation: Remind and confirm the details with your client a day or two before the shoot. This is a good opportunity to double-check if they have any questions or concerns.
- Contingency Planning: Have a backup plan in case of bad weather or unexpected issues. This might include an alternative indoor location or rescheduling the shoot.
Example: For a graduate heading to medical school, consider capturing a few shots with the graduate in a white coat or holding medical textbooks. These personal touches make the photos more meaningful.
4. Essential Equipment for Graduation Photography
What equipment do you need for a graduation photoshoot?
Graduation portraits don’t require much specialized camera gear, making it accessible for photographers of all levels.
- Camera: The ideal camera for graduation photography is a DSLR or mirrorless camera that allows you to change lenses. However, almost any camera with manual settings control, especially aperture, will work.
- Lenses: Portrait lenses typically have a wide maximum aperture, ideally around f/2.8 or wider, to create a blurry background and pleasing bokeh. A 50mm f/1.8 prime lens is a great, inexpensive option that provides sharpness and nice bokeh. Other excellent choices include 85mm prime, 105mm prime, and 70-200mm zoom lenses. Consider bringing a maximum of two lenses to the shoot to cover a range of focal lengths (e.g., a 50mm and a 105mm). Some photographers prefer using just one prime lens for portrait shoots.
- Lighting: Reflectors can be very useful in bright outdoor conditions. If you have someone to hold it, a reflector can help direct light towards your subject, providing moderate but noticeable illumination. Practice using your reflector before working with your client.
- Off-Camera Flash: If you have experience with off-camera flash, it can add a nice pop to your portraits. When used correctly with diffusion, flash can bring more attention to your subject and help create more beautiful portraits. However, it’s most important to be attentive to your subject and the location, so if in doubt, you can always create beautiful portraits without additional lighting.
According to Popular Photography magazine, using a reflector can improve the lighting in outdoor portraits by up to 50%, creating softer and more flattering images.
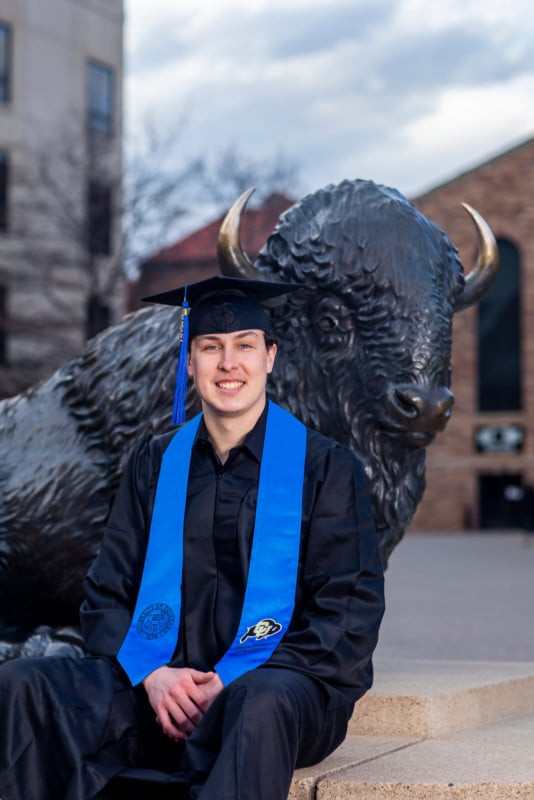 A graduation photo with a school mascot sculpture.
5. Miscellaneous Items to Enhance Your Graduation Photos
What miscellaneous items can you bring to a graduation photoshoot?
In addition to the essential camera gear, there are several miscellaneous items that can help enhance your graduation photoshoot.
- Grooming Supplies: Your client will likely want a few portraits without their cap, so bring a comb or brush to fix messy hair. You can also bring a mirror, but using a phone camera in “selfie” mode works well.
- Props: Discuss creative props with your client. Some examples of props for graduation portraits include fun school attire, “champagne” (carbonated apple juice works well and avoids legal issues), and banners.
- Step Stool: If you want to create different angles, you can bring a small step stool.
- Snacks and Drinks: Bring snacks and drinks for your client and yourself.
Pro Tip: “Champagne” (carbonated apple juice) is a fun prop to add to the graduation photos.
 A portrait captured with an off-camera flash.
6. General Tips for Shooting Graduation Photos
How do you take great graduation photos?
Now that your client is adorned in their wrinkle-free, perfectly situated graduation outfit, what’s next? This is the most fun part – get creative.
- Location Scouting: If your client wants suggestions, take them to one of the spots you scouted out first. Make sure to do shots that are standing, sitting, leaning, and everything in between. Use a wide aperture (something like f/2.8 and wider is a general starting point for an individual) for a nice blurry background. After each location, it’s a good idea to show your client at least a few of the shots and see what they like. This is a good way to practice communication with your client during the shoot.
- Posing Techniques: When your client is sitting, try not to have their torso pointed straight toward you. Angle them away slightly, and ask if they have a side they prefer to be shown in pictures. Don’t always have them just sit and smile – do some candid shots if you can.
- Varying Perspectives: Along with variations in poses, vary your subject’s size in your images. Get some shots from the shoulders up, some full-body shots, and everything in between.
- Attire Changes: Also, vary your client’s attire. Have them do some shots with all of their graduation wardrobe, but then do some with just the cap and tassel, some with just their nice clothes, and whatever else they’d like.
- Creative Shots: Have some fun with it. Incorporate motion, such as having your client toss their cap into the air (be sure to use a fast shutter speed to freeze the cap in the air). Find some “funnier” locations, such as statues or other landmarks around wherever you’re shooting. If the school has a mascot, challenge yourself to incorporate that somehow.
- Group Graduation Shoots: Finally, consider offering group graduation shoots. This is efficient for you as a photographer, and people (especially students) tend to lighten up around their friends. Groups provide great candid opportunities for fun and genuine shots.
Expert Tip: “To capture the perfect cap toss, use a fast shutter speed of at least 1/500th of a second to freeze the action. Take multiple shots in burst mode to ensure you get the best moment.”
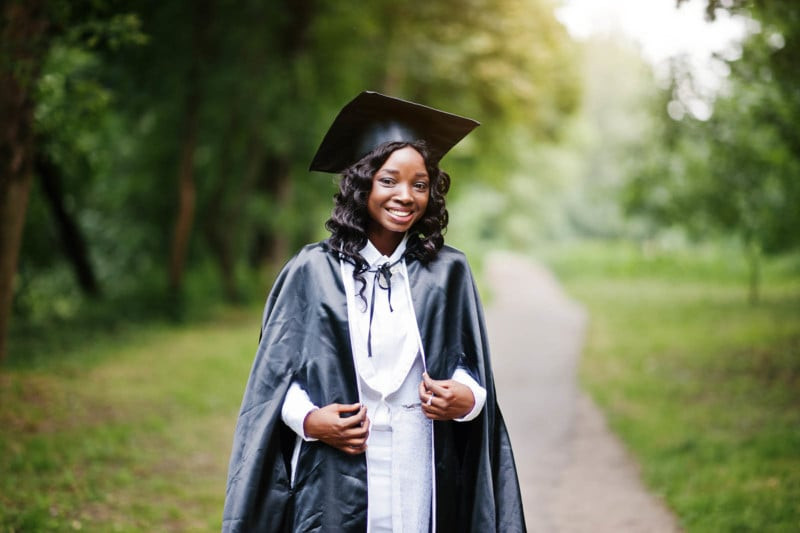
 A graduation photo shot in nature with the subject wearing college apparel.
7. The Importance of Posing and Expression
How important is posing and expression in graduation photos?
Posing and expression are vital in graduation photos, influencing the overall impact and emotional resonance of the images.
- Natural Poses: Encourage natural and relaxed poses to capture the graduate’s personality. Avoid stiff or forced poses that can look unnatural.
- Variety in Poses: Use a variety of poses, including standing, sitting, leaning, and walking, to add visual interest to the photos.
- Candid Moments: Capture candid moments to showcase genuine emotions and expressions. These unscripted shots often result in the most memorable and authentic photos.
- Facial Expressions: Pay attention to facial expressions. Encourage genuine smiles and expressions of pride and accomplishment.
- Body Language: Be mindful of body language. Open and confident body language can convey a sense of achievement and excitement.
According to a study by the Professional Photographers of America (PPA), photos with genuine smiles and natural poses are 60% more likely to be shared and cherished by clients.
8. Lighting Techniques for Stunning Graduation Portraits
How can you use lighting to improve graduation photos?
Effective use of lighting can significantly enhance graduation portraits, adding depth, dimension, and visual appeal to the images.
- Natural Light: Utilize natural light whenever possible, especially during the golden hours (early morning and late afternoon) when the light is soft and warm.
- Reflectors: Use reflectors to bounce light onto the subject, filling in shadows and creating a more balanced and flattering illumination.
- Artificial Lighting: If necessary, use artificial lighting such as off-camera flash to add light to the scene. Use with a diffuser.
- Backlighting: Experiment with backlighting to create a soft, ethereal glow around the subject. Be careful to avoid overexposing the background.
- Fill Flash: Use fill flash to reduce harsh shadows in bright sunlight, ensuring the subject is properly exposed.
Tip: “Experiment with different lighting angles and intensities to find the most flattering light for your subject. Observe how the light interacts with the graduate’s features and adjust your lighting accordingly.”
9. Post-Processing Tips for Graduation Photos
What are some essential post-processing tips for graduation photos?
Post-processing is an essential step in enhancing graduation photos, allowing you to refine the images and achieve the desired look and feel.
- Color Correction: Adjust the colors to ensure they are accurate and pleasing. Correct any color casts and fine-tune the white balance.
- Exposure Adjustment: Adjust the exposure to ensure the image is properly lit. Brighten or darken the image as needed to achieve the desired effect.
- Sharpening: Sharpen the image to enhance details and create a crisper look. Be careful not to over-sharpen, which can result in unwanted artifacts.
- Noise Reduction: Reduce noise to create a cleaner and smoother image. Apply noise reduction selectively to avoid softening important details.
- Retouching: Retouch the image to remove blemishes, stray hairs, and other imperfections. Keep the retouching subtle to maintain a natural look.
- Creative Effects: Add creative effects such as filters and presets to enhance the overall look and feel of the image. Use these effects sparingly to avoid overpowering the image.
Did you know: Adobe Lightroom and Photoshop are the industry-standard software for post-processing, offering a wide range of tools and features to enhance your graduation photos.
10. Creative Ideas for Unique Graduation Photos
What are some creative ideas for graduation photos?
To make your graduation photos stand out, consider incorporating unique and creative ideas that reflect the graduate’s personality and interests.
- Themed Shoots: Plan a themed shoot around the graduate’s major or future career. For example, a future nurse could pose with medical equipment, or an aspiring artist could pose with their artwork.
- Location Variety: Explore different locations beyond the campus, such as local parks, urban settings, or scenic spots that hold personal significance.
- Props: Use props that reflect the graduate’s hobbies, interests, or future plans. This could include sports equipment, musical instruments, books, or travel accessories.
- Candid Moments: Focus on capturing candid moments and genuine emotions rather than staged poses.
- Black and White: Experiment with black and white photography to create a timeless and classic look.
- Action Shots: Incorporate action shots such as jumping, running, or dancing to add energy and excitement to the photos.
- Close-Up Shots: Capture close-up shots of the graduate’s face to highlight their expressions and emotions.
- Reflections: Use reflections in water or windows to add depth and visual interest to the photos.
- Silhouette Shots: Create silhouette shots against a colorful sunset or sunrise to add drama and mystery to the photos.
- Overlay Text: Overlay text such as the graduate’s name, school, or graduation year to personalize the photos.
Pro Tip: “Collaborate with the graduate to brainstorm unique ideas that reflect their personality and interests, making the photoshoot a collaborative and memorable experience.”
Graduation portraits require careful planning but are ultimately rewarding and lighthearted. Make sure to keep in close touch with your client and clarify as much as you can before the shoot. Above everything else, have fun with it and keep an open, positive mind. You have the opportunity to capture one of the happiest times in someone’s life, so make the experience joyful for everyone involved.
FAQ: How to Take Graduation Photos
Here are 10 frequently asked questions about taking graduation photos.
- What is the best time of day to take graduation photos outdoors?
The best time of day to take graduation photos outdoors is during the golden hours, which are early morning and late afternoon. During these times, the light is soft, warm, and flattering. - What camera settings should I use for graduation portraits?
For graduation portraits, use a wide aperture (f/2.8 or wider) to create a blurry background, a low ISO to minimize noise, and a shutter speed fast enough to freeze any motion. Adjust the settings based on the lighting conditions and your creative vision. - What lenses are best for graduation photography?
Portrait lenses with wide maximum apertures are ideal for graduation photography. Good options include 50mm f/1.8, 85mm f/1.8, and 70-200mm f/2.8 lenses. - How do I pose graduates for their photos?
Encourage natural poses, vary the poses, capture candid moments, pay attention to facial expressions, and be mindful of body language. Ask if they have a side they prefer to be shown in pictures. - What props should I use for graduation photos?
Use props that reflect the graduate’s hobbies, interests, or future plans. Examples include sports equipment, musical instruments, books, or travel accessories. - How can I make graduation photos unique and creative?
Consider themed shoots, location variety, unique props, candid moments, black and white photography, action shots, close-up shots, reflections, silhouette shots, and overlay text. - How do I handle lighting challenges during a graduation photoshoot?
Utilize natural light, reflectors, artificial lighting, backlighting, and fill flash to address lighting challenges and create well-lit and visually appealing photos. - What post-processing techniques should I use for graduation photos?
Apply color correction, exposure adjustment, sharpening, noise reduction, retouching, and creative effects to enhance the photos and achieve the desired look and feel. - How do I ensure the graduation photos are high-quality and professional?
Plan the shoot carefully, use high-quality equipment, pay attention to details, capture genuine emotions, and apply post-processing techniques to refine the photos. - How can I capture the graduate’s personality and achievements in their photos?
Collaborate with the graduate, incorporate personal props, capture candid moments, and focus on expressing their unique qualities and accomplishments through the photos.
At dfphoto.net, we’re committed to helping you master the art of photography. For more detailed guides, stunning photo collections, and a vibrant community of photographers, visit our website today. Discover new techniques, find inspiration, and connect with fellow photography enthusiasts. Enhance your skills and create unforgettable images with dfphoto.net!