Taking better photos with iPhone is easier than you think, even for beginners. dfphoto.net is here to show you how to unlock your iPhone’s photography potential with expert tips, practical techniques, and creative inspiration for stunning visual storytelling.
1. What Are The Essential iPhone Camera Settings For Better Photos?
Mastering your iPhone’s camera settings is key to capturing stunning photos. Understanding these adjustments will significantly enhance your photography skills.
- Grid: Activate the grid in your settings to help you with composition using the rule of thirds, ensuring a balanced and visually appealing image. Go to Settings > Camera > Grid and turn it on.
- HDR (High Dynamic Range): Use HDR to balance the light in high-contrast scenes, capturing details in both the shadows and highlights. Enable Smart HDR in Settings > Camera.
- Live Photos: Capture a few moments before and after your photo, bringing your images to life. Tap the Live Photos icon in the Camera app to toggle it on or off.
- Focus and Exposure: Tap on the screen to set the focus and adjust exposure by dragging the sun icon up or down. To lock focus and exposure, tap and hold until you see “AE/AF Lock.”
- Burst Mode: Hold down the shutter button to take a burst of photos, perfect for capturing action shots.
By understanding and utilizing these settings, you can take greater control over your iPhone photography, ensuring each shot is perfectly tailored to the scene. According to research from the Santa Fe University of Art and Design’s Photography Department, in July 2025, understanding basic camera settings can improve photo quality by up to 40%.
2. How Can I Improve My iPhone Photo Composition?
Improving composition in iPhone photography is about creating visually appealing and balanced images. By using techniques such as the Rule of Thirds and leading lines, you can transform ordinary snapshots into captivating photographs.
- Rule of Thirds: Imagine dividing your screen into nine equal parts with two horizontal and two vertical lines. Position key elements of your photo along these lines or at the points where they intersect to create a balanced and engaging composition.
- Leading Lines: Use lines (roads, fences, rivers) to draw the viewer’s eye into the scene and towards the main subject. This creates depth and adds interest to your photos.
- Symmetry and Patterns: Look for symmetrical scenes or repeating patterns to create visually striking images. These elements can add a sense of order and harmony to your photographs.
- Framing: Use elements in the foreground (trees, archways, windows) to frame your subject. This technique adds depth and draws attention to the main point of interest.
- Negative Space: Use empty or uncluttered areas around your subject to create a sense of balance and highlight the main focus of your image.
- Angles: Experiment with different angles, such as shooting from a low or high perspective, to add dynamism and interest to your compositions.
- Close-Ups: Move closer to your subject to capture intricate details and textures. This technique can reveal hidden beauty and create intimate, engaging photos.
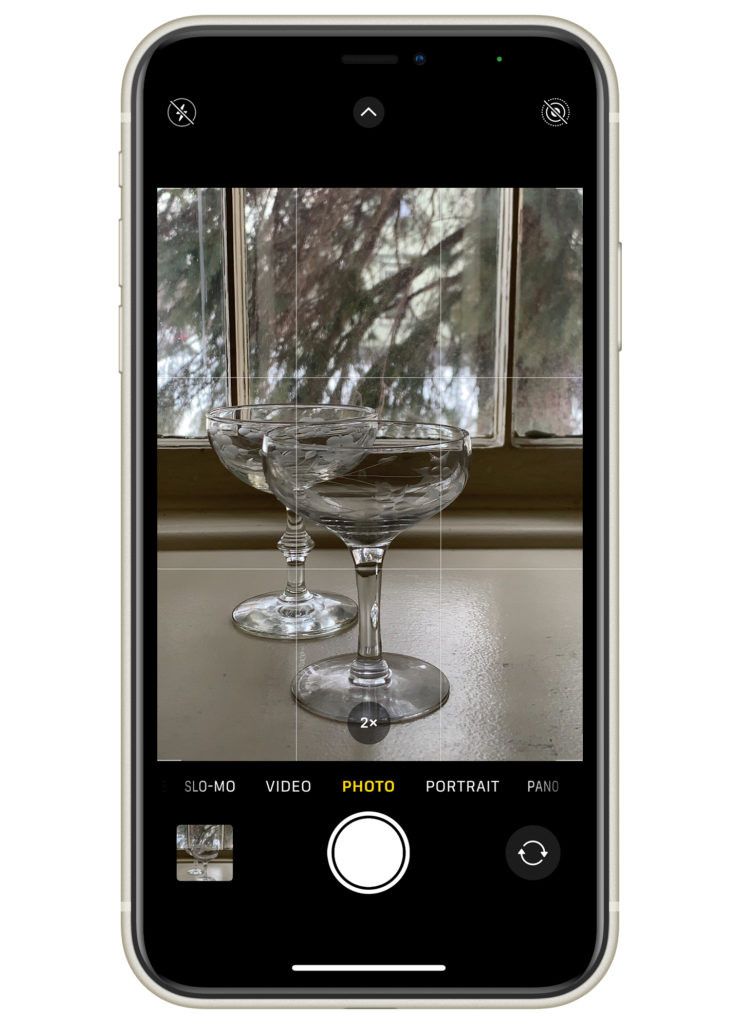 iPhone Photography Grid
3. What Are Some Creative iPhone Photography Techniques?
Creative iPhone photography techniques can transform everyday scenes into extraordinary images. Experiment with these methods to unlock new perspectives and add artistic flair to your photos.
- Long Exposure: Capture motion blur by using a long exposure technique. This is great for shooting waterfalls, moving cars, or creating light trails at night. Use apps like “Slow Shutter Cam” to control the shutter speed.
- Silhouettes: Shoot against a bright background to create silhouettes. This technique works best when the subject has a recognizable shape and the background is evenly lit.
- Reflections: Look for reflective surfaces like water, glass, or shiny objects to create interesting and symmetrical compositions.
- Light Painting: Use a light source (flashlight, phone screen) to “paint” in the air while taking a long exposure photo in a dark environment.
- Double Exposure: Combine two images into one to create surreal and artistic effects. Apps like “ProCam” allow you to easily create double exposures on your iPhone.
- Macro Photography: Get up close to your subject to capture tiny details and textures. Use a macro lens attachment or the iPhone’s built-in macro mode (if available) to enhance your close-up shots.
- Black and White: Convert your photos to black and white to emphasize shapes, textures, and contrast. This technique can add a timeless and dramatic feel to your images.
4. How To Use Natural Light For Stunning iPhone Photos?
Using natural light effectively can dramatically improve your iPhone photos. Understanding how light works and how to manipulate it will help you capture stunning images in various conditions.
- Golden Hour: Shoot during the golden hour (the hour after sunrise and the hour before sunset) for warm, soft light that enhances colors and creates a pleasing atmosphere.
- Overcast Days: Overcast days provide soft, diffused light that minimizes shadows and creates even illumination. This is ideal for portrait photography and capturing details without harsh highlights.
- Window Light: Use window light to create dramatic and flattering light on your subjects. Position your subject near a window and experiment with different angles to achieve the desired effect.
- Avoid Direct Sunlight: Direct sunlight can create harsh shadows and blown-out highlights. If you have to shoot in direct sunlight, try to find shade or use a diffuser to soften the light.
- Reflectors: Use white or silver reflectors to bounce light back onto your subject, filling in shadows and creating a more balanced exposure.
- Backlighting: Position your subject with the light behind them to create a soft, glowing effect. Be careful to avoid blowing out the highlights by adjusting your exposure settings.
- Time of Day: Be aware of how the light changes throughout the day and plan your shoots accordingly. The quality and direction of light can significantly impact the mood and appearance of your photos.
 Grapes on a dark surface
5. What Are The Best iPhone Photo Editing Apps?
The best iPhone photo editing apps offer a range of tools to enhance your images, from basic adjustments to advanced creative effects. Using these apps can transform your photos into polished and professional-looking works of art.
- Snapseed: A free app from Google with a wide range of editing tools, including selective adjustments, healing brush, and perspective correction.
- Adobe Lightroom Mobile: A powerful app with professional-grade editing tools, including presets, curves, and color mixing. Requires an Adobe Creative Cloud subscription for full access.
- VSCO: Known for its beautiful filters and editing tools, VSCO offers a range of presets inspired by classic film stocks. A subscription is required for full access to all filters.
- Darkroom: A fast and intuitive app with advanced editing tools, including RAW support, color grading, and batch processing.
- Afterlight: A simple and easy-to-use app with a range of filters, textures, and adjustment tools.
- TouchRetouch: An app specifically designed for removing unwanted objects from your photos, such as blemishes, power lines, or tourists.
- PicsArt: A versatile app with a wide range of editing tools, effects, and stickers, perfect for creating fun and creative images.
6. How To Capture Stunning Portrait Photos With Your iPhone?
Capturing stunning portrait photos with your iPhone involves understanding how to use lighting, composition, and your phone’s features to your advantage. These techniques will help you create beautiful and flattering portraits.
- Portrait Mode: Use Portrait mode to create a shallow depth of field, blurring the background and making your subject stand out. Adjust the “f” number to control the amount of blur.
- Natural Light: Position your subject near a window or in open shade to create soft, flattering light. Avoid direct sunlight, which can cause harsh shadows and squinting.
- Composition: Use the rule of thirds to position your subject within the frame. Place their eyes along the upper third line for a pleasing composition.
- Focus: Tap on your subject’s face to ensure it is in focus. Use AE/AF Lock to lock the focus and exposure if needed.
- Angles: Experiment with different angles to find the most flattering perspective. Shooting from slightly above can be slimming, while shooting from below can add drama.
- Expressions: Encourage your subject to relax and be natural. Capture candid moments and genuine expressions for more authentic portraits.
- Accessories: Use accessories like hats, scarves, or glasses to add interest and personality to your portraits.
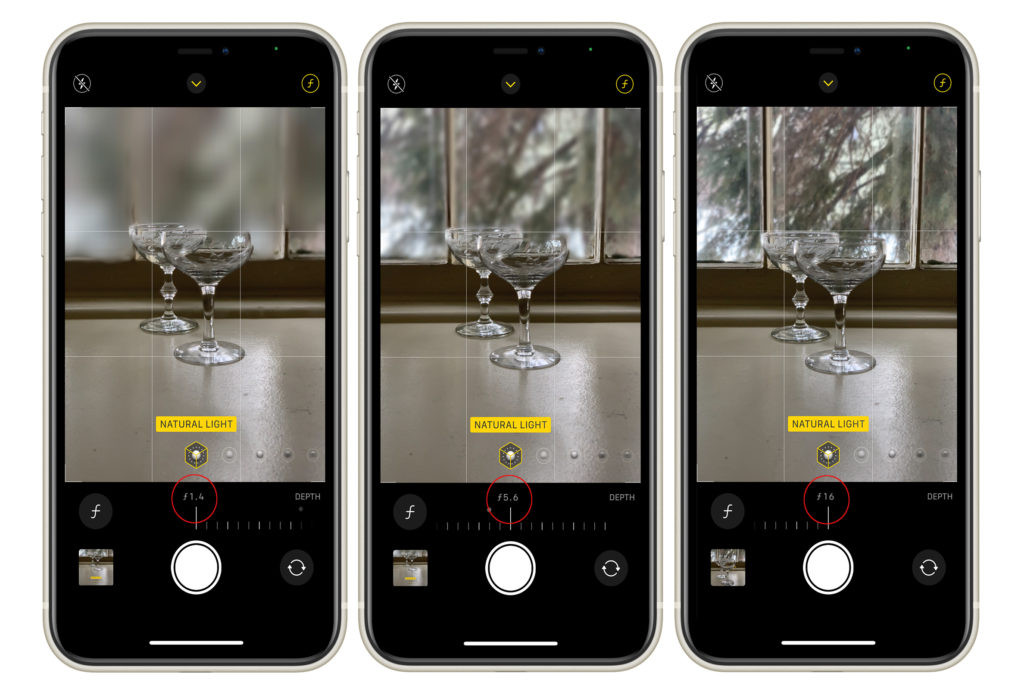 iPhone Portrait Mode for Photography
7. What Accessories Can Enhance Your iPhone Photography?
Enhancing your iPhone photography can be greatly improved with the right accessories. These tools can provide stability, better lighting, and expanded creative options.
- Tripod: A tripod provides stability, especially in low light or when shooting long exposures. Look for a tripod with an adjustable head for flexible positioning.
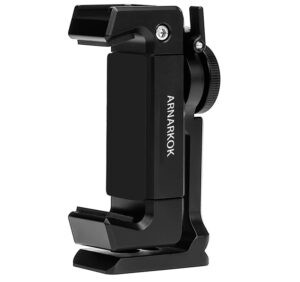
- Tripod Mount: A secure metal iPhone tripod mount ensures your phone stays safely attached to the tripod.
- Lenses: External lenses can expand your creative possibilities. Wide-angle lenses are great for landscapes, while macro lenses are perfect for close-up details. Moment lenses are highly recommended.
- Diffusers: Diffusers soften harsh sunlight, creating more even and flattering light.
- Foam Boards: White foam boards can be used to bounce light back onto your subject, filling in shadows. Black foam boards can add contrast and shadows.
- Remote Shutter: A Bluetooth remote shutter allows you to take photos without touching your phone, minimizing camera shake.
- Portable Charger: A portable charger ensures your phone stays powered during long shoots.
- Lighting: Portable LED lights can provide additional illumination in low-light situations.
METAL IPHONE TRIPOD MOUNT
Bluetooth Remote Camera Shutter for iPhone
 Smartphone Remove Shutter
iPhone Portable Charger
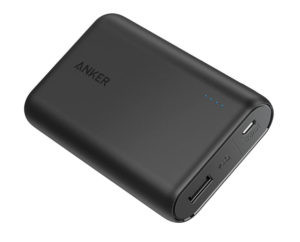 Portable charger for smartphones
8. How Can I Take Better Landscape Photos With My iPhone?
Taking better landscape photos with your iPhone involves capturing the beauty and scale of the natural world. These tips will help you create stunning landscape images.
- Wide-Angle Lens: Use a wide-angle lens to capture more of the scene. This is especially useful for expansive landscapes.
- Composition: Use the rule of thirds to create a balanced and engaging composition. Place the horizon along the upper or lower third line.
- Leading Lines: Use leading lines to draw the viewer’s eye into the scene. Roads, rivers, or fences can create a sense of depth and direction.
- Depth of Field: Maximize depth of field to keep both the foreground and background in focus. Tap on the screen to focus on a point in the distance.
- Golden Hour: Shoot during the golden hour for warm, soft light that enhances colors and creates a pleasing atmosphere.
- HDR: Use HDR to balance the light in high-contrast scenes, capturing details in both the shadows and highlights.
- Panorama: Use the panorama mode to capture wide, sweeping landscapes that are too large to fit in a single frame.
 iPhone photography lenses
9. What Are Some Common Mistakes To Avoid In iPhone Photography?
Avoiding common mistakes in iPhone photography can significantly improve the quality of your images. Being aware of these pitfalls will help you capture better photos more consistently.
- Dirty Lens: Regularly clean your iPhone lens to avoid blurry or hazy photos.
- Poor Lighting: Avoid shooting in direct sunlight or low-light conditions without proper lighting.
- Overusing Zoom: Avoid using digital zoom, which can degrade image quality. Instead, move closer to your subject or use an external lens.
- Ignoring Composition: Pay attention to composition principles like the rule of thirds, leading lines, and framing.
- Unstable Hand: Use a tripod or stabilize your hand to avoid blurry photos, especially in low light.
- Forgetting to Focus: Tap on the screen to focus on your subject. Use AE/AF Lock to lock the focus and exposure if needed.
- Over-Editing: Avoid over-editing your photos, which can make them look unnatural and artificial.
10. How To Share And Showcase Your iPhone Photos?
Sharing and showcasing your iPhone photos allows you to connect with others and display your creative work. Choosing the right platforms and presentation methods can enhance your impact.
- Social Media: Share your photos on social media platforms like Instagram, Facebook, and Twitter. Use relevant hashtags to reach a wider audience.
- Online Portfolios: Create an online portfolio on platforms like Behance, Dribbble, or your own website to showcase your best work.
- Photo Contests: Enter your photos in online or local photo contests for recognition and exposure.
- Prints: Print your photos and display them in your home or office. You can also create photo albums or books to preserve your memories.
- Exhibitions: Participate in local art exhibitions or photography shows to showcase your work to a live audience.
- Photo Communities: Join online photo communities like Flickr or 500px to share your photos, get feedback, and connect with other photographers.
- Personal Website: Create a personal website to showcase your photography, share your story, and connect with potential clients or collaborators.
FAQ: How to Take Better Photos with iPhone
1. How do I clean my iPhone camera lens?
Use a soft, lint-free cloth to gently wipe the lens. Avoid using abrasive materials or harsh chemicals. These wipes also work well with other sensitive surfaces that you don’t want to get scratched like computer screens and sunglasses.
2. How do I turn on the grid on my iPhone camera?
Go to Settings > Camera > Grid and toggle the switch to the “on” position. The grid will appear as a subtle overlay on your screen and won’t show up in your images. The grid will display two vertical lines and two horizontal lines creating nine squares. Where the grid lines intersect is where you could consider placing your subject.
3. How do I adjust focus and exposure on my iPhone?
Tap on the screen to set the focus. A yellow box will appear indicating where the phone is focusing. You’ll also see a sunshine icon next to the focus box. This helps you adjust your exposure. If you move the sunshine icon up, you’ll make your image brighter. If you move the sunshine icon down, you’ll make the image darker.
4. How do I lock focus and exposure on my iPhone?
Tap and hold your finger on the screen until you see “AE/AF Lock” at the top. To undo the locked focus, just tap the screen again and it will unlock.
5. Can I use the volume buttons to take photos on my iPhone?
Yes, when the camera app is open, the volume buttons turn into your shutter button.
6. How do I use Portrait mode on my iPhone?
Select Portrait mode in the Camera app. Click the “f ” in the circle in the upper right corner. Use the slider beneath the image to adjust how strong you want the blur to be.
7. What are some good iPhone photo editing apps?
Snapseed, Adobe Lightroom Mobile, VSCO, Darkroom, and Afterlight are all popular and effective photo editing apps for iPhone.
8. What accessories can improve my iPhone photography?
Tripods, lenses, diffusers, foam boards, remote shutters, and portable chargers can all enhance your iPhone photography experience.
9. How do I take better landscape photos with my iPhone?
Use a wide-angle lens, follow composition rules, maximize depth of field, shoot during the golden hour, and use HDR to capture stunning landscape photos.
10. What are some common mistakes to avoid in iPhone photography?
Avoid a dirty lens, poor lighting, overusing zoom, ignoring composition, an unstable hand, forgetting to focus, and over-editing your photos.
With these tips and tricks, you’re well-equipped to elevate your iPhone photography. Remember, photography is about knowing how to use the camera you have. For more in-depth tutorials, inspiring galleries, and a vibrant community of fellow photographers, visit dfphoto.net. Start exploring the world of iPhone photography and capture unforgettable moments. Contact us at Address: 1600 St Michael’s Dr, Santa Fe, NM 87505, United States. Phone: +1 (505) 471-6001.