Witnessing the ethereal dance of the Aurora Borealis, or Northern Lights, is a bucket-list experience for many. While professional photographers often rely on DSLRs to capture this celestial phenomenon, you might be surprised to learn that your iPhone is also capable of taking breathtaking aurora photos. Last night’s spectacular display proved just that! Although iPhones lack the advanced manual controls of dedicated cameras, with the right techniques and a little know-how, you can effectively capture the magic of the aurora with your smartphone. This guide will walk you through everything you need to know to take impressive aurora photos with your iPhone.
Essential iPhone Settings and Features for Aurora Photography
To maximize your iPhone’s potential for aurora photography, understanding and utilizing key settings is crucial.
Leverage Night Mode
If you own an iPhone 11 or a newer model, the built-in Night mode is your most powerful tool. This feature automatically detects low-light conditions and optimizes camera settings to capture more light. For aurora photography, you’ll want to manually adjust Night mode to extend the exposure time.
To activate and adjust Night mode:
- Open the Camera app.
- If it’s dark enough, the Night mode icon (a moon symbol) will appear at the top left of your screen.
- Tap the Night mode icon. Above the shutter button, you’ll see a slider indicating the suggested exposure time (usually automatic).
- Increase the exposure time to 5-10 seconds by sliding the timer to the maximum allowed, or even slightly beyond if your iPhone allows manual override depending on the iOS version. Longer exposures capture more light, crucial for the faint aurora.
For iPhones from the 12 Pro and later, shooting in RAW format is highly recommended. RAW files retain more image data, providing greater flexibility during post-processing to enhance colors and recover details in the aurora. To enable RAW capture:
- Go to Settings.
- Tap Camera.
- Select Formats.
- Toggle on Apple ProRAW under “Photo Capture.”
HDR and Smart HDR
High Dynamic Range (HDR) photography combines multiple exposures to capture a wider range of tones, from the darkest shadows to the brightest highlights. This is particularly useful when photographing the aurora against a dark sky, ensuring detail in both the faint lights and the blackness of space. Most iPhones automatically apply HDR intelligently (Smart HDR), but ensure it’s enabled for optimal results.
To check or enable HDR:
- Go to Settings.
- Tap Camera.
- Select Smart HDR (or simply HDR on older models) and ensure it is toggled on.
Location and Gear: Setting the Stage for Success
Capturing stunning aurora photos isn’t just about camera settings; your location and minimal gear play vital roles.
Find the Darkest Skies
Light pollution is the enemy of aurora photography. Artificial lights from cities and towns can severely diminish the visibility of the aurora’s subtle glow. To maximize your chances of capturing a vibrant aurora, you need to escape light pollution.
Seek out locations that are:
- Remote: Drive away from urban areas and towns.
- Dark Sky Areas: Parks, woodlands, open fields, and lakeshores far from city lights are ideal.
- Consider the Bortle Scale: For serious aurora hunters, understanding the Bortle scale (which measures night sky brightness) can help you pinpoint truly dark locations. Websites and apps dedicated to dark sky locations can be invaluable resources.
The darker your surroundings, the greater the contrast will be between the aurora and the night sky, leading to more impactful photos.
Tripod and Stabilization
Night mode and long exposure techniques require your iPhone to remain perfectly still. Any movement during the exposure will result in blurry images. A tripod is absolutely essential for sharp aurora photos.
Consider these stabilization options:
- Phone Tripod: Compact and lightweight phone tripods are readily available and easy to carry.
- Mini Tripod: Small tabletop tripods can be useful if you have a stable surface like a rock or car hood.
- Stable Surface: In a pinch, use a rock, wall, or any solid, stationary object to prop your iPhone against.
To further minimize camera shake, especially when pressing the shutter button, use these techniques:
- Timer: Set a 3-10 second timer within the Camera app. This gives you time to release your hand from the phone after pressing the shutter, eliminating movement.
- Bluetooth Remote Shutter: A Bluetooth remote allows you to trigger the shutter without touching your phone at all.
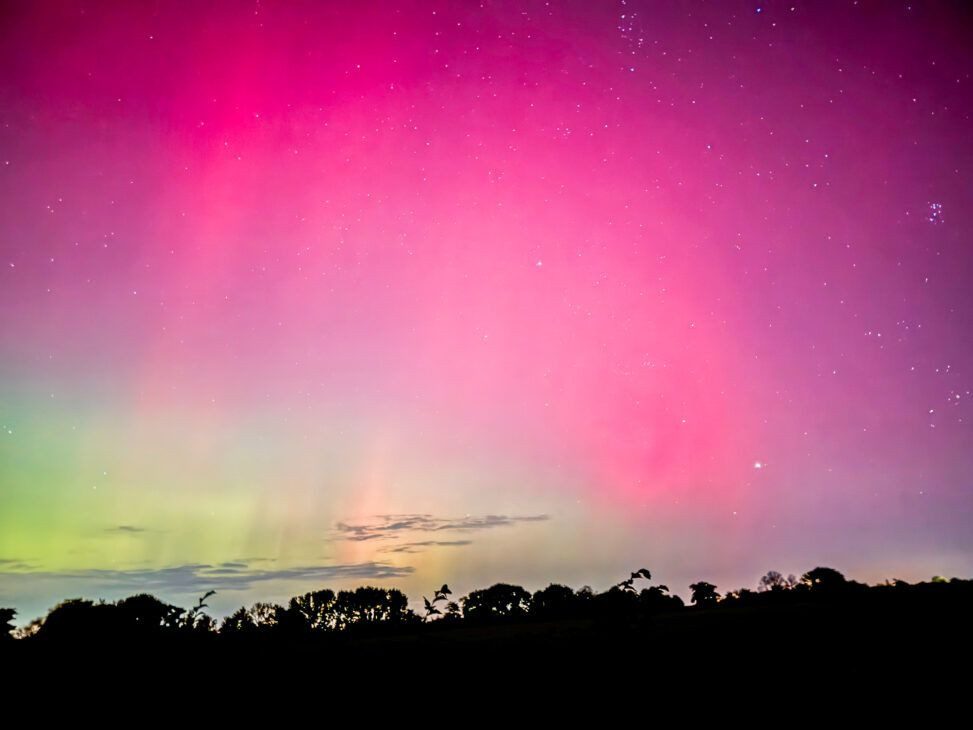 Northern lights captured on iPhone using night mode and tripod in a dark location
Mastering Long Exposure Techniques on iPhone
While Night mode is a great starting point, exploring long exposure apps can unlock even more creative control for aurora photography.
Built-in Night Mode vs. Long Exposure Apps
Night mode offers simplicity and ease of use, automatically adjusting settings. However, for more advanced control and customization, dedicated long exposure apps provide manual settings for shutter speed, ISO, and more.
- Night Mode (Pros): User-friendly, automatic adjustments, readily available.
- Night Mode (Cons): Limited manual control.
- Long Exposure Apps (Pros): Full manual control, advanced features, potentially better image quality in specific scenarios.
- Long Exposure Apps (Cons): Require learning curve, may cost extra.
Exploring Long Exposure Apps
Several excellent apps offer manual long exposure capabilities for iPhones:
- Slow Shutter Cam: This app is specifically designed for long exposures. In “Low Light” mode, set your shutter speed to 15-20 seconds as a starting point and adjust the ISO (sensitivity) based on the aurora’s brightness. Begin with a lower ISO (e.g., 100-400) and increase if the aurora is faint.
- ProCam: A professional-grade camera app offering extensive manual controls, including shutter speed and ISO. Use manual mode to set long exposures similar to Slow Shutter Cam.
- NightCap Camera: This app features a dedicated “Astronomy” mode specifically designed for capturing stars and auroras. Select “Long Exposure” within Astronomy mode and experiment with ISO settings between 800-1600 to enhance light capture.
Manual Adjustments: Exposure and Focus
Fine-tuning exposure and focus is critical for capturing sharp and well-exposed aurora images.
- Exposure Compensation: In Night mode or manual apps, you can often adjust exposure compensation. Tap and hold on the aurora on your iPhone screen to lock focus. Then, slightly slide your finger up or down to fine-tune exposure. If the aurora appears too bright or blown out, reduce the exposure.
- Focusing on Infinity: For sharp aurora and stars, you need to focus at infinity. Manually tap to focus on a bright star or any distant light source. Once focused, you can usually lock focus to prevent it from changing. Some apps offer a manual focus option where you can adjust the focus distance directly, setting it to infinity (∞).
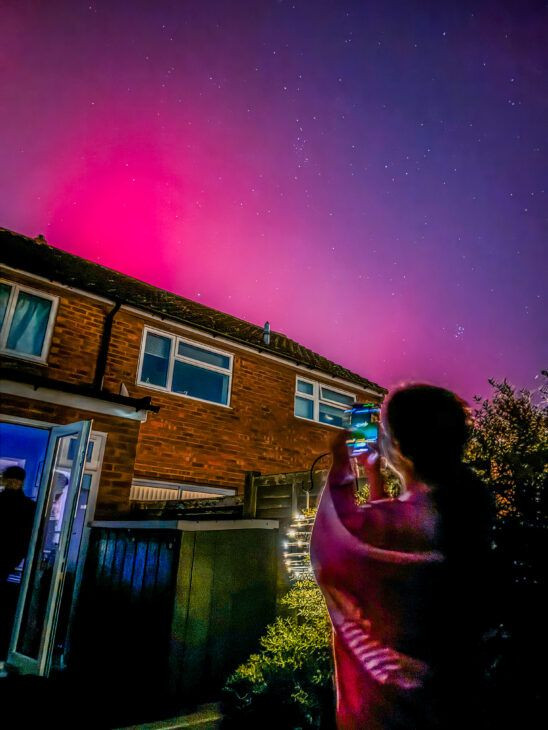 Close up of iPhone screen showing focus and exposure adjustments for aurora photography
Composition and Creativity in Aurora Photography
Beyond technical settings, creative composition elevates your aurora photos from snapshots to captivating images.
Foreground Elements
Don’t just capture the sky. Incorporating foreground elements adds depth, scale, and context to your aurora photos.
Experiment with:
- Silhouetted Trees: Trees against the aurora create a classic and dramatic composition.
- Reflective Lakes or Water: Reflections of the aurora in still water double the visual impact.
- Mountains or Landscapes: Including mountains or interesting landforms provides a sense of place and grandeur.
Portrait vs. Landscape
Try both portrait and landscape orientations to see which best captures the scene. Landscape is generally favored for auroras to capture the wide expanse of the sky, but portrait orientation can be effective for emphasizing vertical elements like trees or reflections. Experiment and see what works best for your scene.
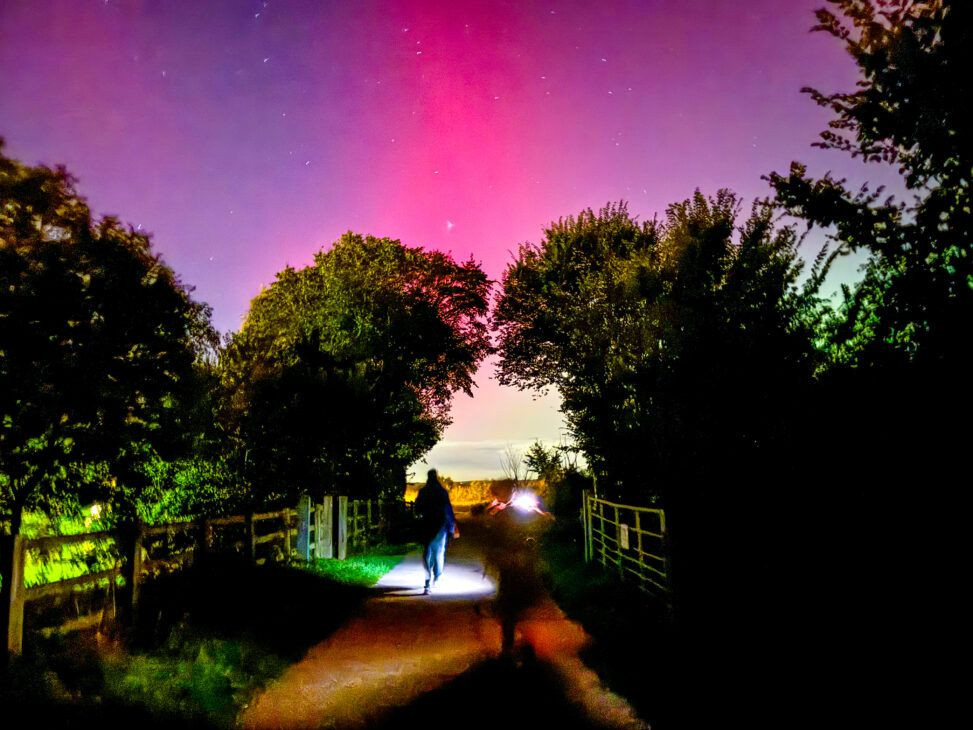 Aurora borealis reflected in a lake with silhouetted trees in the foreground, captured on iPhone
Practical Tips for a Successful Aurora Chase
Photographing the aurora involves more than just camera skills. Practical preparation is key to a comfortable and successful experience.
Battery Management in Cold Weather
Cold temperatures drain iPhone batteries rapidly. When photographing in potentially freezing conditions, battery management is crucial.
- Portable Power Bank: Bring a fully charged power bank to recharge your iPhone if needed.
- Keep Your iPhone Warm: Store your iPhone in an inner pocket close to your body when not actively shooting to help maintain its battery life.
Staying Warm Yourself
Aurora viewing often means long periods outdoors in cold conditions. Dress in warm layers, including:
- Thermal Base Layers: To wick away moisture and retain heat.
- Insulating Mid-Layers: Fleece or down jackets.
- Waterproof and Windproof Outer Layer: To protect against the elements.
- Gloves and Warm Hat: Essential for keeping extremities warm.
Post-Processing for Enhanced Results
Post-processing is often necessary to bring out the best in your aurora photos, especially when shooting in RAW.
Utilize editing apps like:
- Adobe Lightroom Mobile: Excellent for RAW editing, color adjustments, noise reduction, and enhancing aurora vibrancy.
- VSCO: Offers a range of filters and editing tools for stylistic enhancements.
- iPhone’s Built-in Editor: Surprisingly capable for basic adjustments like brightness, contrast, saturation, and color temperature.
Lightroom, in particular, provides greater control over color and noise reduction, which is very beneficial for aurora images.
Enjoy the Moment
While capturing stunning photos is rewarding, remember to take moments to simply appreciate the aurora with your own eyes. Put down your phone occasionally and immerse yourself in the magical experience of witnessing the Northern Lights dance across the sky.
With these tips and techniques, you can confidently capture the beauty of the Aurora Borealis using your iPhone. It may require some experimentation and patience to find the ideal settings for your specific conditions, but the results can be truly breathtaking. Embrace the adventure, and let your iPhone be your tool to preserve these unforgettable moments.
I captured these photos using my iPhone 15 Pro and edited them in Lightroom to enhance the colors. If you are considering upgrading your phone, you can find great deals on mobiles, especially around promotional periods.