Taking amazing photos is an art and a skill that can be learned and honed with the right knowledge and practice. While it might seem like a simple point-and-shoot process to beginners, professional photography involves a deep understanding of composition, lighting, and technique.
Whether you’re aiming to elevate your photography skills, build a stunning online portfolio, or even pursue photography professionally, mastering the fundamentals is key. This guide will walk you through essential techniques to help you take good pictures and transform them into truly amazing photos.
1. Master the Art of Composition for Stunning Images
Composition is the foundation of compelling photography. It’s about arranging elements within your frame in a way that is visually appealing and effectively communicates your intended message.
Choose a Captivating Focal Point
 Vintage SLR camera with a blurred background emphasizing the lens as the focal point
Every great photo has a focal point – the primary subject that draws the viewer’s eye. This could be anything: a striking tree, an architectural marvel, a person, or even a specific detail like their eyes. Before you even press the shutter, ask yourself: “What is the main point of interest I want to highlight?”
Once you’ve identified your focal point, all compositional techniques should work towards enhancing its impact. A strong focal point captivates the viewer and keeps them engaged with your image.
Embrace the Rule of Thirds for Balanced Composition
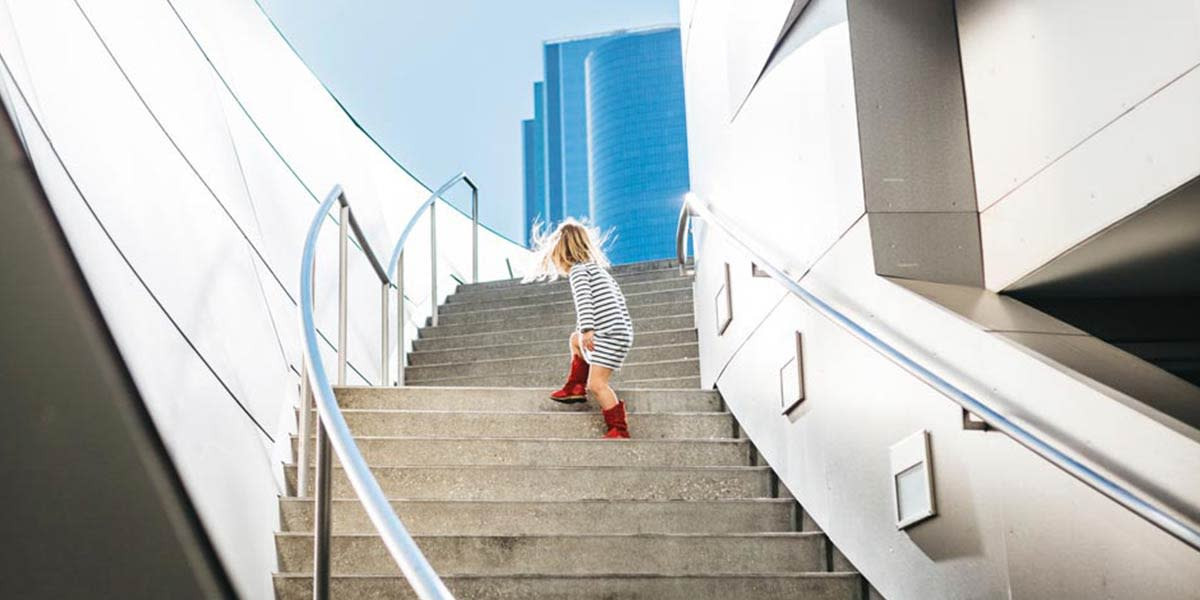 A young girl ascending stairs positioned on the rule of thirds grid, creating a dynamic composition
Instead of always centering your subject, the rule of thirds encourages you to create more dynamic and visually interesting compositions. Imagine your frame divided into a tic-tac-toe grid – two horizontal and two vertical lines splitting the image into thirds.
The rule suggests placing your key elements along these lines or at the intersection points. This off-center placement creates a better balance between the subject and the background, making your photos more engaging than simple centered shots. It’s a fundamental technique for learning how to take professional photos and moving beyond basic snapshots.
Utilize Leading Lines to Guide the Viewer’s Eye
Leading lines are compositional elements that act as visual pathways, directing the viewer’s gaze towards the focal point or through the scene. These lines can be formed by roads, fences, rivers, buildings, shadows, or any linear element within your frame.
Effective use of leading lines can create depth, direct attention, and even evoke specific emotions. Vertical lines can convey power and grandeur, while horizontal lines often suggest calmness and tranquility. Mastering leading lines is a powerful step in learning How To Take Amazing Photos by adding structure and narrative to your images.
Explore Perspective to Transform Your Storytelling
Perspective, the angle and viewpoint from which you shoot, dramatically impacts the message and mood of your photographs. Simply changing your shooting position can completely alter the viewer’s perception of the subject.
Shooting from a high angle (bird’s-eye view) can make subjects appear smaller and more vulnerable, while shooting from a low angle can make them seem dominant and imposing. Distance also plays a crucial role; shooting from afar can emphasize isolation, while close-ups can convey intimacy and power.
Experiment with different perspectives. Move around your subject, explore high and low angles, and observe how these changes affect the overall feeling and story of your photograph. This exploration is key to perfecting how to take amazing photos with unique viewpoints.
Create Depth to Add Dimension and Realism
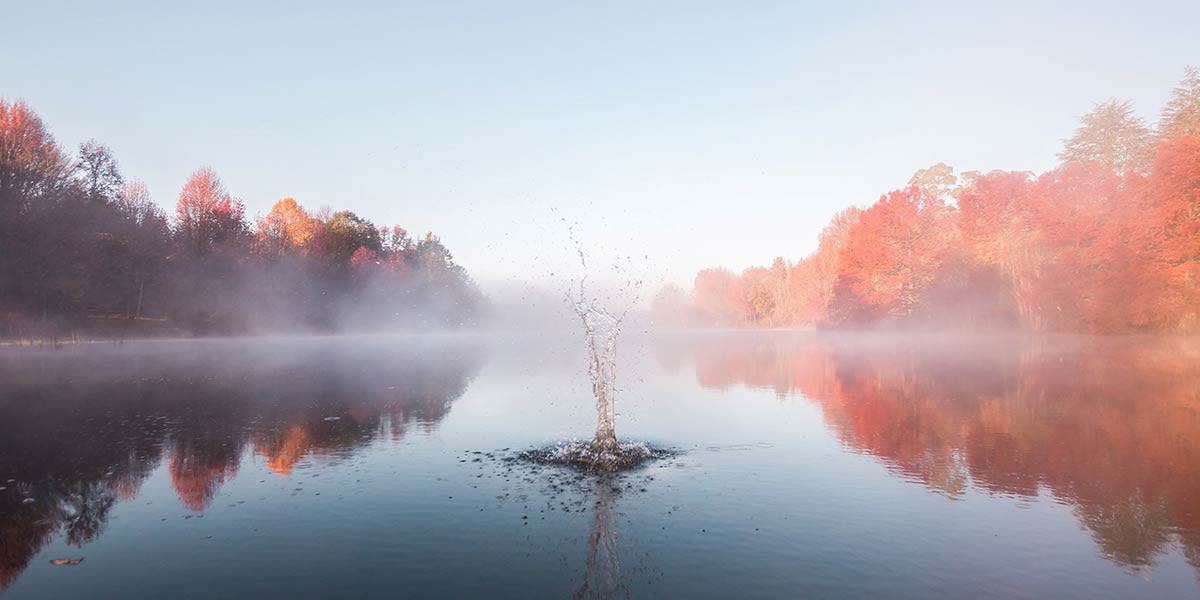 Foggy lake scene with a prominent rock in the foreground, showcasing depth and atmospheric perspective
Depth is crucial for transforming a flat, two-dimensional image into a scene that feels three-dimensional and immersive. Without depth, photos can appear lifeless. The most effective way to create depth is to include elements in the foreground, middle ground, and background.
Instead of photographing a portrait subject against a plain wall, position them slightly away from the background. Incorporate elements in the foreground, like foliage or architectural details, to lead the eye into the scene and create a sense of space. Understanding depth is a vital aspect of how to take professional photos with a sense of realism.
Master Bokeh to Make Your Subject Stand Out
 Couple walking with sparklers, blurred background bokeh emphasizing the subjects in sharp focus
Bokeh, the aesthetically pleasing blur in the out-of-focus areas of an image, is a powerful tool for creating depth and emphasizing your subject. It isolates the subject by softening the background, making it “pop” and draw immediate attention.
Achieving bokeh is often done by using a wide aperture (low f-number like f/2.8 or wider) on your lens and creating distance between your subject and the background. Zoom lenses at their maximum focal length are also effective for creating a shallow depth of field and strong bokeh. Learning to control and utilize bokeh effectively is a hallmark of understanding how to take professional photos with artistic flair.
Frame Your Shot for Enhanced Focus
Framing involves using natural or man-made elements within your scene to create a “frame” around your main subject. Doorways, arches, tree branches, or even window frames can serve as frames.
Framing not only directs the viewer’s attention to the focal point but also adds depth and context to the image. A frame close to the camera can act as a foreground element, further enhancing the sense of depth. By strategically using frames, you can create visually engaging photos that draw the viewer deeper into the scene.
Fill the Frame for Impactful Portraits and Close-ups
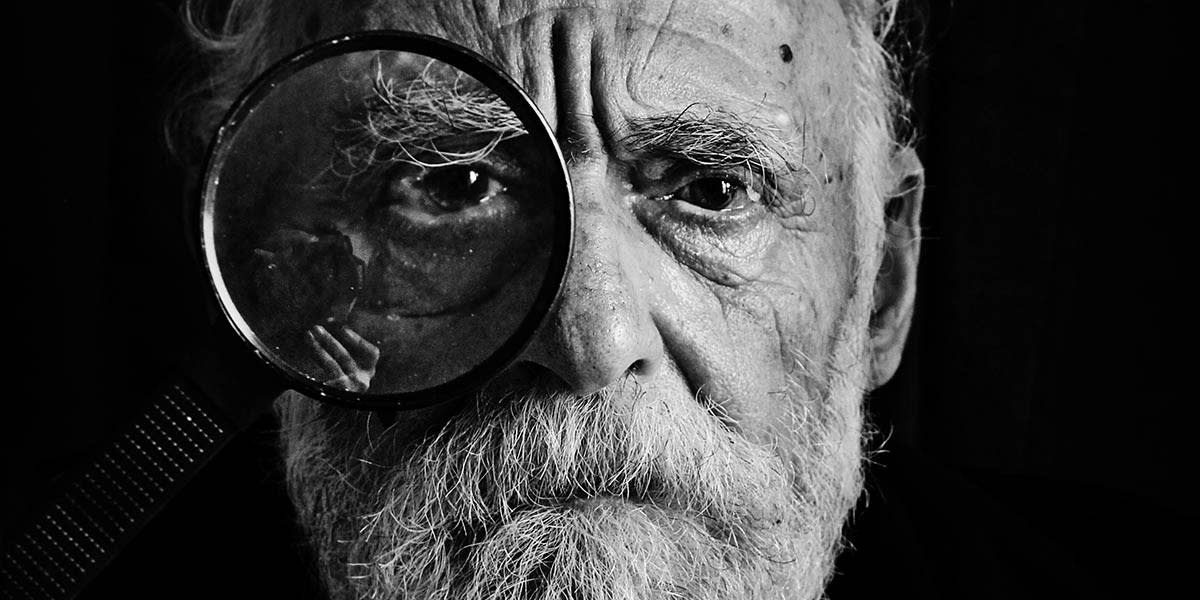 Close-up portrait of an elderly man using a magnifying glass, filling the frame with detail and emotion
“Fill the frame” is a classic piece of photography advice, particularly relevant for portraits and close-up shots. By minimizing empty space around your subject, you eliminate distracting background elements and maximize the impact of your focal point.
In portrait photography, for example, consider moving in closer to capture from the waist up or even just the face. This creates a more intimate and powerful image, focusing attention solely on the subject and their expression. Filling the frame is a straightforward technique that significantly improves the professionalism of your photos.
Seek Patterns and Symmetry – Then Break Them
Patterns and symmetry naturally attract the human eye. Incorporating them into your photographs can create visual appeal and a sense of order. Look for repeating shapes, lines, or colors in your environment.
However, to make your photos even more compelling, consider disrupting these patterns. An element that breaks the symmetry or pattern immediately becomes a focal point. Imagine a row of identical arches with one archway slightly different – this disruption becomes a point of interest and adds a layer of visual intrigue.
2. Harness the Power of Light: The Essence of Amazing Photography
 Photographer working in a machine shop using off-camera lighting to illuminate the subject
Lighting is arguably the most critical element in photography. It shapes the mood, reveals textures, and defines forms. Understanding and controlling light is essential for learning how to make your pictures look professional.
The first step is ensuring sufficient light to properly expose your subject. Insufficient light can lead to underexposed images lacking detail, or if using automatic settings, result in grainy photos due to high ISO or blurry photos from slow shutter speeds. Overly harsh light, on the other hand, can create unwanted harsh shadows and blown-out highlights. Pay close attention to the quality, direction, and intensity of light in your scene.
3. Elevate Your Lighting with Essential Equipment
Relying solely on natural or ambient light can be limiting. Professional photographers understand the importance of manipulating light and often utilize various lighting equipment to achieve their desired effects. You don’t need to break the bank to significantly improve your photography lighting.
Utilize Light Reflectors for Soft and Directional Light
A light reflector is an incredibly affordable and versatile tool for managing light. A 5-in-1 reflector, typically costing around $20, offers multiple surfaces for reflecting light – silver for bright, white for soft, gold for warm, and black for subtracting light.
Reflectors allow you to bounce existing light back onto your subject, fill in shadows, and create more flattering and even lighting. They are invaluable for portraiture, product photography, and any situation where you need to control and soften the light.
Master Flash and Diffusers for Controlled Illumination
 Action shot of a man jumping with white powder, illuminated by flash photography
Camera flashes, often built-in or external, provide a source of artificial light when ambient light is insufficient or when you want to create specific lighting effects. While built-in flashes can sometimes produce harsh, direct light, external flashes offer much greater control and flexibility.
External flashes can be aimed and bounced off surfaces like ceilings or walls to create softer, more diffused light. Flash diffusers, attachments that soften and spread the light, are also excellent tools for reducing harshness. Whether using an external flash or even your camera’s built-in flash with a diffuser, mastering flash photography expands your creative lighting possibilities.
Creative Lighting Techniques to Explore
Beyond basic illumination, light can be used creatively to evoke mood and drama. Experiment with techniques like:
- Backlighting: Placing the light source behind your subject to create silhouettes or rim light.
- Sidelighting: Lighting from the side to emphasize texture and shape.
- Golden Hour Photography: Shooting during the hour after sunrise and before sunset for warm, soft, and flattering light.
- Long Exposure at Night: Using slow shutter speeds to capture light trails and create ethereal night scenes.
 Sunset scene at a beachside pool, capturing the warm light and reflections of golden hour
4. Edit Your Photos Like a Pro: Refine and Enhance
It’s not just about capturing the photo; post-processing is an integral part of taking amazing photos. Photo editing allows you to refine your images, correct imperfections, and enhance their visual impact.
The Power of Photo Editing Software
Software like Adobe Photoshop is an industry standard for professional photographers. It offers a vast array of tools for everything from basic adjustments like cropping and brightness to complex manipulations and retouching.
While Photoshop is powerful, there are also excellent and more affordable alternatives like GIMP (free and open-source) and other user-friendly editing programs. The key is to choose software that suits your needs and learn to use it effectively.
Edit with a Subtle Touch: Less is Often More
A common mistake among beginners is over-editing. The goal of editing is to enhance, not to drastically alter, the image. Start with subtle adjustments to brightness, contrast, color balance, and sharpness.
Consider using presets as a starting point for a consistent look, then fine-tune them to suit each image. Overly processed photos can look artificial and detract from the natural beauty of the scene. Aim for a refined and polished look that remains realistic.
5. Take Control: Master Your Camera’s Manual Settings
 Close-up of camera settings adjusted for sunset photography, emphasizing manual control
Relying solely on automatic camera modes limits your creative control. While automatic settings can be convenient, they often don’t deliver the desired results in challenging or unique situations. Understanding and using manual settings is crucial for learning how to take good pictures consistently and creatively.
Manual mode allows you to control aperture, shutter speed, and ISO – the three pillars of exposure. Mastering these settings gives you the power to achieve specific effects like shallow depth of field, motion blur, or correct exposure in tricky lighting conditions. Familiarize yourself with your camera’s manual settings to unlock its full potential.
6. Invest in a Tripod: Your Stability Partner
A tripod is an essential piece of gear for any photographer serious about taking amazing photos. Even with steady hands, a tripod offers stability and opens up a range of creative possibilities.
The Versatility of a Tripod
Tripods are indispensable for:
- Sharp Images: Eliminating camera shake, especially in low light or when using slow shutter speeds.
- Long Exposures: Capturing motion blur, light trails, and smooth water effects.
- Tethered Photography: Connecting your camera to a computer for precise control and image review.
- Time-lapses and HDR Photography: Maintaining consistent framing between shots.
- Careful Composition: Allowing you to fine-tune your composition without having to constantly recompose.
A quality tripod doesn’t have to be expensive, and it will significantly enhance your ability to capture sharp, well-composed photos in various situations.
7. Consider Upgrading Your Photography Gear
While skill and technique are paramount, outdated or limited equipment can hold you back. If you’re serious about advancing your photography, consider upgrading your camera, lenses, and accessories as your budget allows.
Research different camera types (DSLR, mirrorless), lenses for specific genres (portrait, landscape, macro), and accessories that can enhance your workflow and creativity.
8. Showcase Your Amazing Photos Like a Professional
 Screenshot of a photography website template, highlighting the importance of online portfolios
Once you’re taking amazing photos, the next step is to present them professionally. An online photography portfolio is the ideal platform to showcase your work, attract clients, and share your vision with the world.
Build Your Online Photography Portfolio
Creating a photography website might seem daunting, but website builders specifically designed for photographers make it easy, even without coding experience. Look for platforms that offer:
- Customizable Templates: To create a unique and visually appealing website that reflects your style.
- Image-Focused Design: To prioritize the presentation of your photographs.
- Easy-to-Use Interface: For simple uploading, organizing, and managing your portfolio.
- Mobile Responsiveness: Ensuring your portfolio looks great on all devices.
- Free Trial Options: To test the platform before committing.
A professional online portfolio is your digital storefront, showcasing your best work and opening doors to new opportunities in the photography world.
Ready to transform your photography? By mastering composition, understanding light, refining your editing skills, and utilizing the right gear, you can take your photography to the next level and create truly amazing photos. Start practicing these techniques today and watch your skills – and your portfolio – flourish.