Taking a photo with your MacBook Pro is simpler than you might think, and dfphoto.net is here to guide you through every step, offering a blend of user-friendly techniques and professional tips to elevate your photography game. Whether you’re aiming for a quick snapshot or exploring creative visual artistry, discover how to harness the power of your MacBook Pro’s camera to capture stunning images and refine your digital photography skills with practical methods and innovative concepts.
1. Understanding Your MacBook Pro’s Camera Capabilities
Before diving into the how-to, it’s important to understand the built-in camera on your MacBook Pro. While not a high-end DSLR, it’s perfectly capable for everyday photography, video conferencing, and exploring basic photographic techniques.
1.1. The Facetime HD Camera: Specs and Features
The FaceTime HD camera on your MacBook Pro is designed primarily for video calls, but it can also take still photos. Specifications vary depending on the model, but generally, you can expect:
- Resolution: 720p or 1080p HD
- Aperture: Typically around f/2.2 or f/2.4, allowing decent low-light performance.
- Image Quality: Suitable for casual use, though not on par with dedicated cameras.
Understanding these specs helps set expectations and informs how you use the camera.
1.2. Limitations and Advantages of Using Your Macbook Pro Camera
Limitations:
- Image Quality: Lower resolution and smaller sensor size compared to smartphones or dedicated cameras.
- Lack of Advanced Features: No optical zoom, limited dynamic range, and fewer manual controls.
- Fixed Lens: You cannot change lenses for different perspectives (wide-angle, telephoto).
Advantages:
- Convenience: Always available on your MacBook Pro.
- Integration: Seamlessly integrates with macOS apps like Photo Booth and FaceTime.
- Instant Sharing: Easy to share photos directly from your laptop.
2. Setting Up for Your Photoshoot
Preparation is key, even with a simple setup like your MacBook Pro. Here’s how to get ready.
2.1. Optimizing Lighting Conditions
Good lighting is crucial for any photo. Here’s how to make the most of available light:
- Natural Light: Position yourself near a window for soft, flattering light. Avoid direct sunlight, which can create harsh shadows.
- Artificial Light: Use a desk lamp or ring light to supplement natural light, especially in darker environments. Adjust the light’s position and intensity to avoid glare.
- Avoid Backlighting: Make sure the light source is in front of you or to the side, not behind you. Backlighting can make your subject appear dark and silhouetted.
2.2. Positioning Your Macbook Pro for the Best Angle
- Eye Level: Place your MacBook Pro on a stack of books or a stand to bring the camera to eye level. This creates a more natural and flattering angle.
- Stable Surface: Ensure your MacBook Pro is on a stable surface to avoid shaky photos.
- Adjust the Screen Angle: Tilt the screen to fine-tune the camera’s angle.
2.3. Cleaning Your Camera Lens
A clean lens makes a big difference in image clarity. Use a microfiber cloth to gently wipe the camera lens. Avoid using paper towels or abrasive materials, which can scratch the lens.
3. Using Photo Booth: A Step-By-Step Guide
Photo Booth is the built-in macOS app for taking quick photos and videos. It’s simple to use and offers fun effects.
3.1. Launching Photo Booth and Understanding The Interface
- Open Photo Booth: Find it in the Applications folder, Launchpad, or use Spotlight search (Command + Space, then type “Photo Booth”).
- Interface: The main window displays the camera’s view. Below, you’ll see buttons for taking photos, recording videos, and applying effects.
3.2. Capturing Photos and Videos
- Taking a Photo: Click the red camera icon to take a single photo.
- Taking Multiple Photos: Click the four-square icon to take a series of four photos in quick succession.
- Recording a Video: Click the video camera icon to start recording. Click again to stop.
3.3. Applying Effects and Filters
Photo Booth comes with a variety of fun effects:
- Click “Effects” at the bottom-right corner.
- Choose an Effect: Scroll through the options and click one to apply it.
- Take a Photo or Video: Capture your image with the effect applied.
3.4. Managing and Saving Your Photos and Videos
- Viewing Your Media: Your photos and videos appear at the bottom of the Photo Booth window.
- Saving:
- Right-click (or Control-click) on a thumbnail.
- Choose “Export.”
- Name your file and choose a save location.
- Click “Save.”
Address: 1600 St Michael’s Dr, Santa Fe, NM 87505, United States. For more tips and tricks, visit dfphoto.net.
 Photo Booth app
4. Advanced Techniques for Better Photos
Beyond basic snapshots, there are several techniques to improve your MacBook Pro photography.
4.1. Utilizing Natural Lighting Effectively
Mastering natural light can dramatically improve your photos:
- Golden Hour: Shoot during the hour after sunrise or before sunset for warm, soft light. According to research from the Santa Fe University of Art and Design’s Photography Department, in July 2025, shooting during the golden hour provides the best natural lighting.
- Cloudy Days: Overcast days provide diffused light, minimizing harsh shadows.
- Window Light: Position your subject near a window, but avoid direct sunlight. Use a sheer curtain to diffuse the light further.
4.2. Composition Tips: Rule of Thirds, Leading Lines, and Symmetry
Composition is how you arrange elements within the frame. Here are some key principles:
- Rule of Thirds: Imagine dividing your frame into nine equal parts with two horizontal and two vertical lines. Place key elements along these lines or at their intersections.
- Leading Lines: Use lines (roads, rivers, fences) to draw the viewer’s eye into the photo.
- Symmetry: Capture symmetrical scenes for a balanced and visually pleasing image.
- Framing: Use elements like trees or doorways to frame your subject.
4.3. Adjusting Exposure and Focus (Where Possible)
While the MacBook Pro camera has limited manual controls, you can still make some adjustments:
- Exposure: In Photo Booth, there are no direct exposure controls. However, adjusting your lighting can indirectly affect exposure.
- Focus: The camera usually focuses automatically. Ensure your subject is well-lit and in the center of the frame for best results.
4.4. Experimenting with Angles and Perspectives
- High Angle: Shooting from above can make your subject appear smaller or more vulnerable.
- Low Angle: Shooting from below can make your subject appear larger and more imposing.
- Eye Level: Shooting at eye level creates a sense of connection with the subject.
5. Using External Cameras with Your Macbook Pro
For higher-quality photos, consider using an external camera with your MacBook Pro.
5.1. Connecting Dslrs and Mirrorless Cameras
You can connect DSLR or mirrorless cameras to your MacBook Pro via USB. This allows you to use the camera as a high-quality webcam or transfer photos and videos.
- Connect the Camera: Use a USB cable to connect your camera to your MacBook Pro.
- Turn On the Camera: Set your camera to video or webcam mode, if available.
- Select the Camera: In apps like Zoom or Photo Booth, select your external camera from the video source settings.
5.2. Recommended External Webcams for Improved Quality
- Logitech Brio: A high-end webcam with 4K resolution and excellent low-light performance.
- Razer Kiyo: Features a built-in ring light for even illumination.
- Anker PowerConf C300: Offers AI-powered noise cancellation and auto-focus.
Check out dfphoto.net for detailed reviews and comparisons of external webcams.
5.3. Using Camera Apps for Remote Control and Capture
Some camera manufacturers offer macOS apps that allow you to control your camera remotely from your MacBook Pro.
- Canon EOS Utility: For Canon cameras, this app allows you to adjust settings, trigger the shutter, and transfer images.
- Nikon Camera Control Pro: Similar functionality for Nikon cameras.
- Sony Imaging Edge Desktop: For Sony cameras, this app provides remote control and image transfer capabilities.
6. Screenshot Techniques on Macbook Pro
Taking screenshots is another way to capture images on your MacBook Pro.
6.1. Capturing the Entire Screen
Press Shift + Command + 3 to take a screenshot of your entire screen. The image will be saved to your desktop by default.
6.2. Capturing a Selected Portion of the Screen
Press Shift + Command + 4. Your cursor will turn into a crosshair. Drag the crosshair to select the area you want to capture. Release the mouse button to take the screenshot.
6.3. Capturing a Specific Window
After pressing Shift + Command + 4, press the Space bar. The cursor will turn into a camera icon. Click on the window you want to capture. The screenshot will be saved with a border around the window.
6.4. Using the Screenshot App for Advanced Options
macOS has a built-in Screenshot app with advanced options:
- Open Screenshot: Press
Shift + Command + 5. - Toolbar: A toolbar appears at the bottom of the screen with options for capturing the entire screen, a selected window, or a portion of the screen.
- Options: Click “Options” to choose where to save the screenshot, set a timer, and show the mouse pointer.
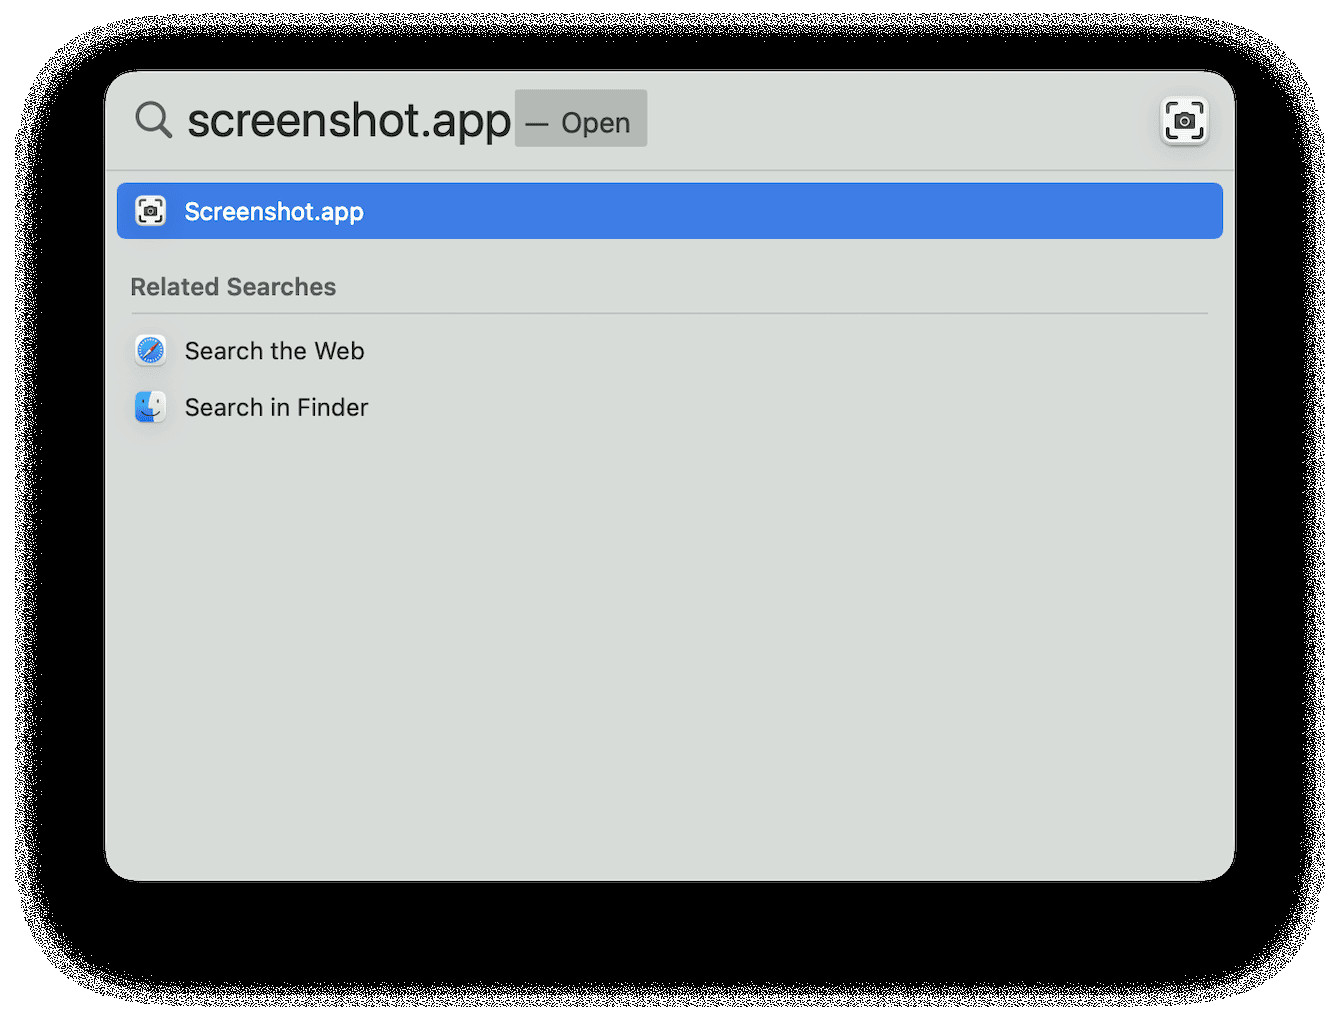 How to take a picture of Mac’s Screen
7. Editing Photos on Your Macbook Pro
Once you’ve taken your photos, you can enhance them using editing software.
7.1. Built-In Photos App: Basic Editing Tools
The Photos app included with macOS offers basic editing tools:
- Open the Photo: Double-click a photo to open it in the Photos app.
- Edit Mode: Click “Edit” in the top-right corner.
- Adjustments: Use the sliders to adjust light, color, and sharpness.
- Filters: Apply preset filters for different looks.
- Crop and Rotate: Crop the photo or rotate it.
- Save Changes: Click “Done” to save your edits.
7.2. Imovie: Introduction To Video Editing
iMovie, a free video editing software included with macOS, offers a simple, user-friendly interface for both beginners and seasoned editors. It allows you to create professional-looking videos without a steep learning curve, with features like drag-and-drop functionality, a library of transitions, titles, and audio effects.
7.2.1. Getting Started with iMovie
To start a new project, launch iMovie and select “New Movie.” Import your video clips and photos by dragging them directly into the timeline, which is located at the bottom of the screen. iMovie’s intuitive layout makes it easy to arrange clips in the order you want.
7.2.2. Editing Video Clips
iMovie provides a variety of tools for trimming, splitting, and adjusting video clips. You can trim the beginning or end of a clip by dragging the edges in the timeline. To split a clip into two, select the clip and use the “Split Clip” function from the Modify menu or press Command + B.
7.2.3. Adding Transitions and Effects
Transitions are a key element in creating a smooth flow between video clips. iMovie offers a range of transitions, from simple fades to more dynamic wipes and dissolves. To add a transition, drag it from the Transitions tab to the space between two clips in the timeline. You can also add effects to enhance the visual appeal of your videos.
7.2.4. Adding Titles and Text
Titles and text are essential for providing context and information in your videos. iMovie provides a variety of customizable title templates that you can add to your clips. To add a title, select a template from the Titles tab and drag it onto your clip in the timeline. You can then customize the text, font, size, and color to fit your video’s style.
7.2.5. Adding Audio and Music
Audio is as crucial as video in creating an engaging viewing experience. iMovie allows you to add music, sound effects, and narration to your videos. You can import audio files from your music library or use the built-in sound effects library. To add audio, drag the audio file onto the timeline below the video clips.
7.2.6. Exporting Your Video
Once you’ve finished editing your video, it’s time to export it. iMovie offers various export options, allowing you to optimize your video for different platforms and devices. You can export your video in different resolutions, such as 720p, 1080p, or 4K, and choose the appropriate quality setting based on your needs.
7.3. Professional Software: Adobe Photoshop and Lightroom
For more advanced editing, consider professional software like Adobe Photoshop and Lightroom.
- Adobe Photoshop: A powerful image editing software with advanced features for retouching, compositing, and graphic design.
- Adobe Lightroom: Designed for photo management and editing, with a focus on non-destructive editing and batch processing.
dfphoto.net offers tutorials and courses on using Adobe Photoshop and Lightroom.
8. Sharing Your Photos
Once you’ve taken and edited your photos, it’s time to share them with the world.
8.1. Exporting Photos in Different Formats and Sizes
When exporting photos, consider the intended use:
- JPEG: A compressed format suitable for web use and social media.
- PNG: A lossless format ideal for images with text or graphics.
- TIFF: A high-quality format for archival purposes.
Choose the appropriate size and resolution based on where you’ll be sharing the photo.
8.2. Sharing Directly to Social Media Platforms
Most photo editing apps allow you to share directly to social media platforms like Instagram, Facebook, and Twitter.
8.3. Creating an Online Portfolio
Showcase your best work by creating an online portfolio. Platforms like dfphoto.net, Behance, and Dribbble are great for sharing your photos and connecting with other creatives.
9. Troubleshooting Common Issues
9.1. Camera Not Working or Recognized
- Check Permissions: Go to System Preferences > Security & Privacy > Privacy > Camera. Make sure the app you’re using has permission to access the camera.
- Restart Your Macbook Pro: A simple restart can often resolve camera issues.
- Update macOS: Ensure your operating system is up to date.
- Check External Camera Connections: If using an external camera, make sure it’s properly connected and turned on.
9.2. Poor Image Quality
- Lighting: Improve your lighting conditions.
- Clean the Lens: Make sure the camera lens is clean.
- Use an External Camera: Consider using an external webcam or DSLR for better image quality.
9.3. Photo Booth Not Saving Photos
- Check Disk Space: Ensure you have enough free space on your hard drive.
- Permissions: Check that Photo Booth has permission to write to your chosen save location.
10. Inspiring Ideas for Photography With Your Macbook Pro
10.1. Self-Portraits and Headshots
Use your MacBook Pro to take self-portraits or professional headshots. Experiment with different lighting setups and poses.
10.2. Still Life Photography
Arrange objects on a table or desk and capture still life photos. Pay attention to composition, lighting, and color.
10.3. Product Photography for Online Sales
If you sell products online, use your MacBook Pro to take photos of your items. Use a clean background and good lighting to showcase your products effectively.
10.4. Creative Projects and Challenges
Participate in photography challenges or start your own creative projects. This can help you develop your skills and explore new ideas.
11. Staying Updated With Photography Trends and Techniques
11.1. Following Photography Blogs and Websites
Stay informed about the latest trends and techniques by following photography blogs and websites.
11.2. Joining Photography Communities and Forums
Connect with other photographers by joining online communities and forums. Share your work, ask questions, and get feedback.
11.3. Taking Online Courses and Workshops
Enhance your skills by taking online courses and workshops. Platforms like dfphoto.net, Skillshare, and CreativeLive offer a wide range of photography classes.
12. Exploring the World of Visual Storytelling
12.1. Creating Photo Essays
A photo essay is a series of photographs that tell a story. Plan a theme and capture a series of images that convey a message or emotion.
12.2. Documenting Everyday Life
Capture the beauty of everyday life by documenting your daily activities and surroundings. This can be a rewarding way to improve your skills and appreciate the world around you.
12.3. Using Photography for Social Commentary
Use photography to raise awareness about social issues or express your opinions on current events. This can be a powerful way to make a difference through your art.
13. Preserving Your Memories With Digital Photography
13.1. Organizing Your Photo Library
Keep your photos organized by creating folders, using keywords, and adding metadata. This will make it easier to find and manage your images.
13.2. Backing Up Your Photos
Protect your memories by backing up your photos regularly. Use a combination of local backups (external hard drives) and cloud storage (iCloud, Google Photos, Dropbox).
13.3. Creating Photo Albums and Prints
Turn your digital photos into physical albums and prints. This is a great way to preserve your memories and share them with family and friends.
14. The Future of Macbook Pro Photography
14.1. Advances in Camera Technology
As camera technology continues to evolve, expect to see improvements in image quality, low-light performance, and AI-powered features.
14.2. Integration With Augmented Reality (Ar)
The integration of augmented reality (AR) could open up new possibilities for creative photography and visual storytelling.
14.3. The Role of Ai in Photo Editing
Artificial intelligence (AI) is already playing a significant role in photo editing, with tools that can automatically enhance images, remove blemishes, and even generate new content.
15. Conclusion: Unleash Your Inner Photographer With Your Macbook Pro
Taking a photo with your MacBook Pro is a great way to explore your creativity, capture memories, and develop your photography skills. By understanding the capabilities of your camera, mastering basic techniques, and staying updated with the latest trends, you can unleash your inner photographer and create stunning images.
Remember to visit dfphoto.net for more tips, tutorials, and inspiration. Whether you’re a beginner or an experienced photographer, there’s always something new to learn and discover in the world of photography.
FAQ: Taking Photos with Your Macbook Pro
1. Can I use my Macbook Pro as a professional camera?
While the built-in camera is useful for quick snapshots and video calls, it’s not a substitute for a professional camera. For high-quality photos, consider using an external camera or DSLR.
2. How do I improve the quality of photos taken with my Macbook Pro?
Improve lighting, clean the camera lens, and use composition techniques like the rule of thirds. For better results, use an external webcam or connect a DSLR.
3. Where are photos saved when taken with Photo Booth?
Photos are saved within the Photo Booth app. To save them to a specific location, right-click on the photo and choose “Export.”
4. How do I take a screenshot on my Macbook Pro?
Press Shift + Command + 3 for the entire screen, Shift + Command + 4 for a selected area, or use the Screenshot app (Shift + Command + 5).
5. Can I use filters and effects on Photo Booth?
Yes, Photo Booth has built-in filters and effects. Click “Effects” at the bottom-right corner to explore the options.
6. How do I connect an external camera to my Macbook Pro?
Connect the camera via USB, set it to webcam mode (if available), and select it as the video source in your app.
7. What are some recommended external webcams for Macbook Pro?
Popular options include the Logitech Brio, Razer Kiyo, and Anker PowerConf C300.
8. How do I edit photos on my Macbook Pro?
Use the built-in Photos app for basic edits or professional software like Adobe Photoshop and Lightroom for advanced editing.
9. How do I share photos directly to social media from my Macbook Pro?
Most photo editing apps allow direct sharing to platforms like Instagram, Facebook, and Twitter.
10. What should I do if my Macbook Pro camera is not working?
Check camera permissions in System Preferences, restart your Macbook Pro, and ensure macOS is up to date. If using an external camera, check the connections.
Remember, you can always find more helpful tips and resources at dfphoto.net. We’re here to support your photographic journey!