MacBooks are equipped with built-in cameras that make capturing photos and videos incredibly easy. Whether you’re aiming to snap a quick selfie, participate in a video call, or record a presentation, your MacBook’s camera is a versatile tool right at your fingertips. This guide will walk you through everything you need to know about taking photos with your MacBook, ensuring you get the best possible results.
Understanding Your MacBook Camera
Most MacBooks feature an integrated camera subtly placed near the top edge of the display. This camera is designed for seamless user experience, activating automatically when you launch applications like FaceTime or Photo Booth, or when you utilize features such as Markup or head pointer. A small green light illuminates beside the camera whenever it’s active, providing a clear visual indicator of when you’re being recorded. Rest assured, the camera automatically deactivates once you close all applications or features that utilize it, safeguarding your privacy. For users concerned about application access, macOS provides granular control over which apps are permitted to use your camera, ensuring your peace of mind.
 iMac displaying Center Stage in use during a video call.
Capturing Photos and Recording Videos
Taking a photo or recording a video on your MacBook is straightforward. The primary application for capturing photos and videos directly is Photo Booth. This app is pre-installed on macOS and offers a simple interface for taking quick snapshots and video clips. Alternatively, many other applications, such as FaceTime and QuickTime Player, also allow you to record video using your MacBook’s camera.
To take a photo or video:
- Open Photo Booth (or your preferred camera app from Applications).
- Position yourself in the frame as desired.
- For photos, click the red camera icon to take a snapshot. For videos, click the red video icon to start and stop recording.
These applications typically offer basic controls and previews, allowing you to easily manage your photo and video capture directly from your MacBook.
Enhancing Your Video with Effects
MacBooks also offer fun and practical video effects that can be used within applications like FaceTime. These effects can enhance your video calls and recordings, adding a touch of personalization or professionalism.
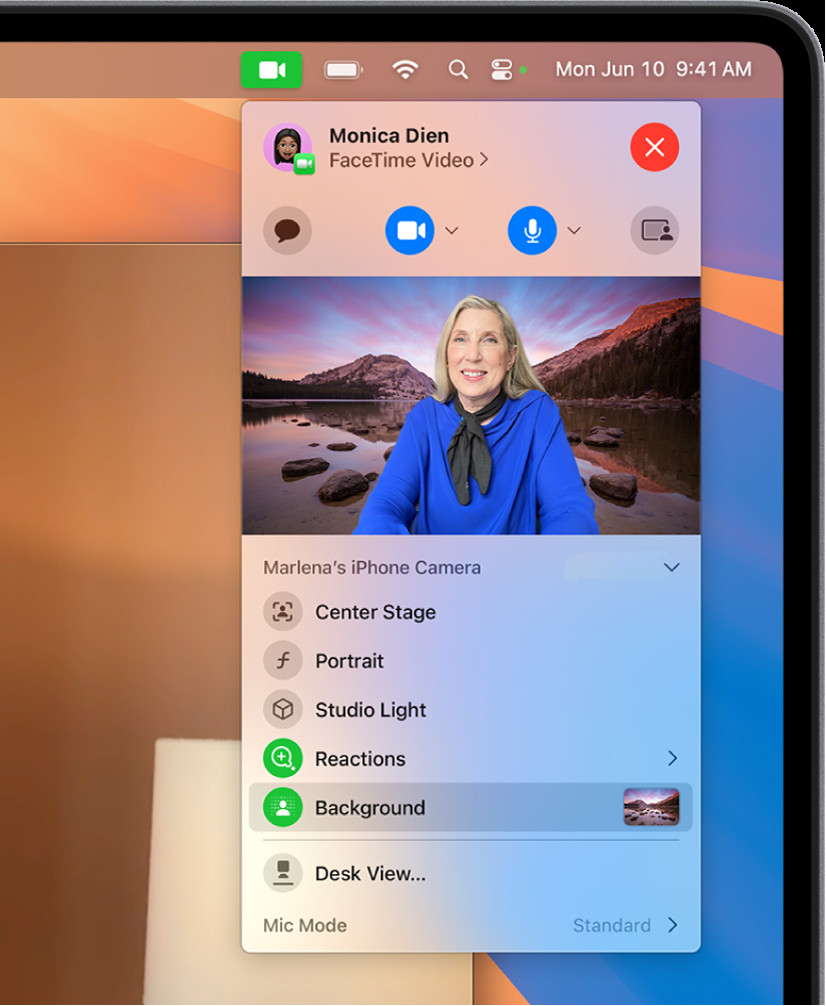 A person using a virtual background on a MacBook during a FaceTime call.
To access and use video effects during a FaceTime call:
- Initiate or answer a FaceTime call.
- Look for the Control Center icon in the menu bar (usually located in the top right corner of your screen).
- Click on the Video Effects option in the Control Center menu.
- Select from options such as Portrait Mode (to blur your background), Studio Light (to enhance facial lighting), or Reactions (for fun animations). You can also choose Backgrounds to blur or replace your real background with a virtual one.
Experiment with these effects to find what best suits your needs and adds a creative touch to your video presence.
Manually Adjusting Your Video Frame
For MacBooks equipped with a wide-angle camera, like those featuring Center Stage, you have the ability to manually adjust your video frame when Center Stage is disabled. This feature provides more control over what your viewers see.
To manually frame your video:
- Open an app that uses video, such as FaceTime.
- Ensure Center Stage is turned off via the Control Center menu bar icon if it’s currently active.
- Hover your pointer over the video preview window typically displayed.
- Use the controls that appear to:
- Zoom: Toggle between 0.5x and 1x for quick zoom adjustments, or use the slider for precise zoom levels.
- Pan: Click and drag within the preview to shift the focus area of your video.
- Recenter: Click the Recenter button to automatically re-frame and center your face.
- Reset Framing: Click the 0.5x or 1x button to revert to the default framing.
These manual framing tools are particularly useful for presentations or when you want to highlight specific elements in your background.
Tips for Improving MacBook Camera Image Quality
Even with a high-quality built-in camera, a few simple steps can significantly enhance your image quality when taking photos or videos on your MacBook:
- Clean Your Camera Lens: Use a soft, lint-free cloth to gently wipe the camera lens. Fingerprints and dust can noticeably degrade image clarity.
- Optimize Lighting: Ensure you are well-lit from the front. Natural light from a window facing you is ideal. Avoid strong backlighting, which can make you appear silhouetted.
- Stable Wi-Fi Connection: A poor Wi-Fi connection can sometimes affect video quality in real-time applications like FaceTime. Move closer to your Wi-Fi router and remove any obstructions to strengthen your signal.
- Check App Settings: Some applications offer settings to adjust camera quality. Explore the preferences or settings menu within your chosen app to see if there are options to enhance video resolution or quality.
By implementing these simple improvements, you can ensure that you are presenting yourself in the best possible light when using your MacBook’s camera.
Conclusion
Taking photos and videos with your MacBook is designed to be a user-friendly experience. With its built-in camera and intuitive software, your MacBook is a convenient tool for visual communication and content creation. By understanding the basic functions, exploring the available effects, and optimizing your setup, you can maximize the potential of your MacBook’s camera for all your photo and video needs. For more in-depth information, Apple Support offers detailed guides on specific applications and troubleshooting tips should you encounter any issues.