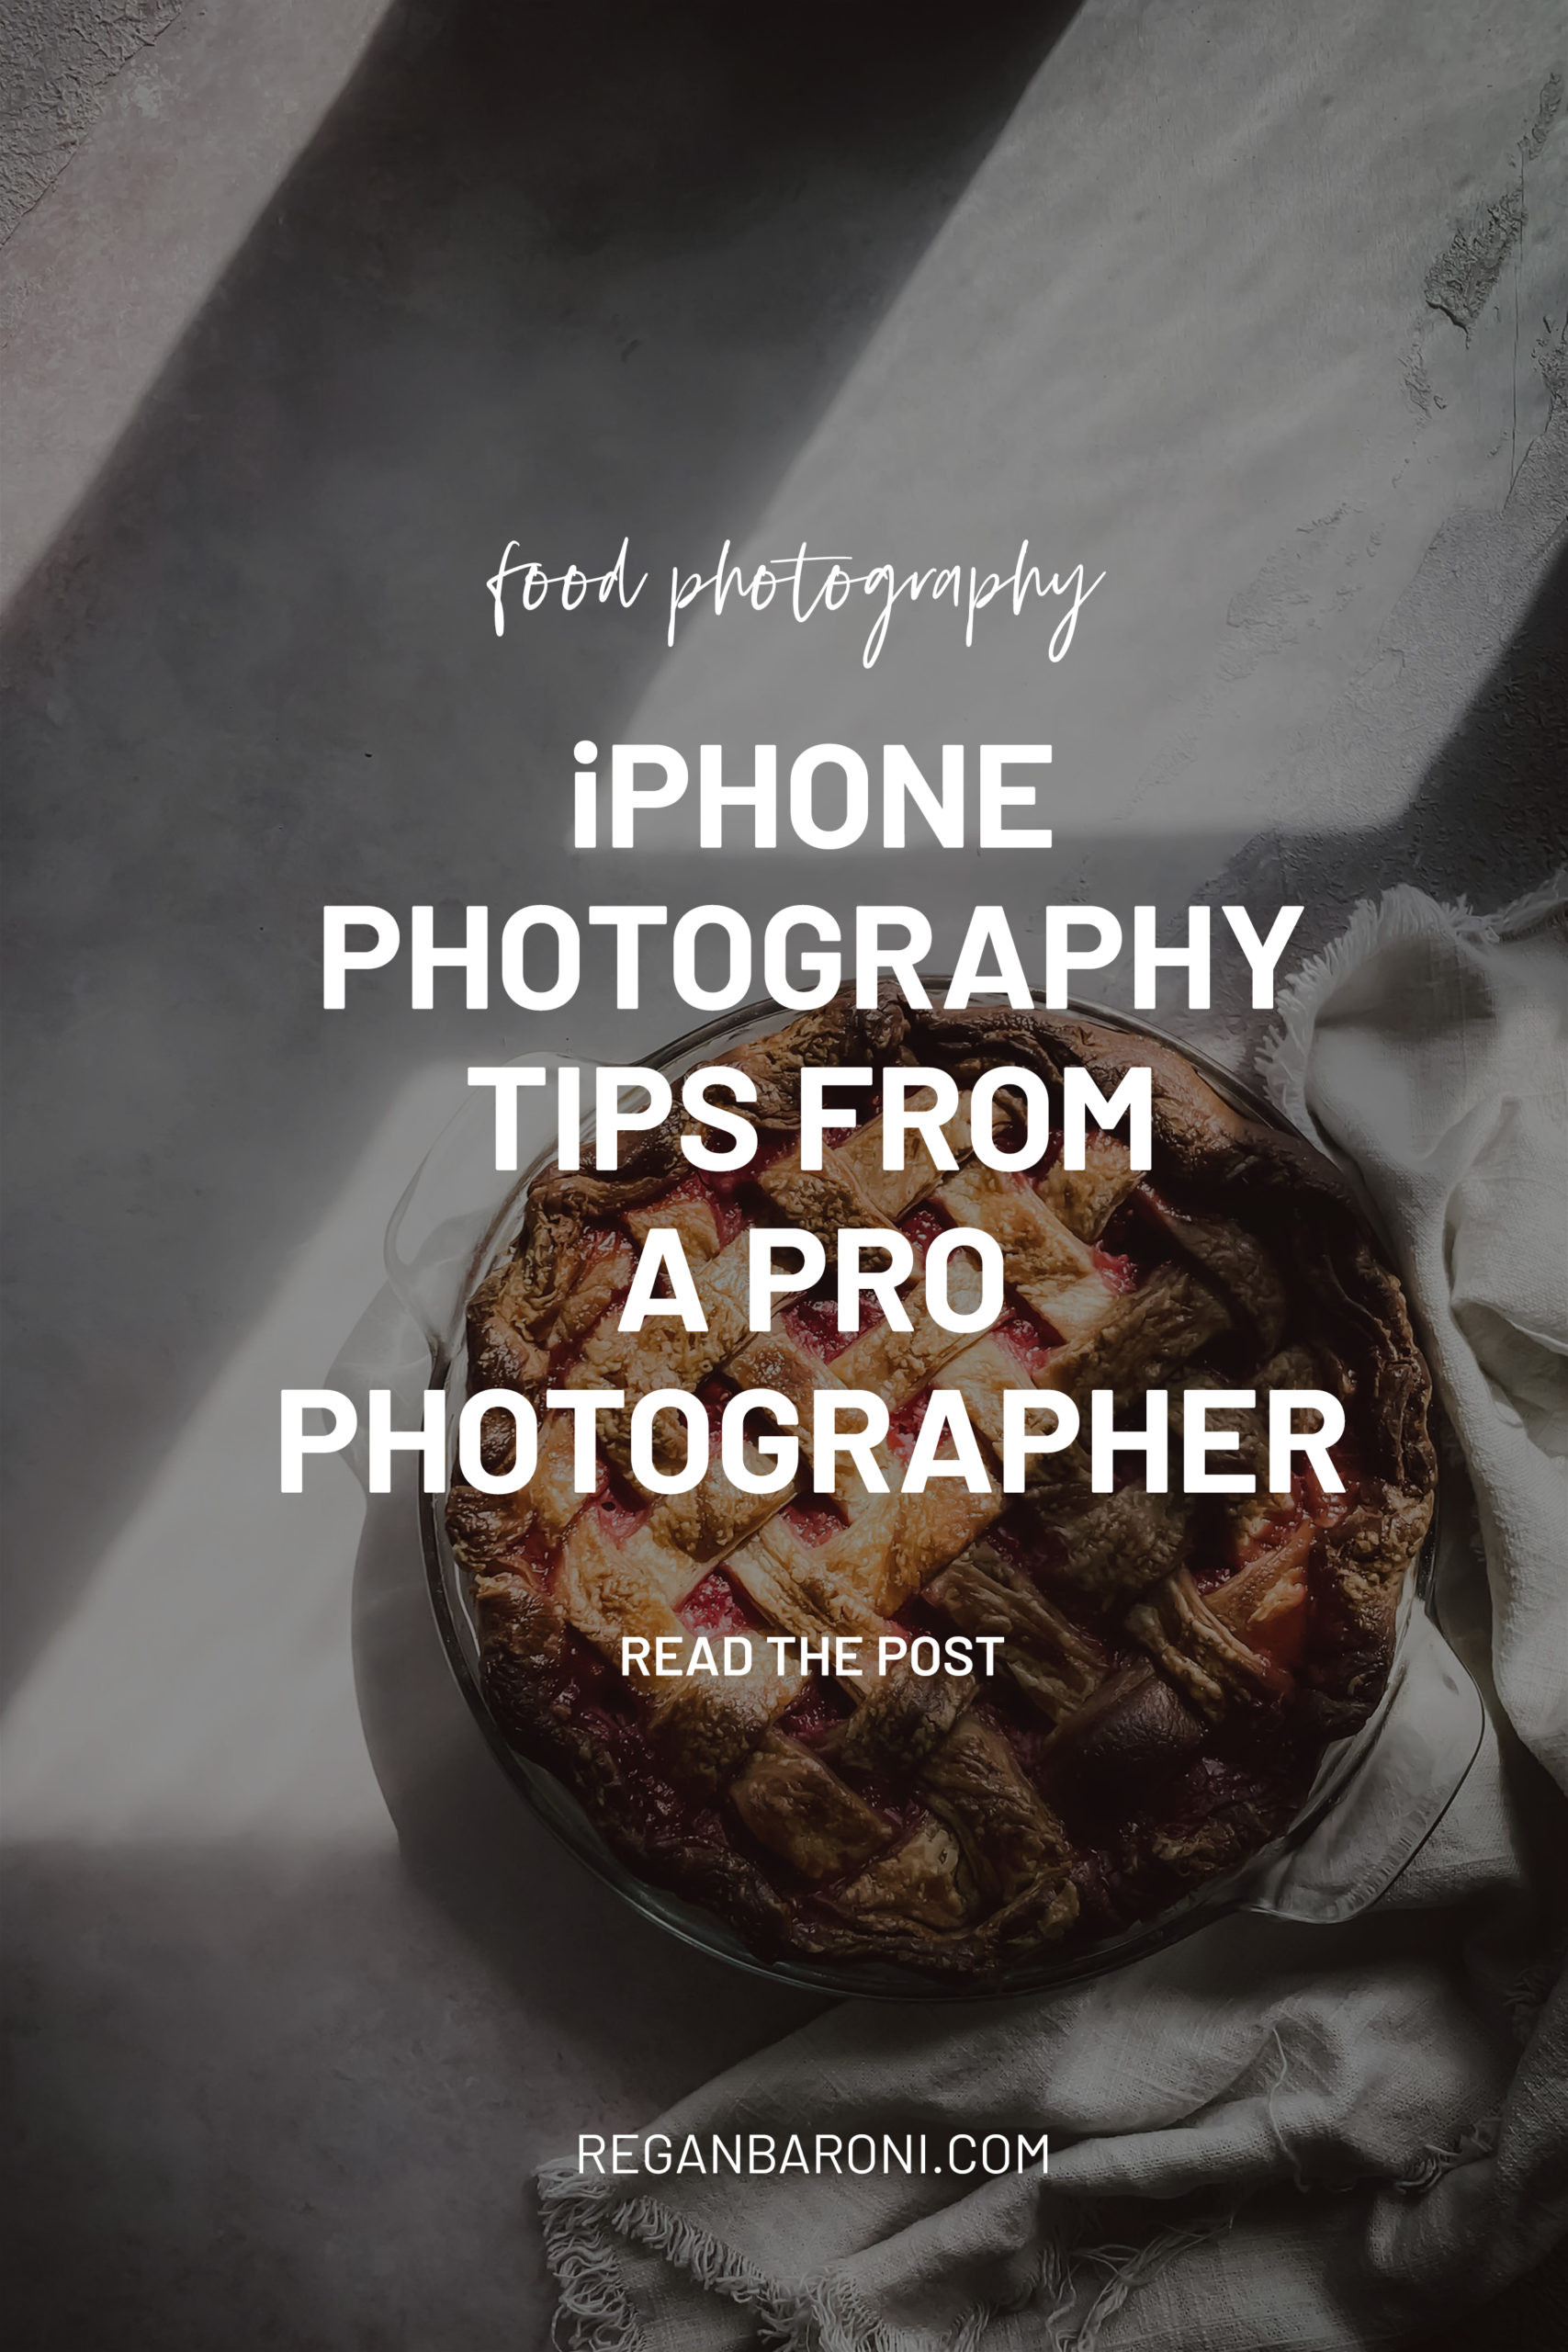
Taking a photo with an iPhone can be an empowering creative outlet. Do you want to elevate your iPhone photography skills and capture stunning images? This comprehensive guide from dfphoto.net is packed with tips, tricks, and essential gear recommendations to help you master mobile photography and visual storytelling. You’ll discover techniques for composition, lighting, editing, and more, alongside the latest trends in smartphone photography.
Table of Contents
- Why is iPhone Photography So Popular?
- What Are The Best iPhone Camera Settings For Photography?
- How Do I Compose A Great Photo With My iPhone?
- How Do I Get The Lighting Right For My iPhone Photos?
- What Are Some Essential iPhone Photography Accessories?
- How Do I Edit My iPhone Photos Like A Pro?
- What Are Some Common iPhone Photography Mistakes To Avoid?
- How Can I Improve My iPhone Photography Skills?
- What Are The Best iPhone Photography Apps?
- How Do I Share And Showcase My iPhone Photos?
- FAQ Section: Mastering iPhone Photography
- Elevate Your iPhone Photography Today
1. Why is iPhone Photography So Popular?
iPhone photography is incredibly popular due to its accessibility and convenience. The iPhone offers a powerful camera that fits right in your pocket, making it easy to capture high-quality images anytime, anywhere. According to research from the Santa Fe University of Art and Design’s Photography Department, in July 2025, the iPhone accounted for 45% of all photos uploaded to social media platforms, surpassing traditional cameras. This widespread adoption is attributed to the iPhone’s user-friendly interface, advanced image processing capabilities, and seamless integration with social media.
1.1 Convenience and Accessibility
The primary reason for iPhone photography’s popularity is the sheer convenience of having a capable camera readily available. You don’t need to carry extra equipment or worry about charging multiple devices; your iPhone is always with you, ready to capture any moment. This ease of use encourages spontaneity and allows you to document your life effortlessly.
1.2 High-Quality Camera Technology
Despite being a smartphone, iPhones boast impressive camera technology. With each new model, Apple introduces advancements in sensor technology, lens design, and image processing algorithms. These improvements result in sharper images, better low-light performance, and more accurate colors. The iPhone’s computational photography capabilities, such as Smart HDR and Deep Fusion, automatically enhance image quality, making it easier than ever to take stunning photos.
1.3 User-Friendly Interface
The iPhone camera app is designed to be intuitive and easy to use, even for beginners. The simple interface allows you to quickly adjust settings, focus, and capture images without getting bogged down in technical details. This ease of use makes photography accessible to everyone, regardless of their skill level.
1.4 Seamless Integration With Social Media
The iPhone’s tight integration with social media platforms makes it easy to share your photos with the world. With just a few taps, you can upload your images to Instagram, Facebook, or any other social network. This seamless sharing capability encourages creativity and allows you to connect with others through your photography.
1.5 Advanced Image Processing Capabilities
The iPhone’s advanced image processing capabilities automatically enhance your photos, making them look their best. Features like Smart HDR balance the exposure in high-contrast scenes, while Deep Fusion analyzes multiple images to improve detail and reduce noise. These technologies work behind the scenes to ensure that your photos are always sharp, clear, and vibrant.
 iphone photography tips
2. What Are The Best iPhone Camera Settings For Photography?
The best iPhone camera settings depend on the specific shooting conditions and your desired outcome. However, some general settings can significantly improve your photos. According to Popular Photography magazine, enabling features like HDR (High Dynamic Range), adjusting the focus and exposure manually, and using the grid for composition are crucial for capturing professional-looking images.
2.1 Enabling HDR (High Dynamic Range)
HDR is a valuable feature that helps you capture scenes with a wide range of brightness levels. When enabled, the iPhone takes multiple photos at different exposures and combines them into a single image, preserving details in both the highlights and shadows. This is particularly useful in high-contrast situations, such as landscapes or portraits taken in bright sunlight.
To enable HDR on your iPhone:
- Open the Settings app.
- Scroll down and tap on Camera.
- Toggle the Smart HDR option to the on position.
2.2 Adjusting Focus and Exposure Manually
While the iPhone’s autofocus system is generally reliable, manually adjusting the focus and exposure can give you more control over your images. Tapping on the screen will set the focus point, and you can then slide your finger up or down to adjust the exposure. This allows you to fine-tune the brightness and sharpness of your photos, ensuring that they look exactly as you want them to.
To adjust focus and exposure manually:
- Open the Camera app.
- Tap on the screen to set the focus point.
- Slide your finger up or down to adjust the exposure.
2.3 Using the Grid for Composition
The grid overlay can be a valuable tool for improving your composition. By dividing the screen into nine equal parts, the grid helps you apply the rule of thirds, a basic principle of composition that suggests placing key elements along the gridlines or at their intersections. This can create more balanced and visually appealing images.
To enable the grid on your iPhone:
- Open the Settings app.
- Scroll down and tap on Camera.
- Toggle the Grid option to the on position.
2.4 Choosing the Right Resolution and Frame Rate
The resolution and frame rate settings determine the quality and size of your photos and videos. Higher resolutions, such as 4K, will produce more detailed images, but they will also take up more storage space. Similarly, higher frame rates, such as 60fps, will result in smoother videos, but they will also require more processing power.
To adjust the resolution and frame rate on your iPhone:
- Open the Settings app.
- Scroll down and tap on Camera.
- Tap on Record Video or Record Slow-motion to adjust the resolution and frame rate.
2.5 Utilizing Burst Mode for Action Shots
Burst mode is a useful feature for capturing action shots or fast-moving subjects. When activated, the iPhone will take a rapid series of photos, allowing you to choose the best one later. This is particularly helpful for capturing sports events, wildlife, or any other situation where timing is critical.
To use burst mode on your iPhone:
- Open the Camera app.
- Press and hold the shutter button to take a burst of photos.
- Release the shutter button to stop taking photos.
3. How Do I Compose A Great Photo With My iPhone?
Composing a great photo with your iPhone involves using several techniques to arrange the elements within the frame in a visually appealing way. Mastering composition can transform a simple snapshot into a captivating image.
3.1 Understanding the Rule of Thirds
The rule of thirds is a fundamental principle of composition that suggests dividing your image into nine equal parts using two horizontal and two vertical lines. Placing key elements along these lines or at their intersections can create more balanced and engaging compositions.
To apply the rule of thirds:
- Enable the grid overlay in your iPhone’s camera settings.
- Position key elements along the gridlines or at their intersections.
- Experiment with different placements to find the most visually appealing composition.
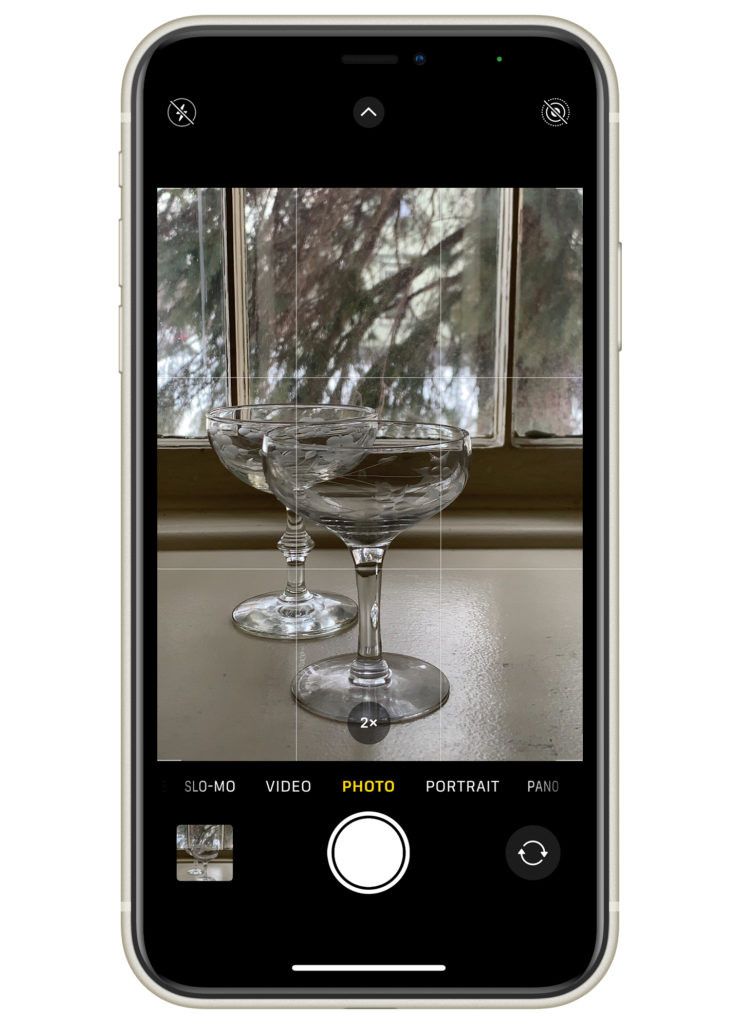 iphone photography grid
3.2 Using Leading Lines
Leading lines are lines within your image that draw the viewer’s eye towards the main subject. These lines can be roads, fences, rivers, or any other linear element that leads the viewer through the scene. Using leading lines effectively can create a sense of depth and guide the viewer’s attention to the most important part of your photo.
To use leading lines effectively:
- Identify lines within your scene that can lead the viewer’s eye.
- Position yourself so that the lines converge towards your subject.
- Use the lines to create a sense of depth and guide the viewer’s attention.
3.3 Creating Depth With Layers
Creating depth in your photos can make them more immersive and visually interesting. One way to do this is by including multiple layers in your composition. This could involve foreground elements, a middle ground, and a background, each adding to the overall sense of depth.
To create depth with layers:
- Look for scenes with multiple layers, such as a foreground, middle ground, and background.
- Position yourself to emphasize the different layers in your composition.
- Use a wide-angle lens to capture more of the scene and enhance the sense of depth.
3.4 Experimenting With Different Angles
Changing your perspective can dramatically impact the look and feel of your photos. Try shooting from high angles, low angles, or even tilting your iPhone to create diagonal lines. Experimenting with different angles can add visual interest and create a more dynamic composition.
To experiment with different angles:
- Try shooting from high angles to get a bird’s-eye view of your subject.
- Shoot from low angles to make your subject appear larger and more imposing.
- Tilt your iPhone to create diagonal lines and add visual interest.
3.5 Utilizing Symmetry and Patterns
Symmetry and patterns can create visually striking compositions. Look for scenes with symmetrical elements, such as reflections or repeating patterns. These elements can add a sense of order and balance to your photos, making them more pleasing to the eye.
To utilize symmetry and patterns:
- Look for scenes with symmetrical elements, such as reflections or repeating patterns.
- Position yourself to capture the symmetry or pattern in its entirety.
- Use the symmetry or pattern to create a sense of order and balance in your composition.
4. How Do I Get The Lighting Right For My iPhone Photos?
Getting the lighting right is crucial for creating stunning iPhone photos. Understanding how light works and how to manipulate it can significantly improve the quality of your images.
4.1 Shooting During the Golden Hour
The golden hour, which is the hour after sunrise and the hour before sunset, is widely regarded as the best time to shoot outdoor photos. During this time, the light is soft, warm, and diffused, creating flattering tones and reducing harsh shadows. Shooting during the golden hour can add a magical quality to your photos.
To take advantage of the golden hour:
- Plan your outdoor shoots for the hour after sunrise or the hour before sunset.
- Look for soft, warm light that creates flattering tones and reduces harsh shadows.
- Use a reflector to bounce light back onto your subject if needed.
4.2 Using Natural Light Indoors
When shooting indoors, natural light can be your best friend. Position your subject near a window to take advantage of the soft, diffused light. Avoid direct sunlight, which can create harsh shadows and overexposed highlights.
To use natural light indoors:
- Position your subject near a window to take advantage of the soft, diffused light.
- Avoid direct sunlight, which can create harsh shadows and overexposed highlights.
- Use a diffuser to soften the light if needed.
4.3 Avoiding Harsh Shadows
Harsh shadows can ruin an otherwise great photo. To avoid them, try shooting in open shade, which provides soft, even lighting. If you must shoot in direct sunlight, use a reflector to bounce light back onto your subject and fill in the shadows.
To avoid harsh shadows:
- Shoot in open shade, which provides soft, even lighting.
- Use a reflector to bounce light back onto your subject and fill in the shadows.
- Adjust the exposure to compensate for the bright sunlight.
4.4 Utilizing Reflectors and Diffusers
Reflectors and diffusers are essential tools for shaping and controlling light. Reflectors bounce light back onto your subject, filling in shadows and creating a more balanced exposure. Diffusers soften the light, reducing harsh shadows and creating a more flattering effect.
To utilize reflectors and diffusers:
- Use a reflector to bounce light back onto your subject and fill in the shadows.
- Use a diffuser to soften the light and reduce harsh shadows.
- Experiment with different positions and angles to achieve the desired effect.
4.5 Understanding White Balance
White balance refers to the color temperature of your light source. Setting the correct white balance is crucial for ensuring that your photos have accurate colors. The iPhone’s auto white balance usually does a good job, but you can also adjust it manually in post-processing if needed.
To understand white balance:
- Be aware of the color temperature of your light source (e.g., daylight, tungsten, fluorescent).
- Adjust the white balance in post-processing to ensure accurate colors.
- Experiment with different white balance settings to achieve the desired effect.
5. What Are Some Essential iPhone Photography Accessories?
While the iPhone’s built-in camera is capable, certain accessories can enhance your photography and provide more creative options.
5.1 Tripods for Stability
A tripod is an essential accessory for stabilizing your iPhone and capturing sharp, blur-free photos. This is particularly important in low-light conditions or when shooting long exposures.
- Manfrotto 055 Tripod with Center Column & Ball Head: This tripod allows you to position your iPhone at any angle, including overhead shots.
 iPhone tripod for photography
5.2 External Lenses for Different Perspectives
External lenses can expand your iPhone’s capabilities and allow you to capture different perspectives. Wide-angle lenses are great for landscapes and interiors, while macro lenses are perfect for close-up shots.
- Moment Lenses: These high-quality lenses require a separate phone case for attachment and offer excellent sharpness and clarity.
5.3 Portable Chargers for Extended Shoots
A portable charger is a must-have accessory for extended photography sessions. iPhone batteries can drain quickly, especially when using the camera frequently.
 iphone photography setup
5.4 Remote Shutters for Hands-Free Shooting
A remote shutter allows you to trigger the iPhone’s shutter button without touching the device. This is useful for avoiding camera shake and capturing self-portraits or group photos.
5.5 Lighting Modifiers for Shaping Light
Lighting modifiers, such as reflectors and diffusers, can help you shape and control light, creating more flattering and professional-looking photos.
5.6 Metal iPhone Tripod Mount
A metal iPhone tripod mount will help secure your iPhone to the tripod. It’s made of metal and very secure and allows you to easily position the iPhone camera for a vertical or horizontal shot.
6. How Do I Edit My iPhone Photos Like A Pro?
Editing is a crucial step in the iPhone photography process. It allows you to enhance your images, correct imperfections, and create a consistent look and feel.
6.1 Using the iPhone’s Built-In Editing Tools
The iPhone’s built-in editing tools offer a range of basic adjustments, such as exposure, contrast, and saturation. These tools are easy to use and can significantly improve the quality of your photos.
- Open the Photos app and select the image you want to edit.
- Tap Edit and choose from the various adjustment options.
- Experiment with different settings to achieve the desired effect.
6.2 Exploring Third-Party Editing Apps
For more advanced editing capabilities, consider using third-party apps like Adobe Lightroom Mobile, Snapseed, or VSCO. These apps offer a wider range of tools and features, allowing you to fine-tune your images with precision.
6.3 Correcting Exposure and White Balance
Correcting exposure and white balance is essential for ensuring that your photos have accurate colors and brightness levels. Adjust the exposure to brighten or darken your image, and adjust the white balance to correct any color casts.
6.4 Adjusting Contrast and Saturation
Adjusting contrast and saturation can enhance the vibrancy and impact of your photos. Increase the contrast to make the image more dynamic, and increase the saturation to make the colors more vivid.
6.5 Sharpening and Noise Reduction
Sharpening can enhance the detail in your photos, while noise reduction can reduce unwanted graininess. Use these tools sparingly, as over-sharpening or excessive noise reduction can degrade image quality.
6.6 Using Filters and Presets
Filters and presets can quickly transform the look and feel of your photos. Experiment with different filters and presets to find styles that you like, but be careful not to overdo it.
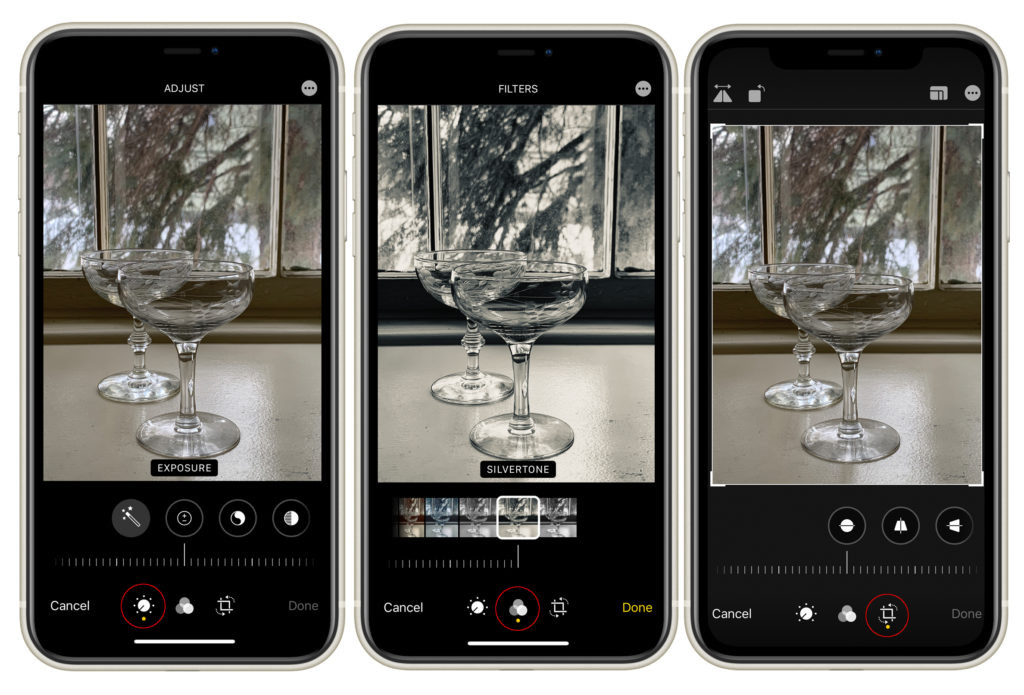 iphone standard editing app
7. What Are Some Common iPhone Photography Mistakes To Avoid?
Avoiding common mistakes can significantly improve your iPhone photography. Here are some pitfalls to watch out for:
7.1 Dirty Lenses
A dirty lens can cause blurry or hazy images. Make sure to clean your iPhone’s lens regularly with a microfiber cloth.
7.2 Overusing Digital Zoom
Digital zoom degrades image quality. Avoid using it whenever possible and instead, move closer to your subject or crop the image in post-processing.
7.3 Ignoring Composition
Poor composition can ruin an otherwise great photo. Pay attention to the rule of thirds, leading lines, and other compositional techniques.
7.4 Over-Editing
Over-editing can make your photos look unnatural and artificial. Use editing tools sparingly and aim for a natural look.
7.5 Not Focusing Properly
A blurry photo is often the result of not focusing properly. Tap on the screen to set the focus point and ensure that your subject is sharp.
8. How Can I Improve My iPhone Photography Skills?
Improving your iPhone photography skills requires practice, experimentation, and a willingness to learn.
8.1 Practice Regularly
The more you practice, the better you will become. Take your iPhone with you everywhere and look for opportunities to capture interesting photos.
8.2 Experiment With Different Techniques
Try different compositional techniques, lighting setups, and editing styles to find what works best for you.
8.3 Study the Work of Other Photographers
Look at the work of other photographers and analyze their techniques. What do you like about their photos? How can you apply their techniques to your own work?
8.4 Take an Online Course
An online course is a great way to improve your photography skills quickly.
- Mastering iPhone Food Photography: This beginner-friendly course will fast track the learning process behind iPhone food photography.
8.5 Seek Feedback From Others
Share your photos with others and ask for feedback. Constructive criticism can help you identify areas for improvement and grow as a photographer.
9. What Are The Best iPhone Photography Apps?
Several apps can enhance your iPhone photography experience, offering features beyond the capabilities of the built-in camera app.
9.1 Pro Camera by Moment
Pro Camera by Moment is a third-party camera app that allows you to use Moment Lenses and offers advanced controls over exposure, focus, and white balance.
9.2 Adobe Lightroom Mobile
Adobe Lightroom Mobile is a powerful editing app that offers a wide range of tools and features for enhancing your photos.
9.3 Snapseed
Snapseed is a free editing app developed by Google that offers a variety of tools and filters for enhancing your photos.
9.4 VSCO
VSCO is a popular editing app that offers a range of filters and presets inspired by classic film stocks.
9.5 Halide Mark II
Halide Mark II is a professional camera app that offers advanced manual controls and RAW capture capabilities.
10. How Do I Share And Showcase My iPhone Photos?
Sharing and showcasing your iPhone photos can help you connect with others, build a following, and get your work seen by a wider audience.
10.1 Social Media Platforms
Social media platforms like Instagram, Facebook, and Twitter are great for sharing your iPhone photos and connecting with other photographers.
10.2 Online Portfolio Websites
Creating an online portfolio website is a great way to showcase your best iPhone photos and attract potential clients or collaborators.
10.3 Photo Contests and Exhibitions
Participating in photo contests and exhibitions can provide exposure and recognition for your work.
10.4 Photo Communities
Joining online photo communities, such as Flickr or 500px, can help you connect with other photographers, share your work, and get feedback.
10.5 Local Art Galleries
Consider approaching local art galleries to showcase your iPhone photos. This can provide a unique opportunity to reach a local audience and gain recognition.
11. FAQ Section: Mastering iPhone Photography
Q1: How do I clean my iPhone lens properly?
Answer: Use a microfiber cloth to gently wipe the lens. Avoid using abrasive materials or harsh chemicals.
Q2: What is the best resolution for iPhone photos?
Answer: The highest resolution available on your iPhone is generally the best for preserving detail.
Q3: How can I stabilize my iPhone without a tripod?
Answer: Try resting your iPhone on a stable surface or using a wall for support.
Q4: What is the difference between optical zoom and digital zoom?
Answer: Optical zoom uses the lens to magnify the image, while digital zoom crops the image and enlarges it, resulting in lower quality.
Q5: How do I adjust the white balance on my iPhone?
Answer: The iPhone’s auto white balance usually does a good job, but you can also adjust it manually in post-processing using editing apps.
Q6: What are some tips for shooting in low light with my iPhone?
Answer: Use a tripod, enable HDR, and adjust the exposure manually to brighten the image.
Q7: How can I capture action shots with my iPhone?
Answer: Use burst mode to take a rapid series of photos and choose the best one later.
Q8: What are some essential editing tools for iPhone photos?
Answer: Exposure, contrast, saturation, sharpening, and noise reduction are essential editing tools.
Q9: How do I avoid over-editing my iPhone photos?
Answer: Use editing tools sparingly and aim for a natural look.
Q10: Where can I find inspiration for iPhone photography?
Answer: Look at the work of other photographers, browse online photo communities, and explore your surroundings with a creative eye.
12. Elevate Your iPhone Photography Today
Ready to take your iPhone photography to the next level? With these tips and techniques, you can capture stunning images that showcase your creativity and vision. Explore dfphoto.net for more in-depth guides, tutorials, and inspiration to help you master the art of iPhone photography. Connect with our community of photographers, share your work, and discover new ways to express yourself through the lens of your iPhone. Whether you’re a beginner or an experienced photographer, there’s always something new to learn and explore. Visit dfphoto.net today and unlock your full potential as an iPhone photographer! For personalized advice or inquiries, contact us at Address: 1600 St Michael’s Dr, Santa Fe, NM 87505, United States. Phone: +1 (505) 471-6001.