Taking photos with your webcam is simpler than you might think, and dfphoto.net is here to guide you through it with ease, focusing on enhancing your photographic journey and visual artistry. Whether you’re aiming for a quick snapshot or exploring creative image capture, we’ll cover various methods, including dedicated camera apps, online tools, and software with advanced features. Let’s explore how to capture the perfect image!
1. What Is The Easiest Way To Take A Photo With A Webcam On Windows?
The easiest way to take a photo with a webcam on Windows is by using the built-in Camera app. This app comes standard with Windows 10 and 11 and provides a straightforward interface for capturing photos and videos using your webcam.
Here’s how to use it:
Step 1: Type “Camera” in the Windows search bar, and click on the Camera app to open it.
Step 2: If your webcam is already connected, you should see a live feed. If not, or if you want to switch cameras, look for a “Change Camera” option (usually an icon) to select your preferred webcam.
Step 3: To take a photo, simply click the “Take Photo” button, which is usually a camera icon located in the middle-right side of the screen.
Step 4: To view your captured photos, click the camera roll icon, which often looks like a small image preview on the lower-left side. You can then scroll through your images using the arrow keys or mouse wheel.
The Windows Camera app is designed for quick and simple photo capture, making it ideal for basic webcam photography. It’s a convenient option for those who don’t need advanced features or editing tools.
2. How Can I Enhance My Webcam Photos Using Software?
To enhance your webcam photos, consider using software like FineShare FineCam. FineCam combines webcam functionality with extensive customization options, allowing you to significantly improve the quality and look of your photos.
Here’s how FineCam can help enhance your webcam photos:
-
Background Modification: Change, remove, or blur your webcam background with or without a green screen. This is especially useful for creating a professional or creative look without needing a perfect physical setup.
-
Visual Effects: Add various visual effects to your photos, such as filters, overlays, and animations, to make your images more engaging and unique.
-
AI Integration: Utilize AI-powered features for automatic adjustments and enhancements. These can include auto-focus, lighting correction, and noise reduction, ensuring your photos look their best.
-
Multi-Scene Feature: Add multiple camera sources, allowing you to switch between different angles or incorporate other visual elements into your photos.
-
Mobile Device as Webcam: Use your iPhone, iPad, or Android device as a high-quality webcam. This can significantly improve image quality compared to standard built-in webcams.
To use FineCam:
Step 1: Download and install FineShare FineCam.
Free Download for Windows 8 or Later
Free Download for macOS 11 or Later
Step 2: Run FineCam and select the webcam you want to use.
Step 3: Customize your settings by adding backgrounds, adjusting image properties, and applying filters.
Step 4: Click the snapshot camera icon to take your enhanced photo.
FineCam is perfect for users who want more control over their webcam photos and seek advanced features to create visually appealing and professional-looking images.
3. What Are The Best Online Tools For Taking Webcam Photos?
Several online tools allow you to take webcam photos directly in your browser without needing to install any software. These tools are convenient for quick snapshots and adding fun effects. Here are a couple of the best options:
Webcam Toy
Webcam Toy is a fun and easy-to-use online webcam tool perfect for taking random, funny photos of yourself and your friends. It offers a variety of camera effects to add creativity to your snapshots.
Step 1: Go to the Webcam Toy website at https://webcamtoy.com/.
Step 2: Click the “Ready? Smile!” button to start.
Step 3: Allow Webcam Toy to access your camera.
Step 4: Use the left and right arrow keys to scroll through different effects like mirrored, ghost, and filmstrip.
Step 5: Click the camera icon to take a photo.
Step 6: Share your photos on Twitter, Google Photos, and Tumblr, or save them to your desktop.
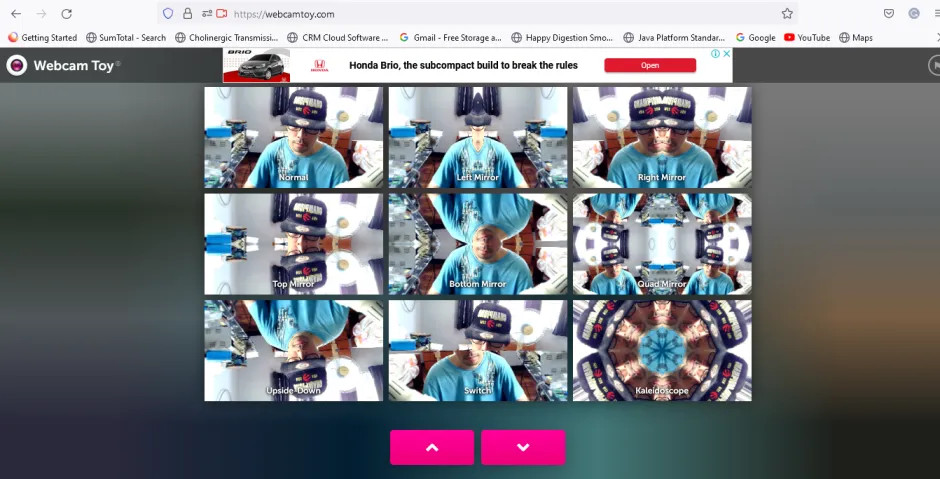 Funny effects of webcam tool
Pixect
Pixect is a versatile online webcam photo editor that combines webcam functionality with photo editing tools, allowing you to add effects and edit your photos directly in your browser.
Step 1: Go to Pixect.com and click “Get Started now!”
Step 2: Allow Pixect to access your camera.
Step 3: Choose whether to use a camera or upload a photo.
Step 4: Select your camera source and browse the available effects on the lower-left side.
Step 5: Use the timer and photo collage options as needed.
Step 6: Click the camera icon to take a photo and use the editing functions to enhance your images. Save or share your photo on social media.
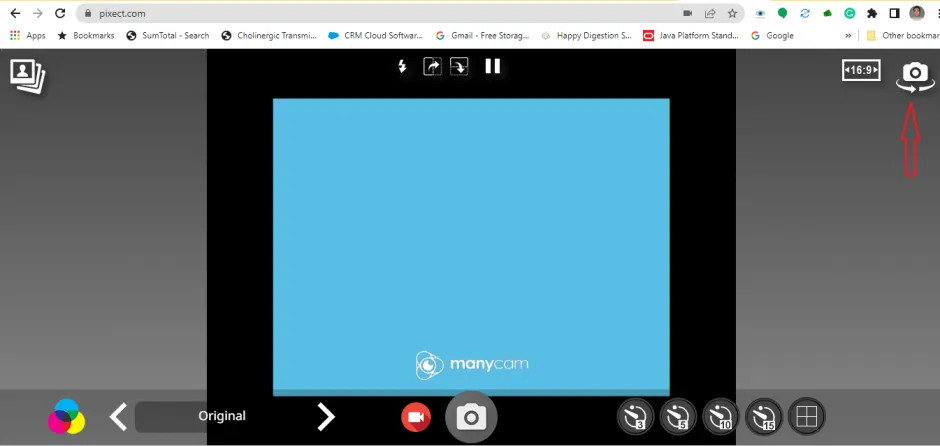 Pixect – Switch camera
Comparison of Online Webcam Tools
| Feature | Webcam Toy | Pixect |
|---|---|---|
| Effects | Many funny and wacky effects | Photo effects, collage maker, and editing tools |
| Ease of Use | Very easy, straightforward | Easy, with a more comprehensive set of features |
| Sharing Options | Twitter, Google Photos, Tumblr, Save | Save and Share on Social Media |
| Editing Features | Limited | Includes photo editing features such as blurring and spot removal |
| Best For | Quick, fun selfies with instant effects | Versatile webcam photos with basic editing and collage capabilities |
4. How Can I Improve The Quality Of My Webcam Photos?
Improving the quality of your webcam photos involves several factors, from adjusting your camera settings to optimizing your environment. Here are some tips to help you capture better webcam photos:
- Adjust Camera Settings: Most webcam software and apps allow you to adjust settings such as brightness, contrast, saturation, and sharpness. Experiment with these settings to find the optimal configuration for your webcam and lighting conditions.
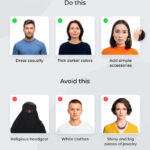
- Optimize Lighting: Good lighting is crucial for high-quality photos. Ensure that your face is well-lit and that the light is evenly distributed. Natural light is often the best option, so try to position yourself near a window if possible. If natural light isn’t available, use a soft, diffused light source to avoid harsh shadows.
- Use a Clean Background: A cluttered or distracting background can detract from your photo. Choose a clean, simple background that doesn’t compete with you for attention. A plain wall or a neatly organized workspace can work well.
- Increase Resolution: If your webcam and software support it, increase the resolution of your photos. Higher resolution images capture more detail and look sharper. However, keep in mind that higher resolution photos also take up more storage space.
- Reduce Noise: Noise, or graininess, can be a common issue in webcam photos, especially in low-light conditions. Try to reduce noise by ensuring adequate lighting and adjusting your camera settings. Some software also offers noise reduction features.
By implementing these tips, you can significantly improve the quality of your webcam photos and create more visually appealing images.
5. What Are The Common Problems When Taking Webcam Photos And How To Fix Them?
Taking webcam photos can sometimes present challenges. Here are some common issues and how to address them:
Poor Image Quality
Problem: The photo appears grainy, blurry, or lacks detail.
Solution:
- Adjust Lighting: Ensure you have adequate lighting. Natural light is best, but if not available, use a lamp or overhead light.
- Clean the Webcam Lens: Use a soft, dry cloth to gently clean the lens.
- Adjust Camera Settings: In your webcam software, adjust the brightness, contrast, and sharpness settings.
- Increase Resolution: If possible, increase the photo resolution in your webcam settings.
Camera Not Detected
Problem: The webcam is not recognized by your computer or software.
Solution:
- Check Connections: Ensure the webcam is properly connected to your computer. If it’s a USB webcam, try a different USB port.
- Update Drivers: Go to Device Manager, find your webcam under “Cameras” or “Imaging Devices,” right-click, and select “Update driver.”
- Restart Computer: Sometimes, a simple restart can resolve detection issues.
- Check Privacy Settings: In Windows Settings, go to Privacy > Camera and make sure that apps are allowed to access your camera.
Distorted or Unflattering Image
Problem: The image looks stretched, distorted, or doesn’t accurately represent your appearance.
Solution:
- Adjust Webcam Position: Ensure the webcam is positioned at eye level.
- Use Proper Framing: Position yourself in the center of the frame with some space above your head.
- Check Webcam Settings: Look for options like “Face Tracking” or “Auto Framing” and disable them if they are causing issues.
- Use Filters or Effects Carefully: Some filters can distort your image. Use them sparingly.
Software Compatibility Issues
Problem: The webcam software crashes, freezes, or doesn’t work properly.
Solution:
- Update Software: Ensure you have the latest version of your webcam software.
- Reinstall Software: Uninstall and then reinstall the software.
- Check Compatibility: Make sure the software is compatible with your operating system.
- Try a Different Program: Use a different webcam application to see if the issue persists.
By addressing these common problems with the appropriate solutions, you can ensure a smoother and more enjoyable experience when taking photos with your webcam.
6. What Are The Privacy Considerations When Using A Webcam?
Using a webcam comes with several privacy considerations. It’s important to be aware of these issues and take steps to protect your privacy.
Unauthorized Access
Risk: Hackers or malicious software could gain access to your webcam without your knowledge or consent. This could allow them to record video and audio of you without your awareness.
Prevention:
- Cover Your Webcam: When not in use, physically cover your webcam with a sticker, tape, or a dedicated webcam cover.
- Use Antivirus Software: Keep your antivirus software up-to-date and run regular scans to detect and remove any malware that could compromise your webcam.
- Be Careful with Links and Attachments: Avoid clicking on suspicious links or opening attachments from unknown senders, as these could contain malware.
Data Collection
Risk: Some webcam software or apps may collect data about your usage, including when and how you use your webcam. This data could be used for marketing purposes or shared with third parties.
Prevention:
- Read Privacy Policies: Before using any webcam software or app, read the privacy policy to understand what data is collected and how it is used.
- Adjust Privacy Settings: Many apps allow you to adjust privacy settings to limit data collection. Review these settings and disable any unnecessary tracking or data sharing.
- Use Reputable Software: Stick to well-known and reputable webcam software from trusted sources.
Secure Your Network
Risk: A compromised network can allow unauthorized access to devices connected to it, including your webcam.
Prevention:
- Use a Strong Password: Secure your Wi-Fi network with a strong, unique password.
- Enable Firewall: Make sure your firewall is enabled to protect your network from unauthorized access.
- Keep Router Firmware Up-to-Date: Regularly update your router’s firmware to patch any security vulnerabilities.
Be Mindful of Your Surroundings
Risk: What your webcam captures can be seen by others. Ensure that sensitive information or personal activities are not visible in the background.
Prevention:
- Choose Your Location Carefully: Position your webcam in a location where you feel comfortable and secure.
- Be Aware of Your Background: Check what is visible in the background and remove any sensitive or personal items.
7. Can I Use A Virtual Background With My Webcam?
Yes, you can use virtual backgrounds with your webcam to enhance privacy, create a professional appearance, or add a fun and creative touch to your video feed. Virtual backgrounds replace your real-world background with a digital image or video.
Software Options
FineShare FineCam: FineCam is a versatile software that allows you to change, remove, or blur your webcam background with or without a green screen. It also offers AI-powered background removal and the ability to add custom backgrounds.
Snap Camera: Snap Camera is a free desktop app that provides a wide range of filters and lenses, including virtual backgrounds. It integrates with many video conferencing platforms and webcam-enabled applications.
OBS Studio: OBS Studio is a popular open-source software for video recording and live streaming. It supports virtual backgrounds and offers advanced customization options.
How To Set Up A Virtual Background
Step 1: Download and install your chosen software.
Step 2: Configure the Software:
- FineShare FineCam: Open FineCam, select your webcam, and choose the virtual background option. You can upload your own image or video, or select one from the built-in library.
- Snap Camera: Open Snap Camera and choose a virtual background lens from the available options.
- OBS Studio: Add your webcam as a video source, then add a virtual background image or video. Use the chroma key filter to remove your real background and replace it with the virtual one.
Step 3: Select the Webcam Source: In your video conferencing or webcam-enabled application, select the virtual webcam source provided by the software (e.g., “FineCam Virtual Camera,” “Snap Camera,” or “OBS Virtual Camera”).
Step 4: Adjust Settings: Fine-tune the settings to ensure the virtual background looks natural. This may involve adjusting the chroma key settings or lighting.
Tips for Best Results:
- Good Lighting: Ensure even lighting to help the software accurately distinguish you from your background.
- Solid Color Background: Using a solid color background (like a green screen) can improve the quality of the virtual background effect.
- Powerful Hardware: Virtual backgrounds can be resource-intensive. Ensure your computer meets the minimum system requirements for the software you are using.
Using a virtual background is a great way to enhance your webcam experience and create a more polished and professional look.
8. What Are The Best Practices For Webcam Lighting?
Proper lighting is essential for capturing high-quality webcam photos and videos. Here are some best practices to ensure you have optimal lighting:
Use Natural Light Whenever Possible
Natural light is generally the most flattering and provides the best color accuracy.
- Position Yourself Near a Window: Sit facing a window to allow natural light to illuminate your face. Avoid sitting with your back to the window, as this can create a silhouette effect.
- Avoid Direct Sunlight: Direct sunlight can be too harsh and create strong shadows. If the sunlight is too intense, use a sheer curtain to diffuse the light.
- Time of Day: The quality of natural light varies throughout the day. Morning and late afternoon light tends to be softer and more flattering than midday light.
Supplement with Artificial Lighting
When natural light is not available or sufficient, use artificial lighting to supplement it.
- Soft, Diffused Light: Use soft, diffused light to avoid harsh shadows and hot spots. Lamps with lampshades or softbox lighting are good options.
- Ring Light: A ring light can provide even, flattering light that minimizes shadows. It is particularly useful for close-up shots and video calls.
- Three-Point Lighting: If possible, use a three-point lighting setup, which consists of a key light (main light source), a fill light (to fill in shadows), and a back light (to separate you from the background).
Avoid Common Lighting Mistakes
- Backlighting: Avoid having a bright light source behind you, as this will make you appear dark and underexposed.
- Harsh Shadows: Harsh shadows can make you look older and less flattering. Use diffused lighting to soften shadows.
- Uneven Lighting: Ensure that your face is evenly lit. Uneven lighting can create distractions and make it difficult to see your features.
- Color Temperature: Be mindful of the color temperature of your lights. Mixing different color temperatures (e.g., fluorescent and incandescent) can create an unnatural look.
Additional Tips
- Experiment with Lighting Angles: Try different lighting angles to see what works best for you. Slight adjustments to the angle of your light source can make a big difference.
- Use a Reflector: A reflector can be used to bounce light onto your face and fill in shadows.
- Adjust Screen Brightness: If you are using a screen as a light source, adjust the brightness to avoid eye strain and ensure that it is not too harsh.
9. Can I Use My Webcam For Live Streaming?
Yes, you can use your webcam for live streaming on various platforms. Live streaming has become increasingly popular for content creators, educators, and businesses to connect with their audience in real-time.
Platforms for Live Streaming
YouTube Live: YouTube Live is a popular platform for live streaming, offering a wide range of features and tools for creators.
Twitch: Twitch is a leading platform for live streaming, primarily focused on gaming, but also used for other types of content.
Facebook Live: Facebook Live allows you to stream live video to your friends, family, and followers on Facebook.
Instagram Live: Instagram Live is a feature within the Instagram app that allows you to stream live video to your followers.
Zoom/Microsoft Teams: While primarily used for video conferencing, these platforms also support live streaming to a limited audience or to a public platform.
Software for Live Streaming
OBS Studio: OBS Studio is a free, open-source software for video recording and live streaming. It offers a wide range of features and customization options.
Streamlabs OBS: Streamlabs OBS is a popular alternative to OBS Studio, offering a more streamlined and user-friendly interface.
XSplit Broadcaster: XSplit Broadcaster is a professional-grade streaming software with advanced features and customization options.
Hardware Requirements
- Webcam: A high-quality webcam is essential for capturing clear and detailed video.
- Microphone: A good microphone is important for capturing clear and intelligible audio.
- Computer: A computer with sufficient processing power and memory is necessary for encoding and streaming video.
- Internet Connection: A fast and reliable internet connection is crucial for smooth streaming.
Tips for Successful Live Streaming
- Plan Your Content: Before going live, plan what you will talk about and what you will show.
- Promote Your Stream: Let your audience know when you will be live streaming.
- Engage with Your Audience: Interact with your viewers by responding to comments and questions.
- Use a Stable Internet Connection: A stable internet connection is essential for avoiding interruptions and buffering.
- Monitor Your Stream: Keep an eye on your stream to ensure that everything is working properly.
10. How Do I Choose The Right Webcam For My Needs?
Choosing the right webcam depends on your specific needs and how you plan to use it. Here are some factors to consider:
Resolution
The resolution of a webcam determines the level of detail in the image. Common resolutions include 720p (HD), 1080p (Full HD), and 4K (Ultra HD).
- 720p: Suitable for basic video calls and casual use.
- 1080p: Recommended for most users, providing a good balance between image quality and price.
- 4K: Ideal for professional streaming, content creation, and situations where high image quality is essential.
Frame Rate
The frame rate determines how smoothly the video appears. A higher frame rate results in smoother video.
- 30 fps: The standard frame rate for most webcams, providing smooth video for general use.
- 60 fps: Preferred for gaming and fast-paced action, providing smoother and more responsive video.
Field of View (FOV)
The field of view determines how much of the scene is captured by the webcam.
- Narrow FOV: Suitable for close-up shots and individual use.
- Wide FOV: Ideal for group video calls and capturing more of the surrounding environment.
Built-in Microphone
Most webcams come with a built-in microphone, but the quality can vary.
- Basic Microphone: Suitable for casual use and video calls.
- Noise-Canceling Microphone: Recommended for environments with background noise, providing clearer audio.
Low-Light Performance
If you often use your webcam in low-light conditions, look for a webcam with good low-light performance.
- Large Aperture: A larger aperture allows more light to enter the lens, improving low-light performance.
- Automatic Light Correction: Some webcams have automatic light correction features that adjust the image to compensate for low-light conditions.
Additional Features
- Autofocus: Ensures that the image remains sharp and in focus, even if you move around.
- Privacy Shutter: A physical shutter that covers the lens when not in use, providing added privacy.
- Mounting Options: Look for a webcam with flexible mounting options, such as a clip for attaching to a monitor or a tripod mount.
Price
Webcams range in price from around $20 to over $200. Consider your budget and choose a webcam that meets your needs without breaking the bank.
Here is an example of a table with the best webcams in the US market right now:
| Webcam | Resolution | Frame Rate | Field of View | Key Features | Price |
|---|---|---|---|---|---|
| Logitech C920s | 1080p | 30 fps | 78 degrees | Autofocus, light correction, privacy shutter | $70 |
| Razer Kiyo Pro | 1080p | 60 fps | 103 degrees | Adaptive light sensor, HDR, wide-angle lens | $200 |
| Microsoft LifeCam HD-3000 | 720p | 30 fps | 68.5 degrees | Basic microphone, affordable | $30 |
| Dell UltraSharp WB7022 | 4K | 30 fps | 65/78/90 degrees | Advanced light correction, AI auto framing | $200 |
| Logitech Brio | 4K | 30 fps | 65/78/90 degrees | HDR, 5x zoom, advanced light correction | $180 |
FAQ About Taking Photos With A Webcam
1. Can I use my smartphone as a webcam?
Yes, you can use your smartphone as a webcam by using apps like FineCam, which allows you to connect your iPhone, iPad, or Android device to your computer as a high-quality webcam.
2. How do I adjust the settings on my webcam?
You can adjust the settings on your webcam through the webcam software or app you are using. Look for options like brightness, contrast, saturation, and sharpness in the settings menu.
3. Why is my webcam image so dark?
Your webcam image may be dark due to insufficient lighting. Ensure you have adequate lighting in your environment and adjust the brightness settings on your webcam.
4. How can I improve the audio quality of my webcam?
To improve the audio quality of your webcam, use a good microphone and ensure it is positioned close to your mouth. Reduce background noise and adjust the audio settings in your webcam software.
5. Can I use a virtual background with any webcam?
You can use a virtual background with any webcam, but the quality of the virtual background effect may vary depending on the webcam and software you are using.
6. How do I prevent my webcam from being hacked?
To prevent your webcam from being hacked, cover it when not in use, use antivirus software, keep your software up-to-date, and be careful with links and attachments.
7. What is the best resolution for a webcam?
The best resolution for a webcam depends on your needs. 1080p is recommended for most users, while 4K is ideal for professional streaming and content creation.
8. How do I test my webcam?
You can test your webcam by opening the Camera app on your computer or using an online webcam testing tool.
9. Can I record videos with my webcam?
Yes, you can record videos with your webcam using the Camera app or other webcam software.
10. What should I do if my webcam is not working?
If your webcam is not working, check the connections, update the drivers, restart your computer, and check the privacy settings.
Taking photos with your webcam can be a fun and practical way to capture moments, enhance your video calls, and create content. Whether you opt for the simplicity of the built-in Camera app, the versatility of FineShare FineCam, or the fun effects of online tools like Webcam Toy and Pixect, there’s a method to suit every need. By optimizing your lighting, adjusting your camera settings, and being mindful of privacy considerations, you can ensure high-quality and secure webcam photos every time.
Ready to explore more about photography and visual arts? Visit dfphoto.net for a wealth of tutorials, stunning photo collections, and a vibrant community of photography enthusiasts. Discover new techniques, find inspiration, and connect with fellow photographers in the US! Address: 1600 St Michael’s Dr, Santa Fe, NM 87505, United States. Phone: +1 (505) 471-6001. Website: dfphoto.net.